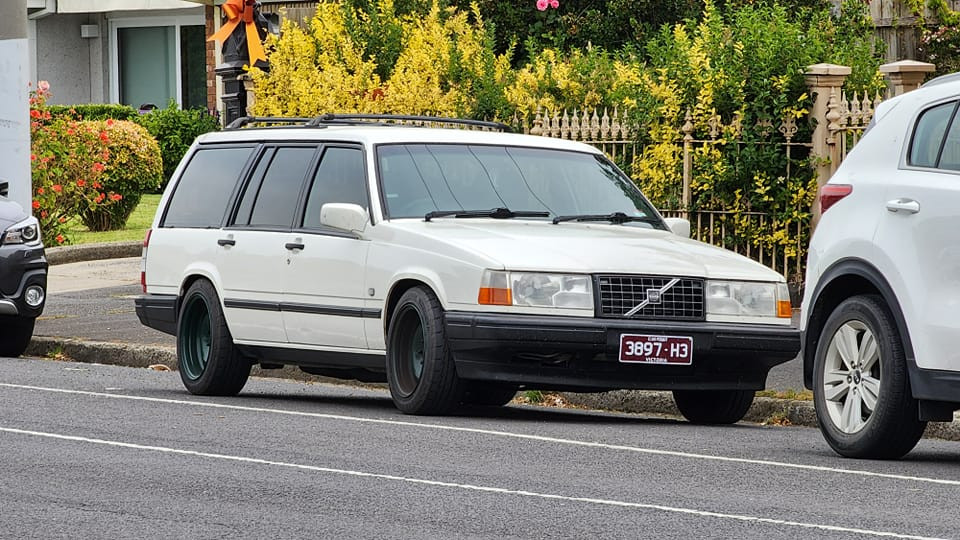
deNs' 1993 940 GL Wagon - "Odin"

Been over a year since an update, so guess it's probably time.
Anyhow, not much happened this past year; drove it, enjoyed it, improved it, ditched club plates and went to full reg to drive it more.
So anyway, things:
Feb 2023 - Under Tray
That big box that was in one of the last pictures was an under-tray I bought off amazon because briefly I had prime, and turns out purchasing that under-tray was by far the cheapest way of getting an aftermarket under-tray. It was something like $65 shipped to my door from the US, which was crazy for something so huge.
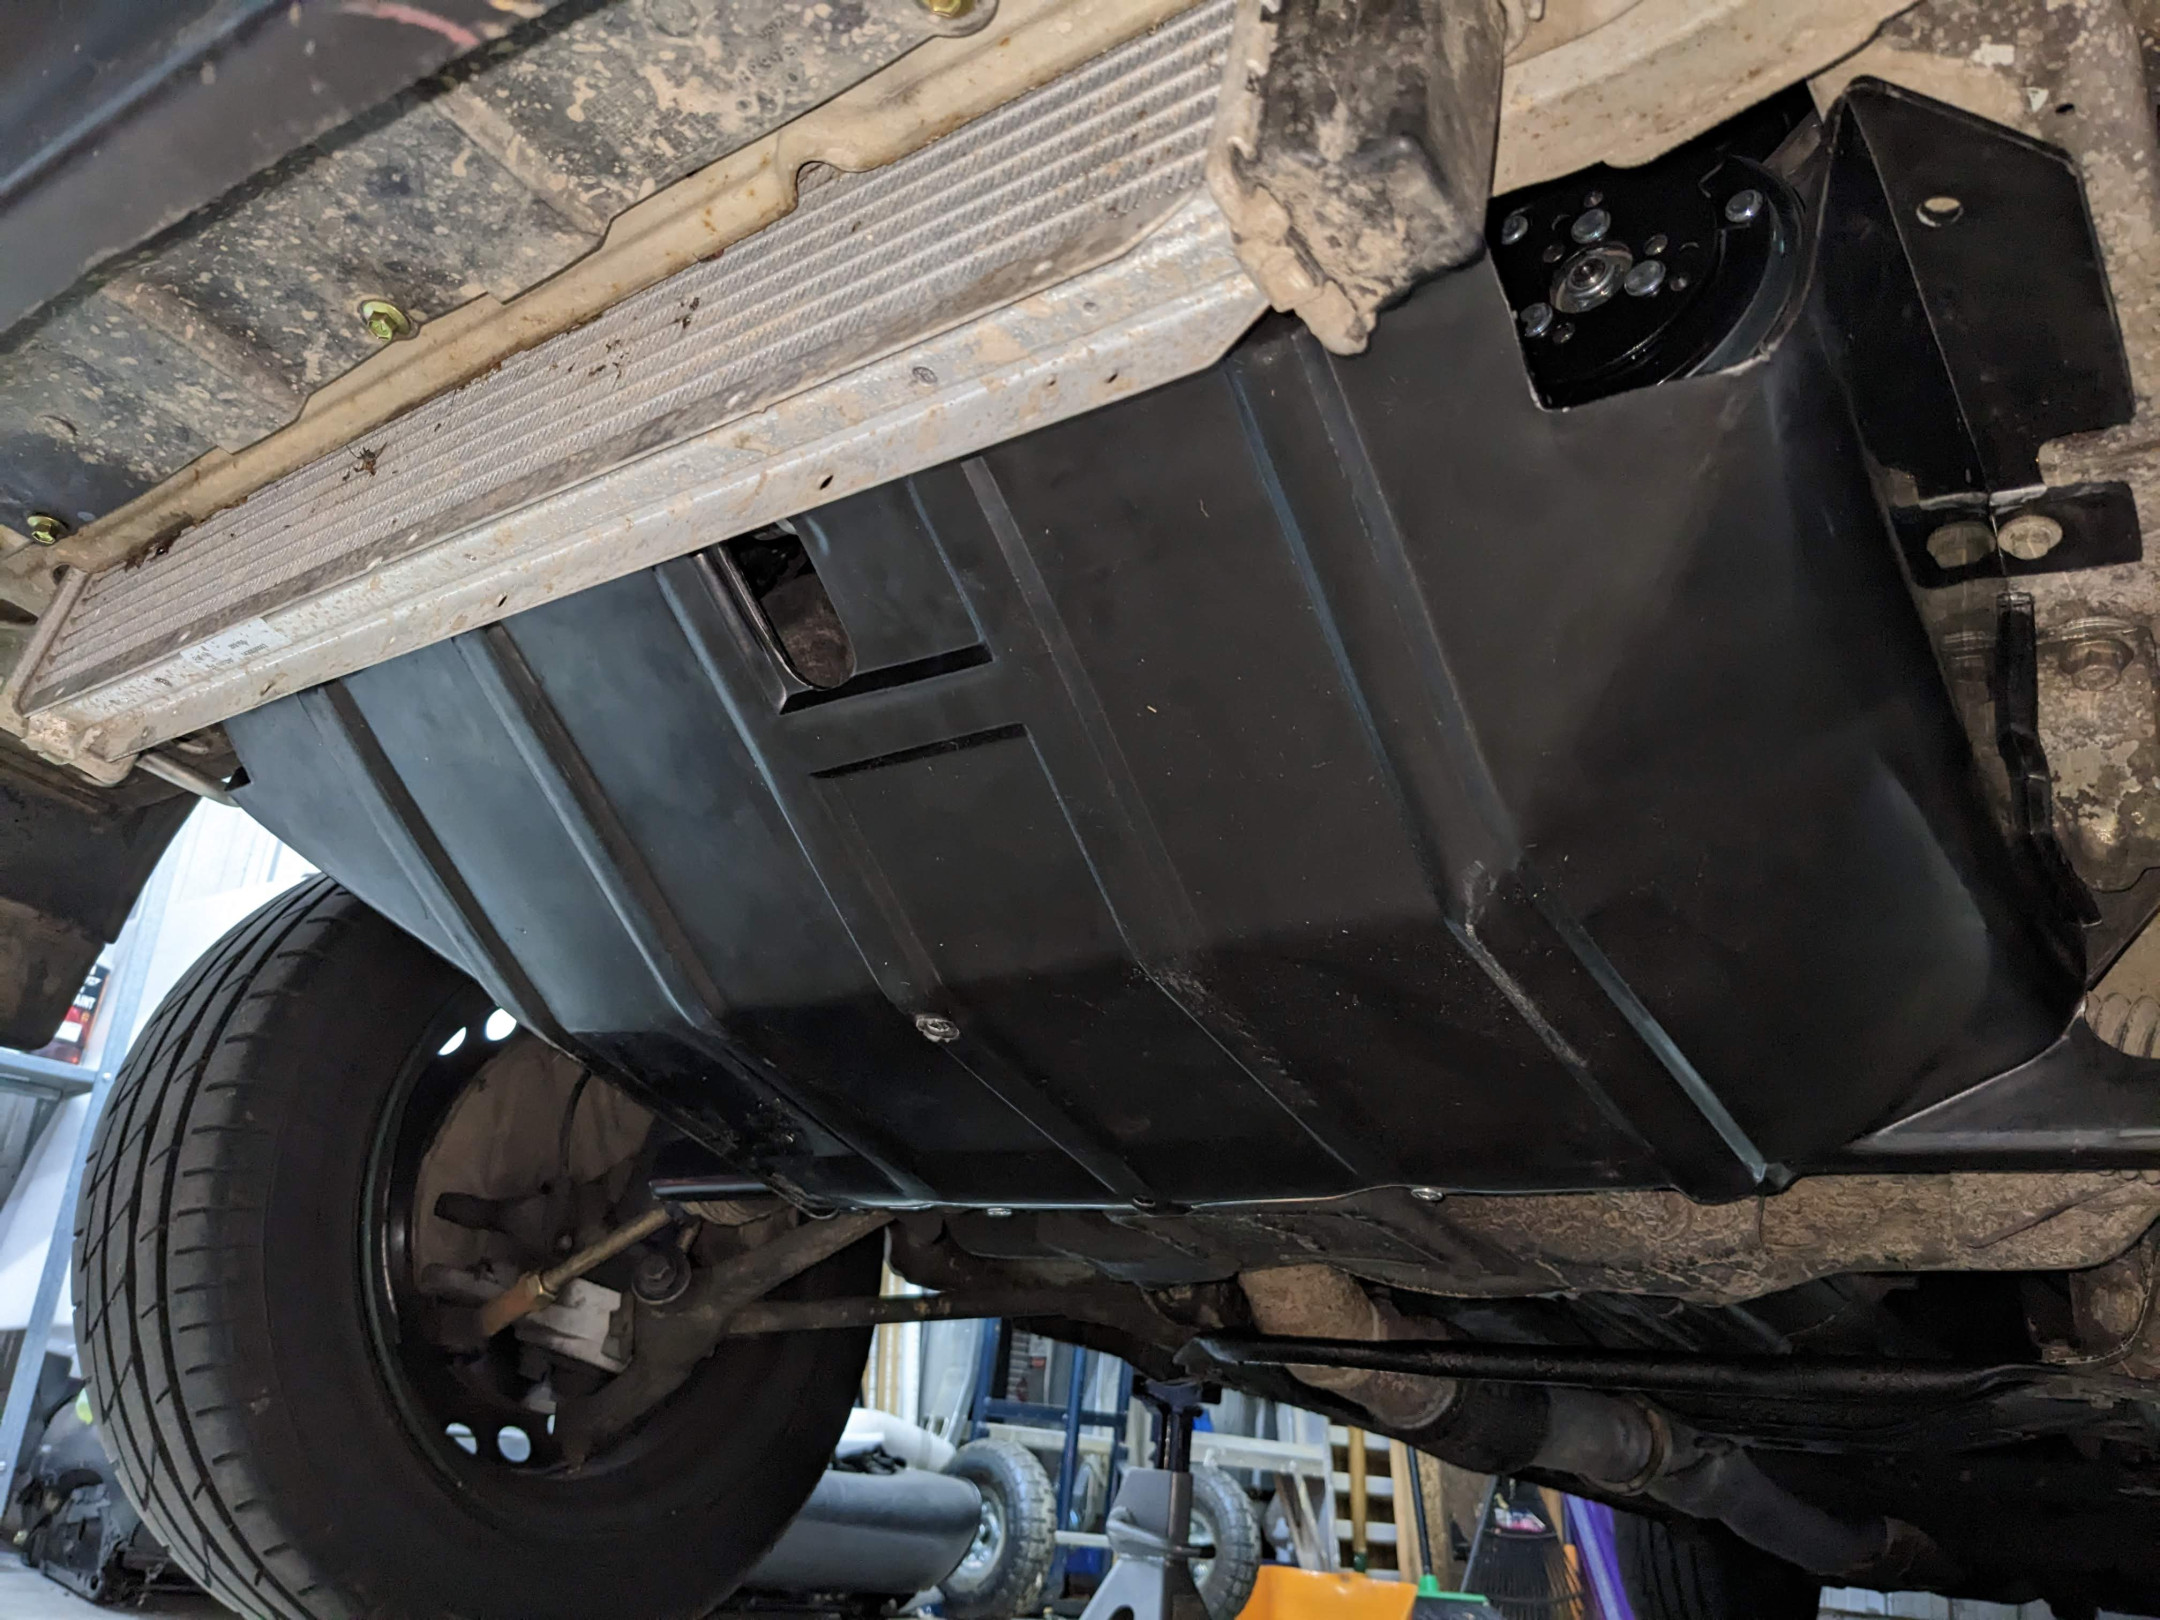
Installed it in part to protect from debris from underneath, but I also desperately need to improve the efficiency through the radiator/intercooler/condenser combination as there's no shroud and the fan cycles too much for my liking (on at 90C on top hose, off at 85C).
Mar 2023 - Speedo Issue
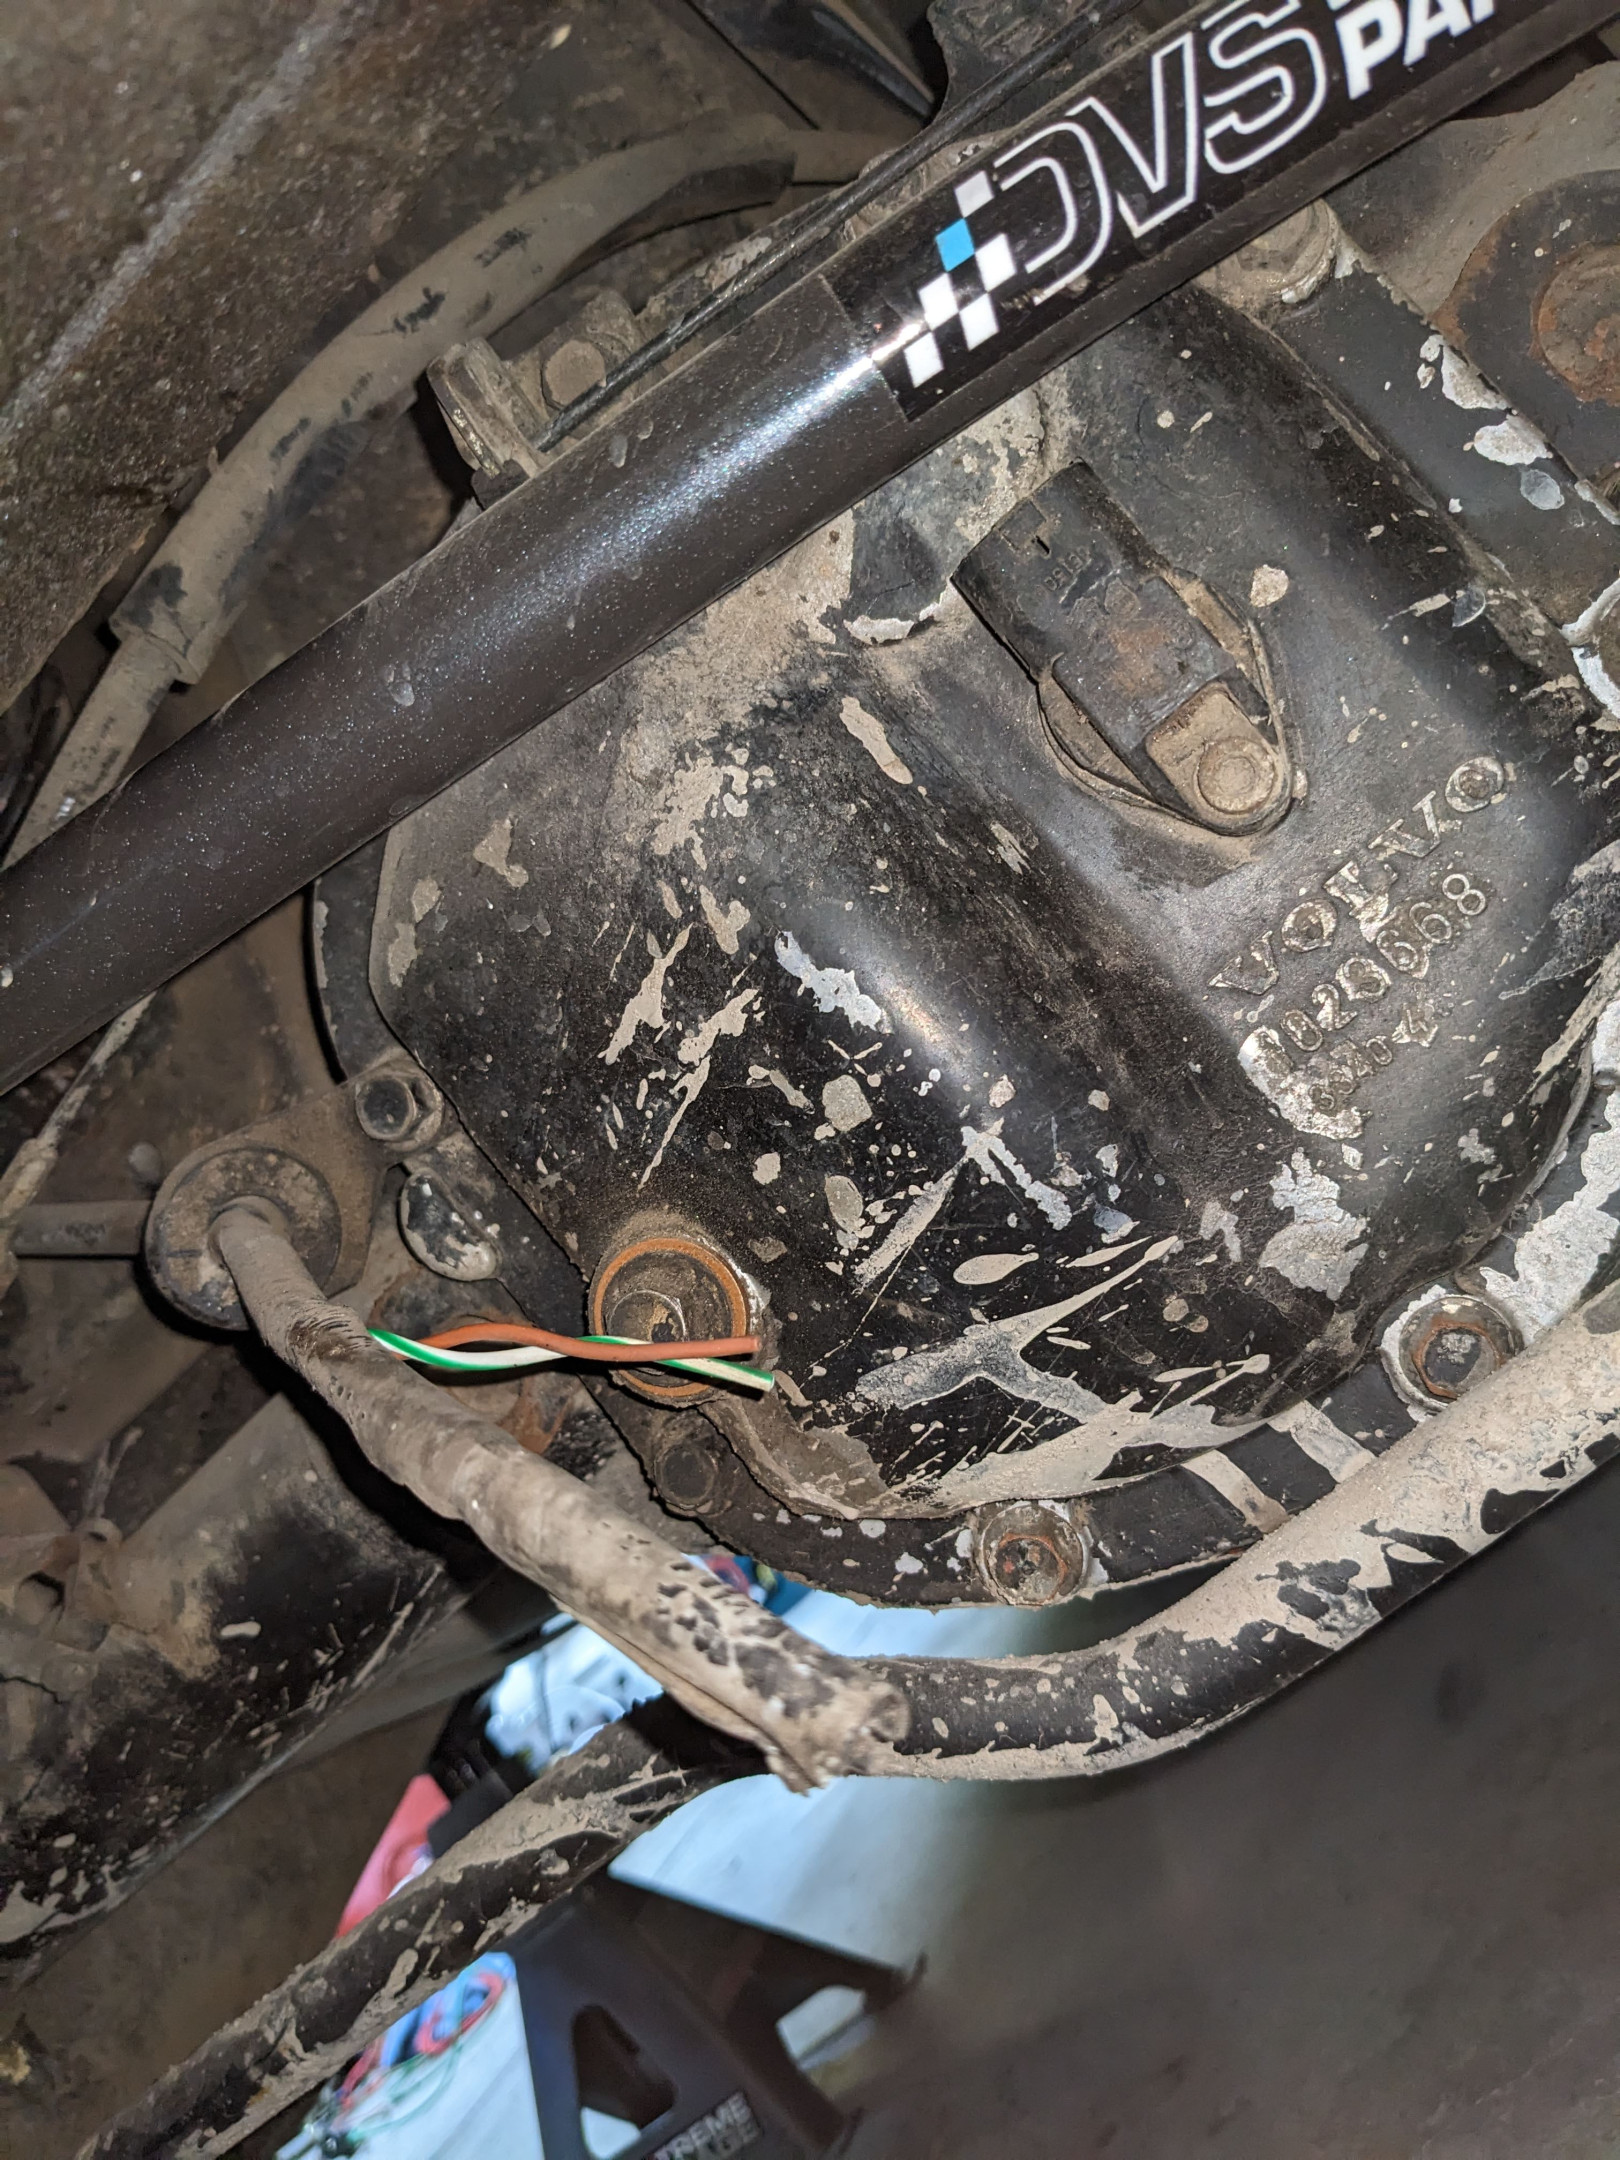
I realised I had some intermittent issues briefly before losing my speedo entirely. I shuddered to think about having to pull the cluster, even going as far as starting the process, but then thought I should check the wiring near the diff in case there was some issues, even though I did a repair back when I got the car.

Yeah that'll do it. So I have entire spare looms, with connectors I can pilfer from, so that's what I did:
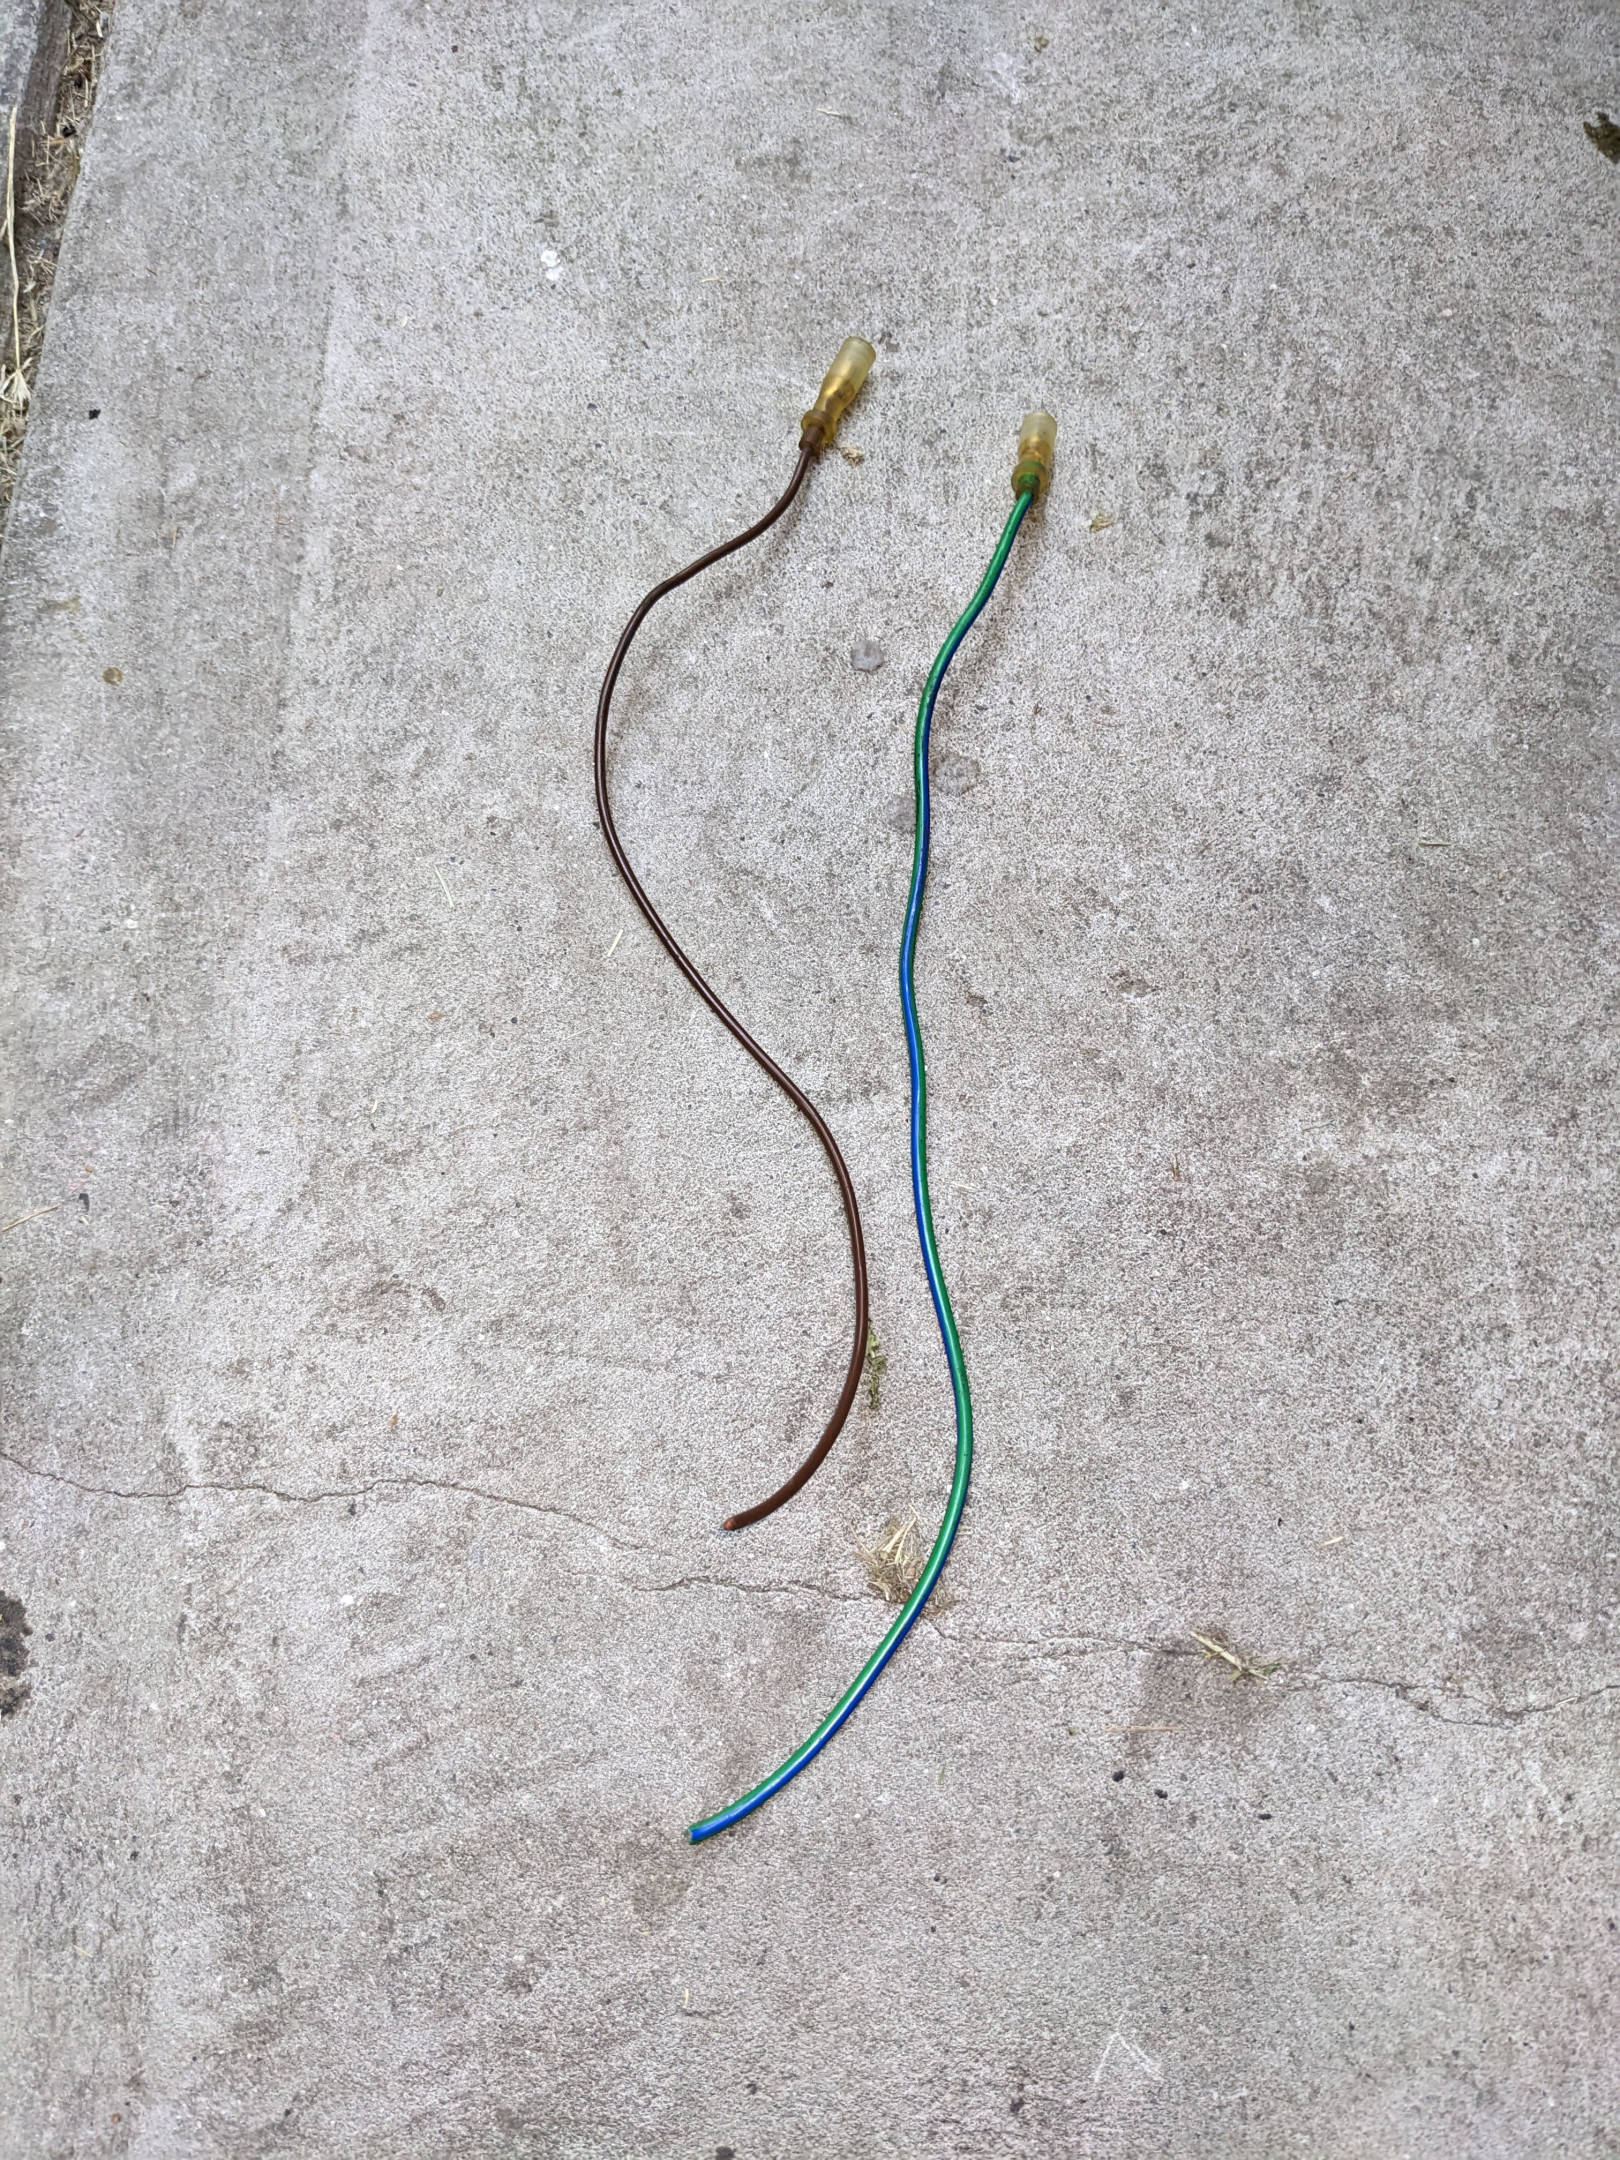
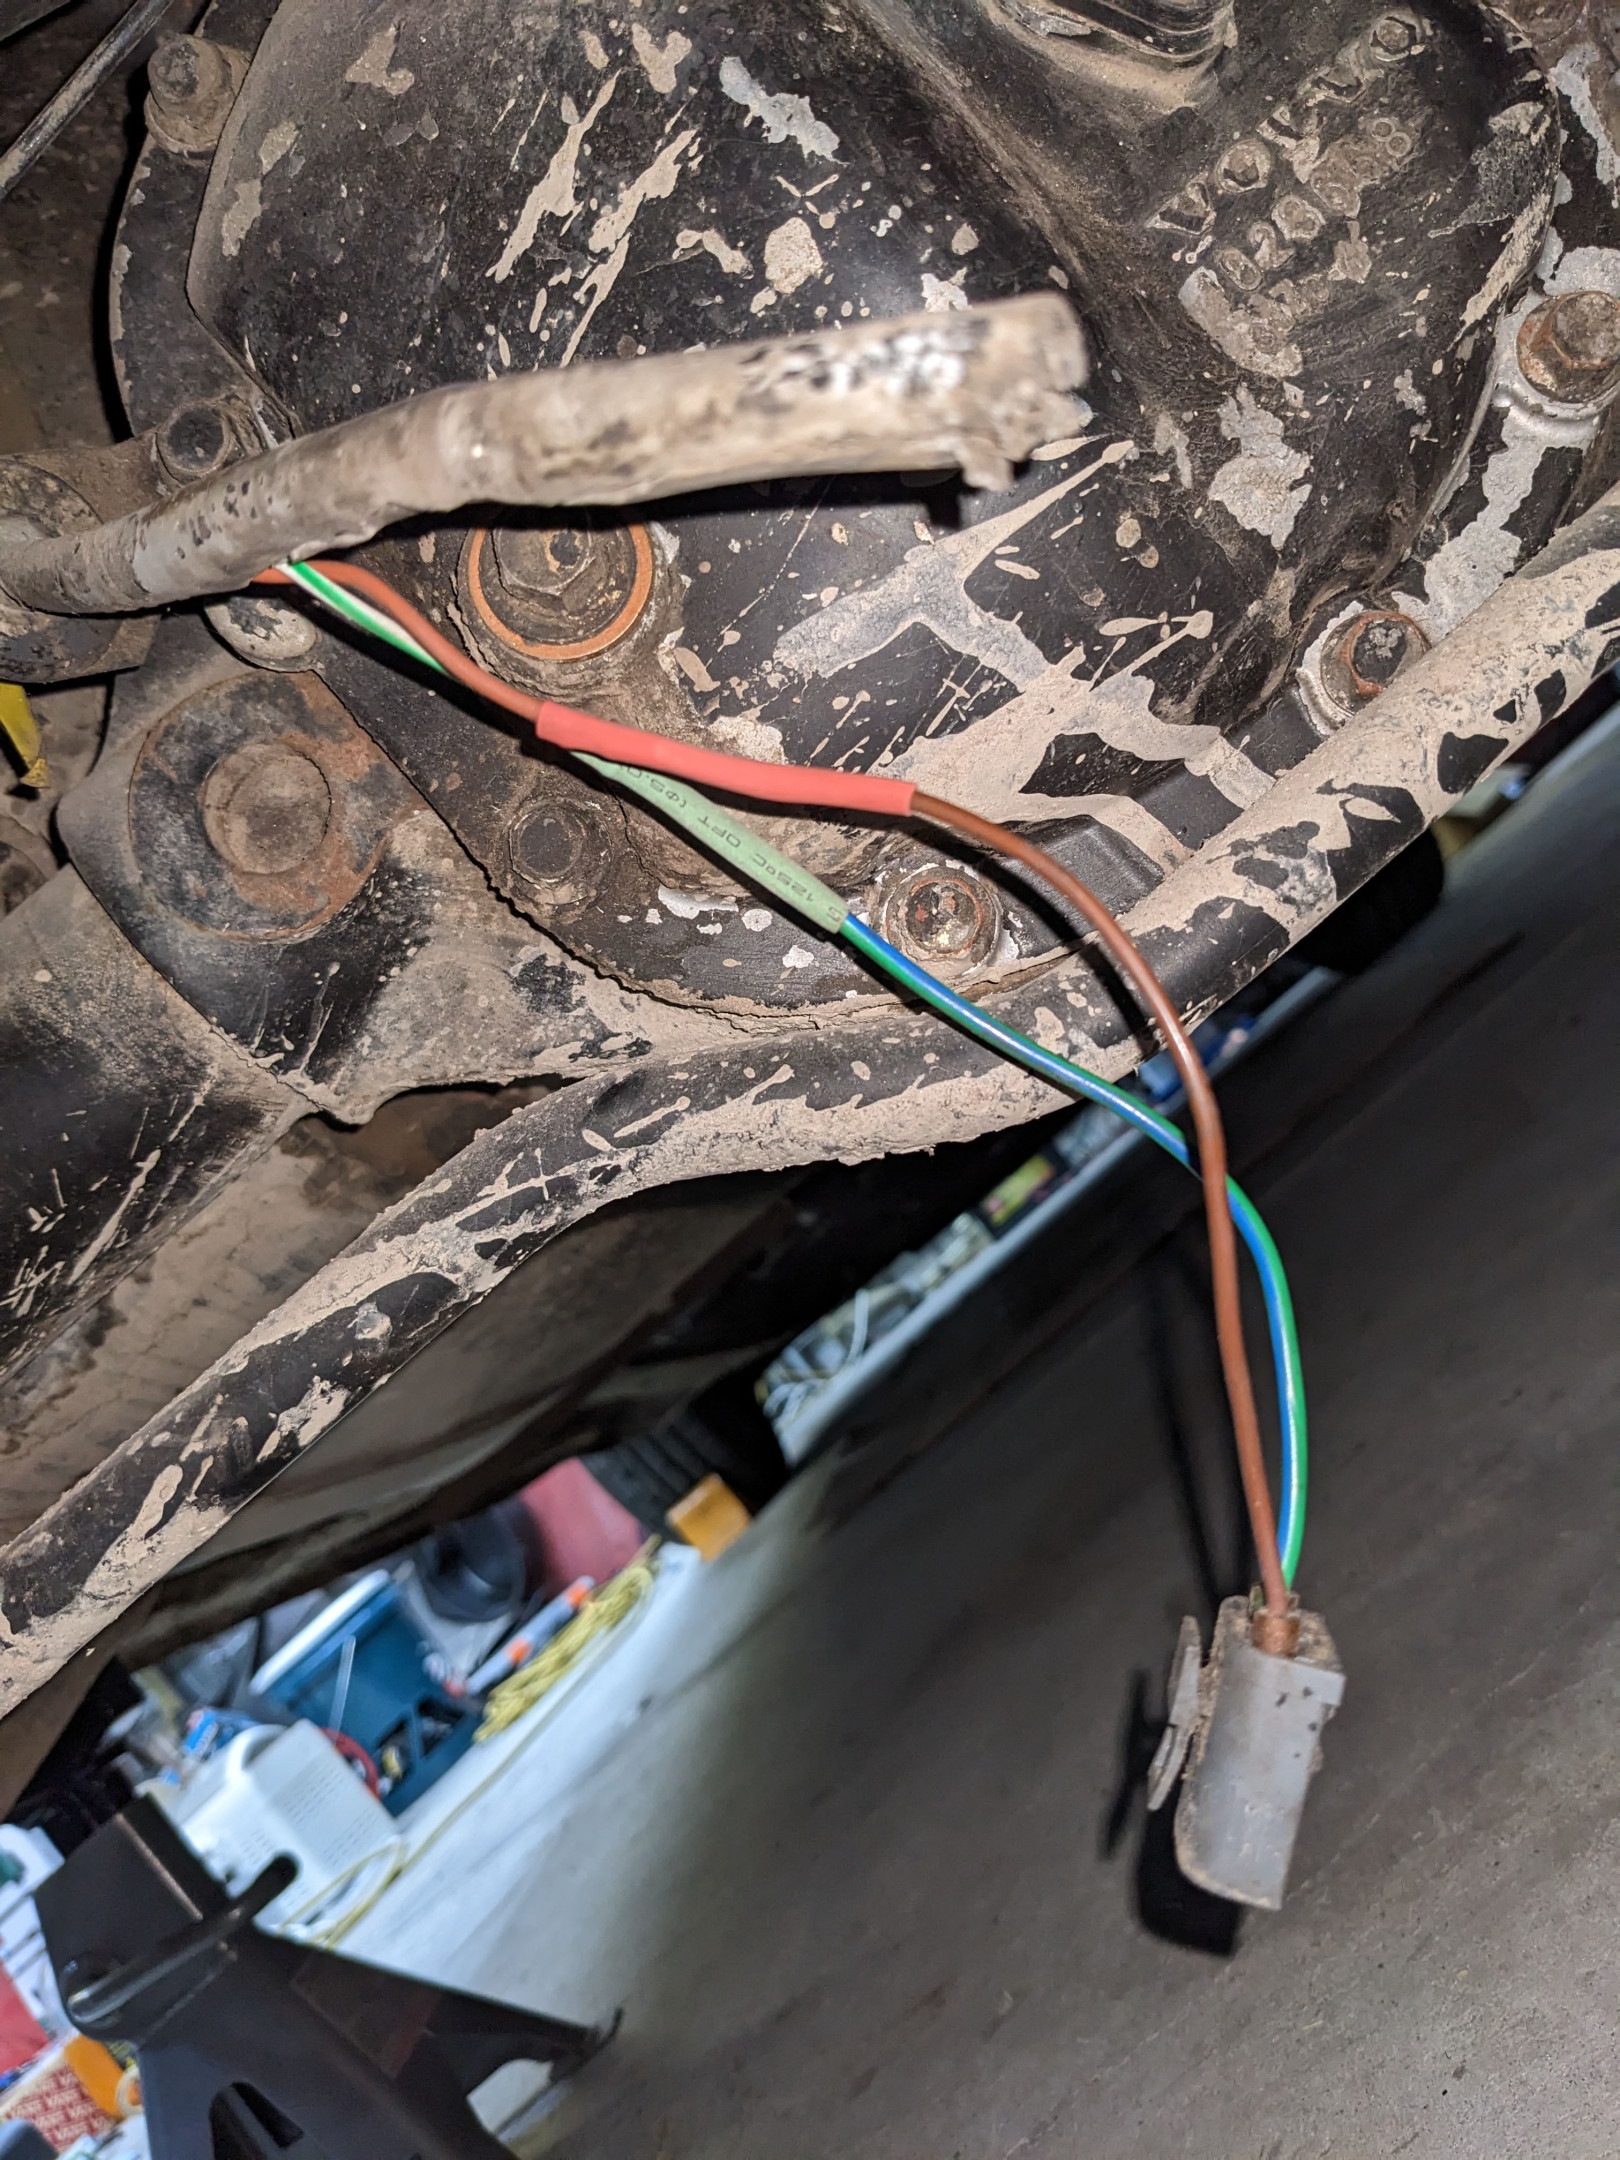
Spliced in the healthier connectors, and back in business. Worked mostly since, but I think the occasional issue I see now is in fact the speedo having issues, that also needs repair. Another time, perhaps.
Got a few more minor updates to come.
Jan 2023 - Cars and Coffee
I don't have the plates anymore so not gonna worry about editing them, also they're not my photos to edit, etc.
Took the family to the inaugural C&C event in Tonsley, SA and a kind photographer took pity by taking a photo of my fridge-on-wheels holding up an Amarok.
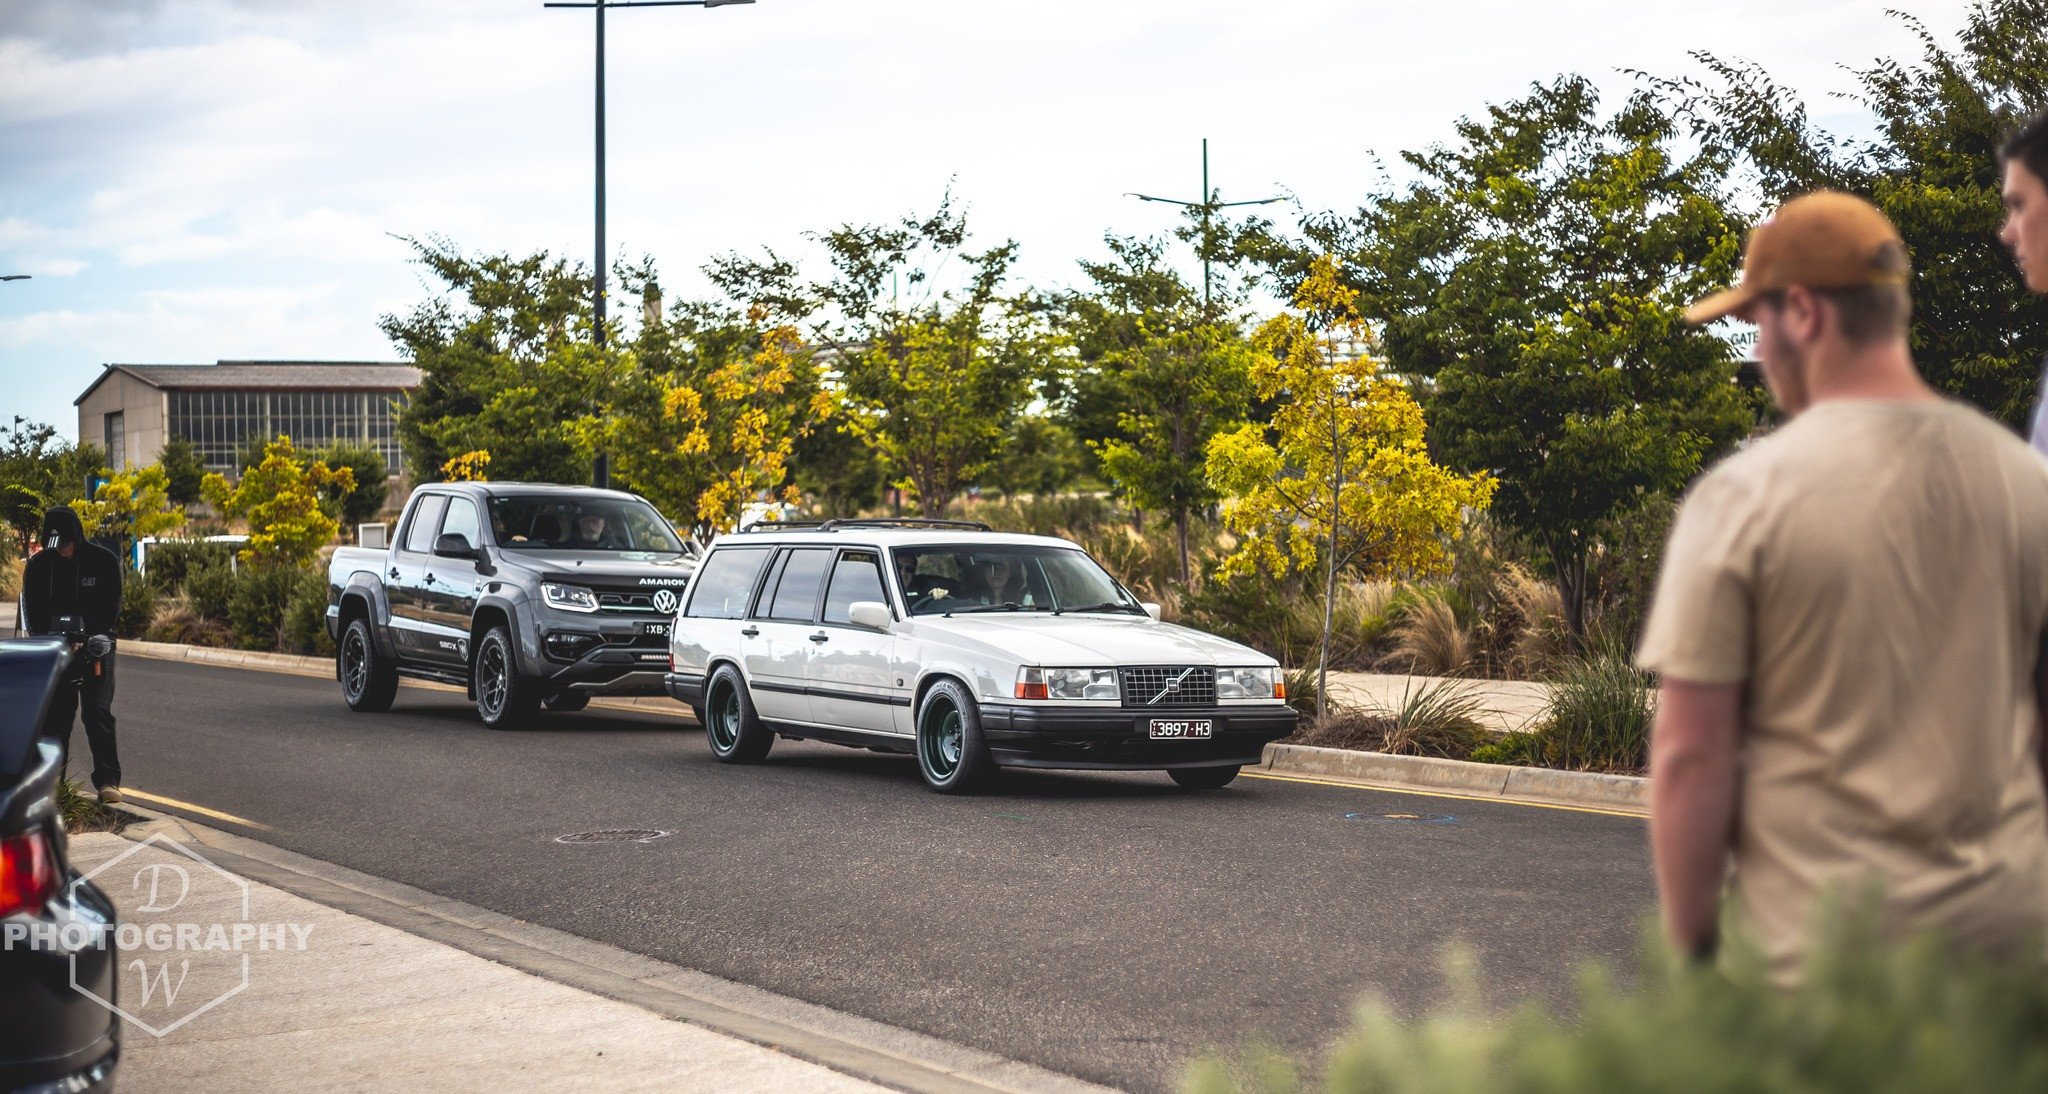
Photo courtesy of DW Photography
deNs The average dual cab in its natural habitat, 2cm off your rear bumper
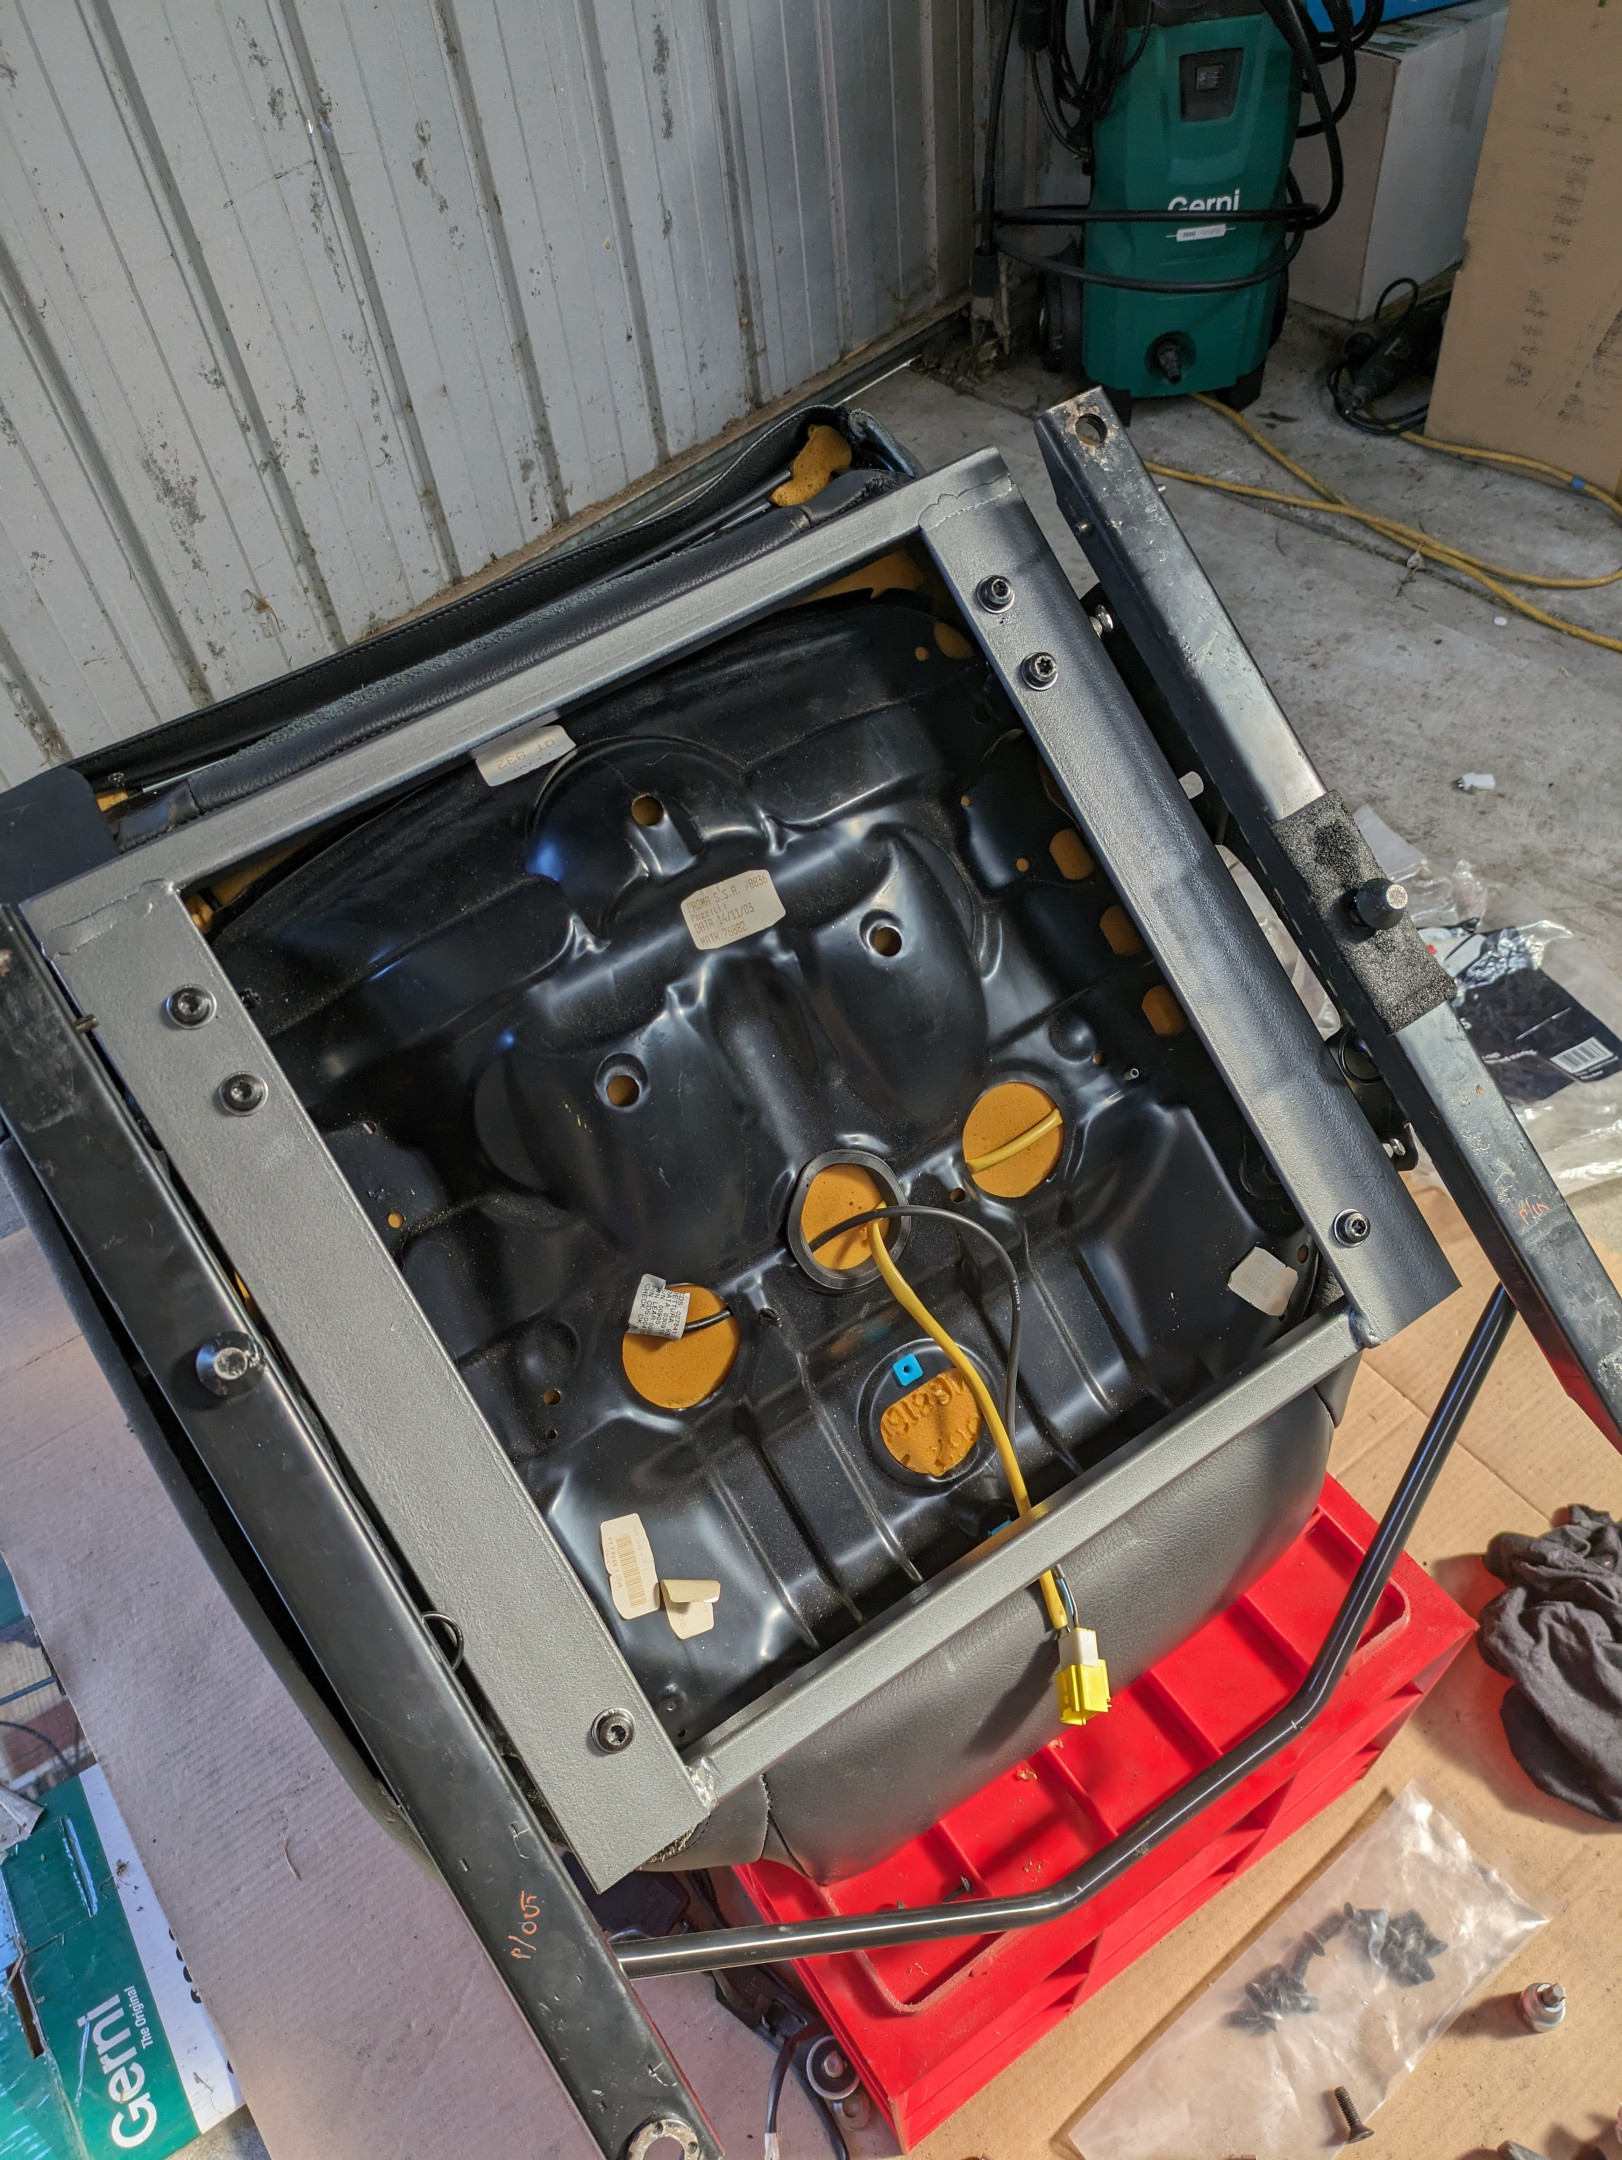
Sept 2023 - Passenger seat rail redesign
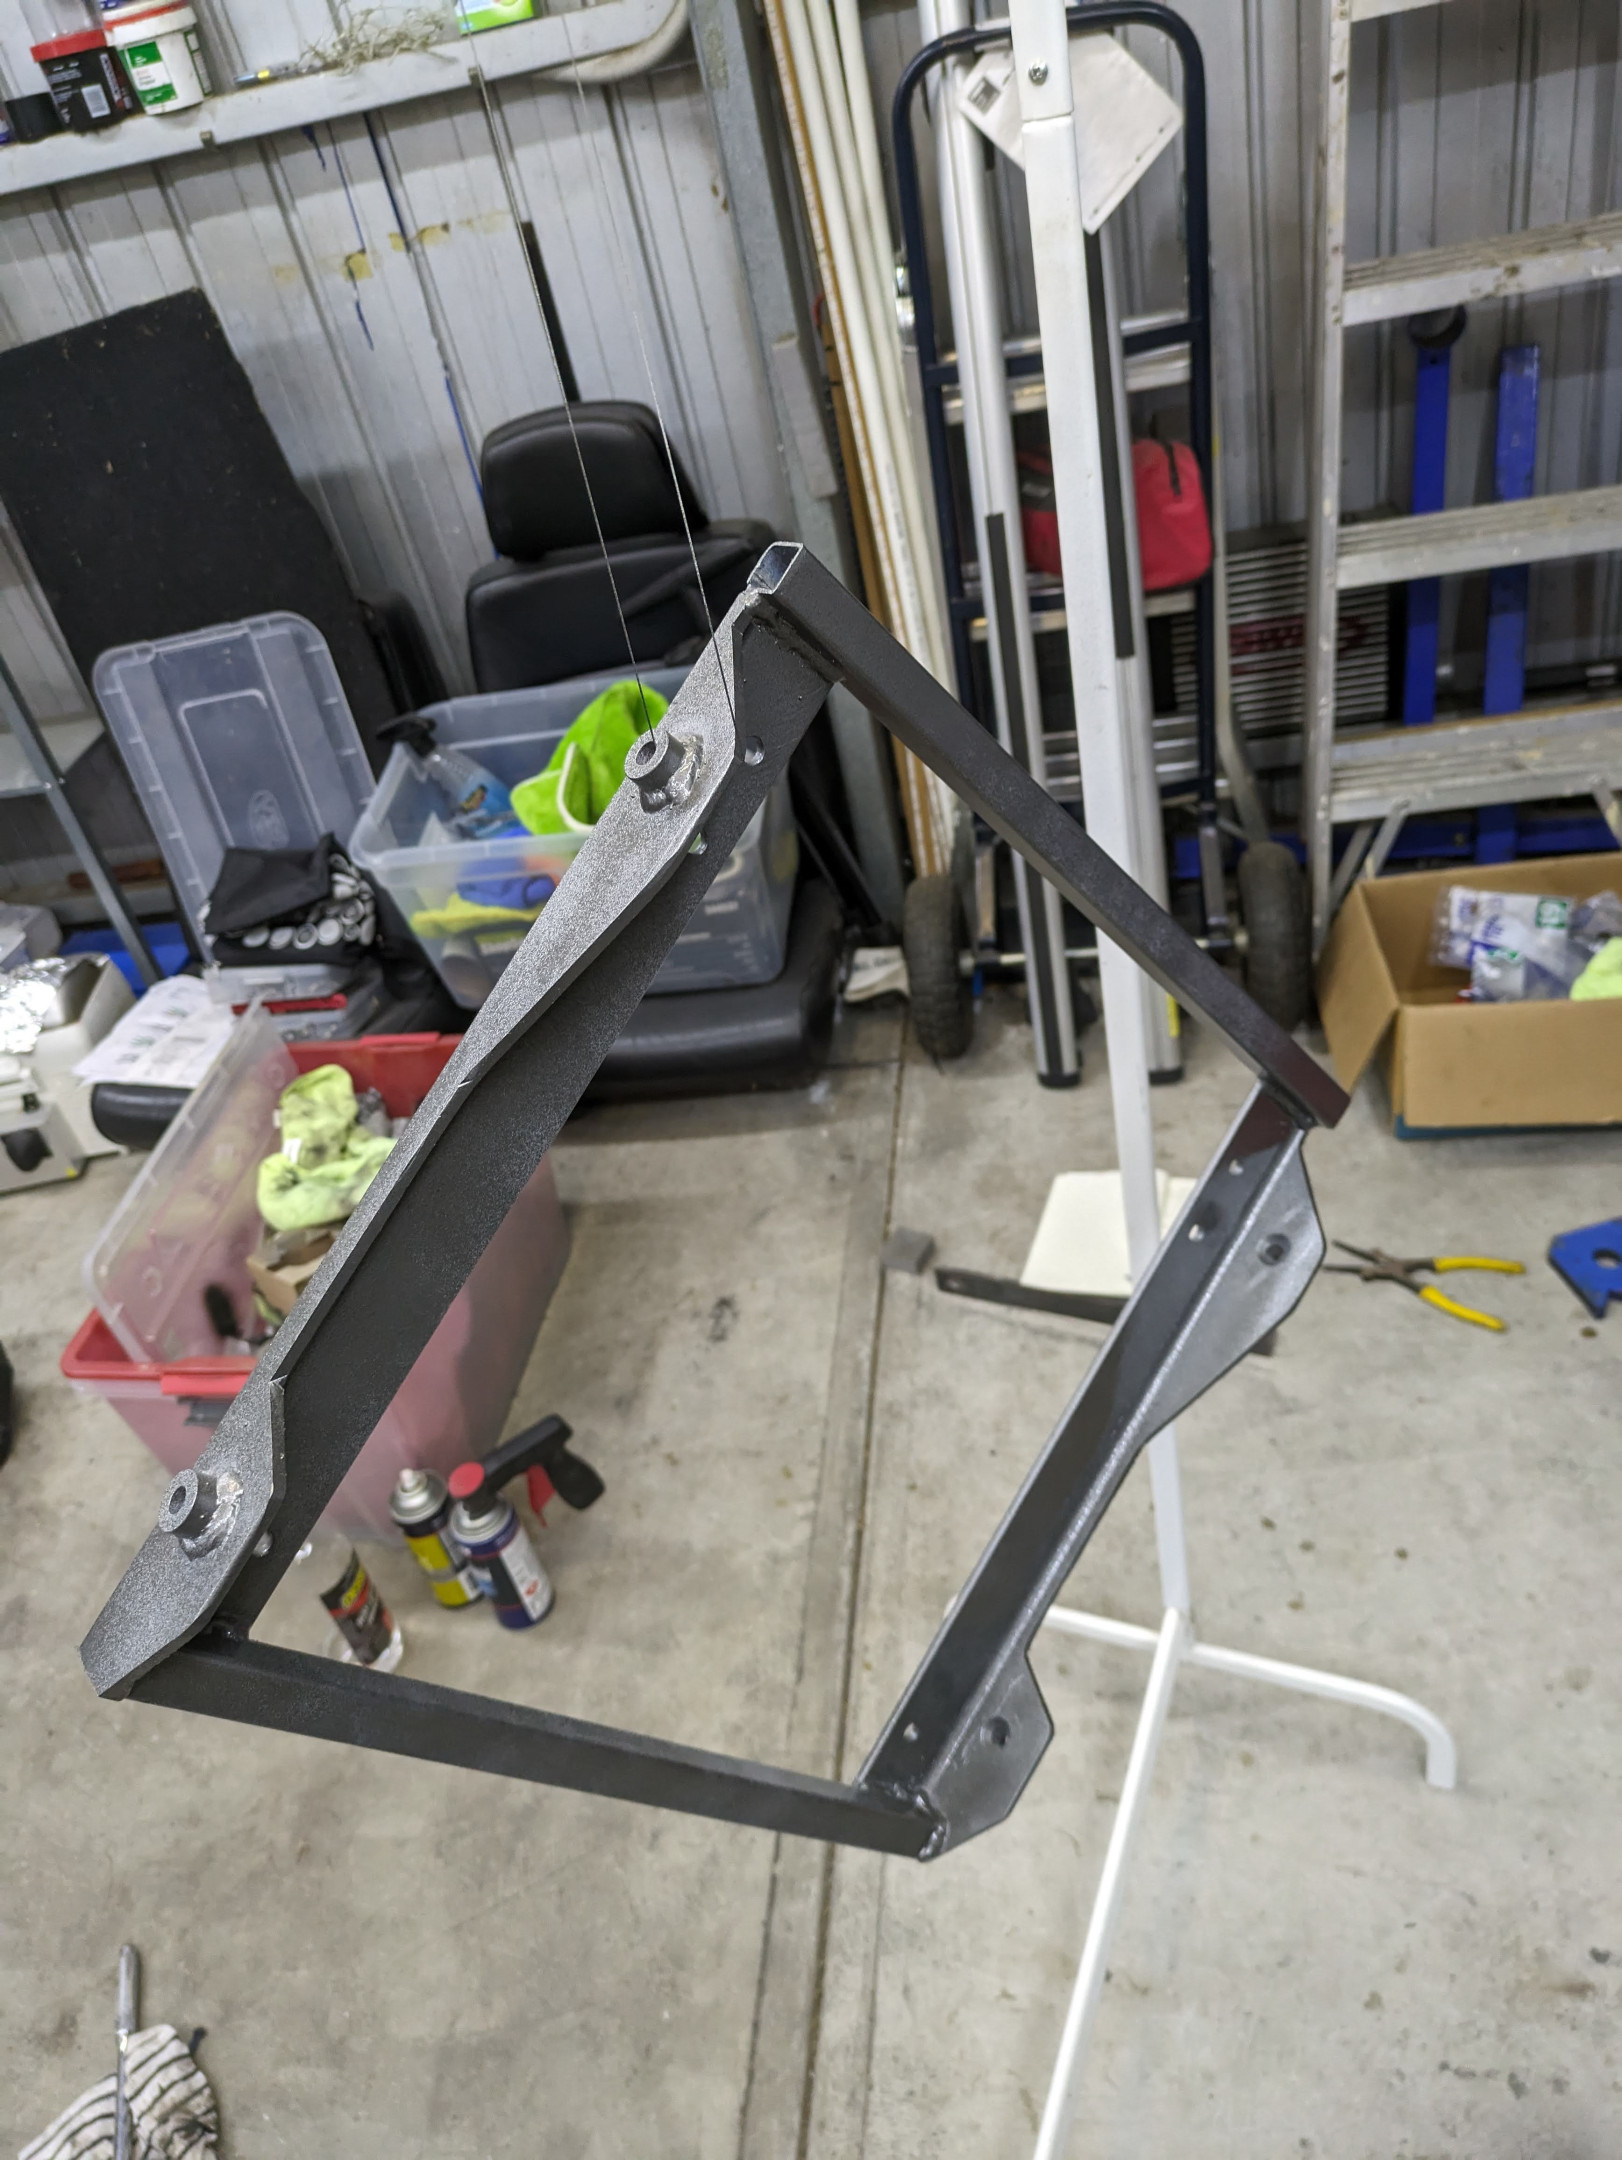
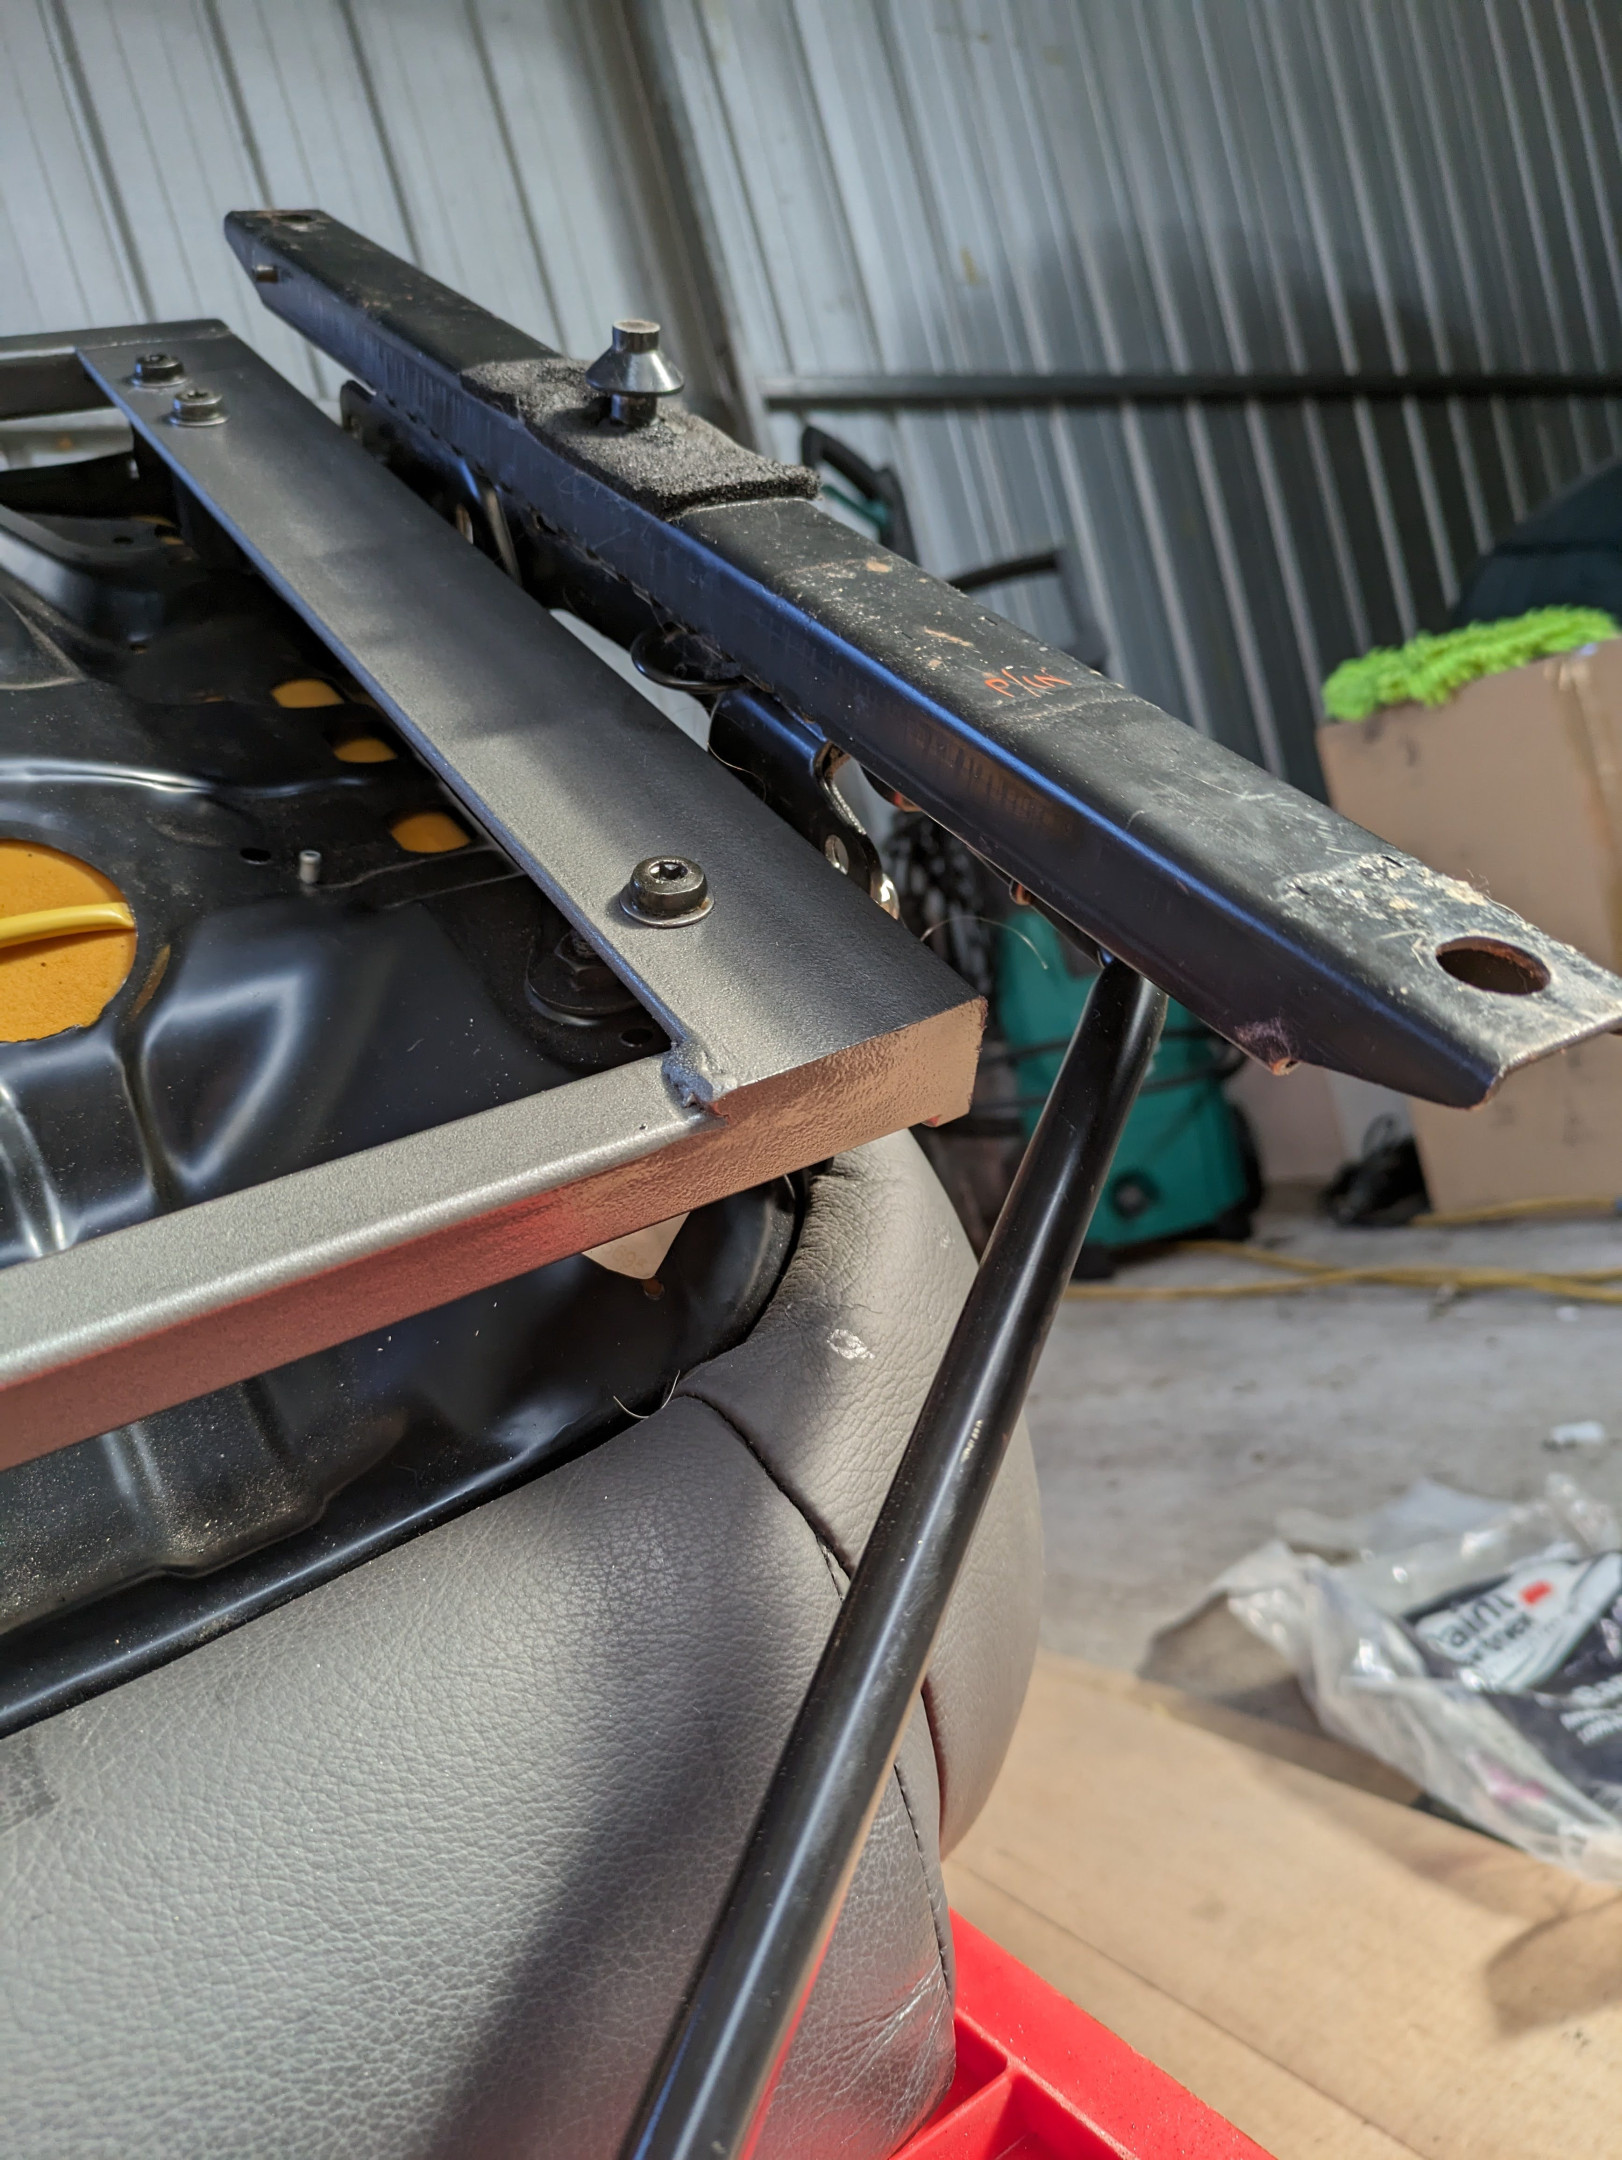
I wasn't happy with how the passenger seat rail was, so I took another crack at it, redesigning it so that it sat ~40mm lower than it did previously. Thanks to the lack of height adjustment in the passenger seat, I'm able to get it lower than the drivers seat by maybe 10-20mm. The spacers were machine mild steel, from memory around 16mm OD and 8mm ID to take high-tensile countersunk M8 bolts that bolt from the inner part of the rail because of clearances. The spacers were welded on inside and outside of the 50x50x5mm right-angle steel.
20mm RHS was used to tie both sides together.
There's improvements that could be made over it again. I'm no pro, so I hesitate to post up stuff involving safety lest someone try to copy this, but.. it is what it is. Because of the thickness of the materials used it probably weight half of what the whole seat does. Oh well.
Sept 2023 - Plates change
As mentioned in a previous post, I wanted to drive the car more, without needing to worry too much about running out of days on my club permit. I changed over to full reg and it's been quite liberating being able to drive it as much as we want. Was previously on a 90-day permit and got pretty close to filling up the book in 2022-2023, with weekend trips and a couple of bigger driving holidays.
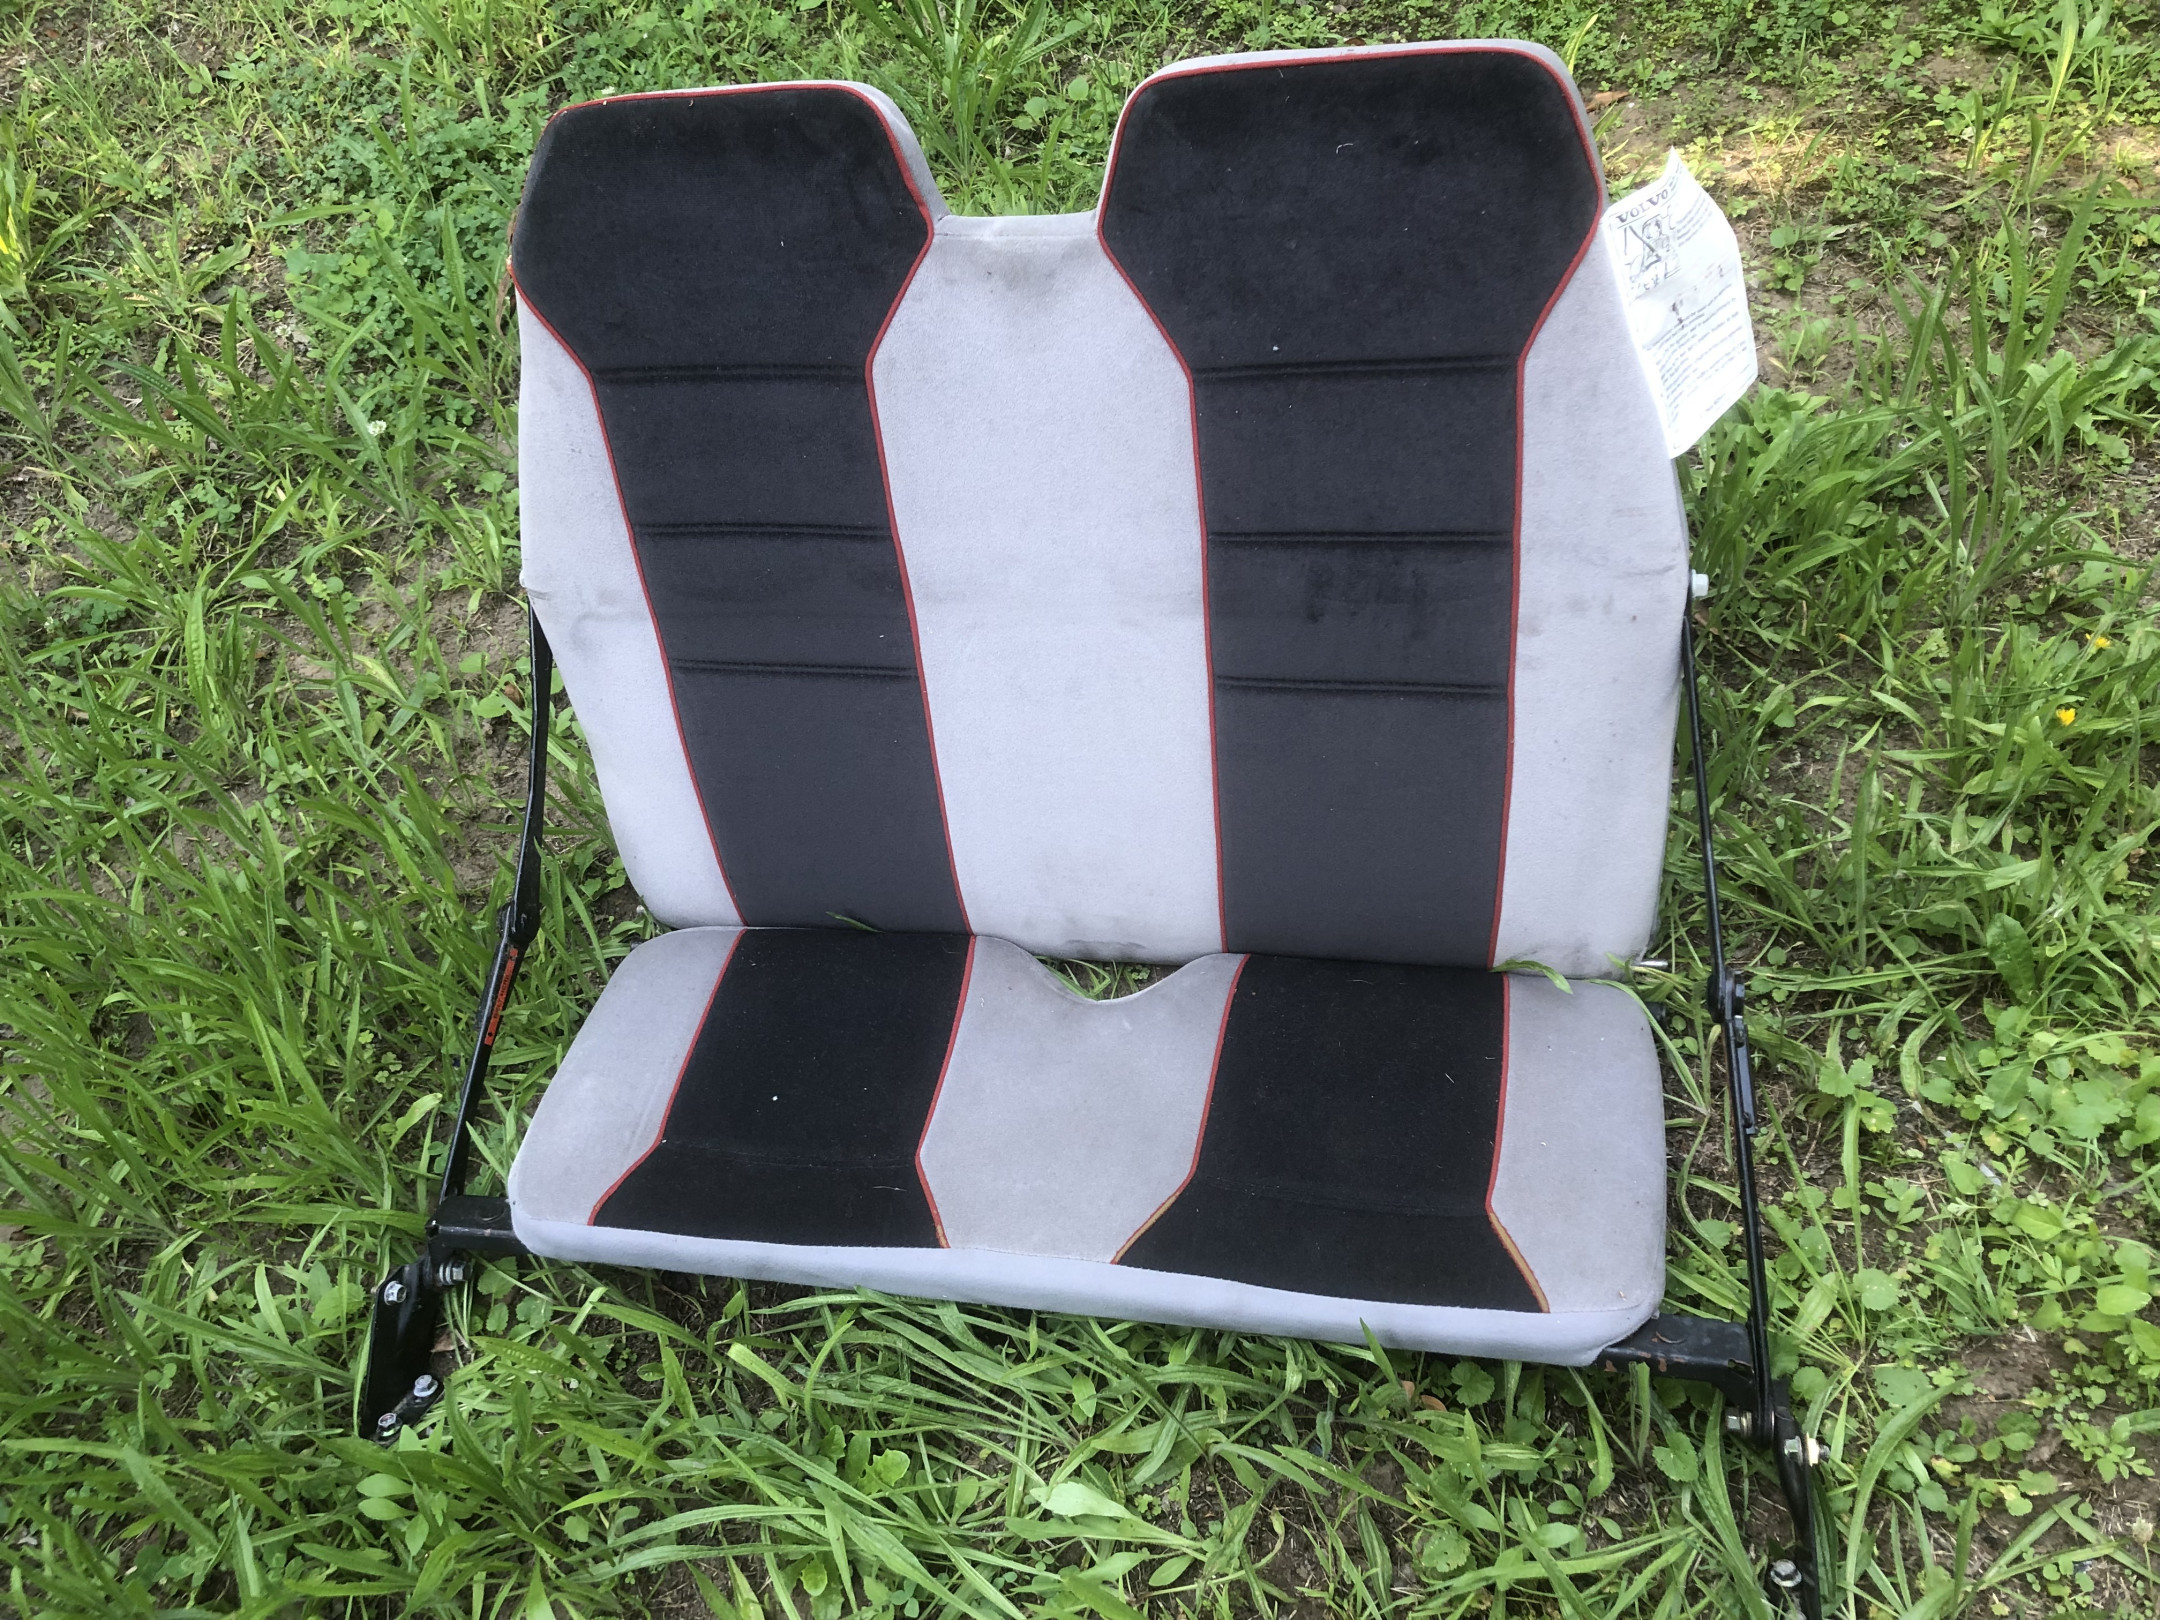
This was also when I found out that it's registered as a 7-seater, so I should probably relocate the amp and find a set of dicky seats so we can make the most of it!
I have third row seats
You are a terrible enabler  I'll have a think about it - there's certainly more important things on the car (and elsewhere) that require money to be spent, but I'll keep it in mind. Thanks mate!
Just had the thought.. how hilarious would it be if a skidpan day allowed all 7 seats to be full for a session.
November 2023 - Steering Wheel
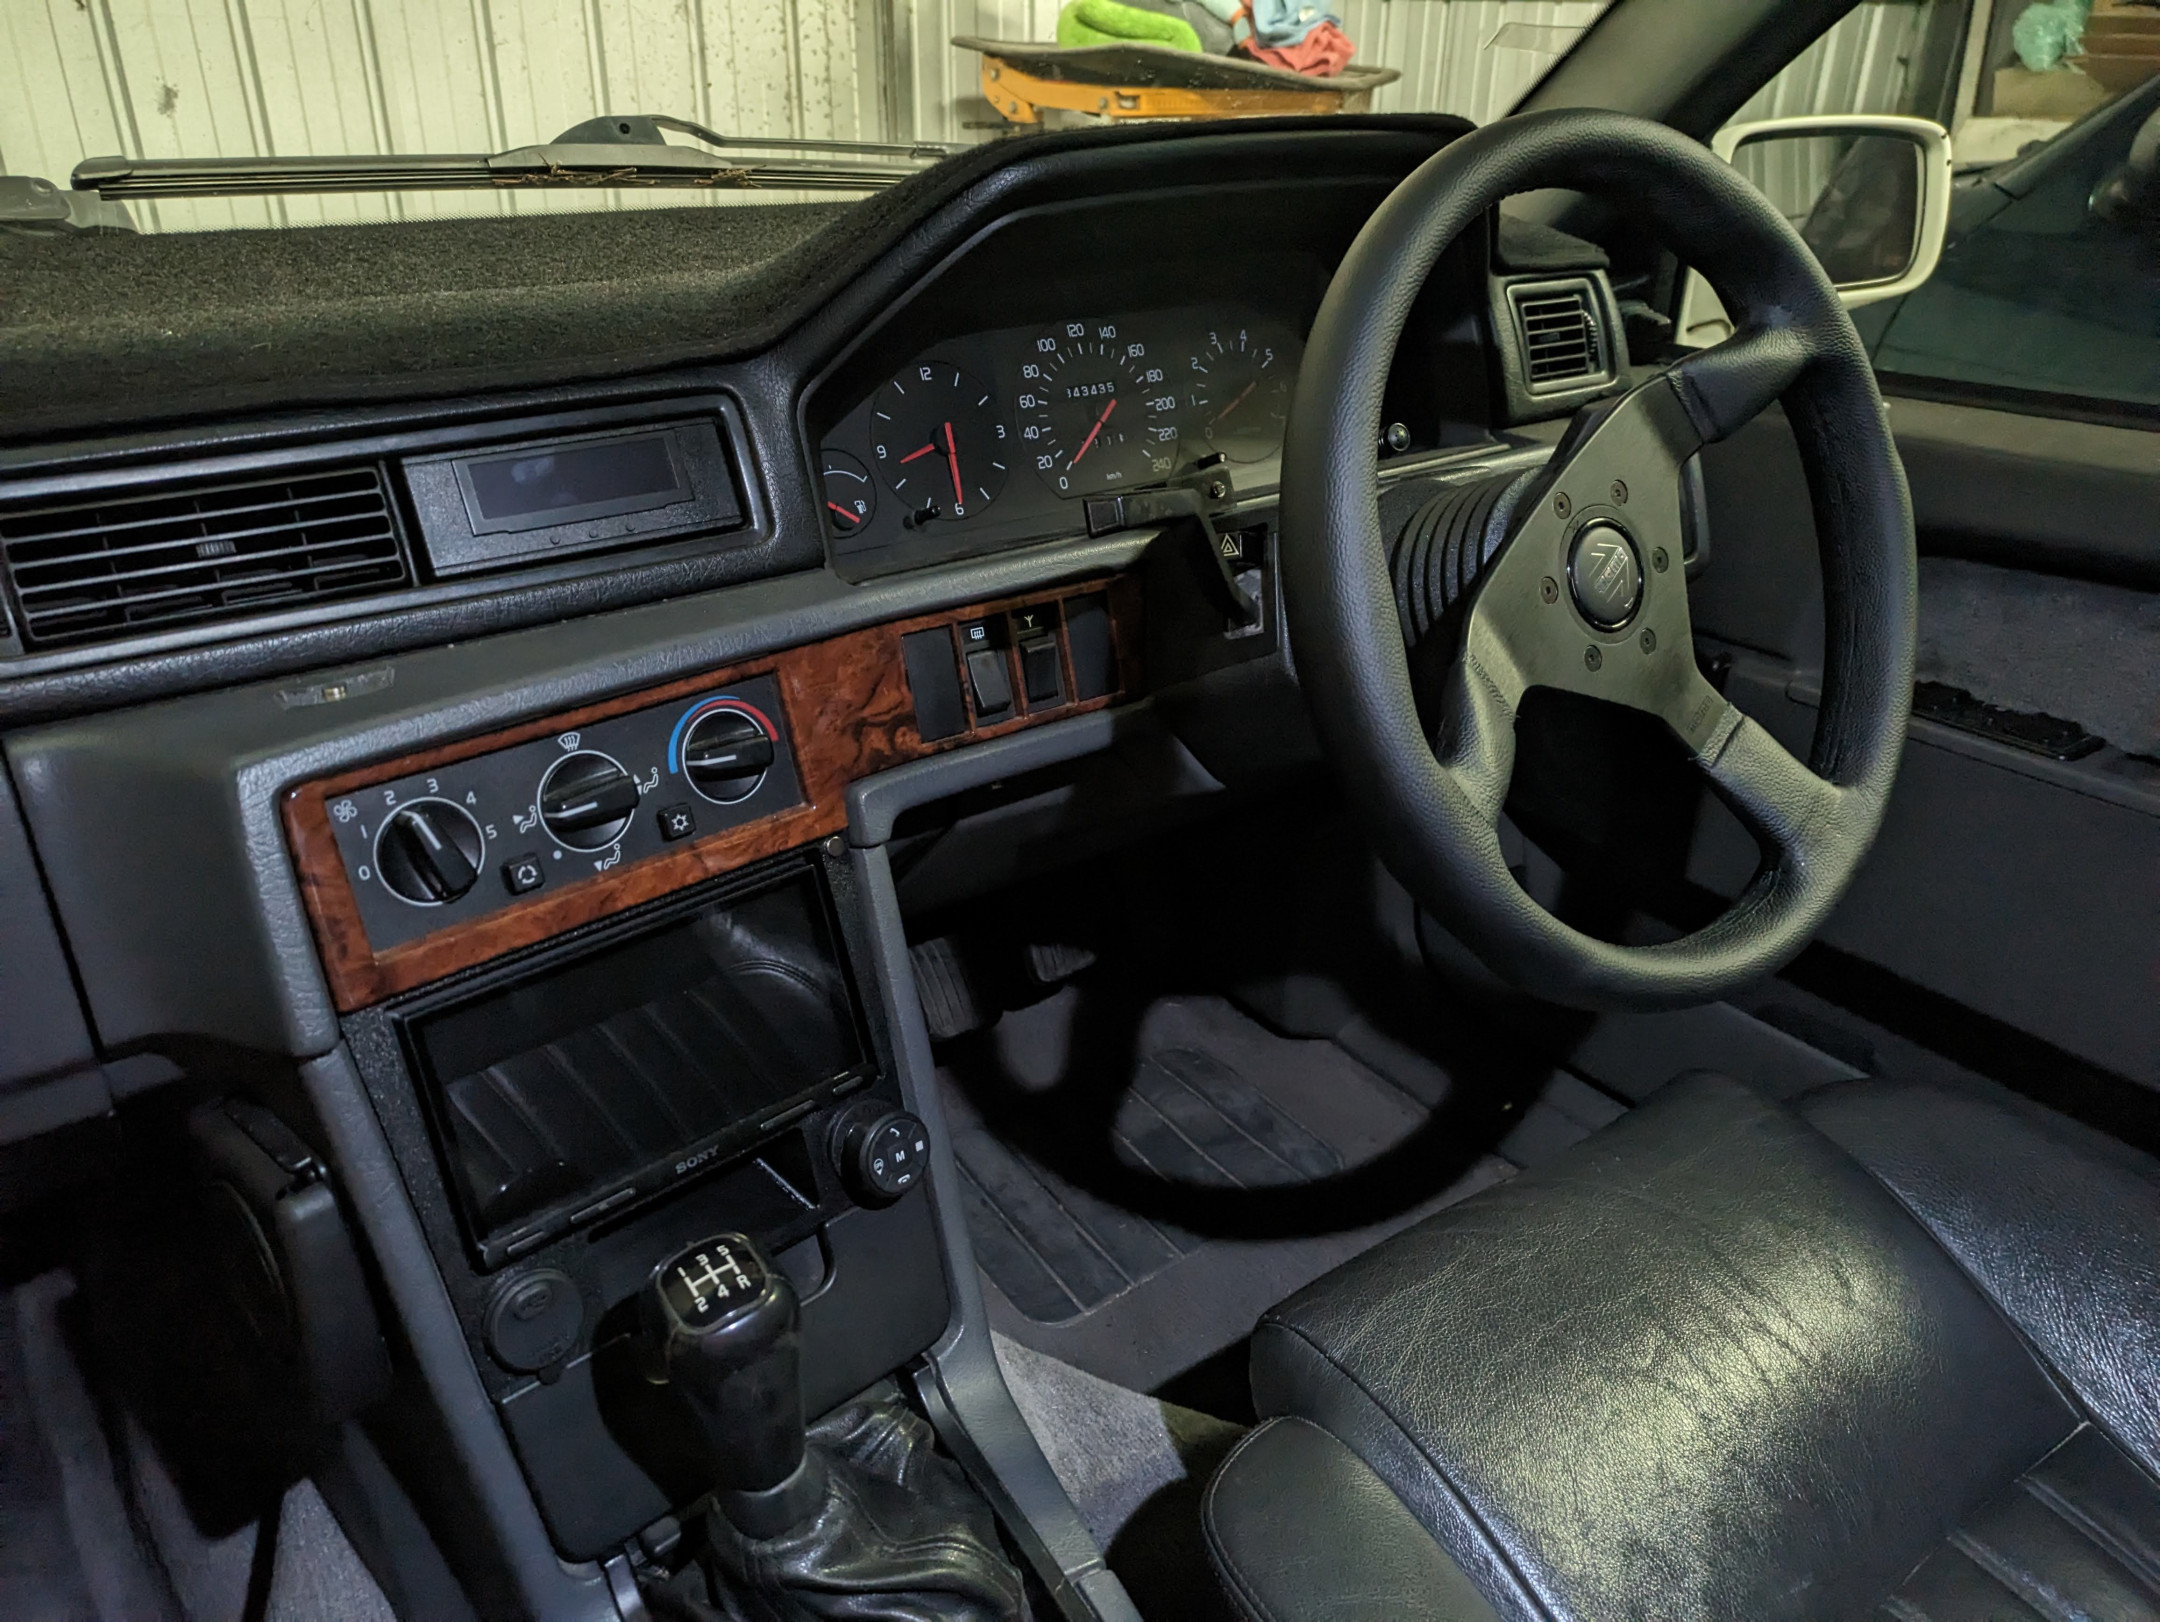
I do love the original in the car, but overall it feels like a plasticky 30-year-old steering wheel and I've had my eyes on a Montecarlo since I got the car. It was between this and a Personal Grinta, but with black friday sales, I could not say no. Had picked up a Momo 9011 boss kit a while back as well. The original wheel is a non-airbag model.
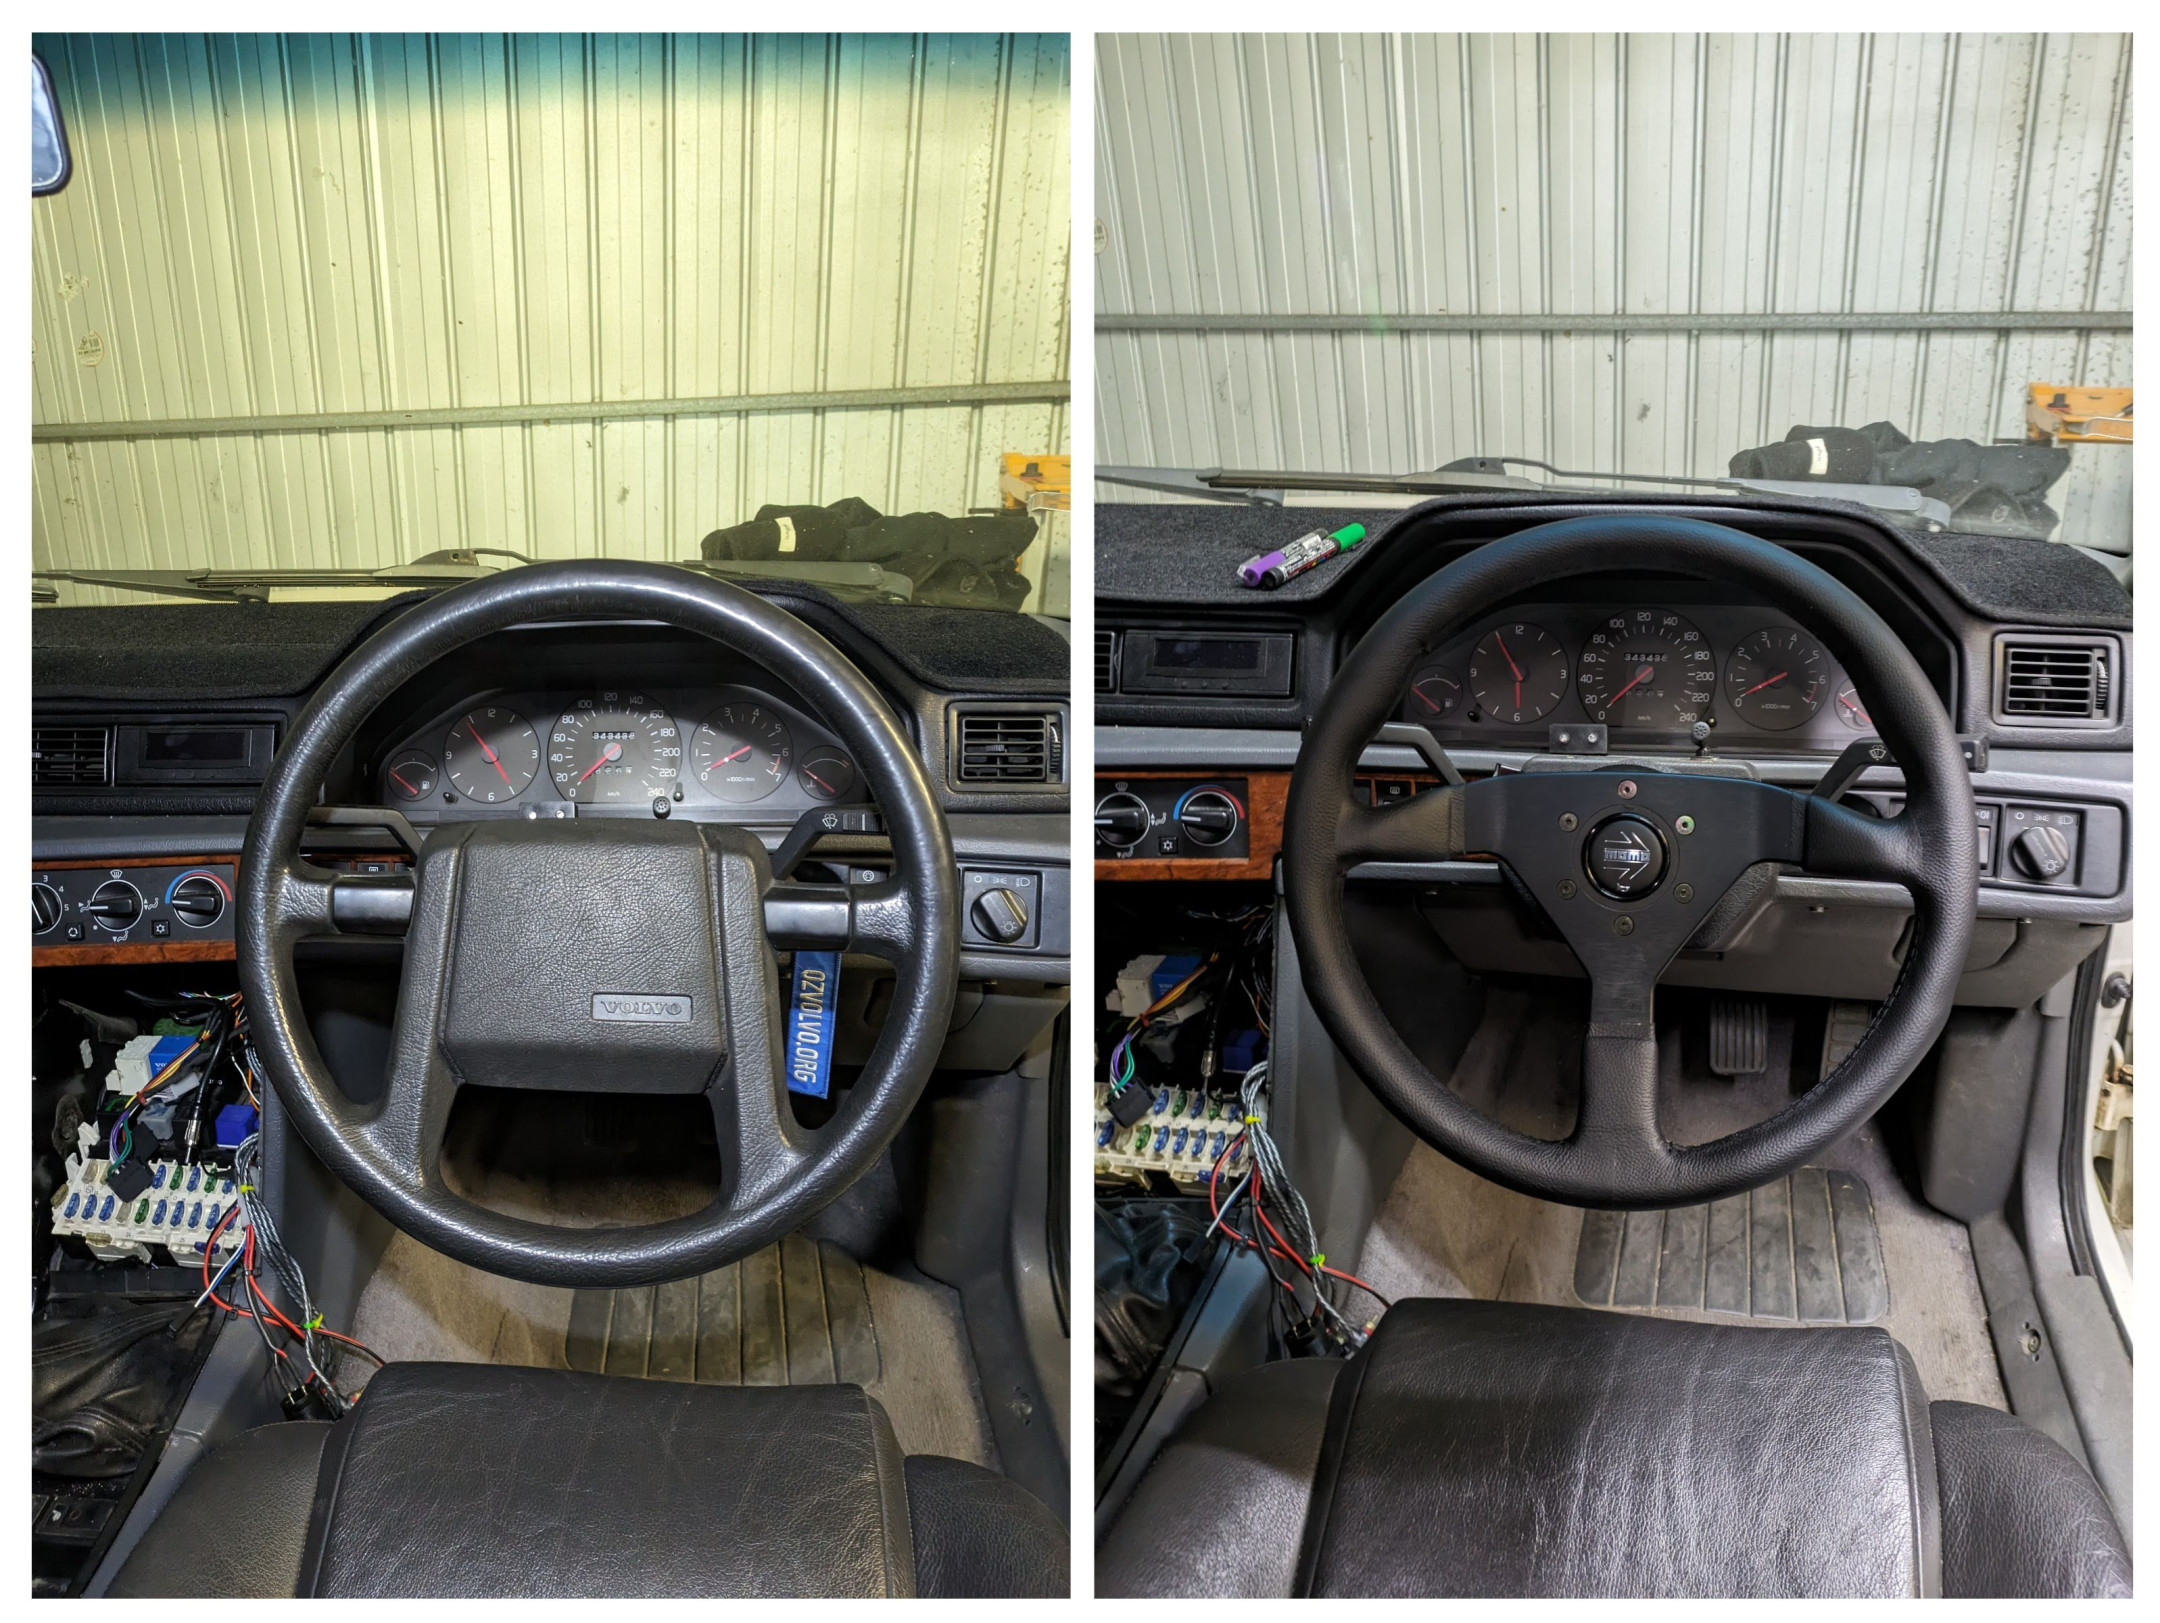
Diameter is 350mm, which feels a lot smaller than the ~365mm original diameter, and even despite having 350mm wheels previously in other cars. Can't see the indicator bulbs but it feels great and that's the main thing 
Awesome, I have a montecarlo 350 as well. Feels much more direct with the smaller diameter. I used a 740 clockspring (bolts right in place of the 940 one) as its non SRS.
They suit the 940 dash so well.
Did you see that Momo just released a heritage wood montecarlo? Would look great with the wood dash spears you have. https://momo-uk.co.uk/momo-montecarlo-heritage-wood-steering-wheel
I had not seen that wooden one - but I don't think it's really my style. it would definitely match the trim but to me I associate wooden wheels with vintage racecars and older cars.. It could look good in a 240, particularly styles like that or the prototipo if that comes in a wood version. This feels like a good match for the era of car..
I promise I'm not trying to copy your 940  If you get a eggcrate grill tho
Did you end up changing to the faster position on the BNE QSRCs?
deNs I have been searching for an eggcrate for ages and haven't been able to find one lol.
And no still on the factory setting. Recently did a skid pan day and was running out of lock so I should change it over eventually.
Still have a set of BNE sway bar links I haven't fitted yet either.
December 2023 - Carpet Clips
I had a set of carpets that I'd used for the front, but had never used the drivers one as there was no way of retaining the mat in place. The item from volvo (p/n 3529482) is no longer available for purchase from dealers here, though you can definitely buy it from other places. After a while I found an option that I went with, which was a bit of punt, on this item on Aliexpress.
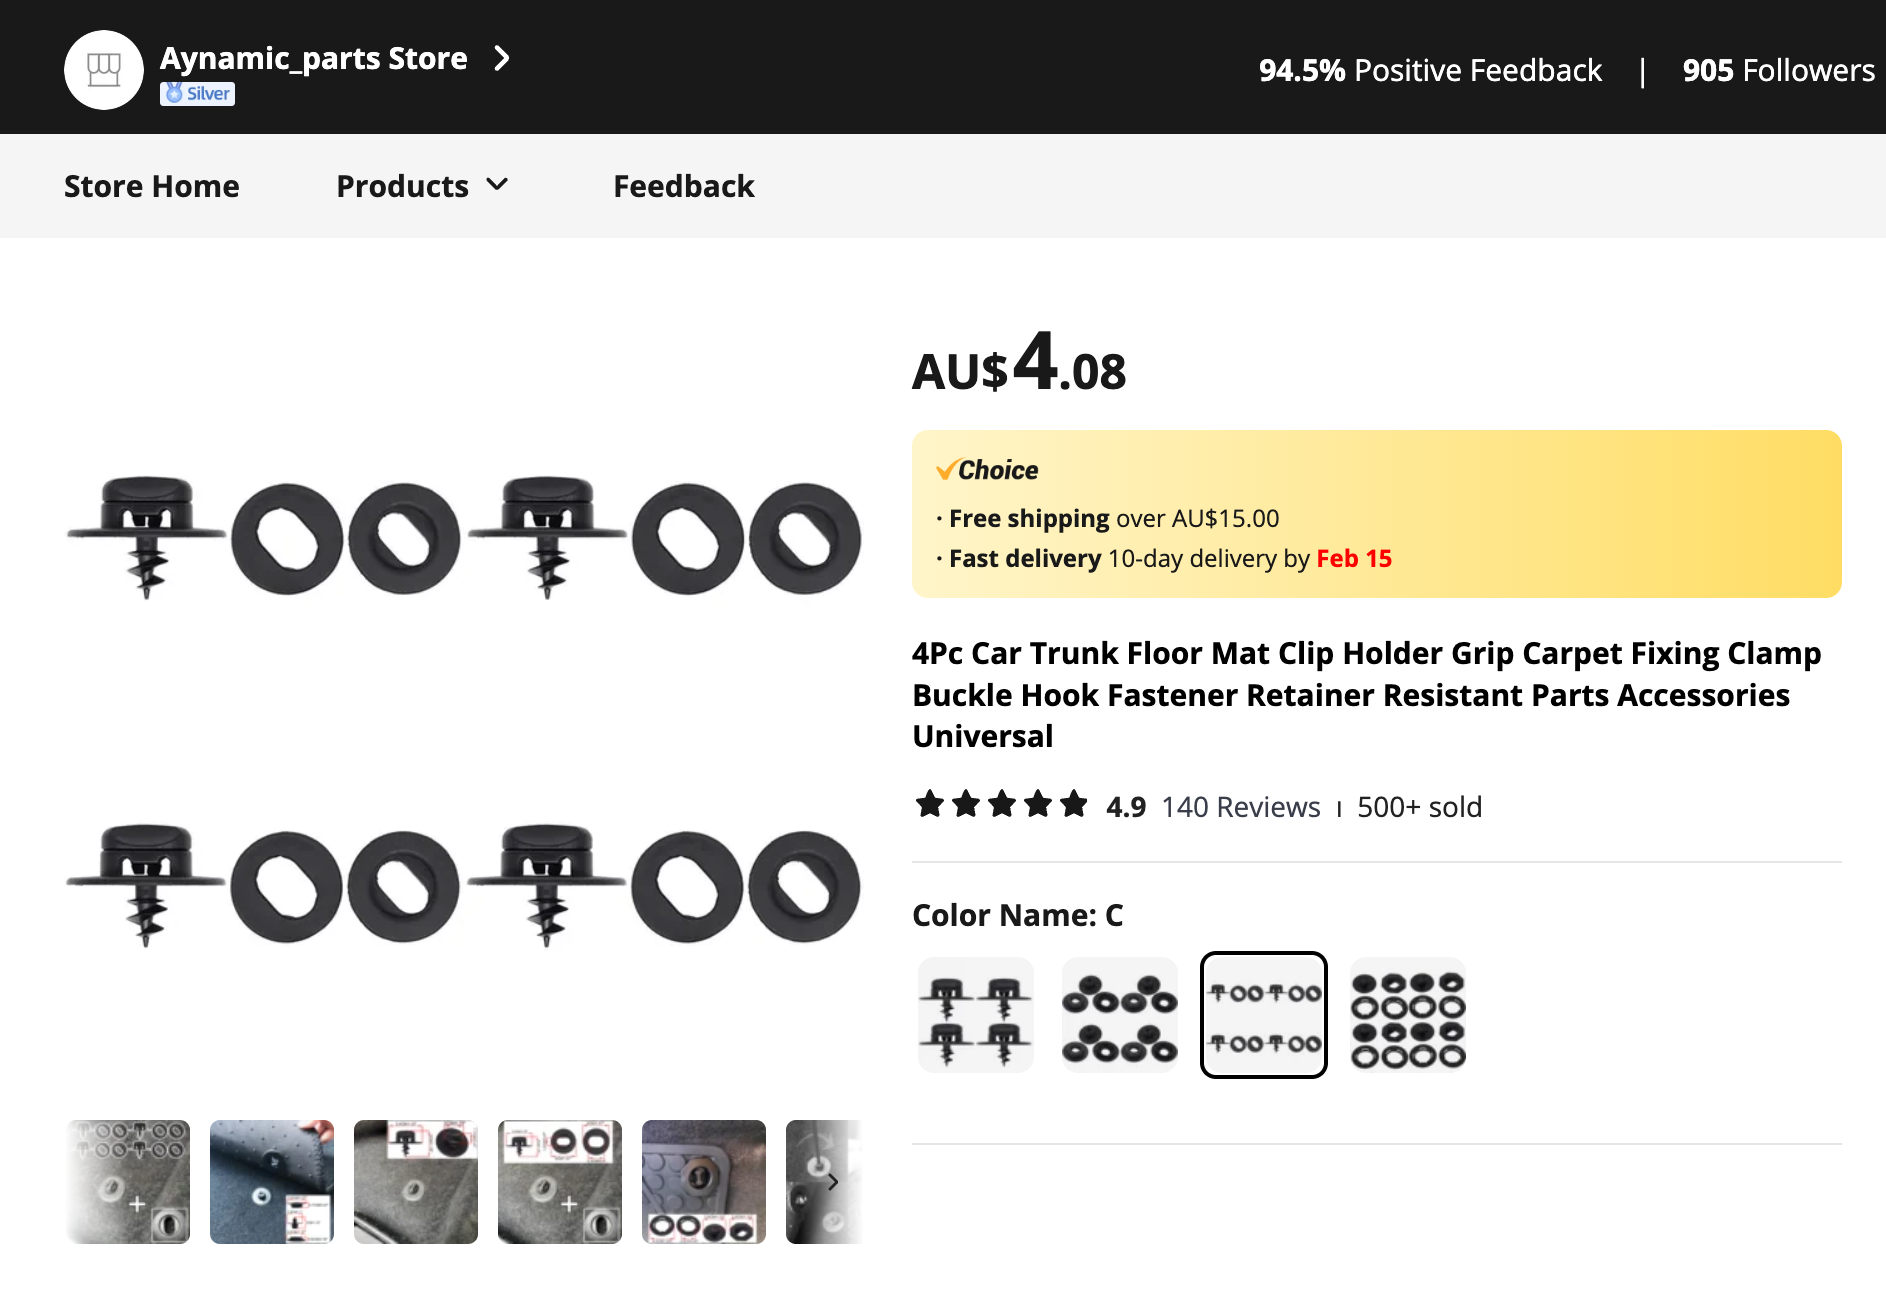
Afterwards I did find what appears to be the same as the Aliexpress item, but from a local seller here, but I haven't tested this. It's interesting if Audi/VW/other VAG cars might use a similar eyelet, so that could be another route if people have easy access to that.
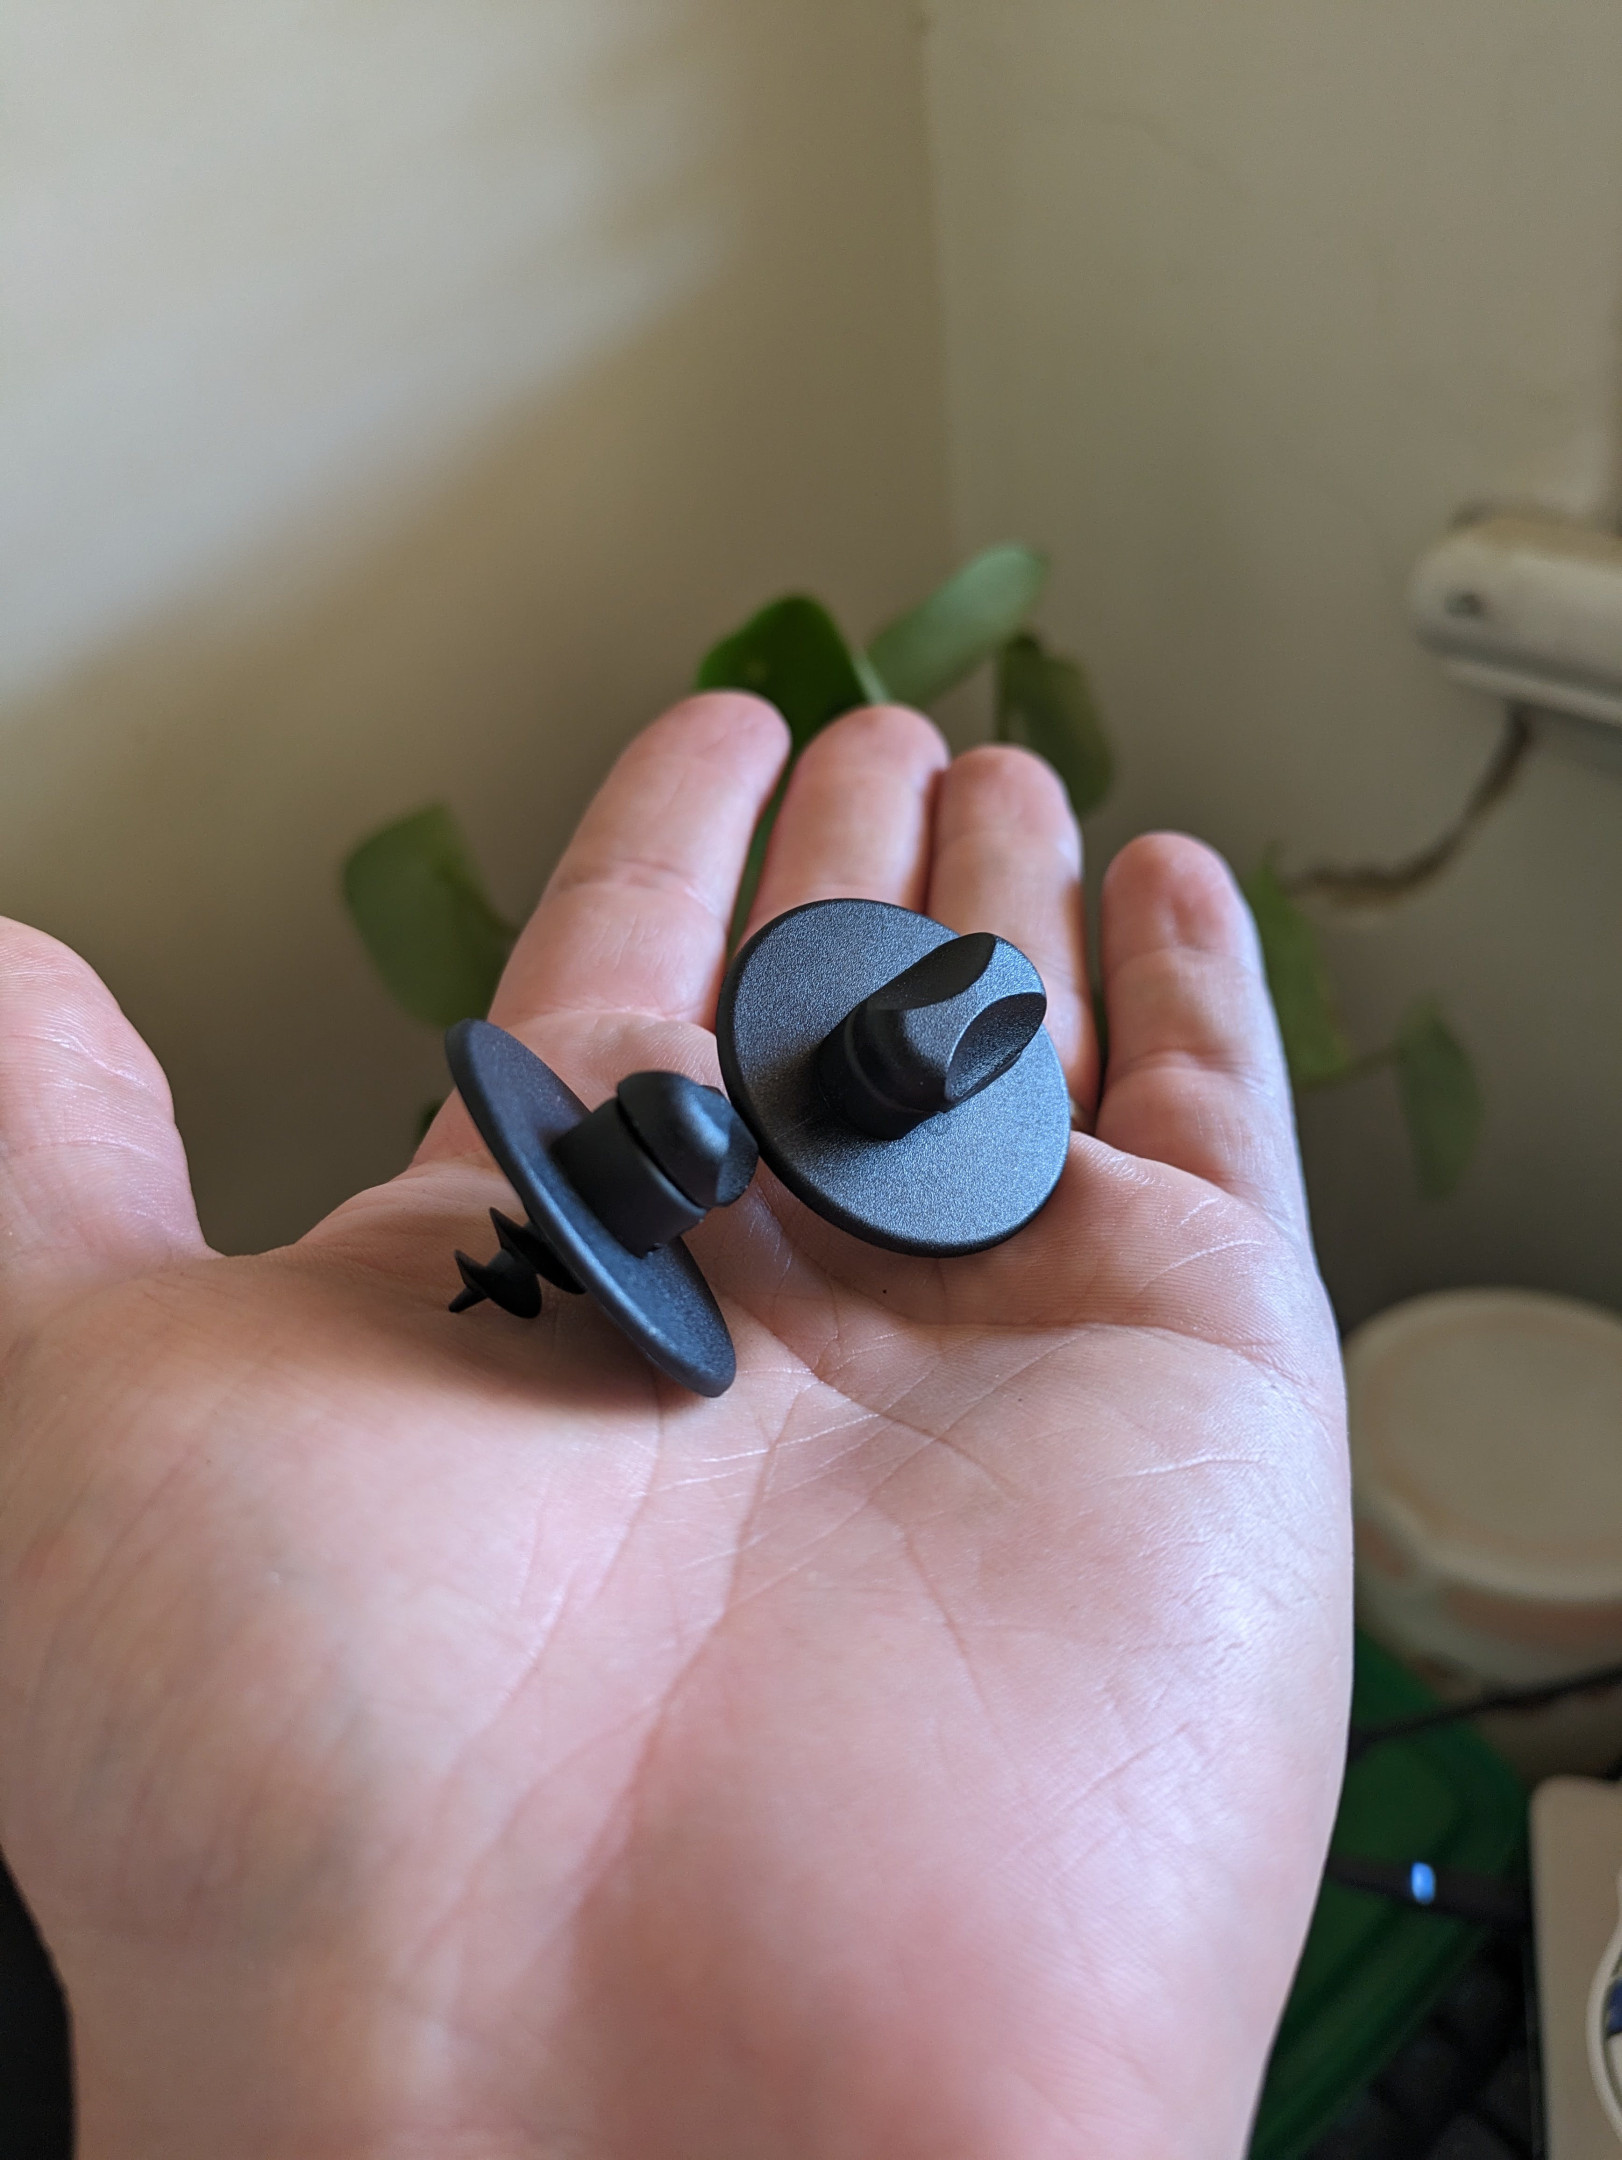
They came, I installed them and it was a perfect fit. Like factory! I probably could've chosen option 'A' as the other clips it comes with to go top/bottom aren't necessary that come with option 'C'. I might need them for my all-weather mats as they also have eyelets and no where to clip to.
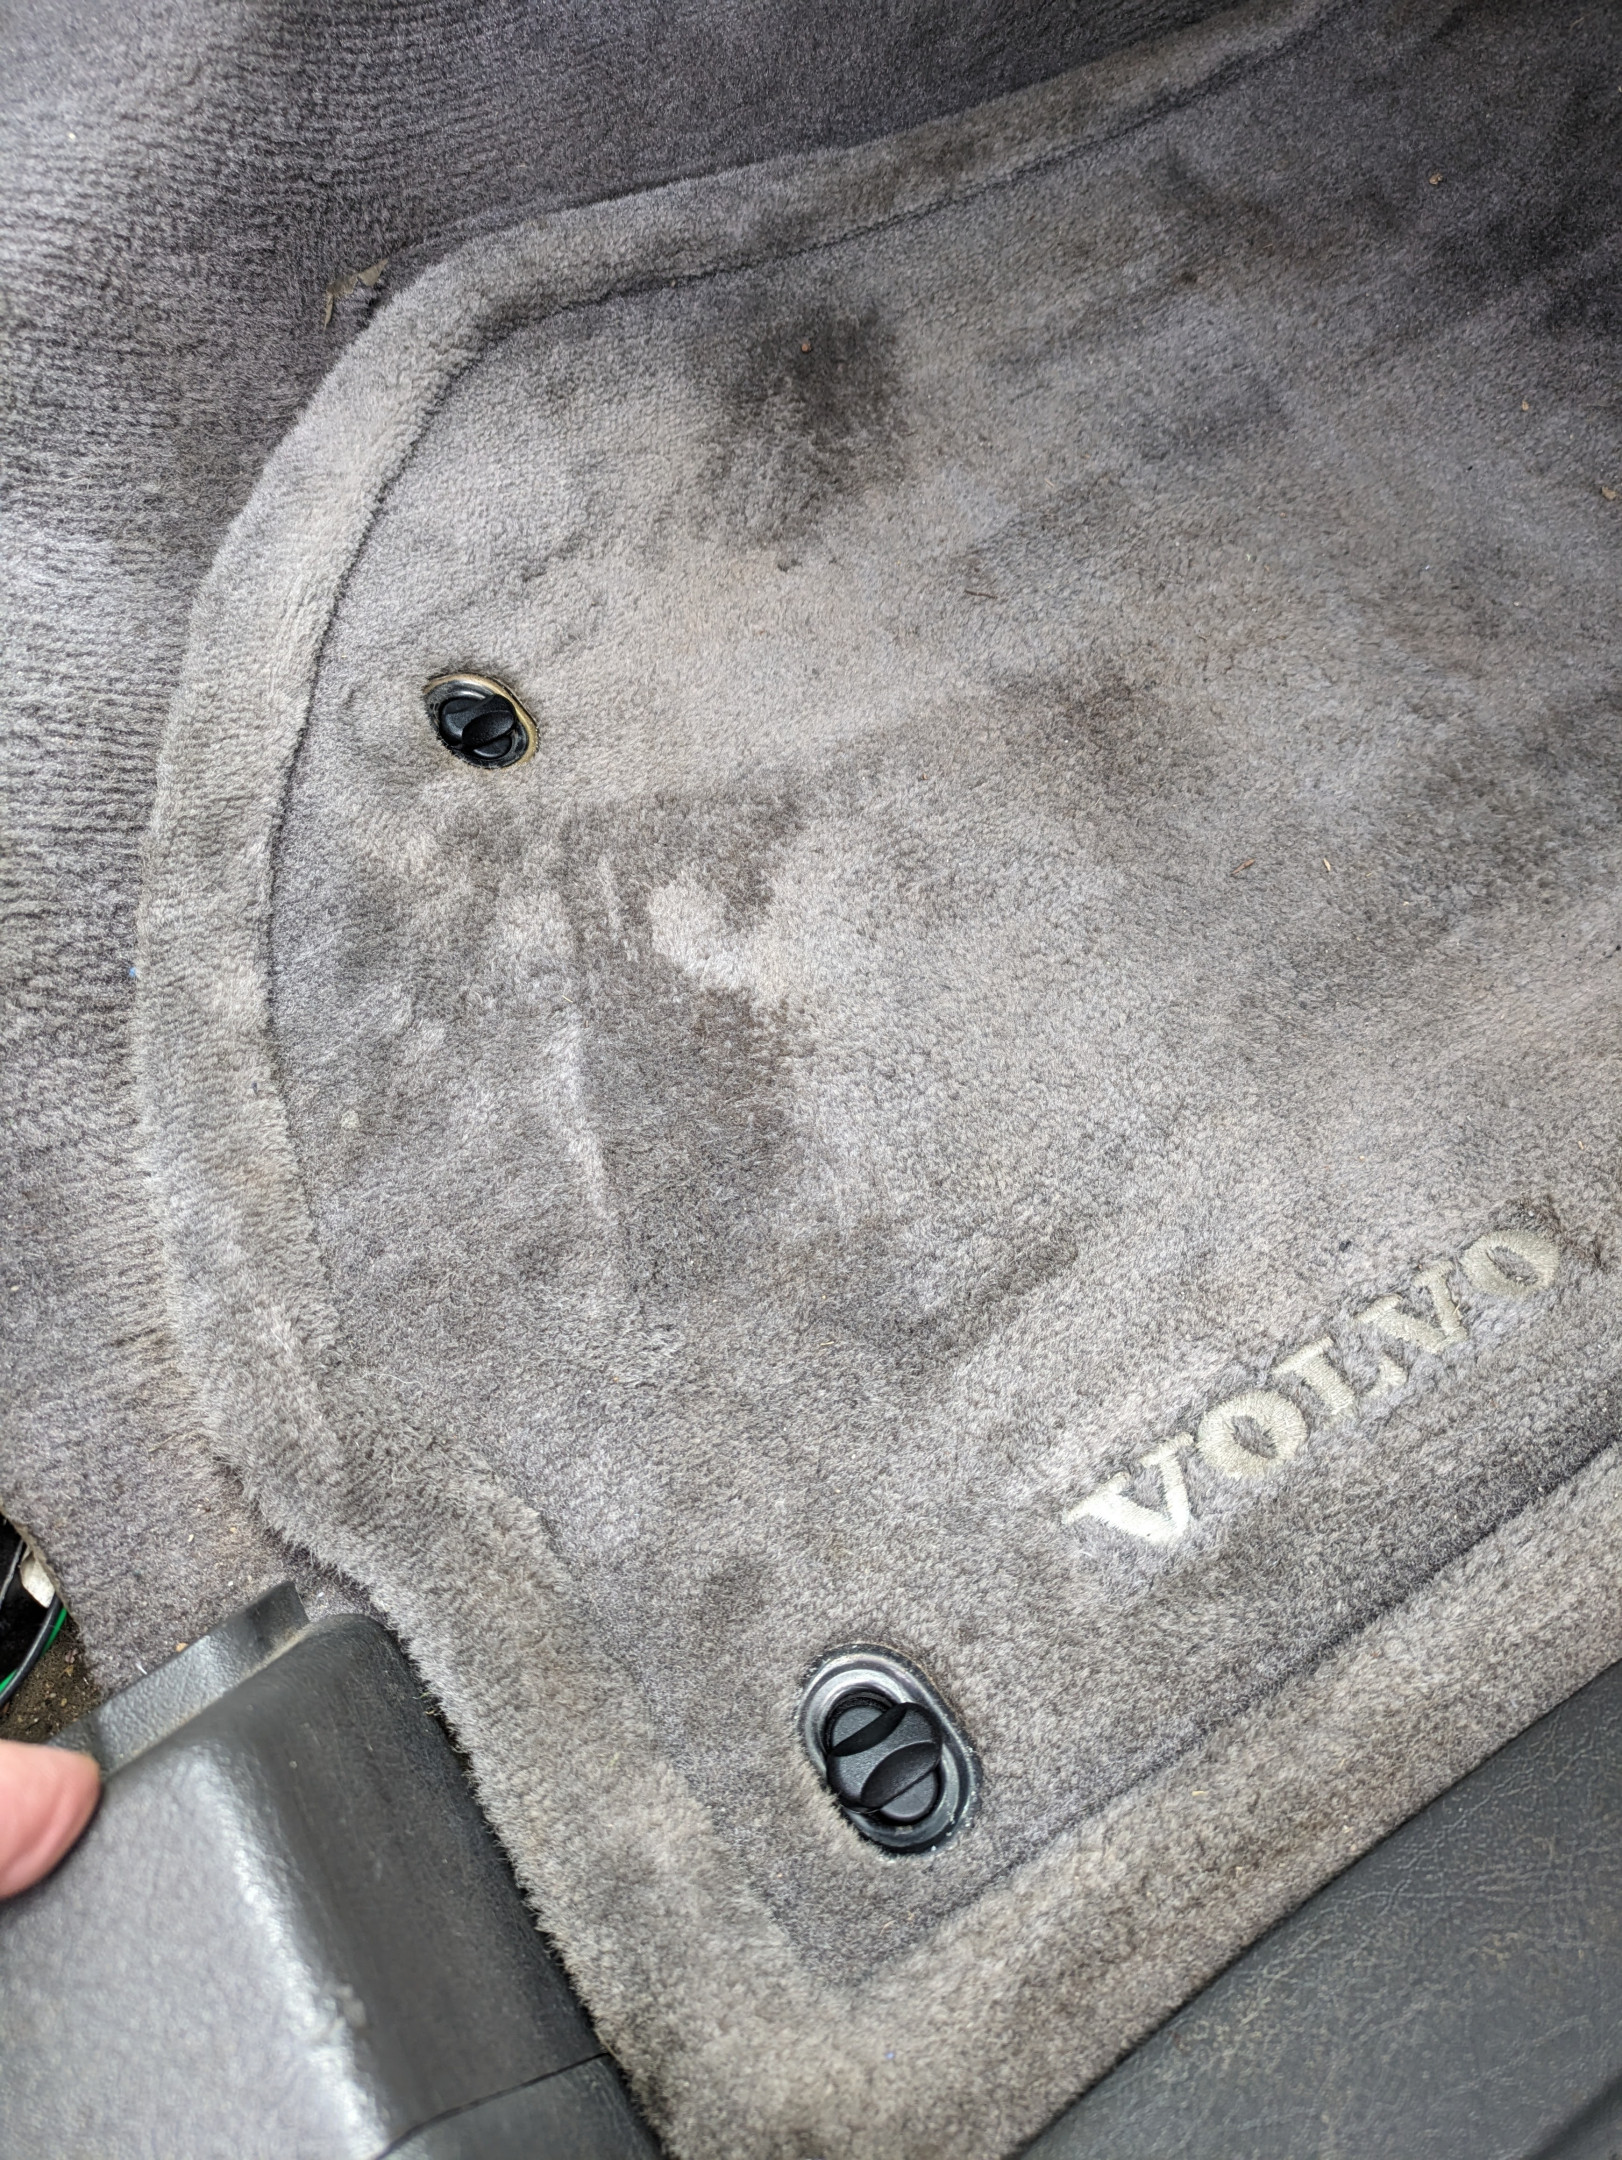
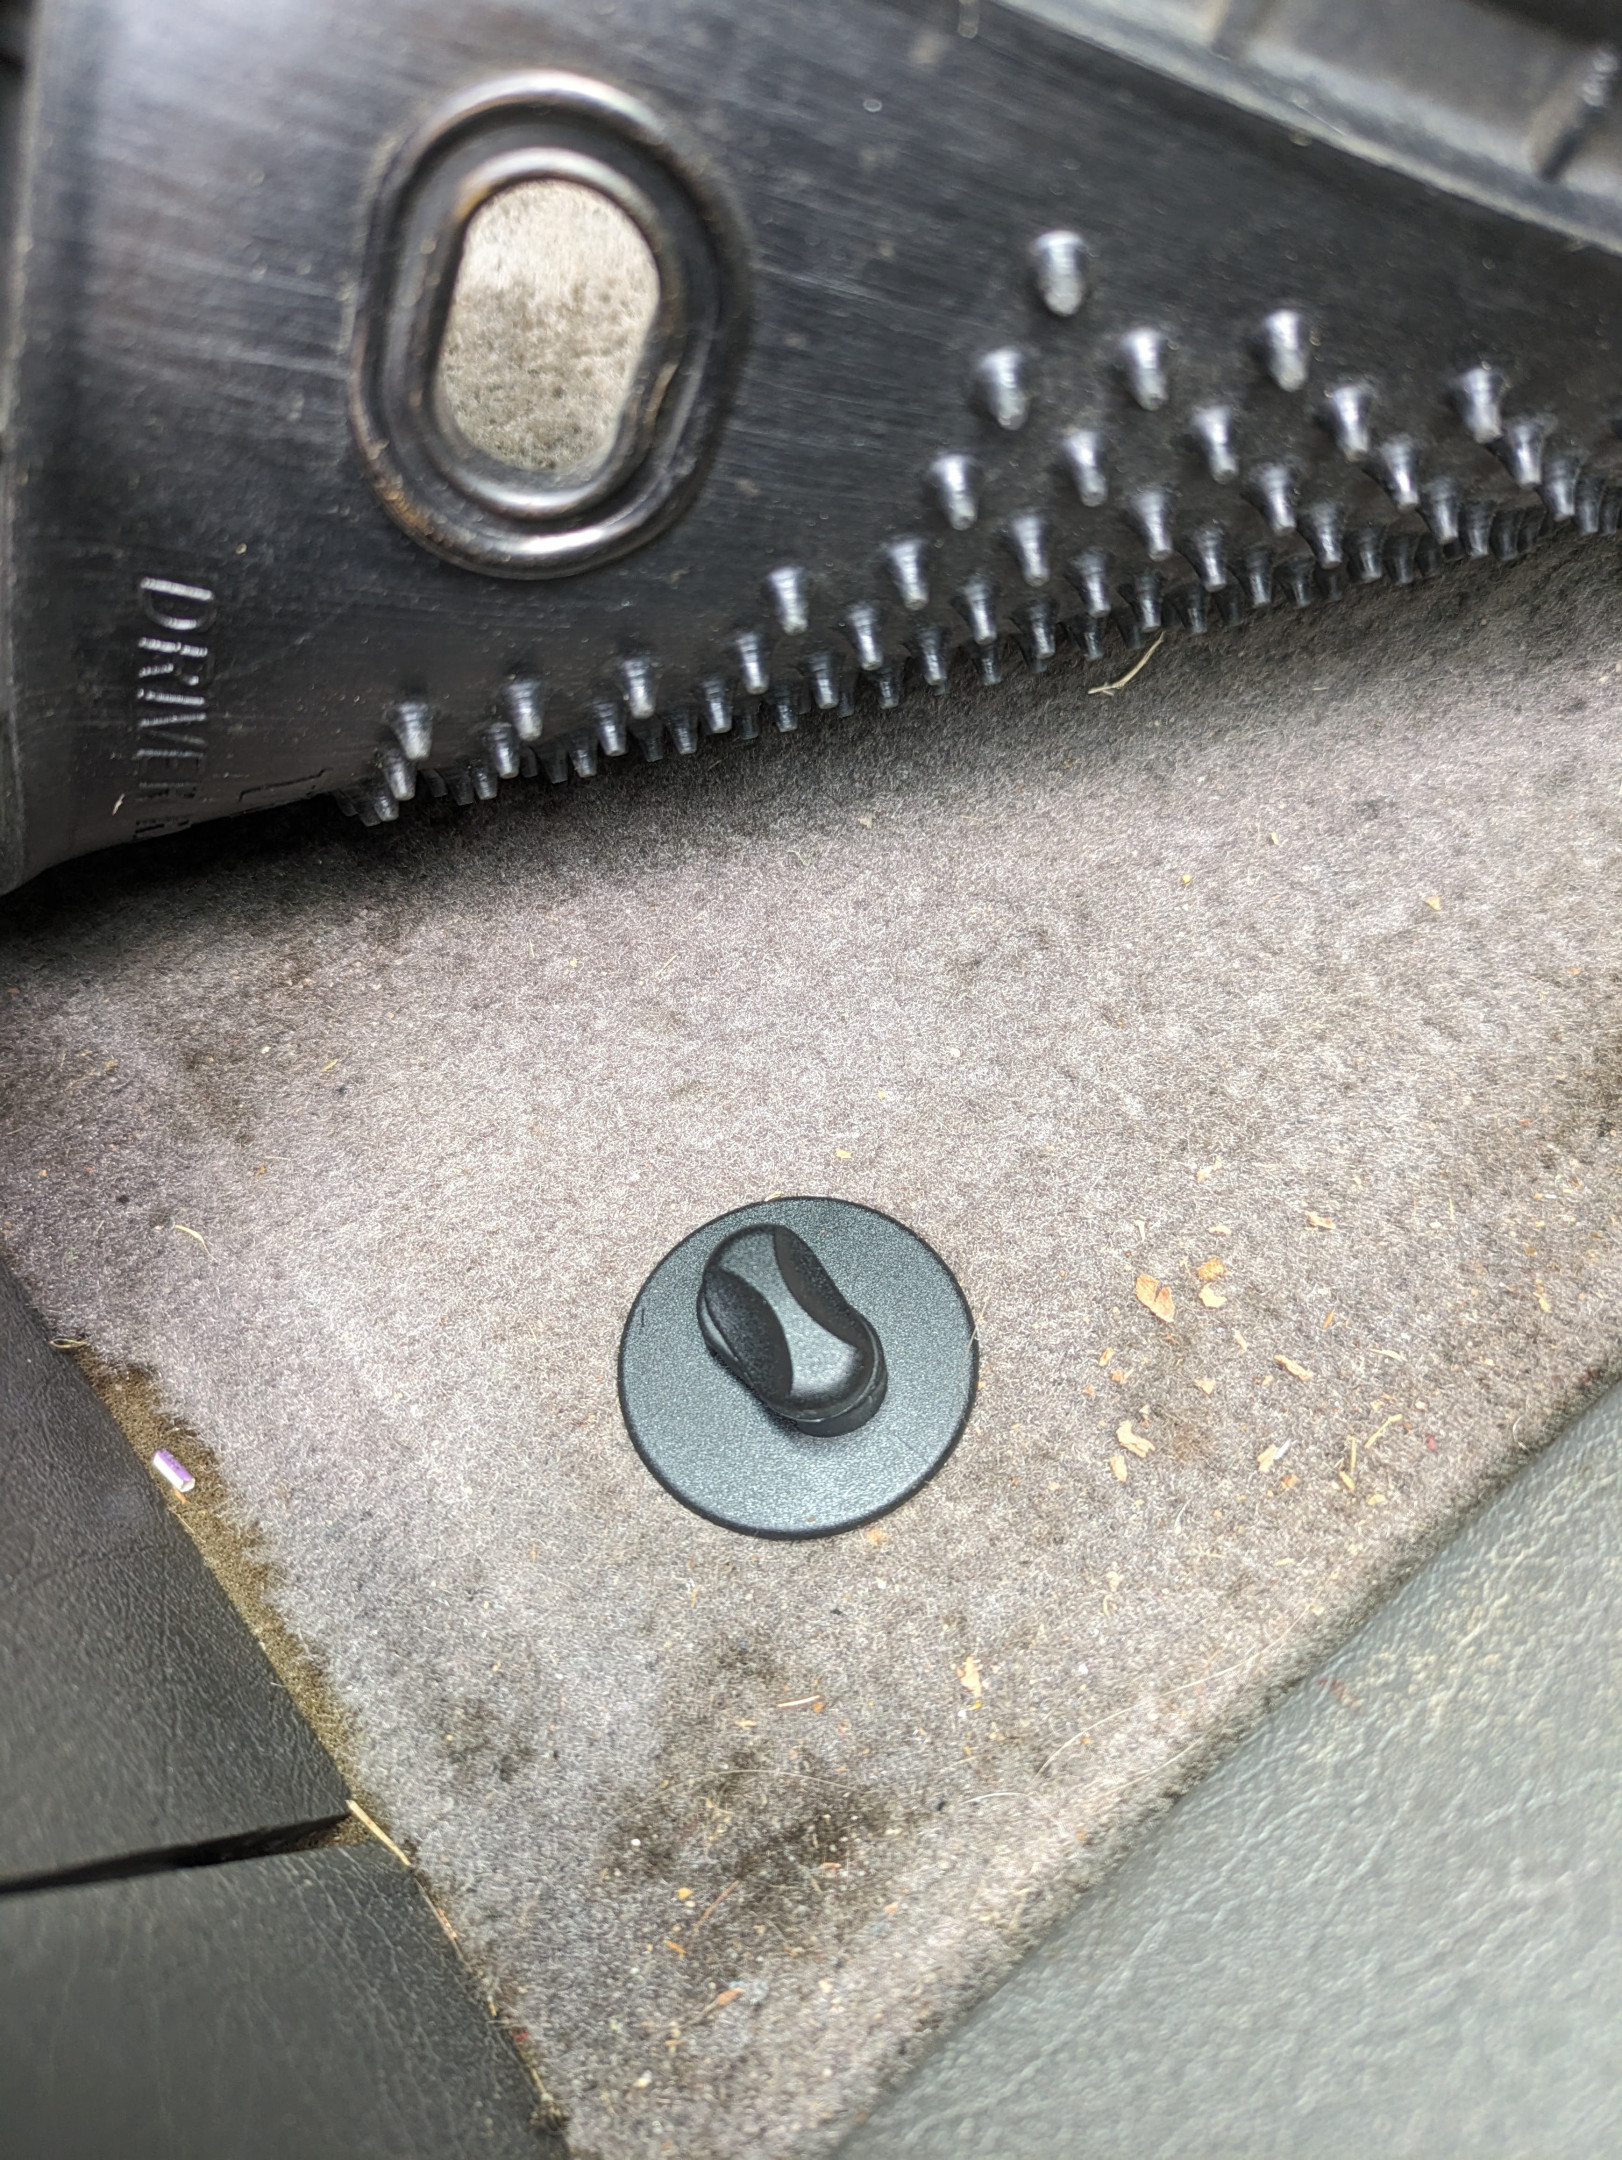
I think this post might tie with my dashmat post for being the most boring of the entire thread (maybe even the whole forum?) but I was chuffed I could find a solution, and now I won't keep wearing down the carpet, and best of all it doesn't interfere with the clutch pedal!
Nov 2023 - Double DIN Upgrade
After a few years with the old Pioneer single DIN bluetooth headunit, I decided for and upcoming road trip it might be a nice thing to upgrade this 30 year old fridge with something a bit better. Inspired by this excellent design, I took the design and modified it to better support the Sony XAV-AX5500 headunit as it's different to the original shallow one it's designed for.
Once modified using Fusion 360, I uploaded my remix here, linking the original, should someone wish to do the same.
So, with measurements taken and design modified, it was time to print!
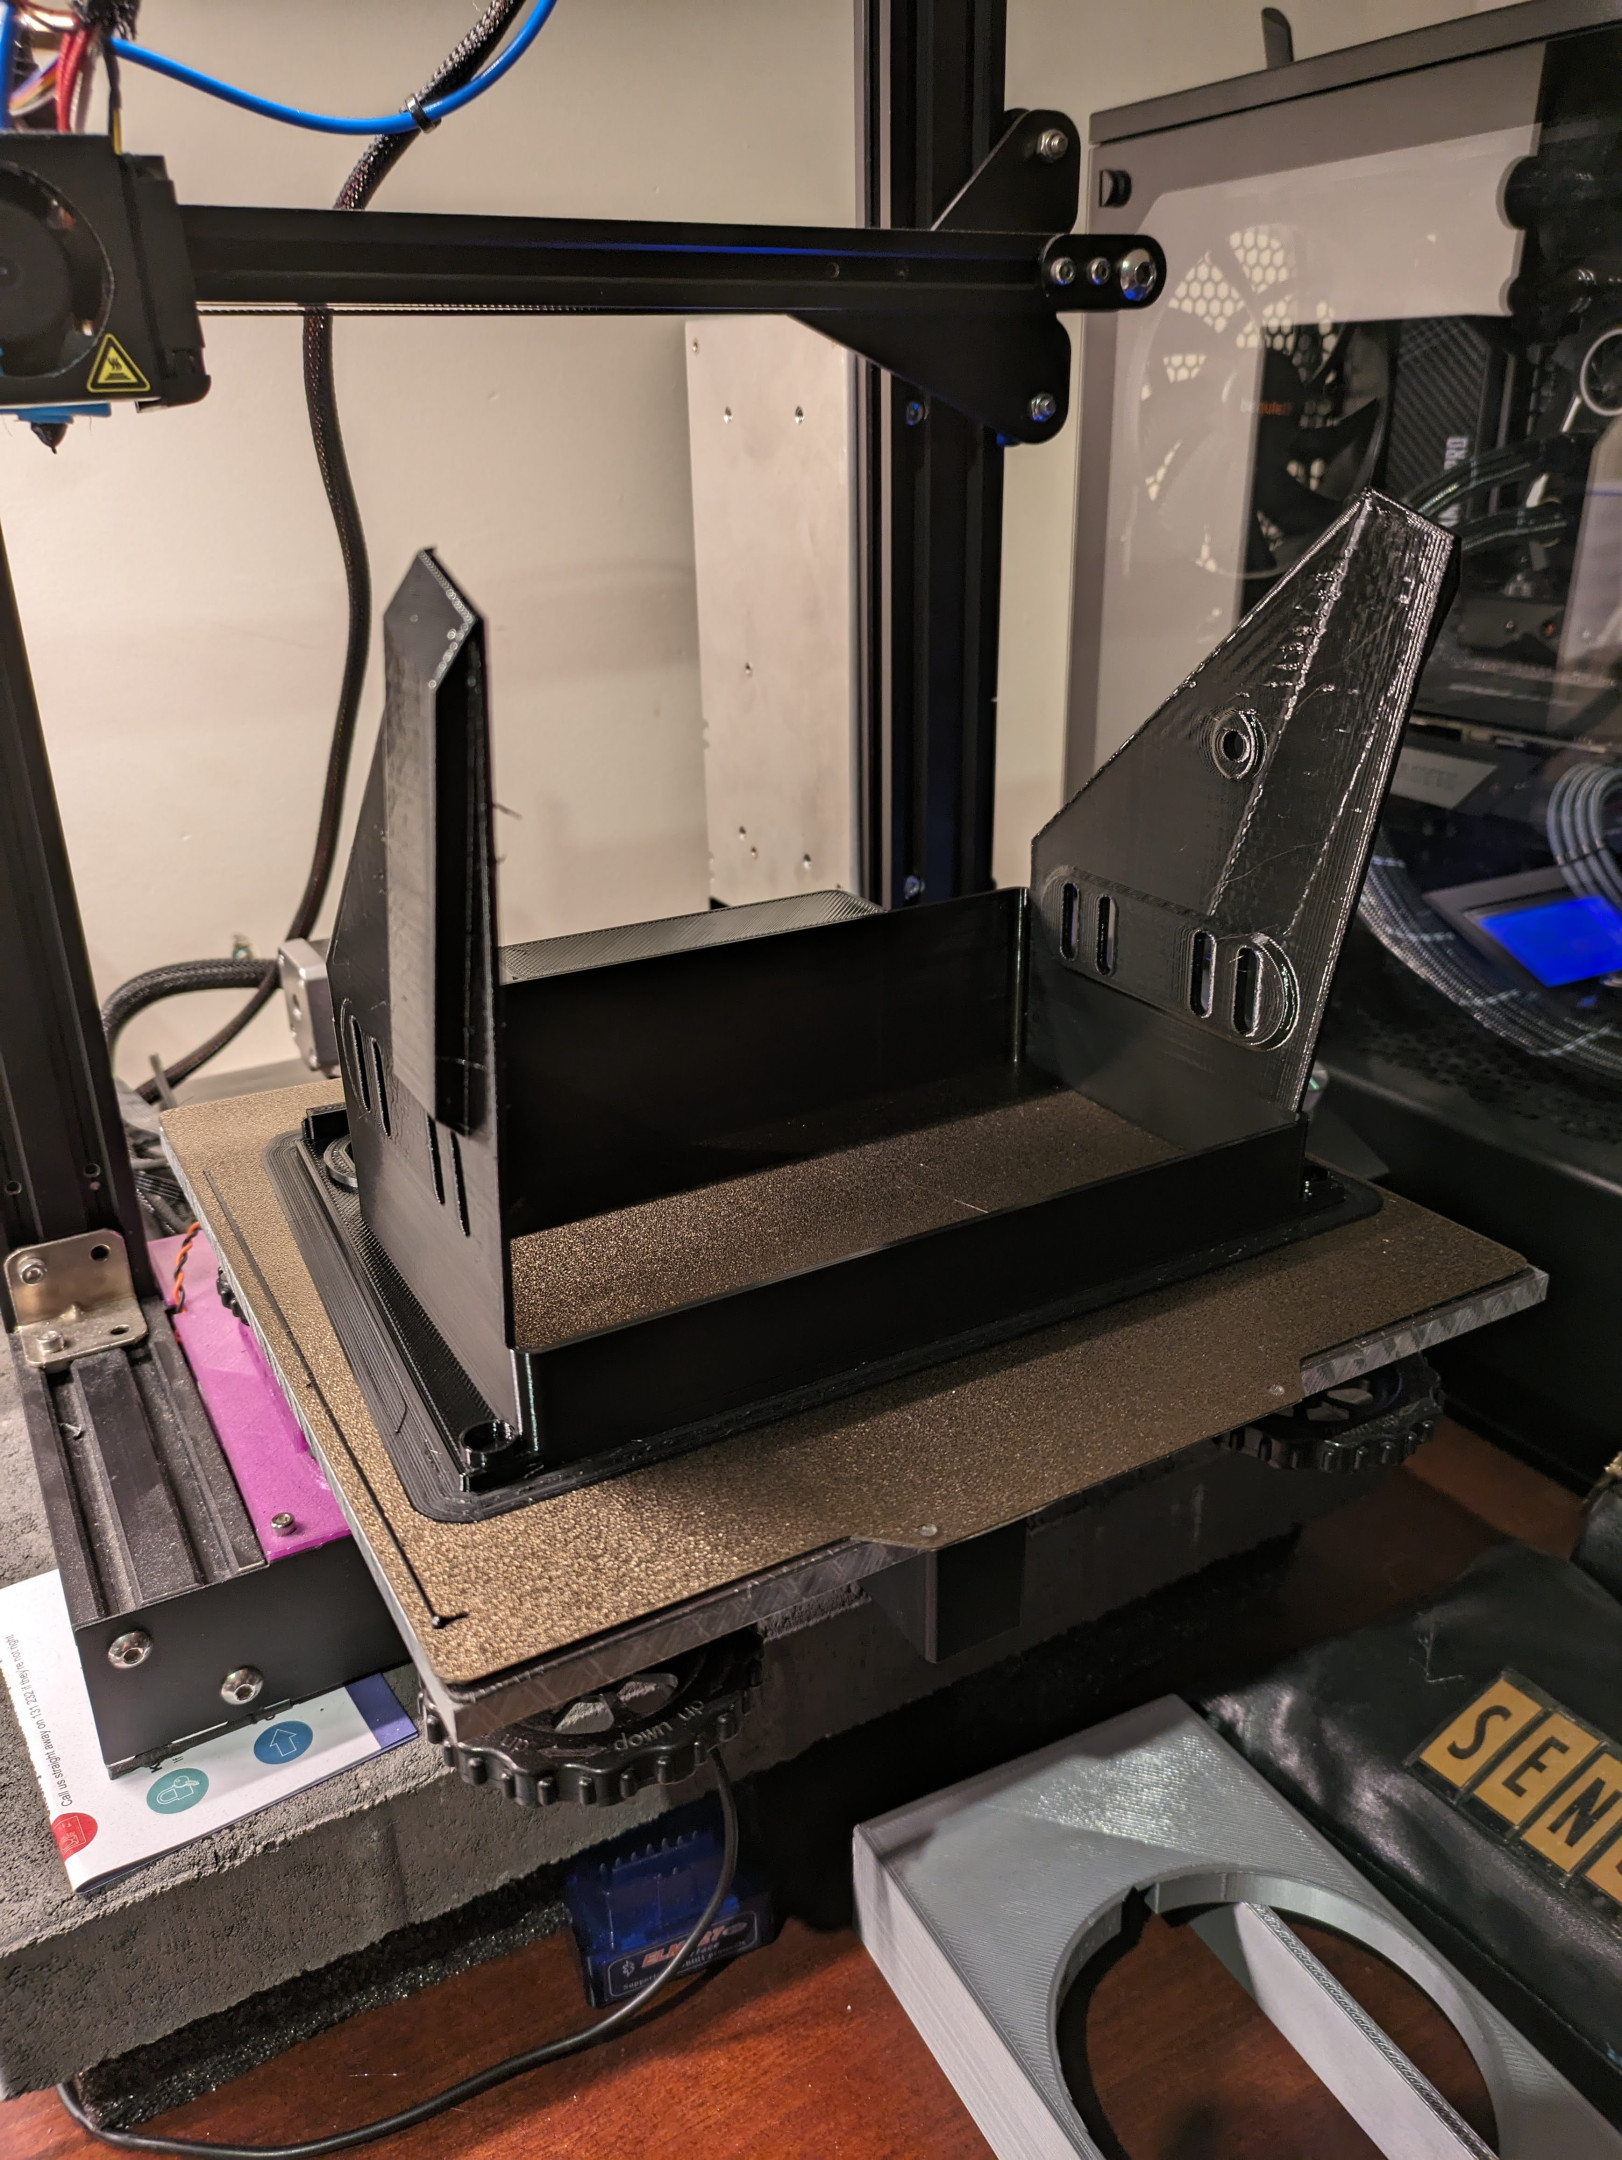
About 10 hours total, from memory. PETG, printed pretty slowly as this is an old (albeit heavily modified) Ender 3 I've had for almost 6 years now, but it does the job.
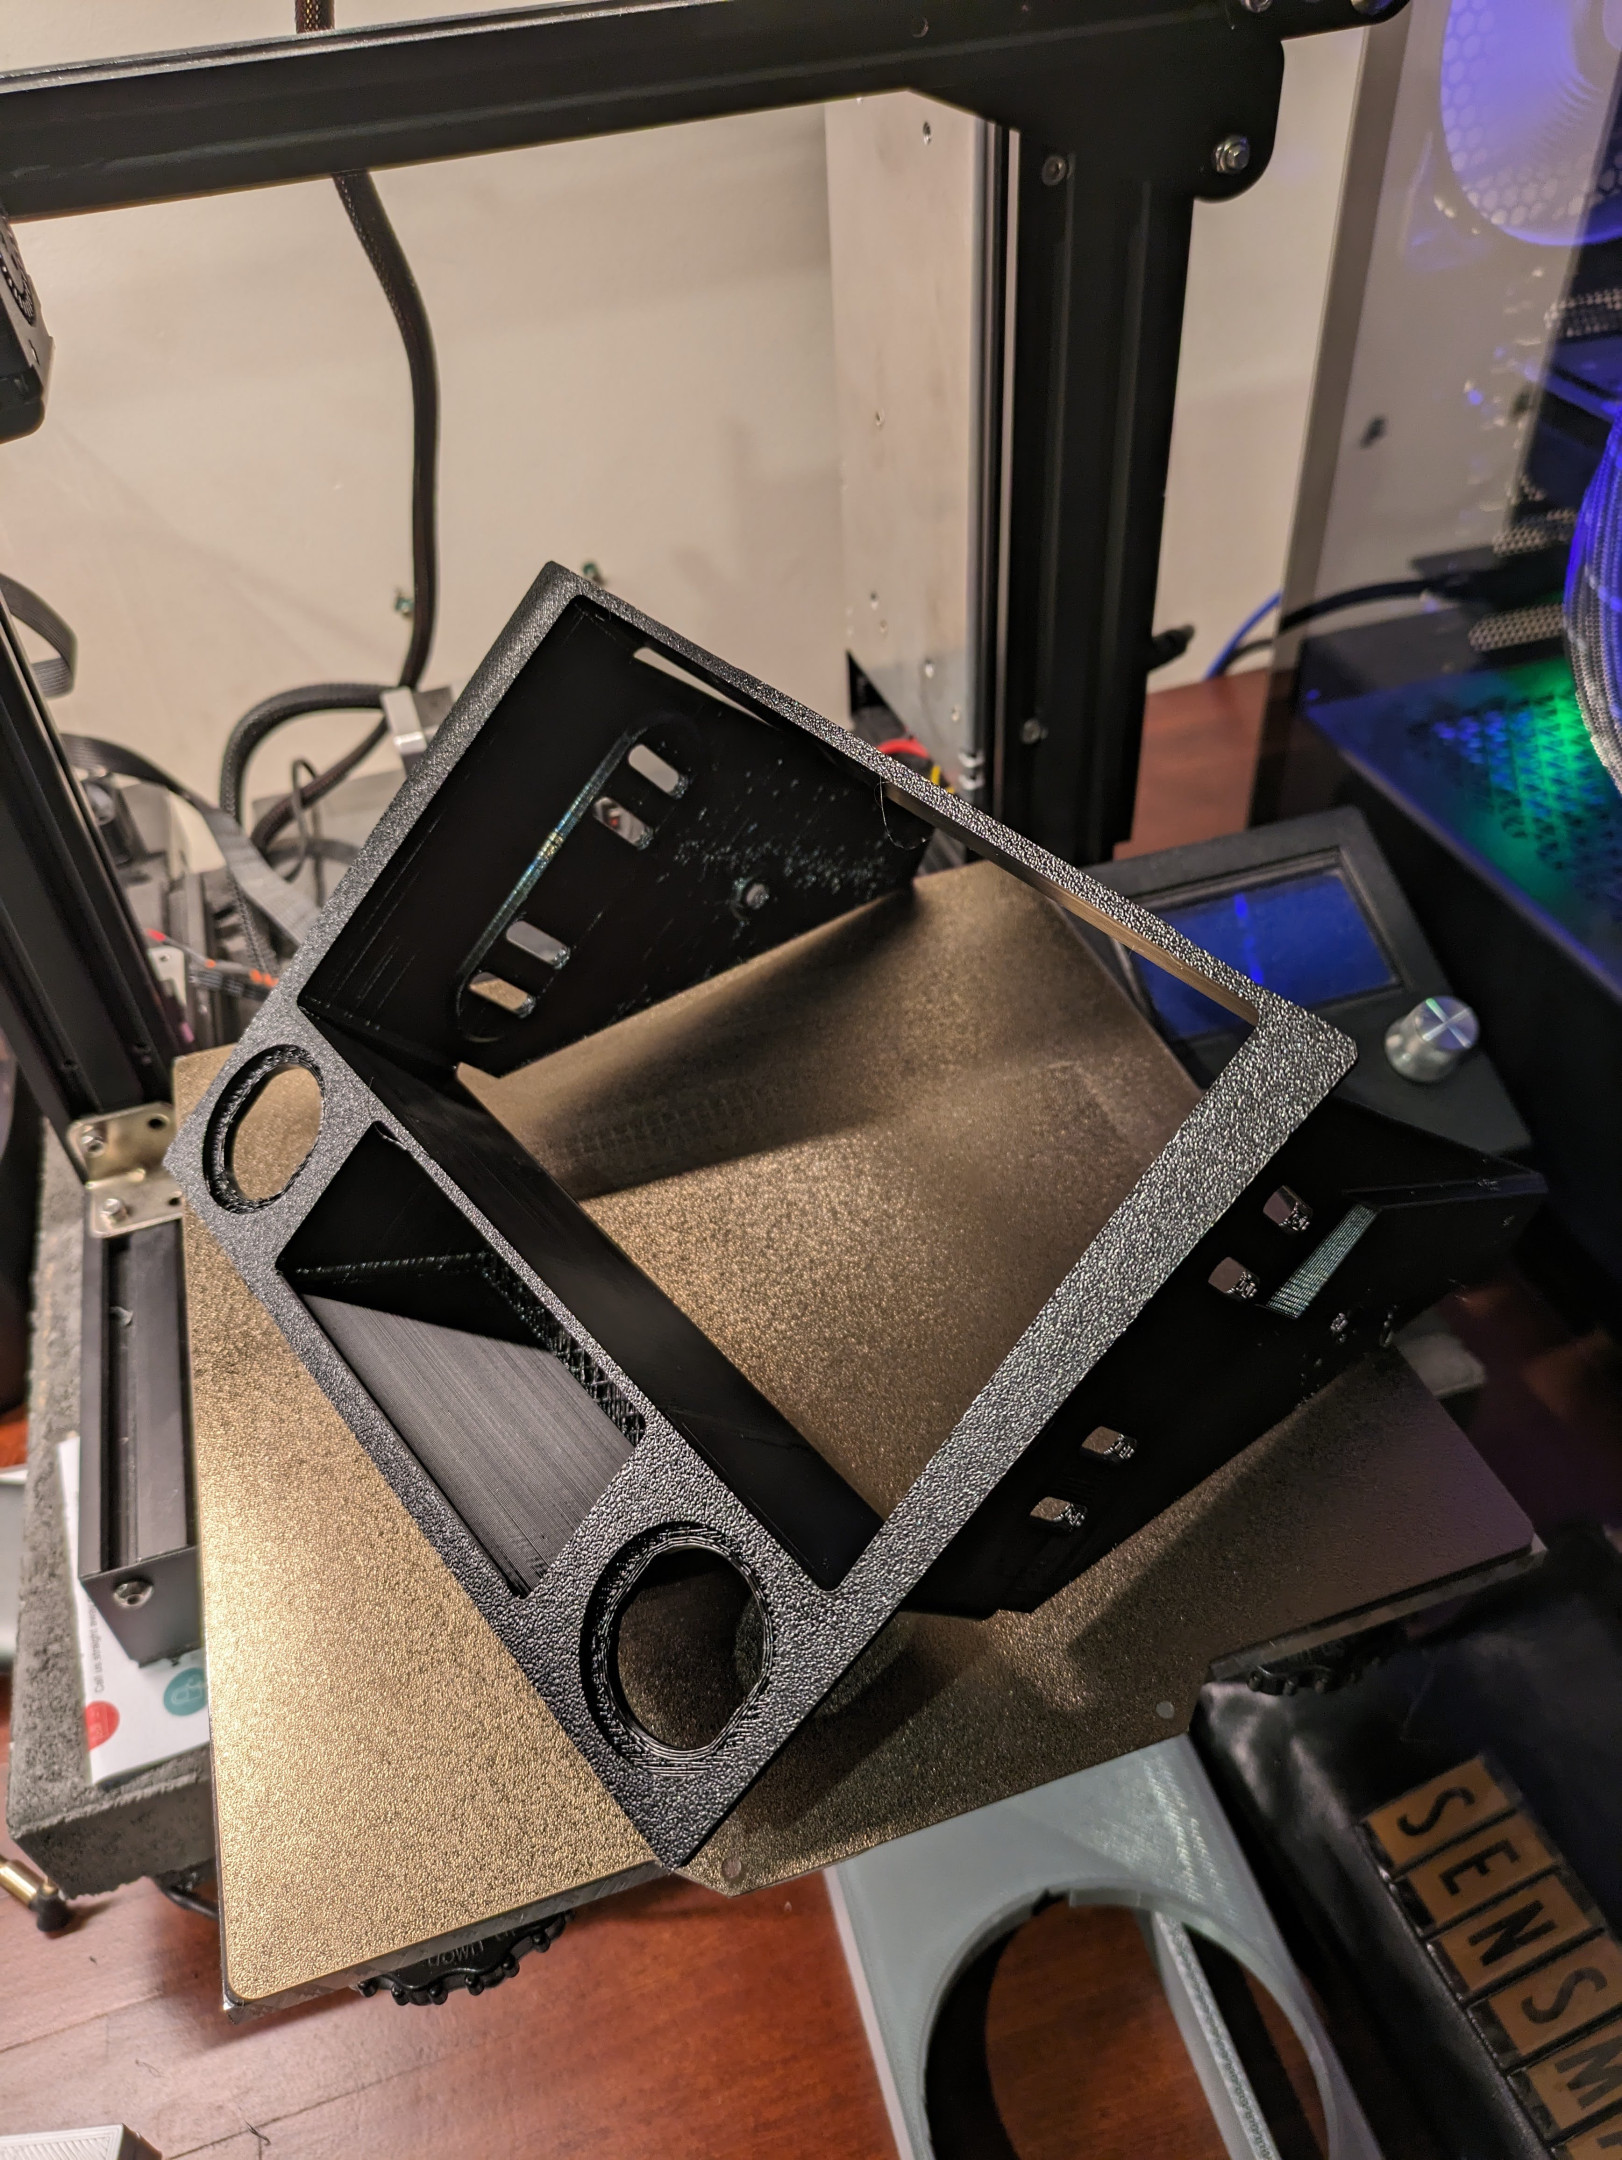
Printed on the textured side of my PEI plate, it gives a very nice finish, without a need to sand/paint/refinish it. The pocket had supports in it which never came off cleanly, but it doesn't bother me since you can't see it once installed.
Purchased a cigarette lighter socket and a new, better USB charger with USB PD. You can see the tabs that go behind each of them that you turn once installed, to wedge it against the dash to stop it sliding forward. They're then locked in place once you screw down each of the lock rings for the sockets. Hard to explain, but it works well and doesn't move once it's in there.
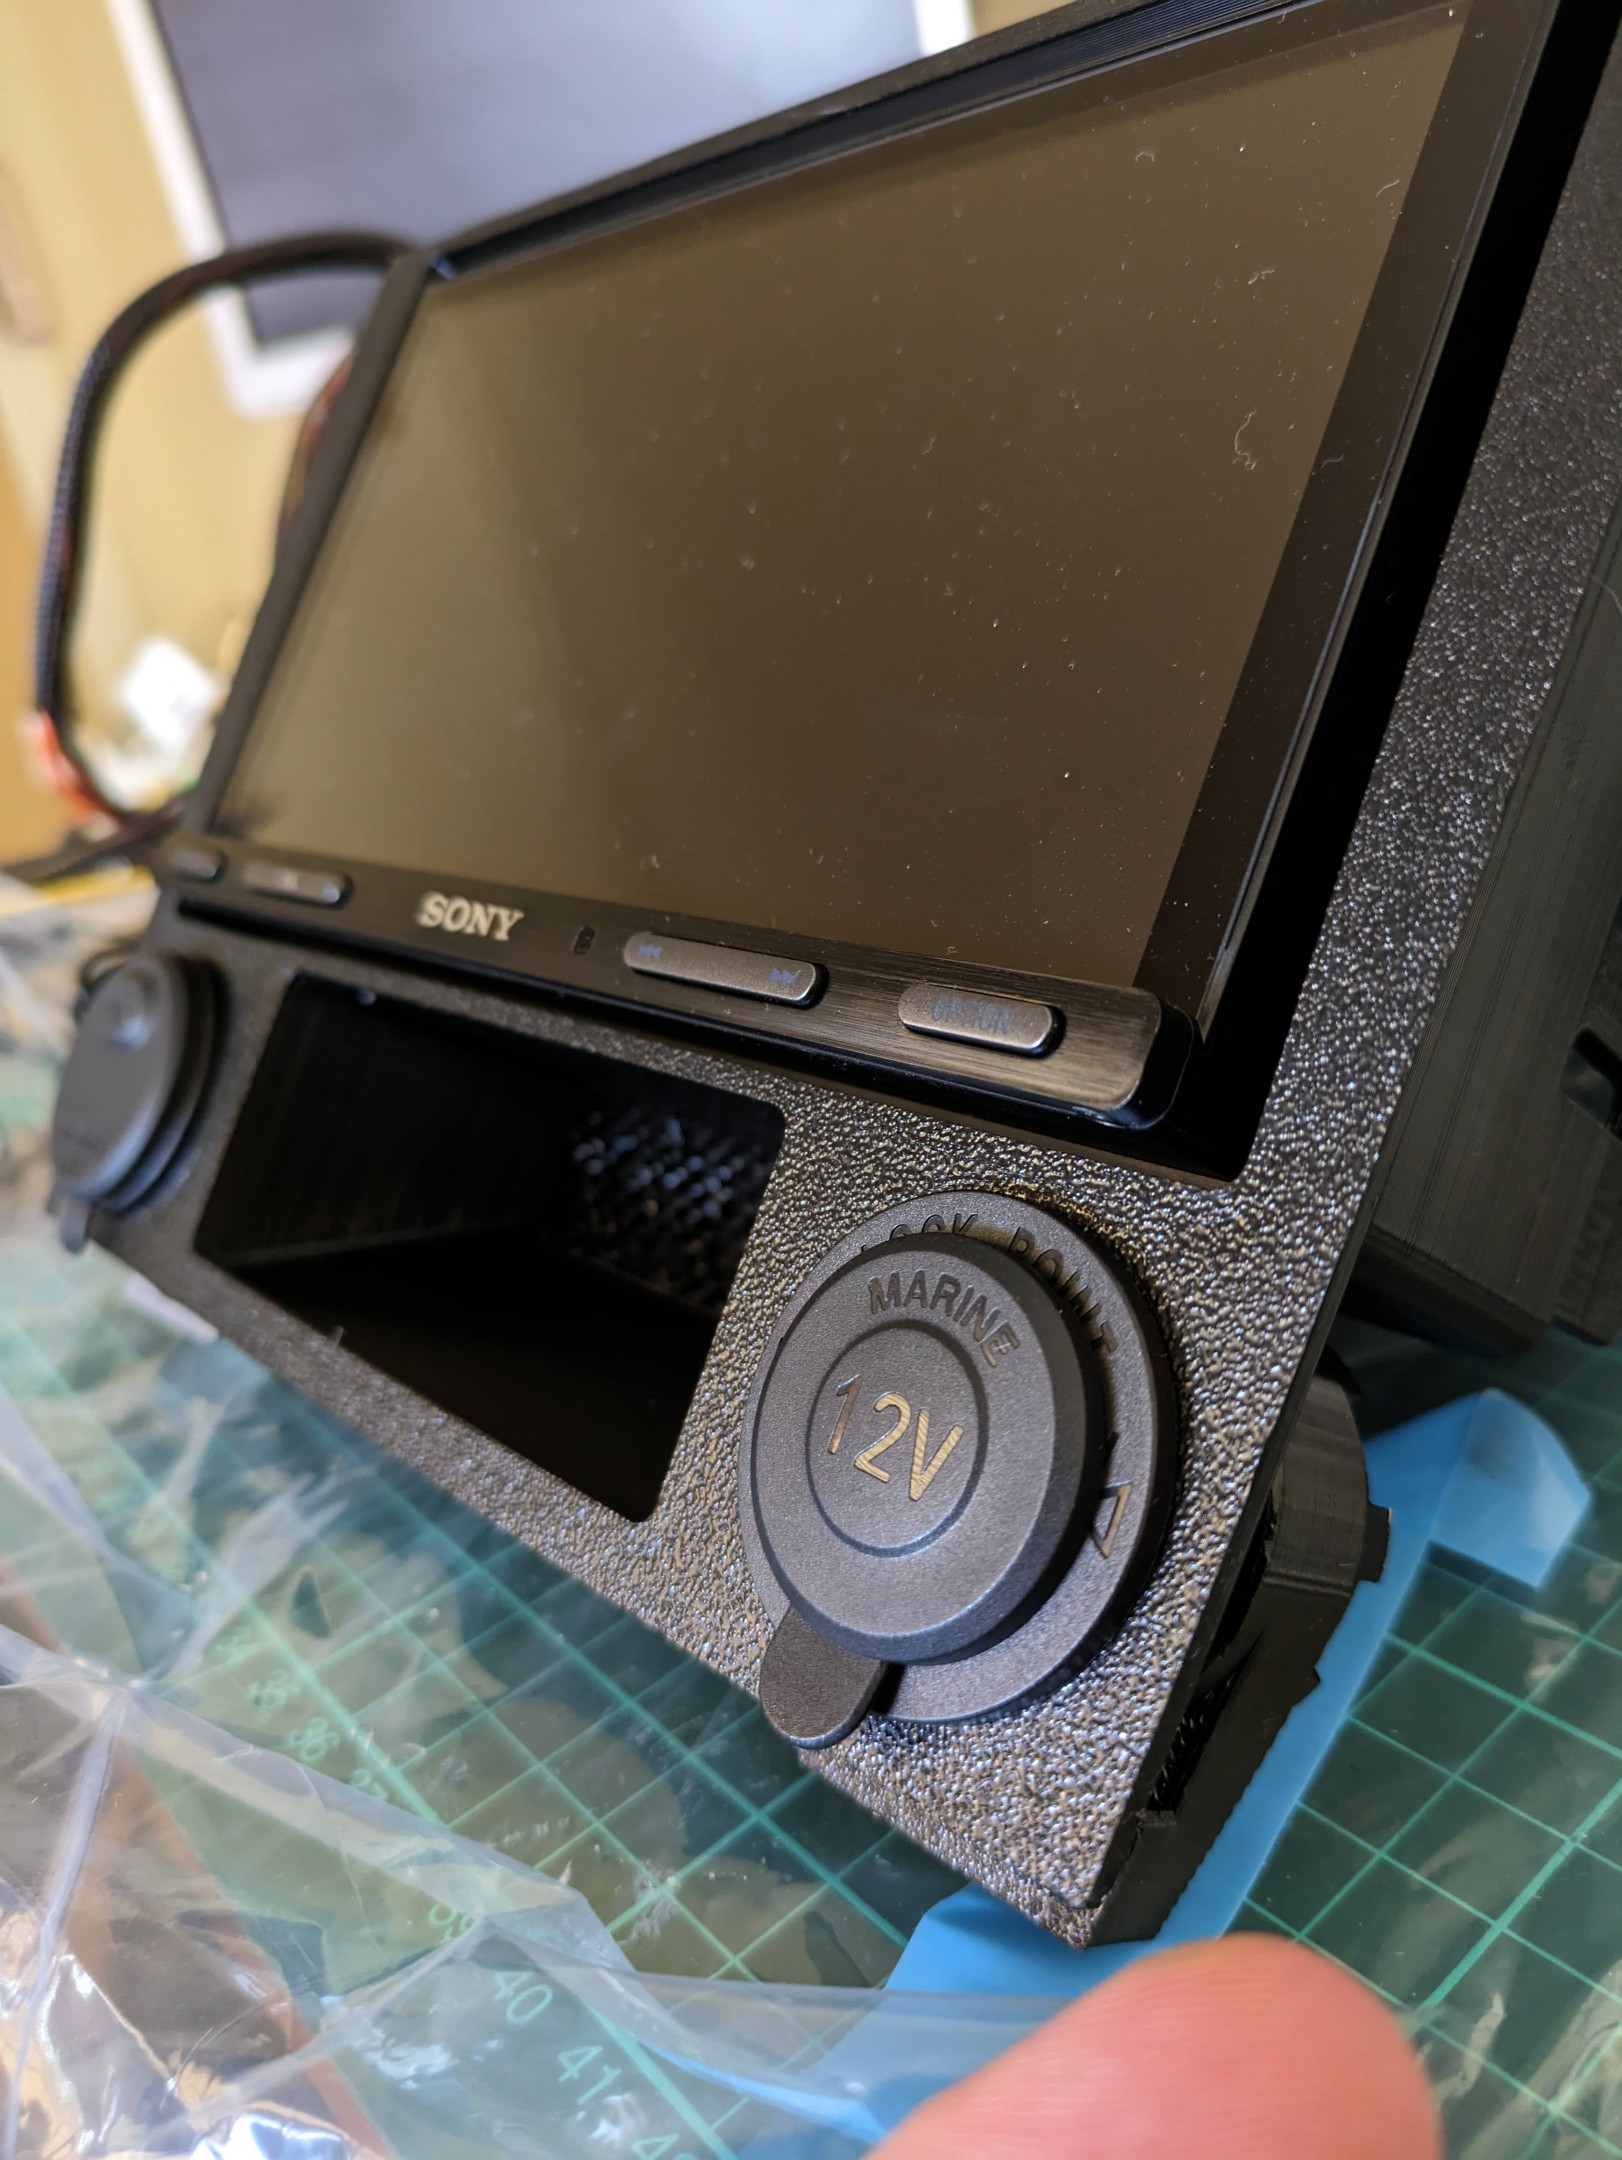
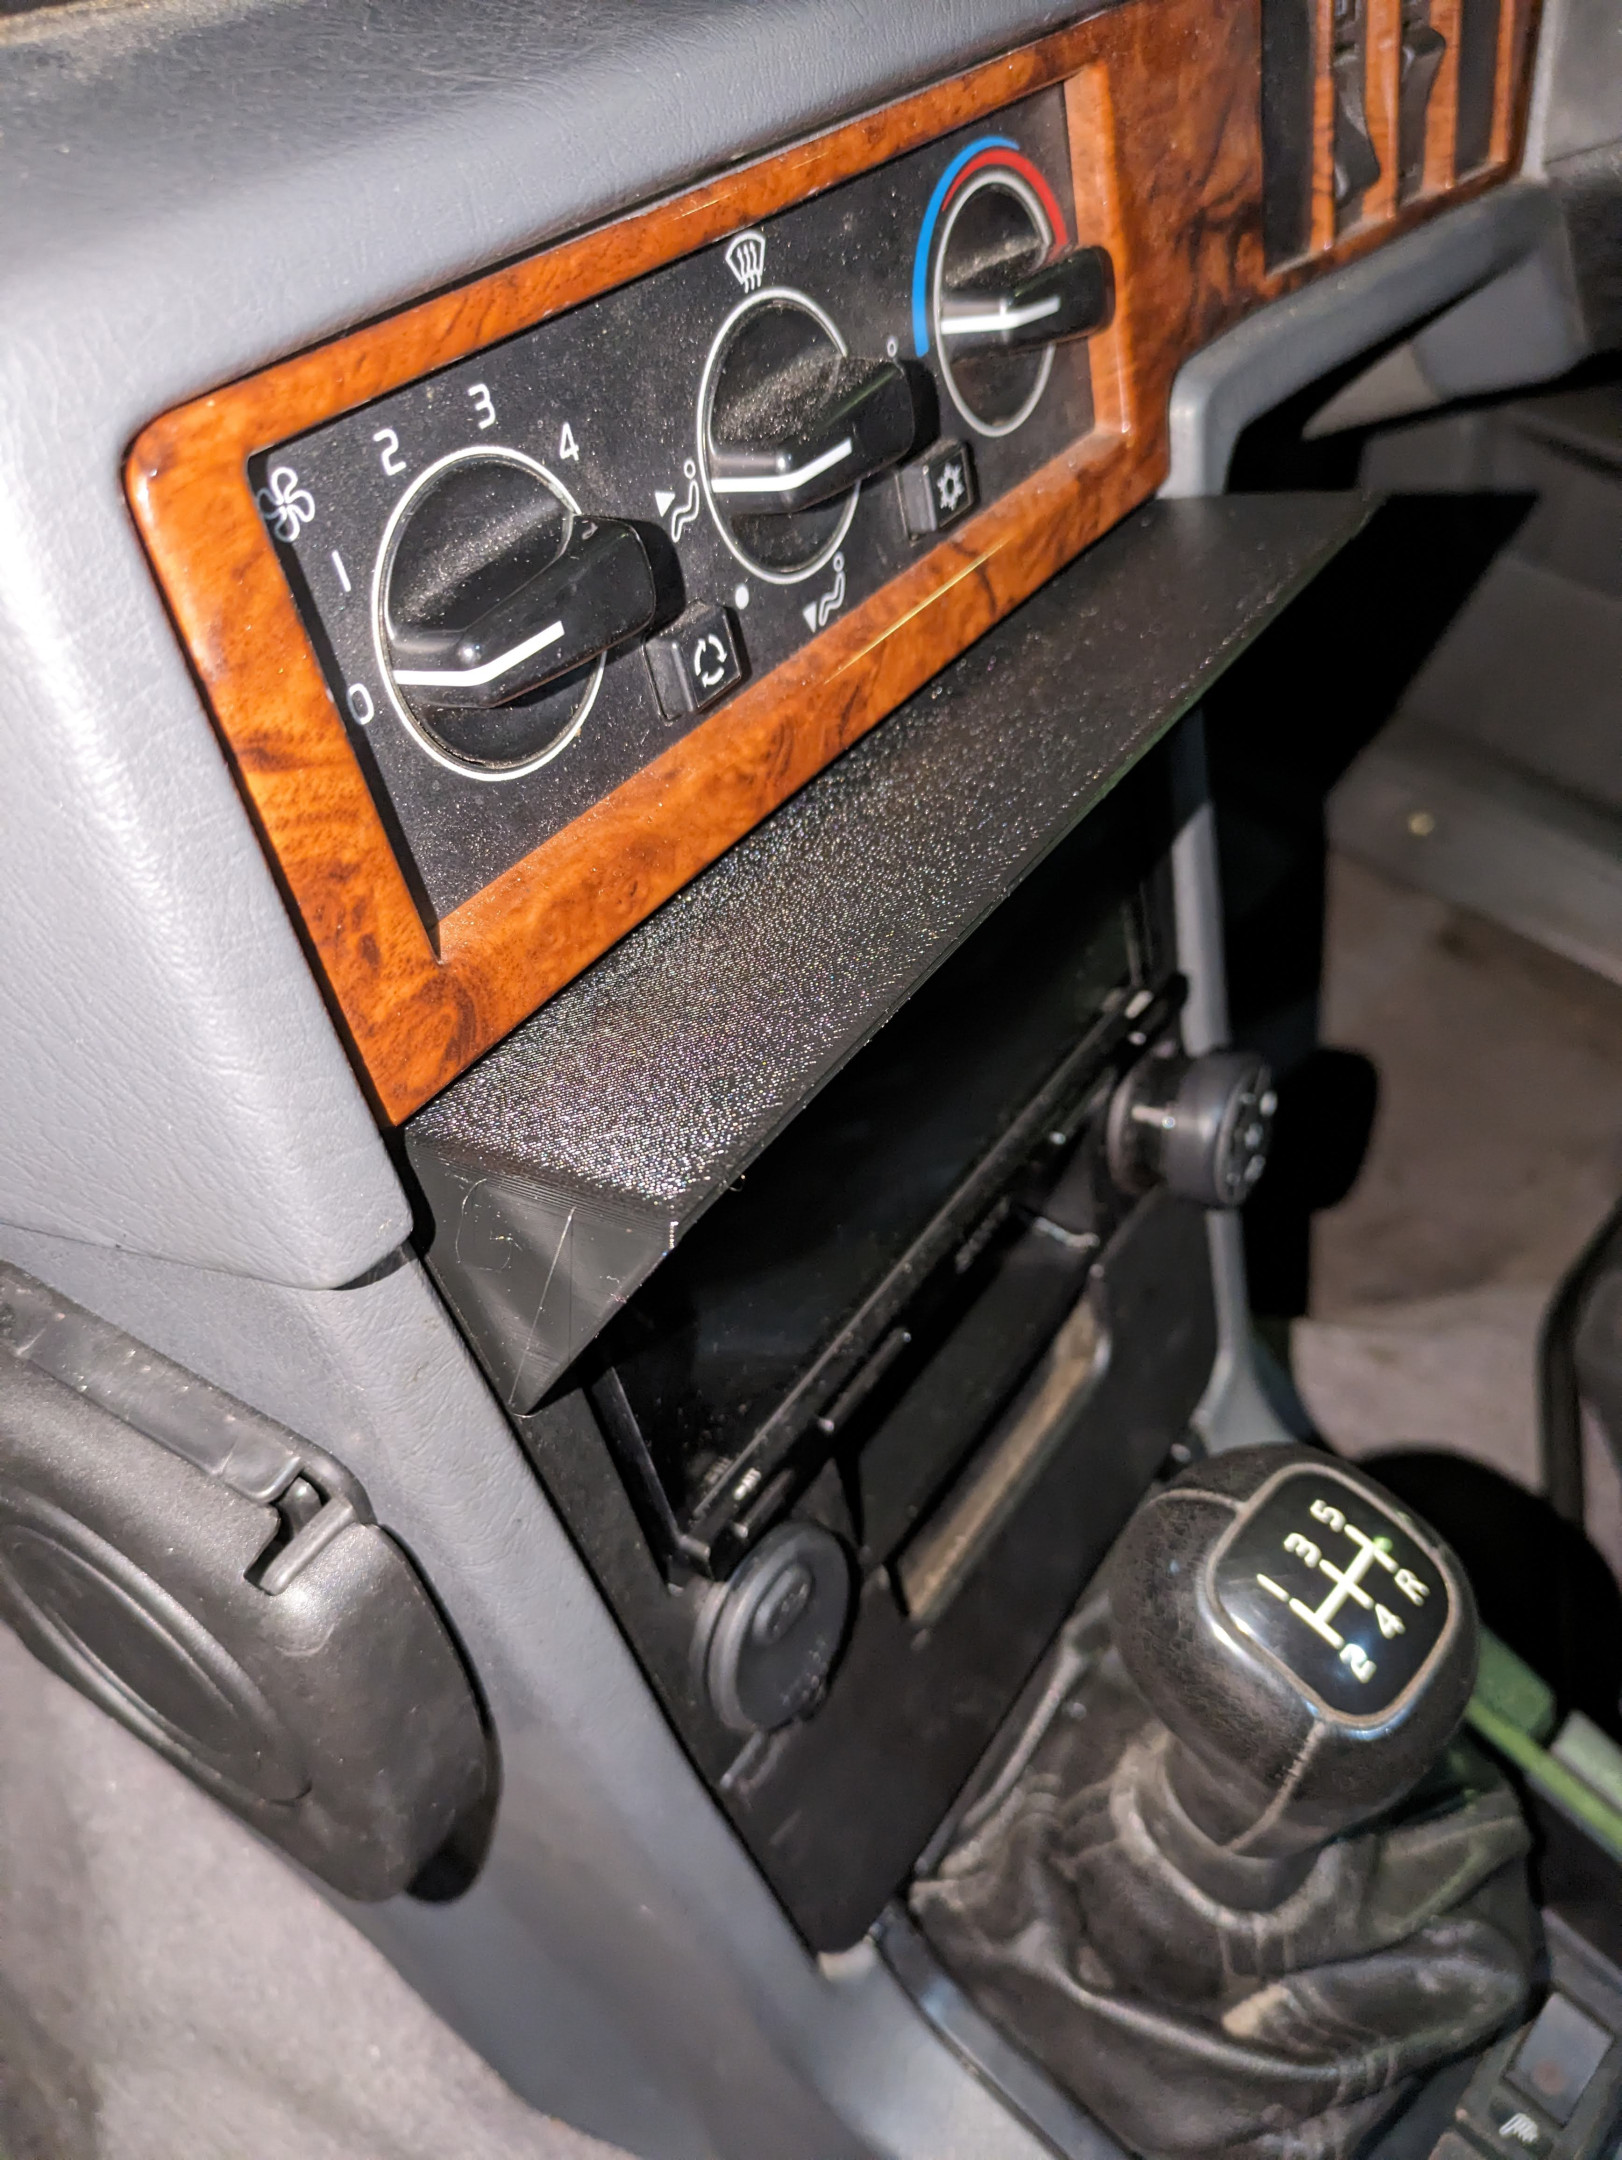
Final test fit. I modified the design to accept two rare earth magnets in order to integrate a hood into the design, to stop excessive glare, since the dash is angled forward.
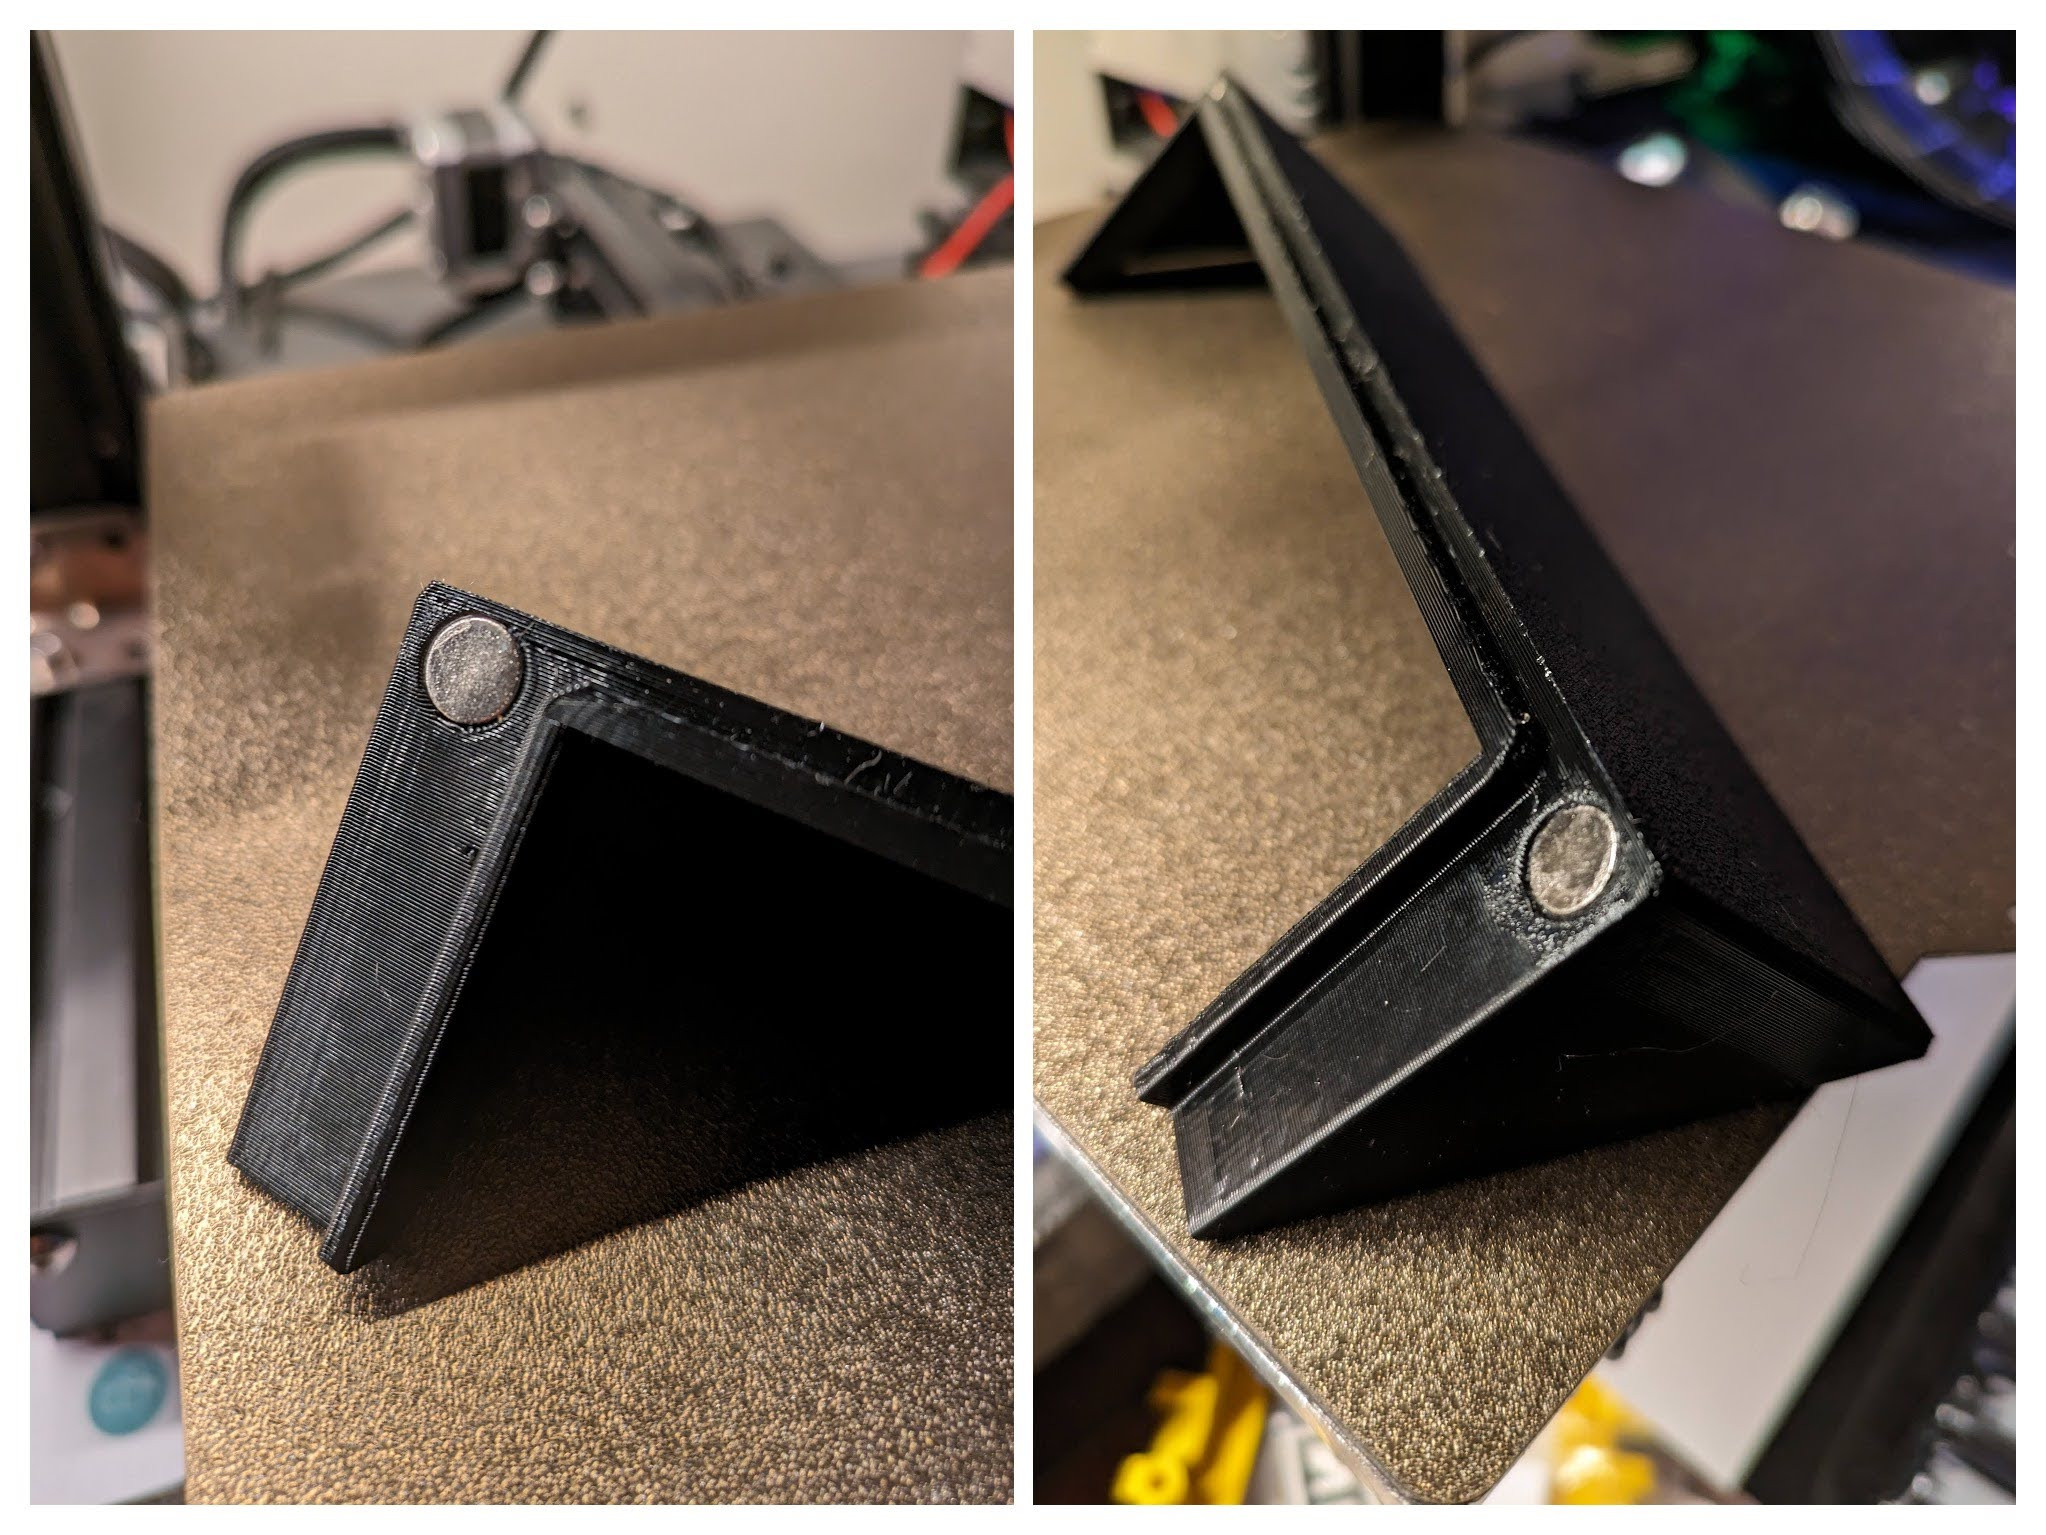
Once installed, the hood looks like this:
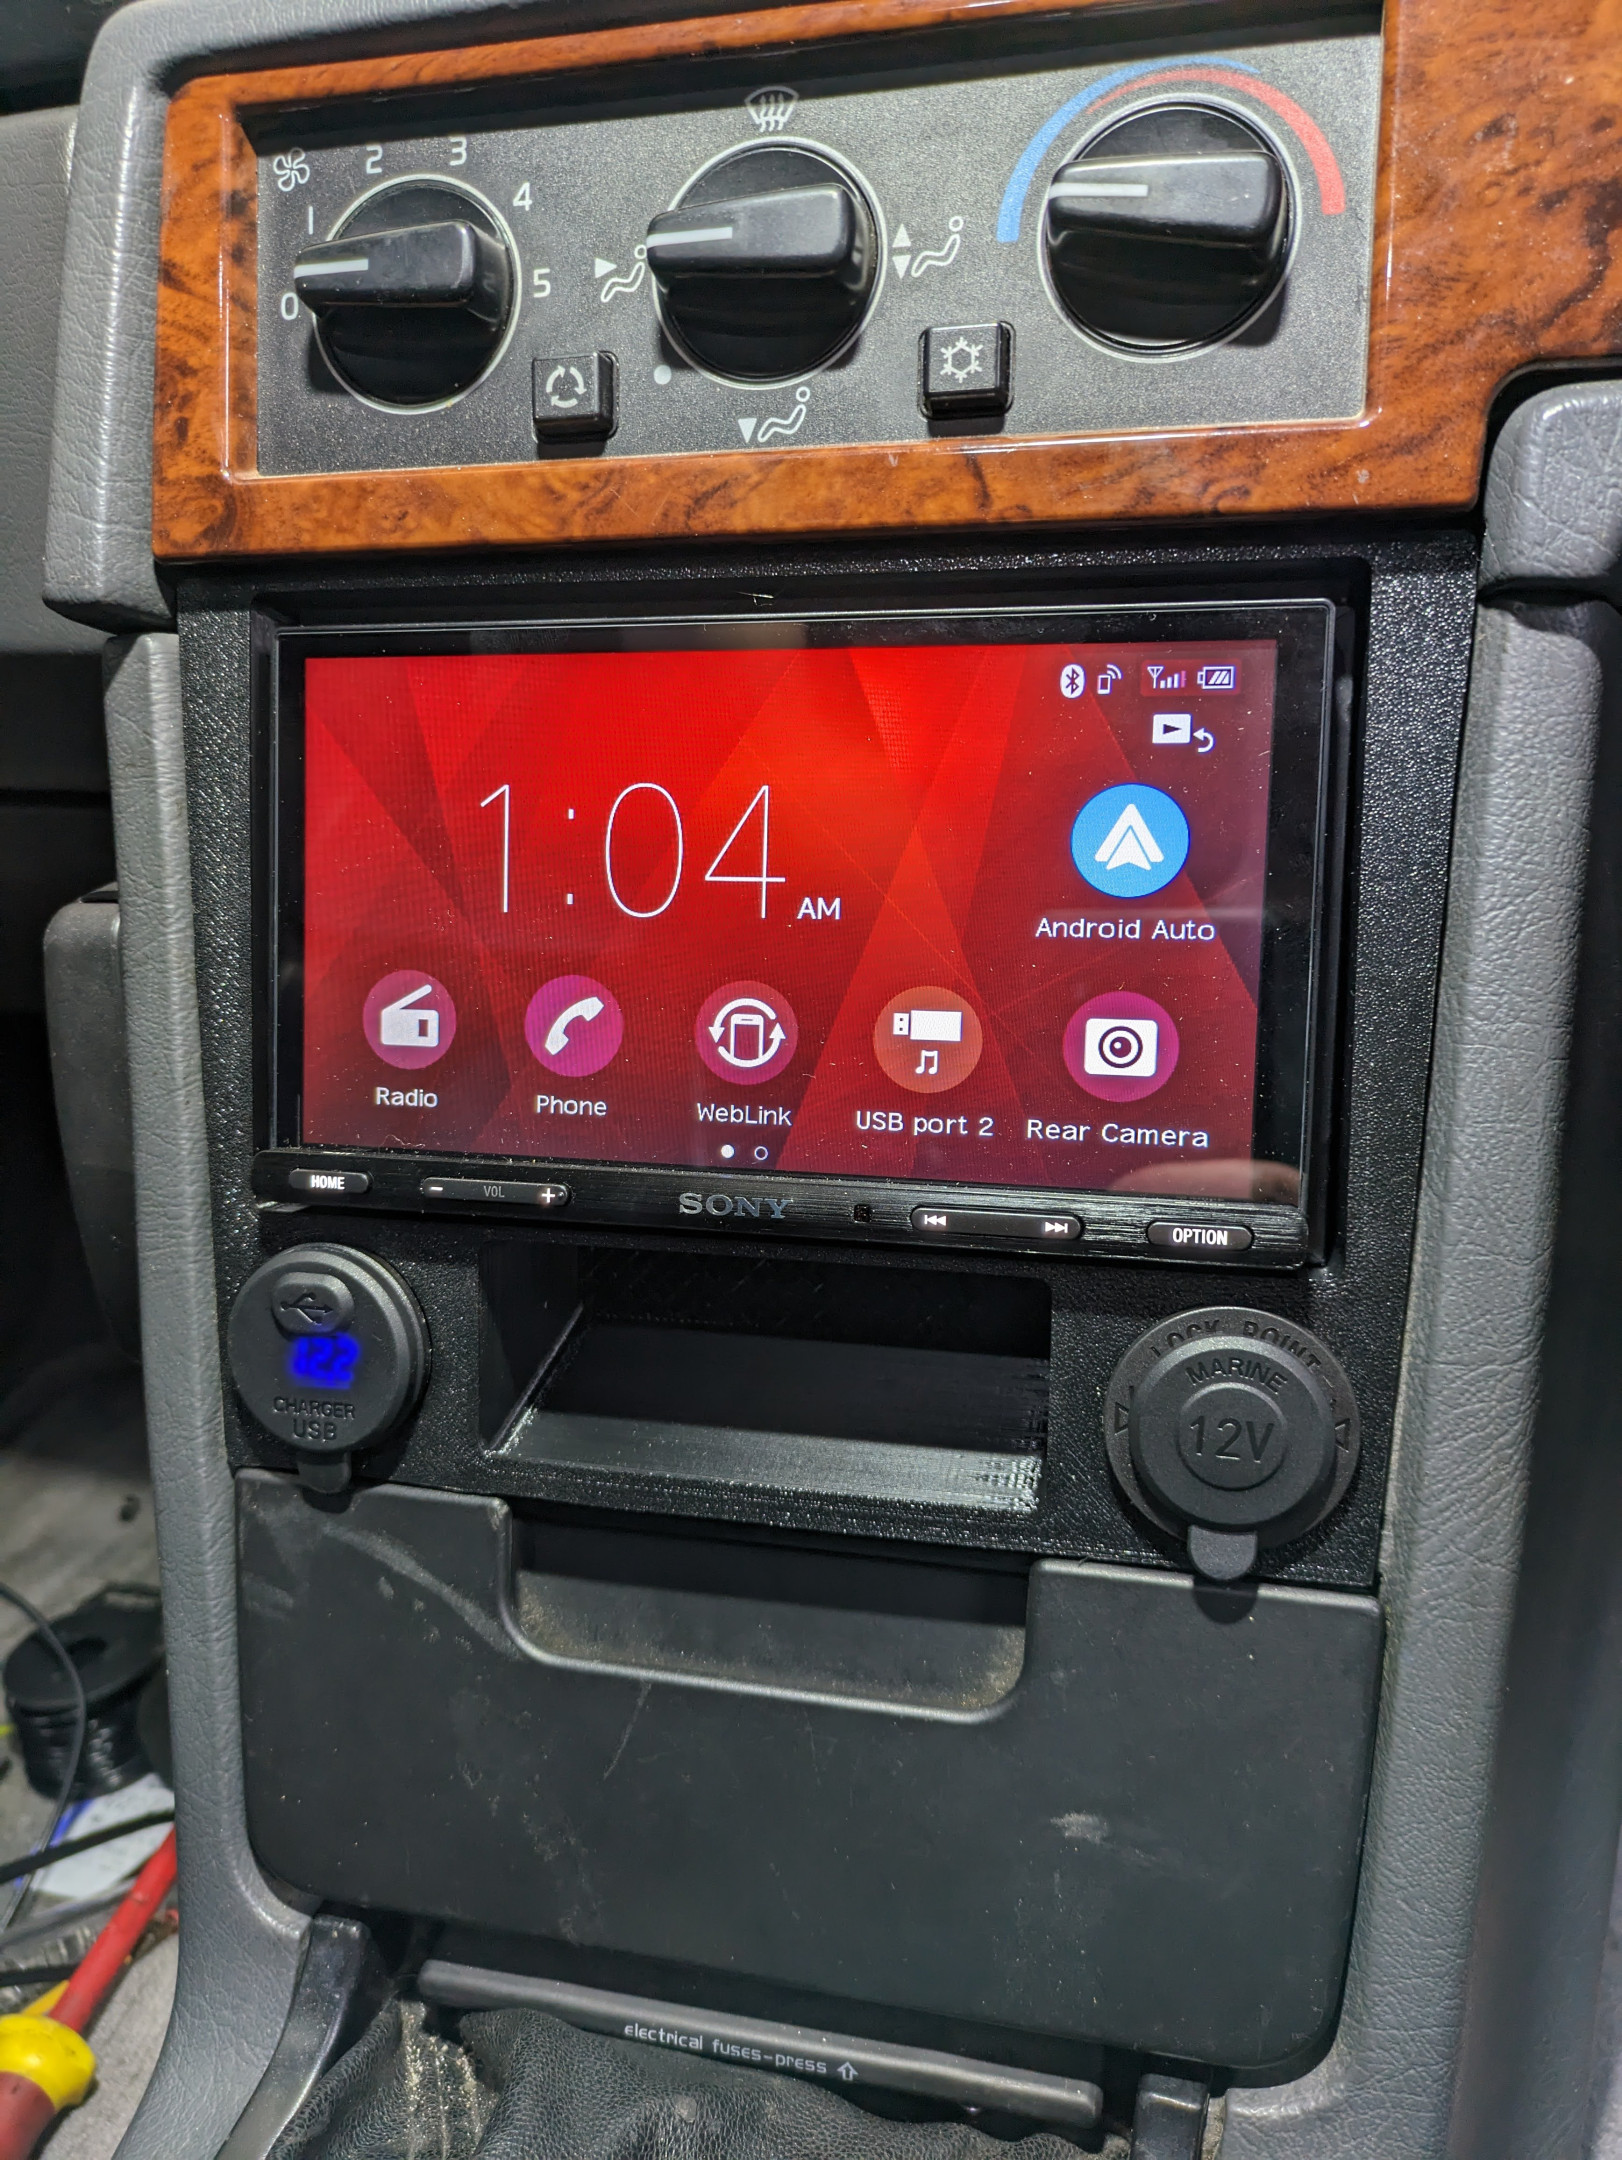
I ran the USB cables to an extension with a panel mount, but this ultimately added too much length and had some android auto issues that gave me a bunch of headaches as a result. I ditched this setup and ran a single high-quality cable from the headunit to plug phones into.
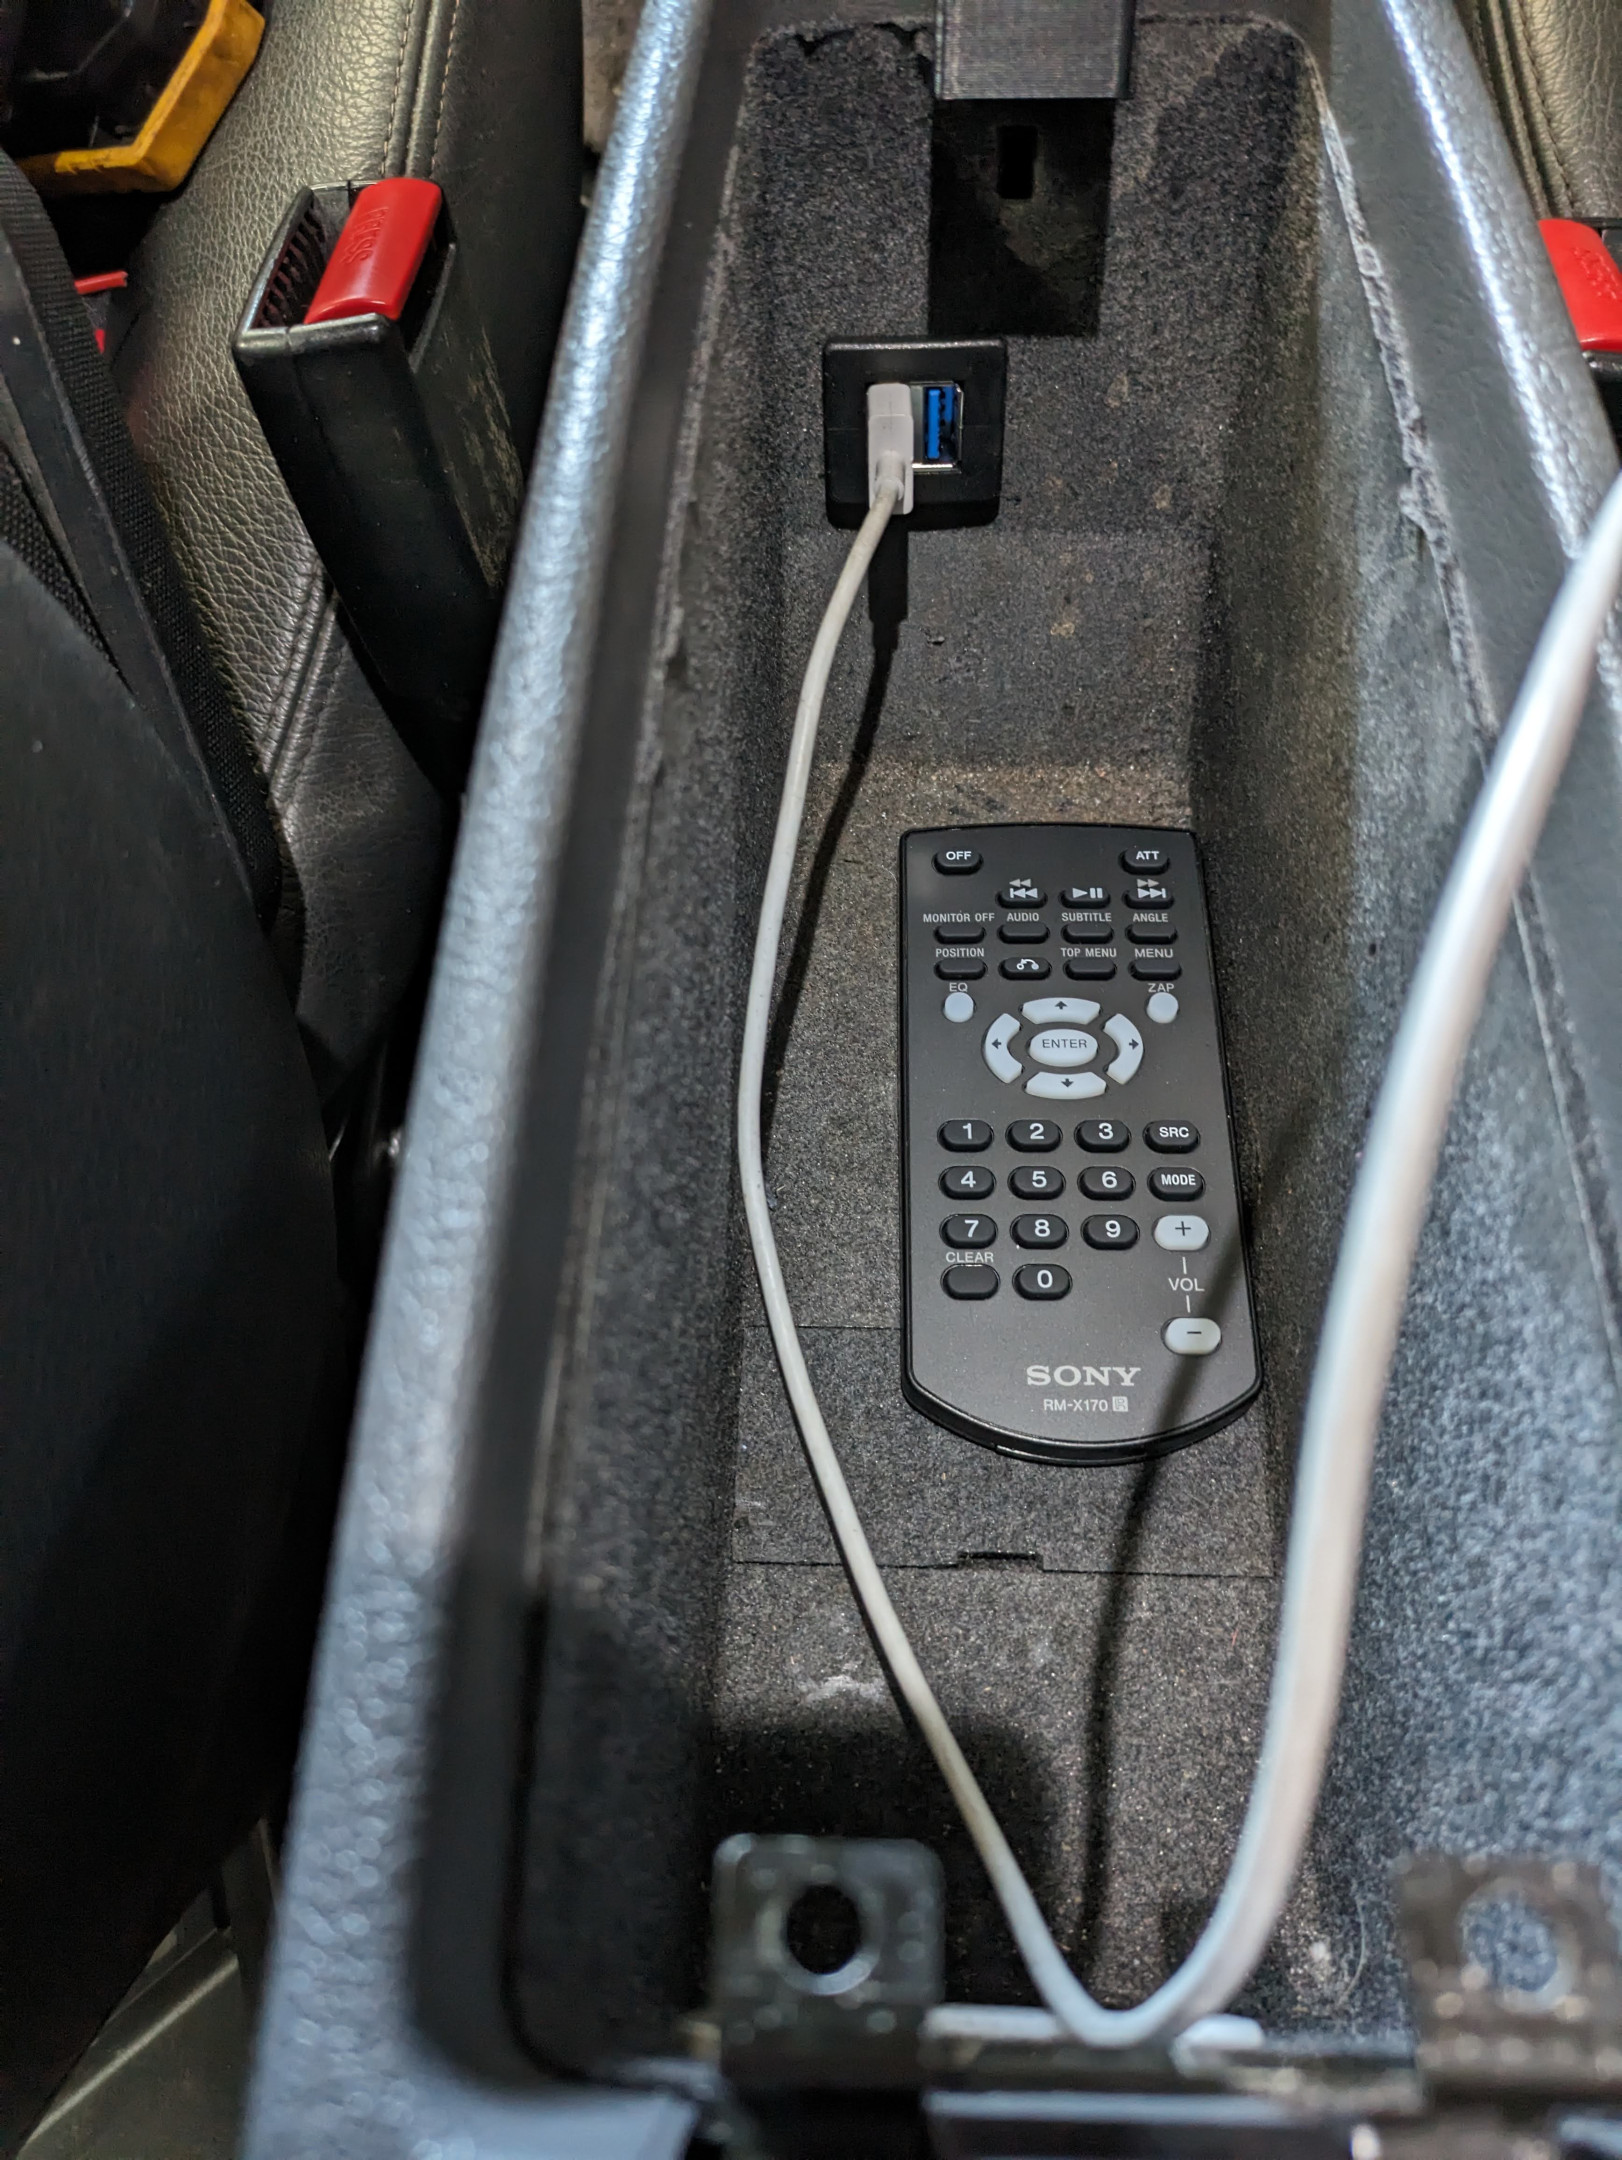
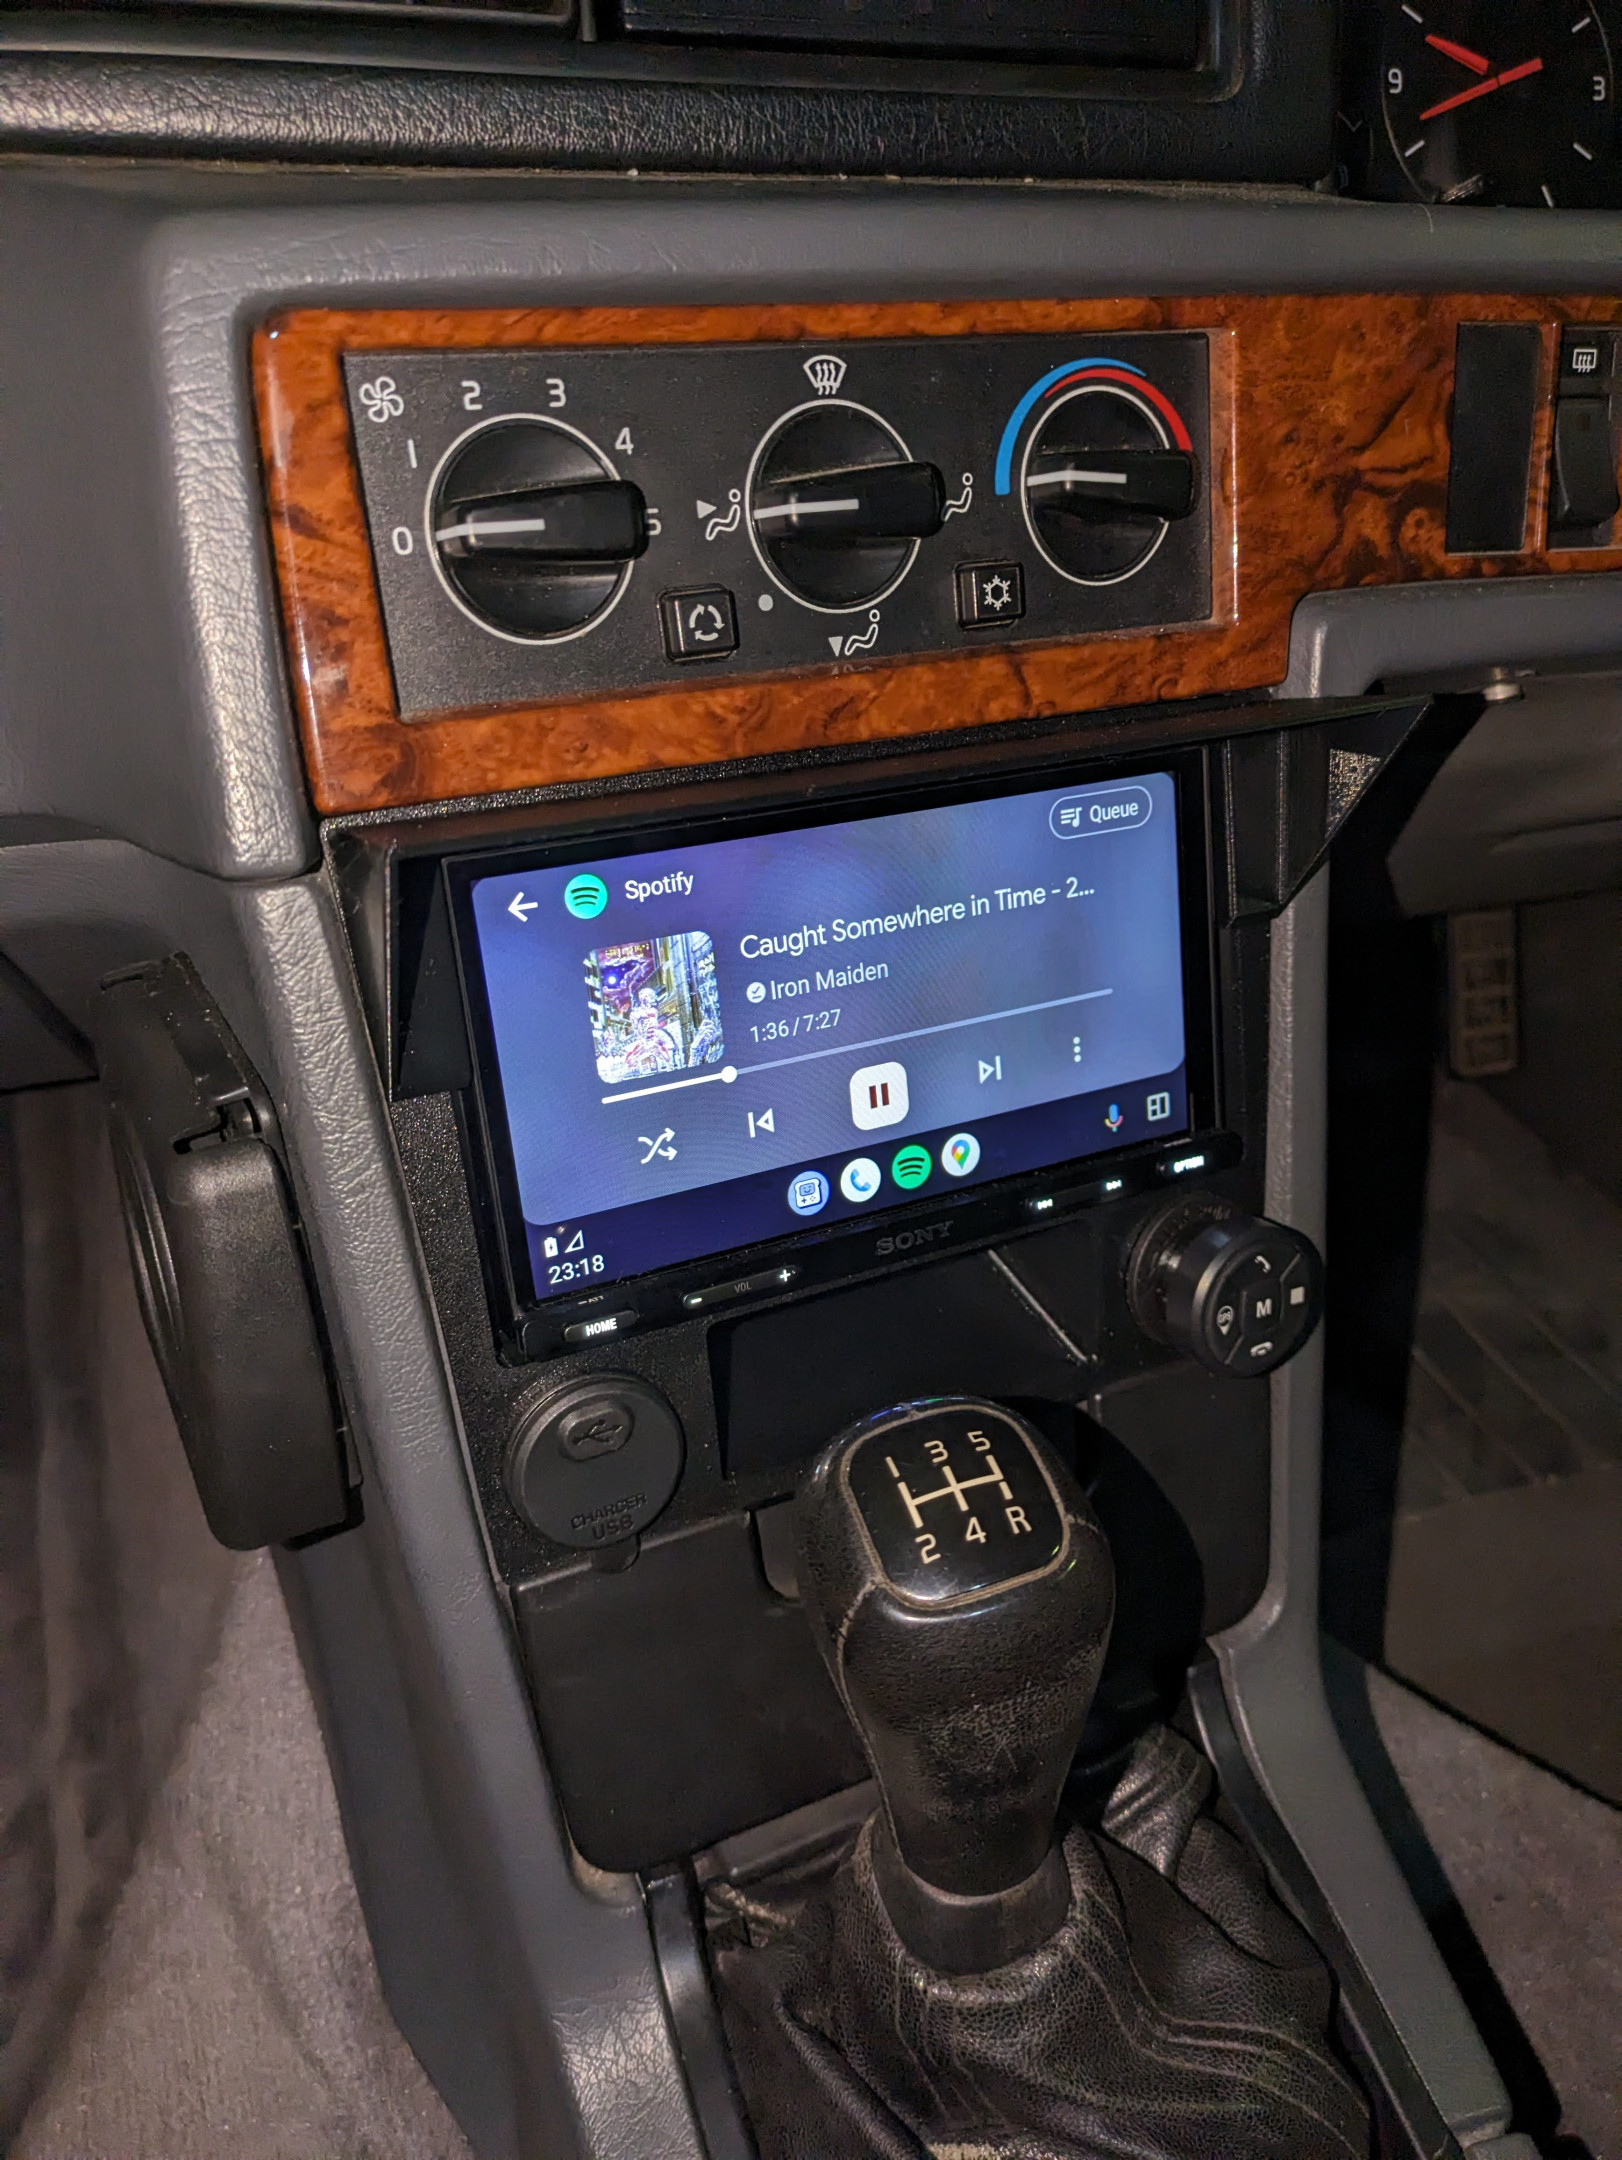
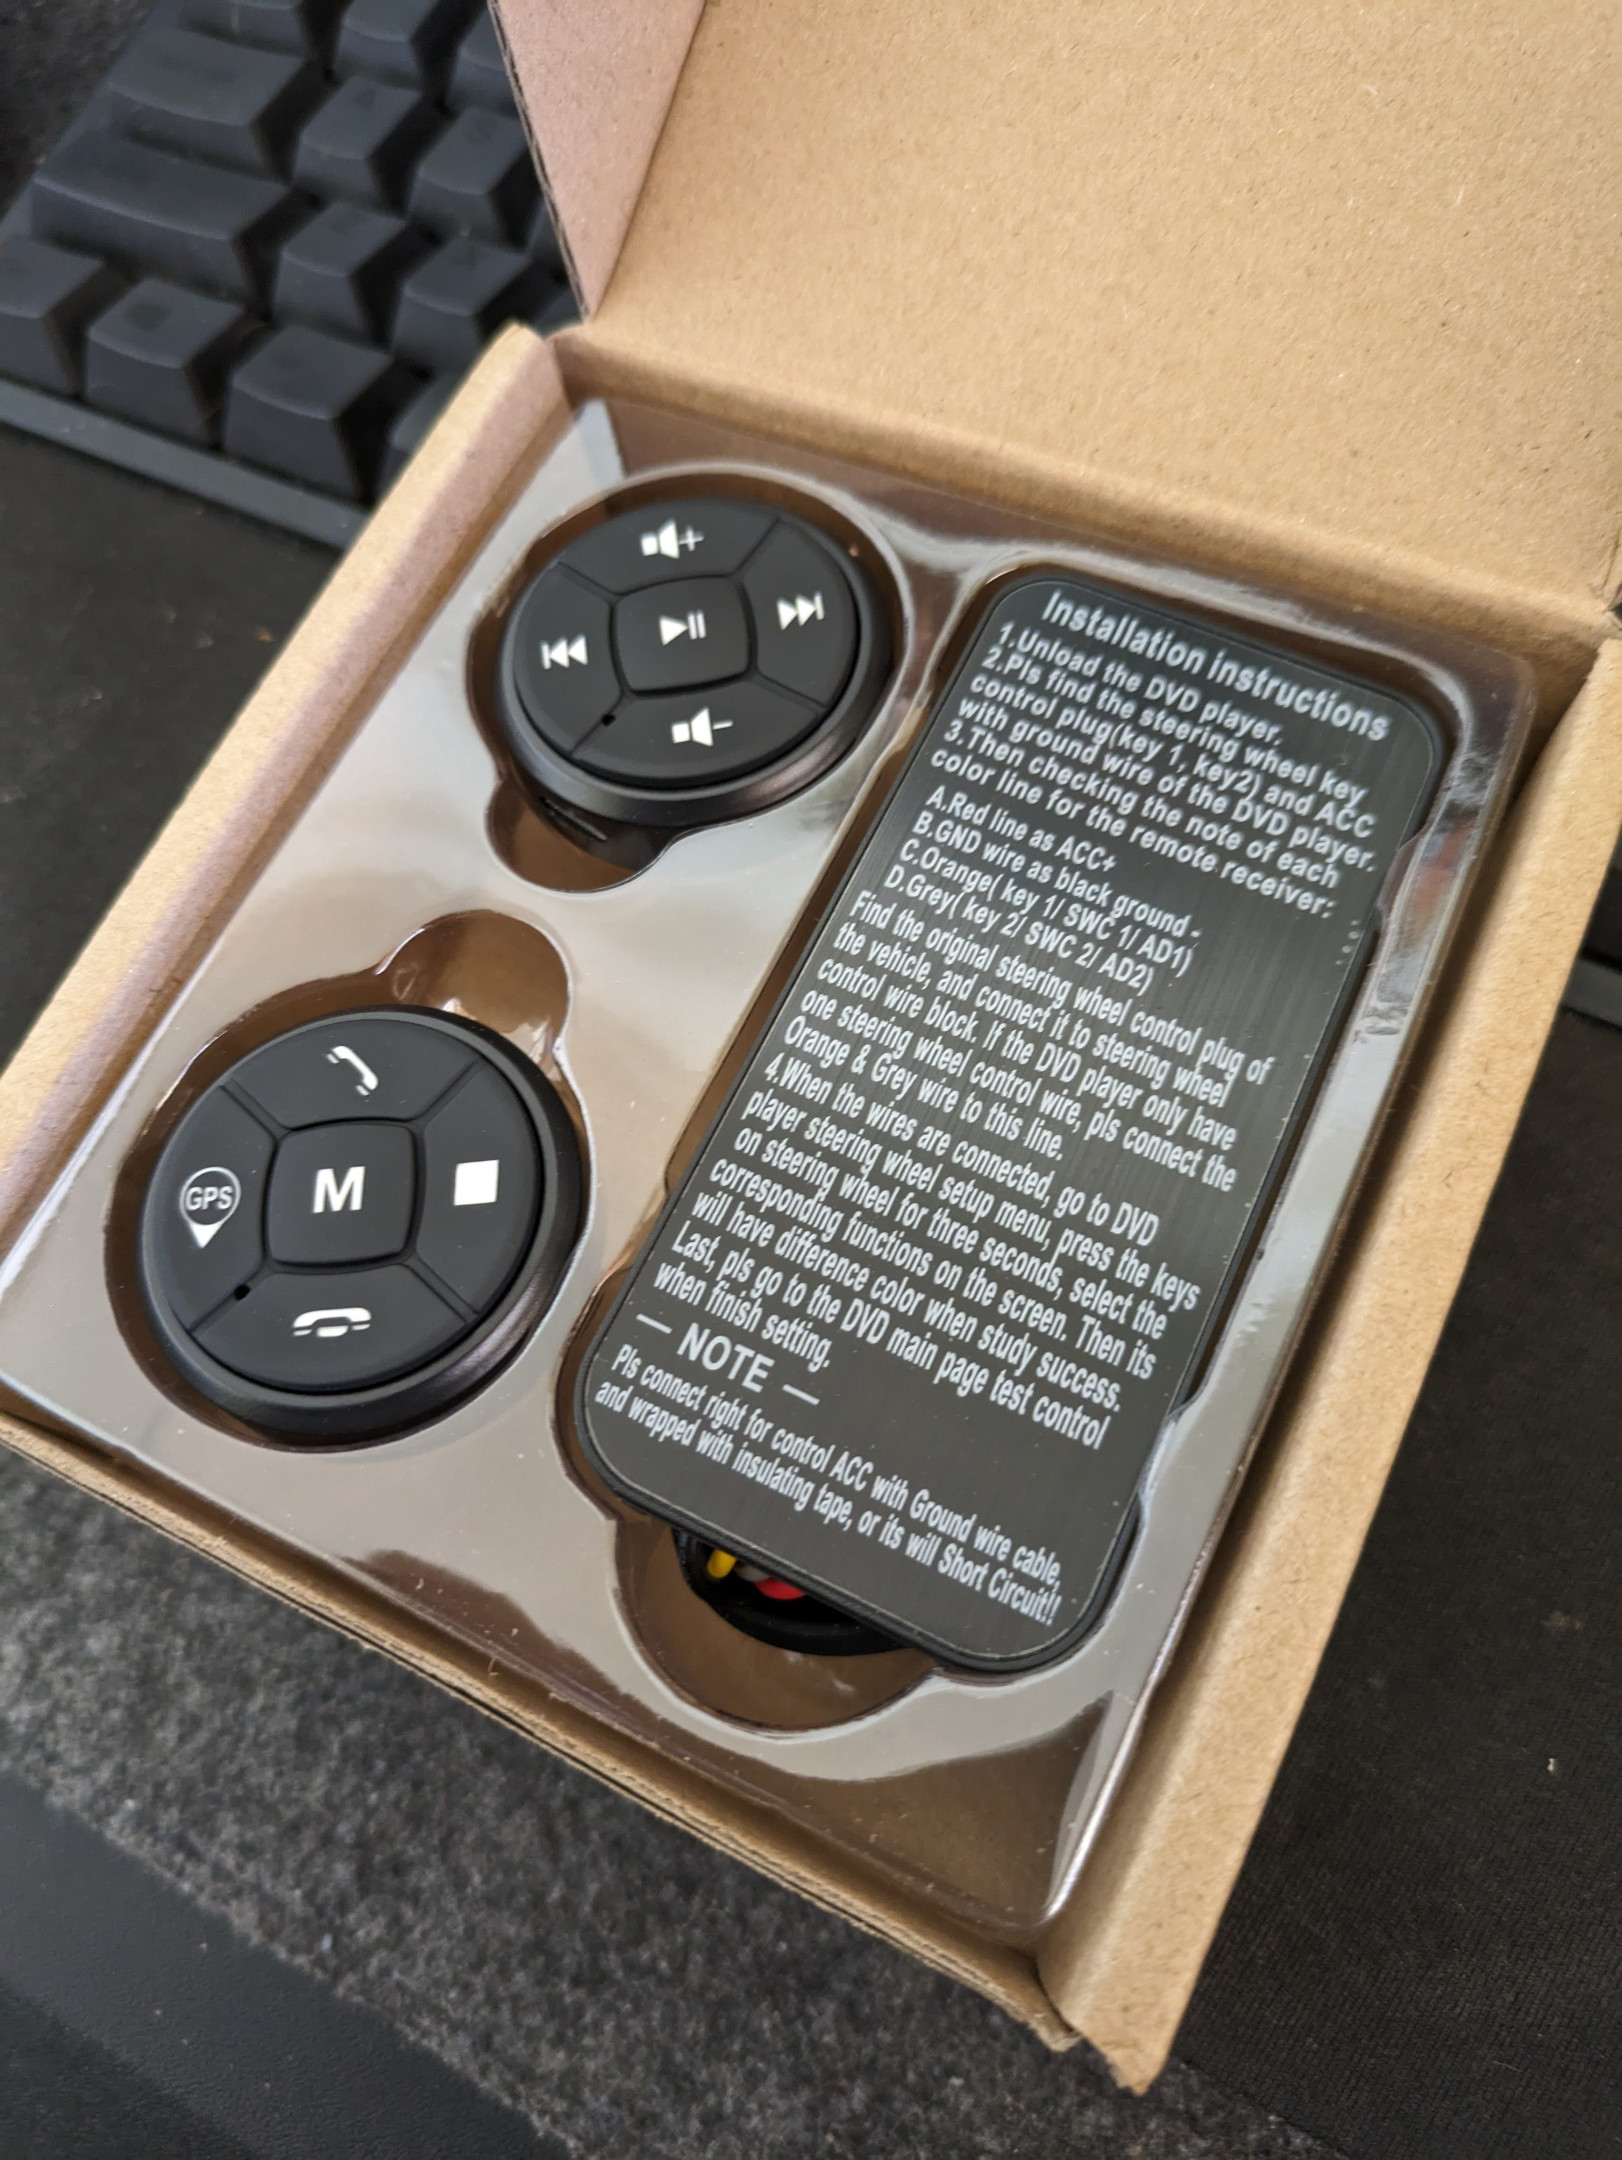
I also integrated some universal steering wheel control buttons and hooked them up to the 3.5mm line so I could get more physical buttons - I printed out a cigarette lighter plug so I could have it sit in there when not in use, and stuck one of the steering wheel controls onto that. The headunit itself was chosen partly because I hate capacitive buttons and this had physical buttons, which I do miss.
Pretty happy with the result.

Great work! Headunit update and a decent looking fascia makes a massive difference.
First question -
Whats the panel in your RH vent above the heater controls? an ODBII reader/scan tool or similar?
(Apologies if you have previously mentioned it - I looked through the thread but couldnt see an answer)
Second question -
How are you finding the ride and handling since we worked through springs & spring rates a while back.
Any thoughts (critical or otherwise) with what we suggested/supplied?
Wow great work man! Love the little sunshade on the facia too. Looks better than the byneset ones!!
- Edited
All good It's a long thread, and I didn't give it much of a write-up. Here's the link to the post: Link
The unit is a Reveltronics UTCOMP-Pro - it consists of the OLED 3.2" display, some buttons underneath, mounted in a generic case you can buy along with it, that someone on Turbobricks posted up a photo of mounted in the same location.
I made a separate sensor harness that connects to the control box mounted under the dash, that the screen connects to. It has some sensors connected to it, like a MAP sensor for boost, Oil pressure, Wideband O2, Vehicle speed, Fuel consumption, Coolant temp via the upper rad hose, ambient temp sensors for inside/outside temp and more that I've probably forgotten. I like it, and it allows for a pretty clean install. For certain things like speed/fuel, I'm piggybacking of LH signals. I would feed most of those sensors direct to an ECU if I wasn't using LH2.4, but wanting to avoid scope creep, decided against going aftermarket ECU for the time being.
Long term, if money was no object, I'd rip all the electricals out that are in there, and go with something like a Nexus R3/5 that has a PDM integrated so I can strip as much of the original LH stuff out as possible. That said, the LH has been (knocks on wood) fine for my purposes so far, so attention has been elsewhere.. like suspension!
I still need to get the front suspension sorted  It's pretty good how things are as they sit, given it's been a year and a bit since the last changes with swapping in the springs I got from you at the time. If I avoid potholes, it's a dream, but I'd rather not clench in fear every time I see a bump in the road.
I've told myself I need to sell another car before I can consider buying more suspension parts to fix this one up - whether that be a set of BC-DS coilovers, or somehow find a way to get GAZ to make up a set through you. I did notice that a certain UK website had stock of the fronts, but I'd rather not go there. With the amount of travel these struts have at the current ride height, I'd rather spend the money to have a good long-term solution, so I'm taking my time. I'll shoot you an email when I'm closer to taking that jump. If you have any thoughts about the above, please feel free to post in here though.
Thanks mate I'm not going to comment on Byneset beyond that it's definitely great that someone's making unique parts like that for our old cars, but I'll just say that I'm very happy with the finish I managed for this one. I'm very thankful the original creator decided to release the design to the world and allow remixing in the way they did.
Oh, and also while trying (and failing) to search for something on the I Roll facebook page, I stumbled across a post where my car was spotto'd:
I think this might've been while we were roadtripping over from Adelaide, and it was in Williamstown, and it was a hot as balls day (22nd December 2022), and after driving off from there was when I stalled the car and was glad I'd fixed the hot-start issue. Drove through the burnley tunnel after that and the car was really pushing the temps stuck in a tunnel in gridlock late in the afternoon… seared into my memory. Looks alright in the photo tho 
- Edited
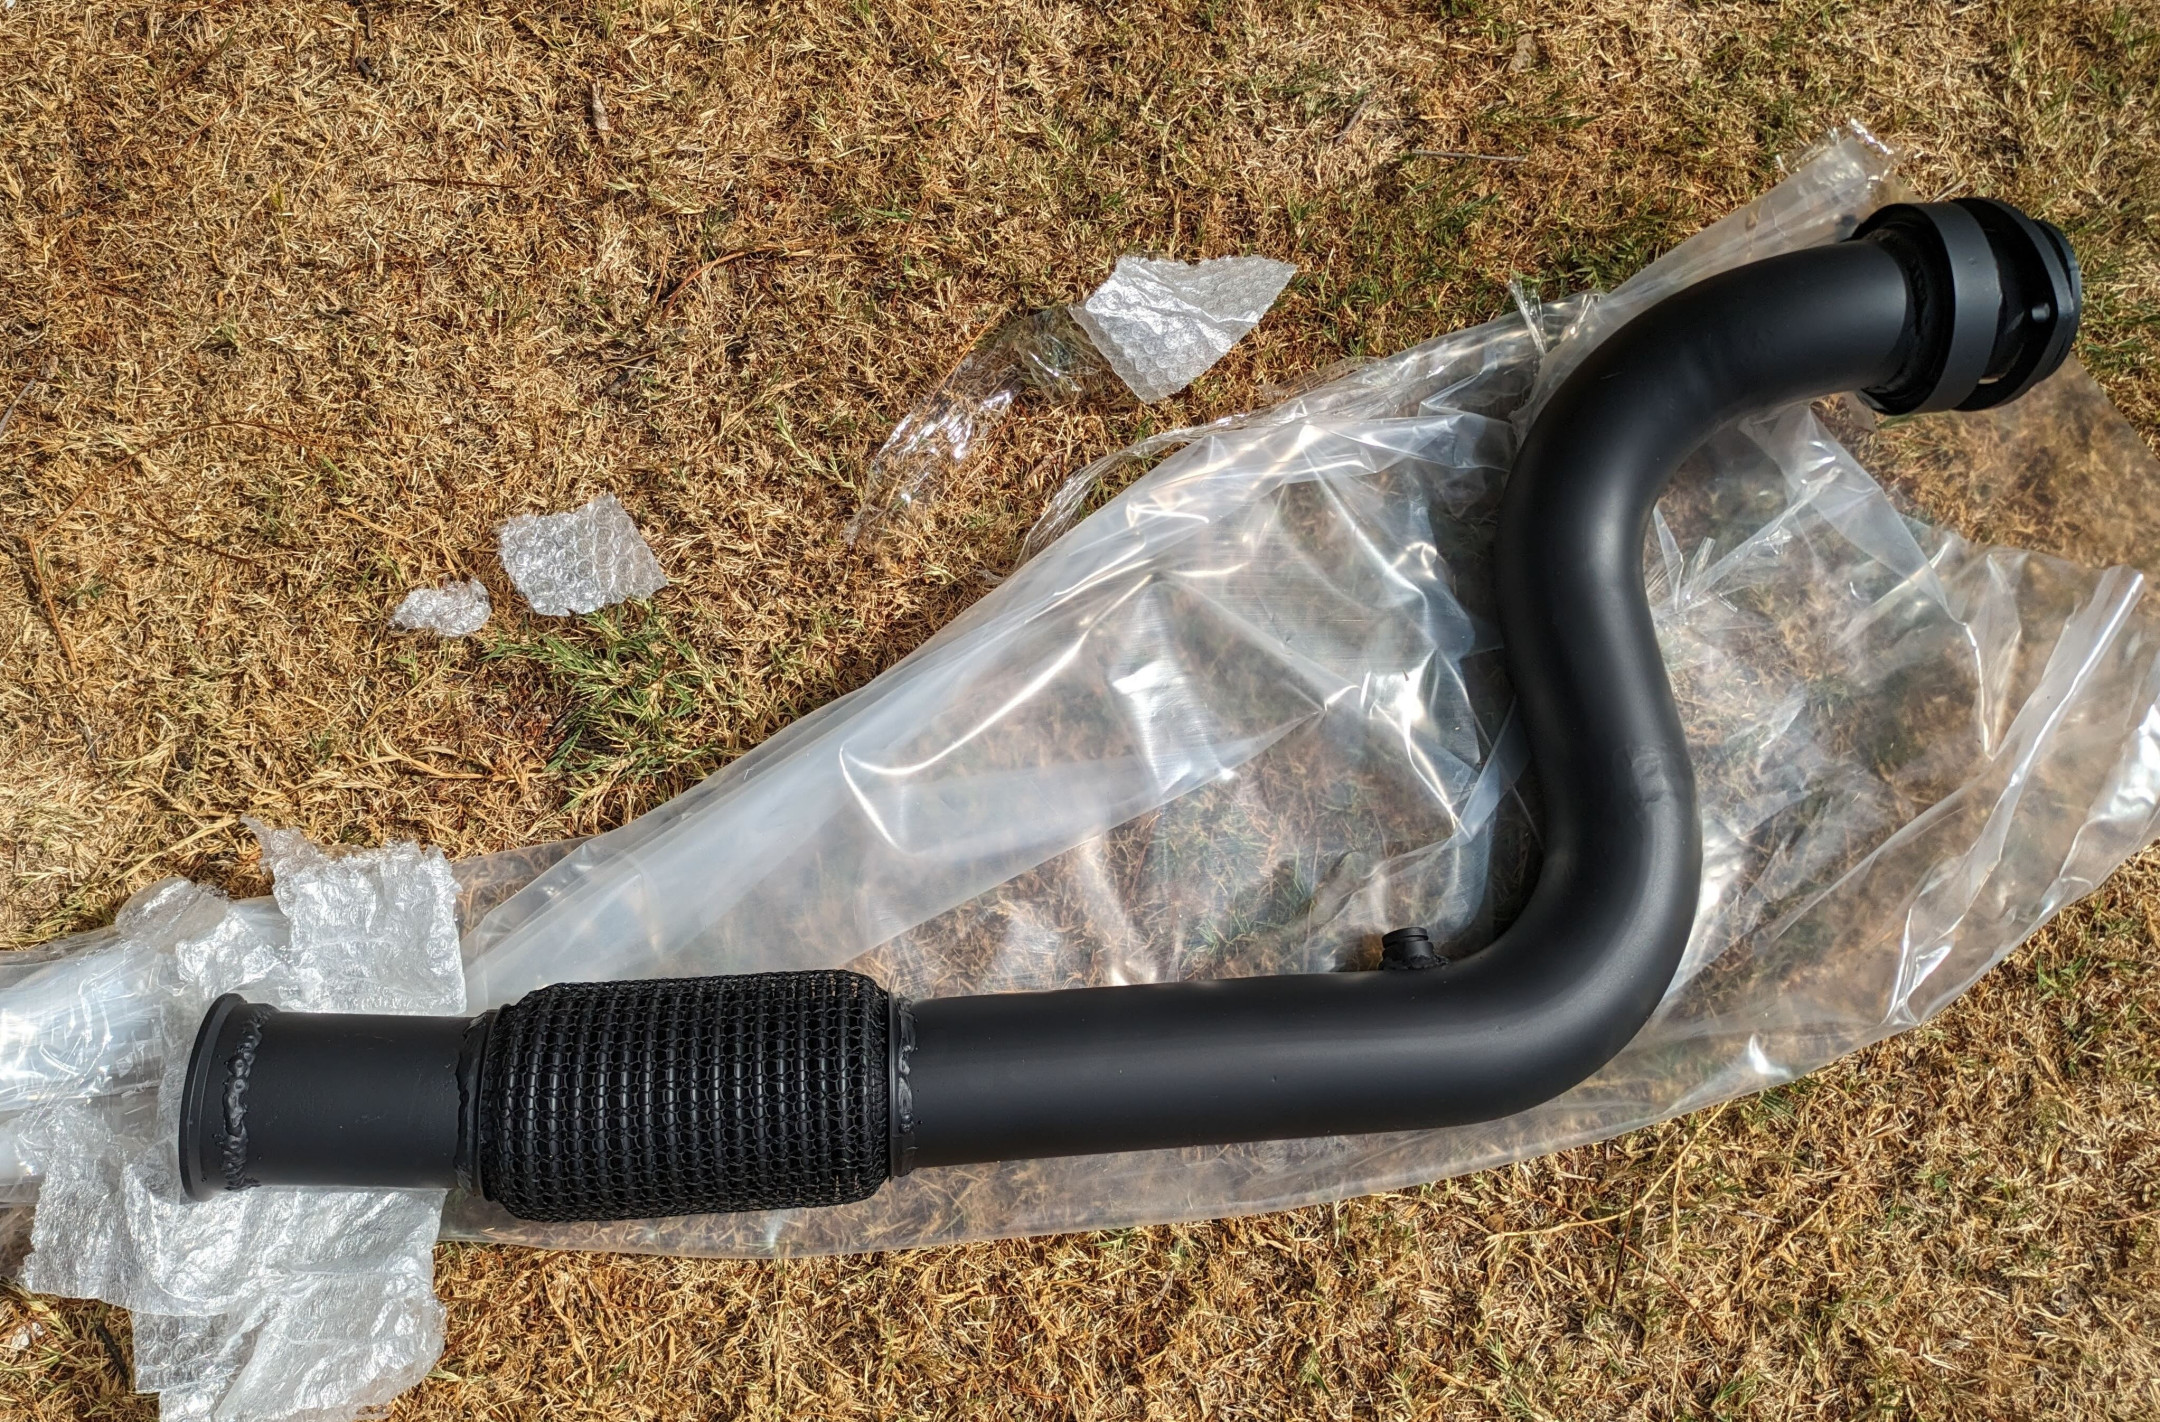
March 2024 - Dump pipe
After a lengthy roadtrip in January, I noticed there was a very obvious exhaust leak that sounded like it was near my feet. I pretty much knew straight away what it was going to be caused by - the gearbox mount I’d made that secured the dump to the gearbox bellhousing.
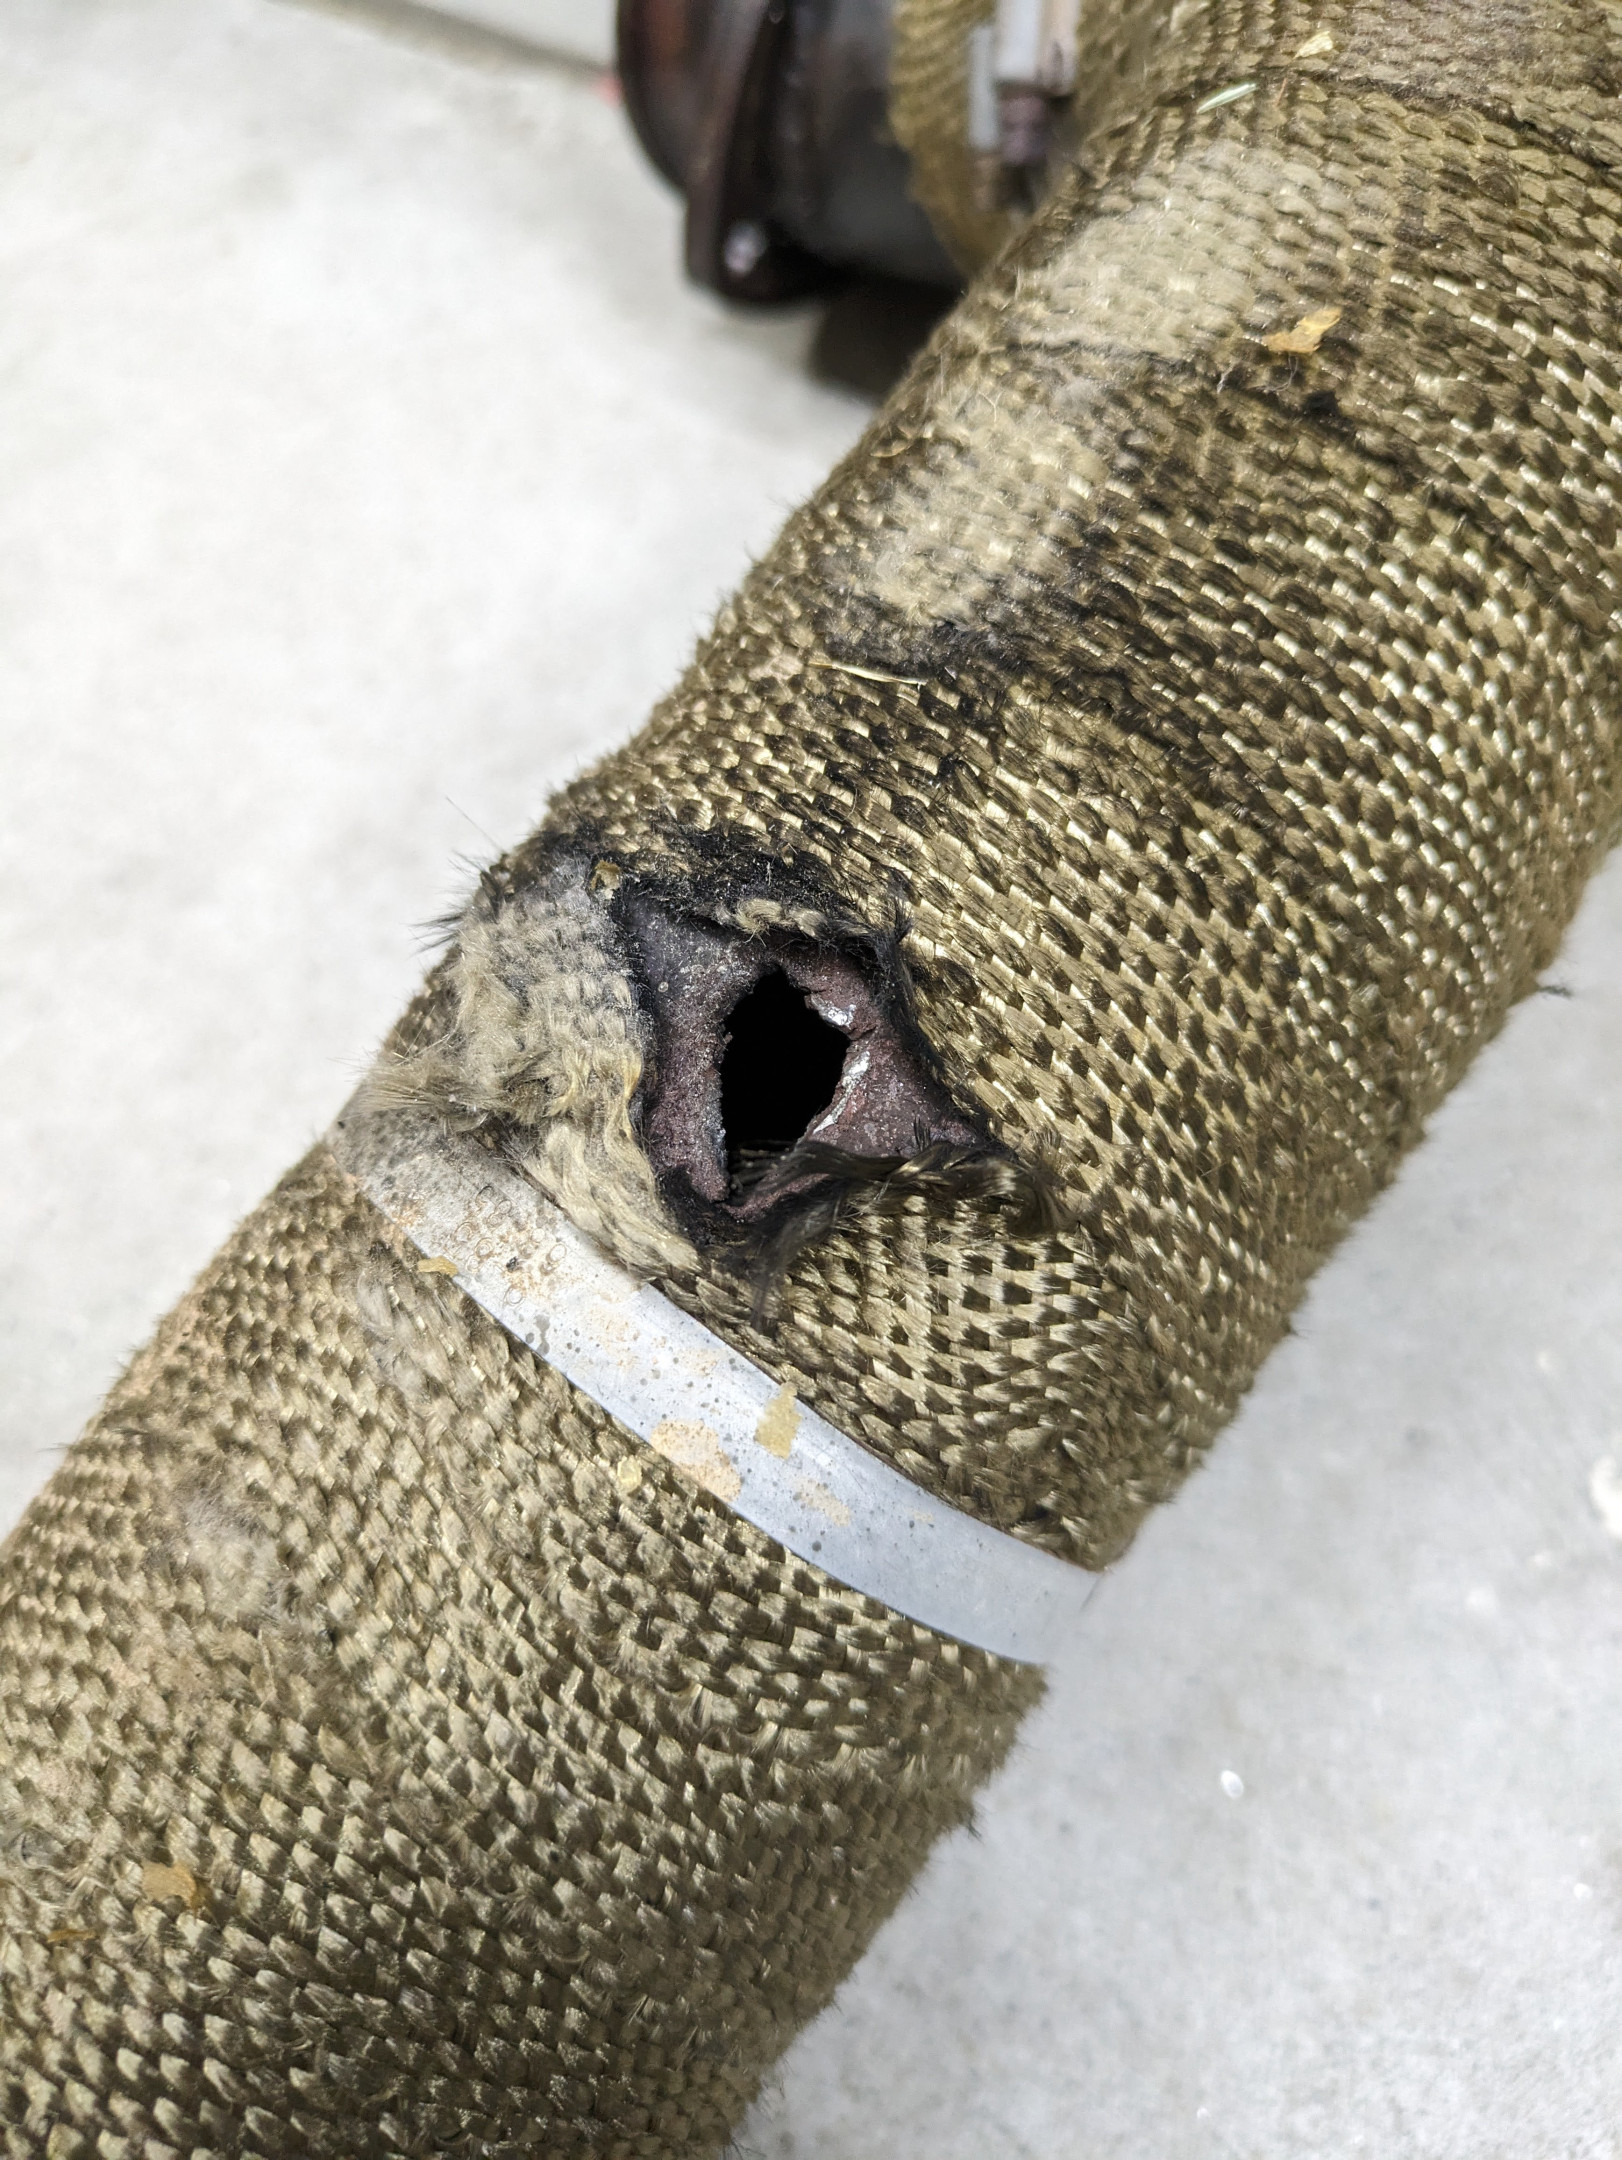
Ever since doing that I’d read how it should’ve been done instead, i.e. with something that has a bit of give in it to allow for expansion/vibration/contraction. I had other priorities on the car as it was working, but now it was broken, I wondered what I should do? Patch it up and bung it back in? Take the car off the road for a bit, get it sorted and then be done with it for longer? I went with the latter, and it was off the road for probably 8 weeks total while I sorted that and some other stuff out.
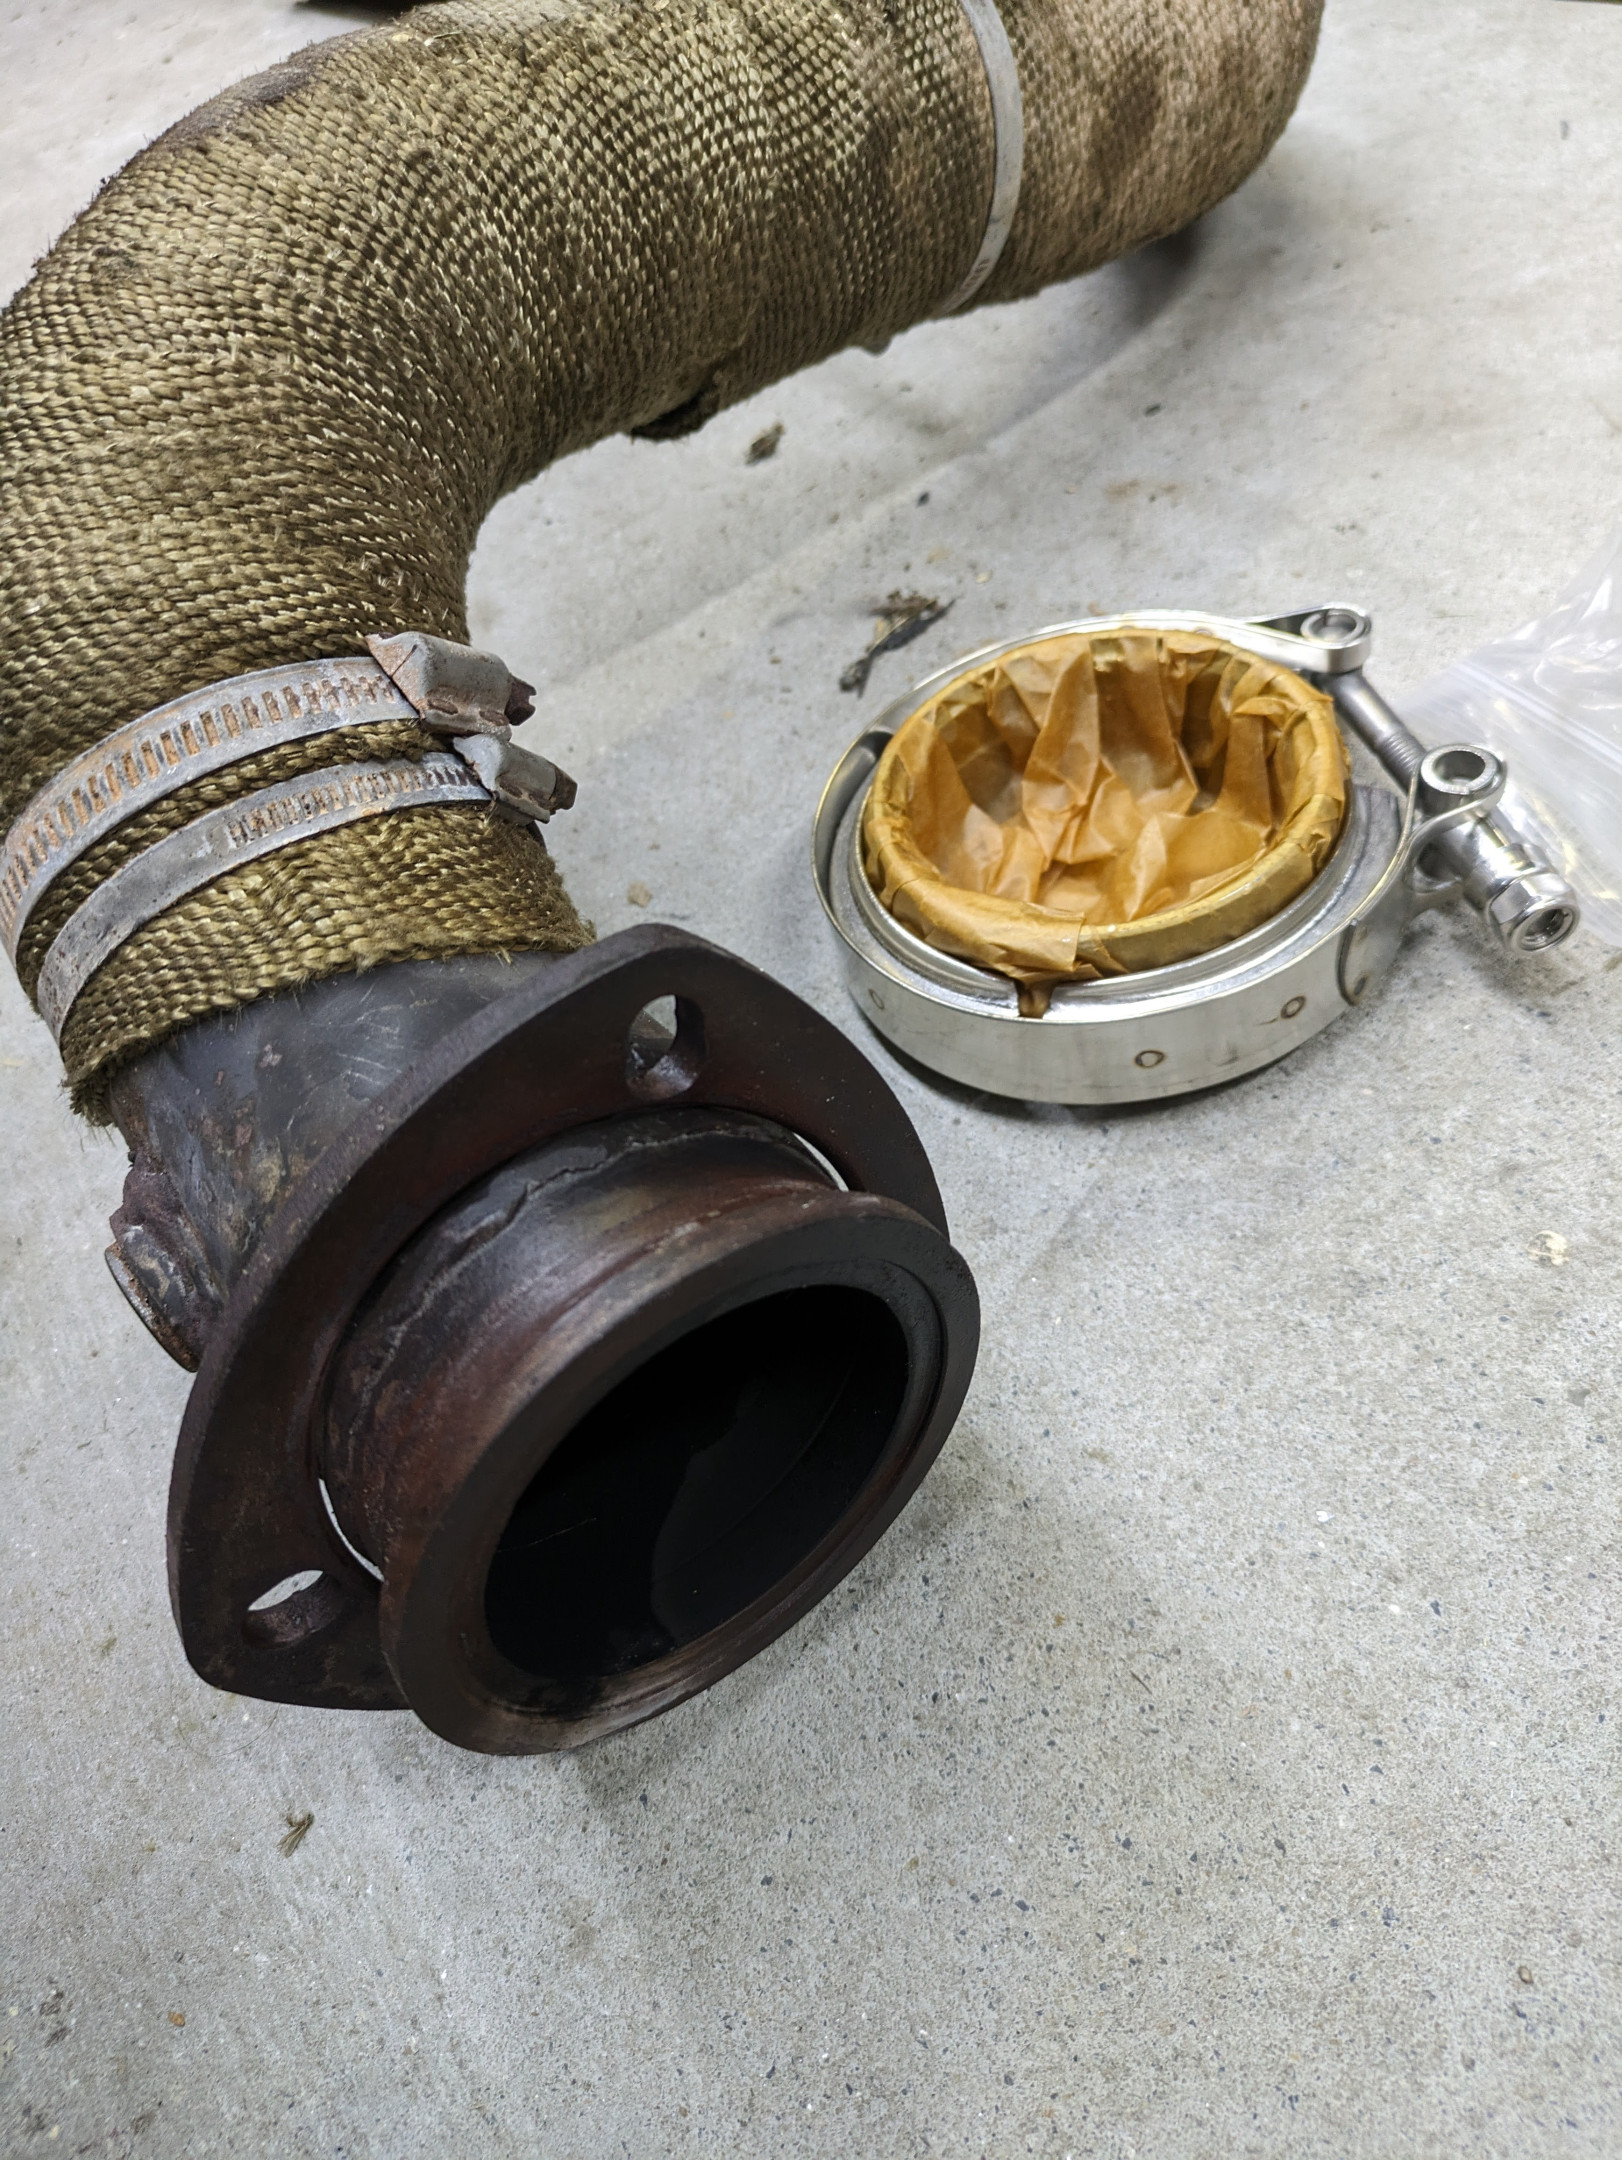
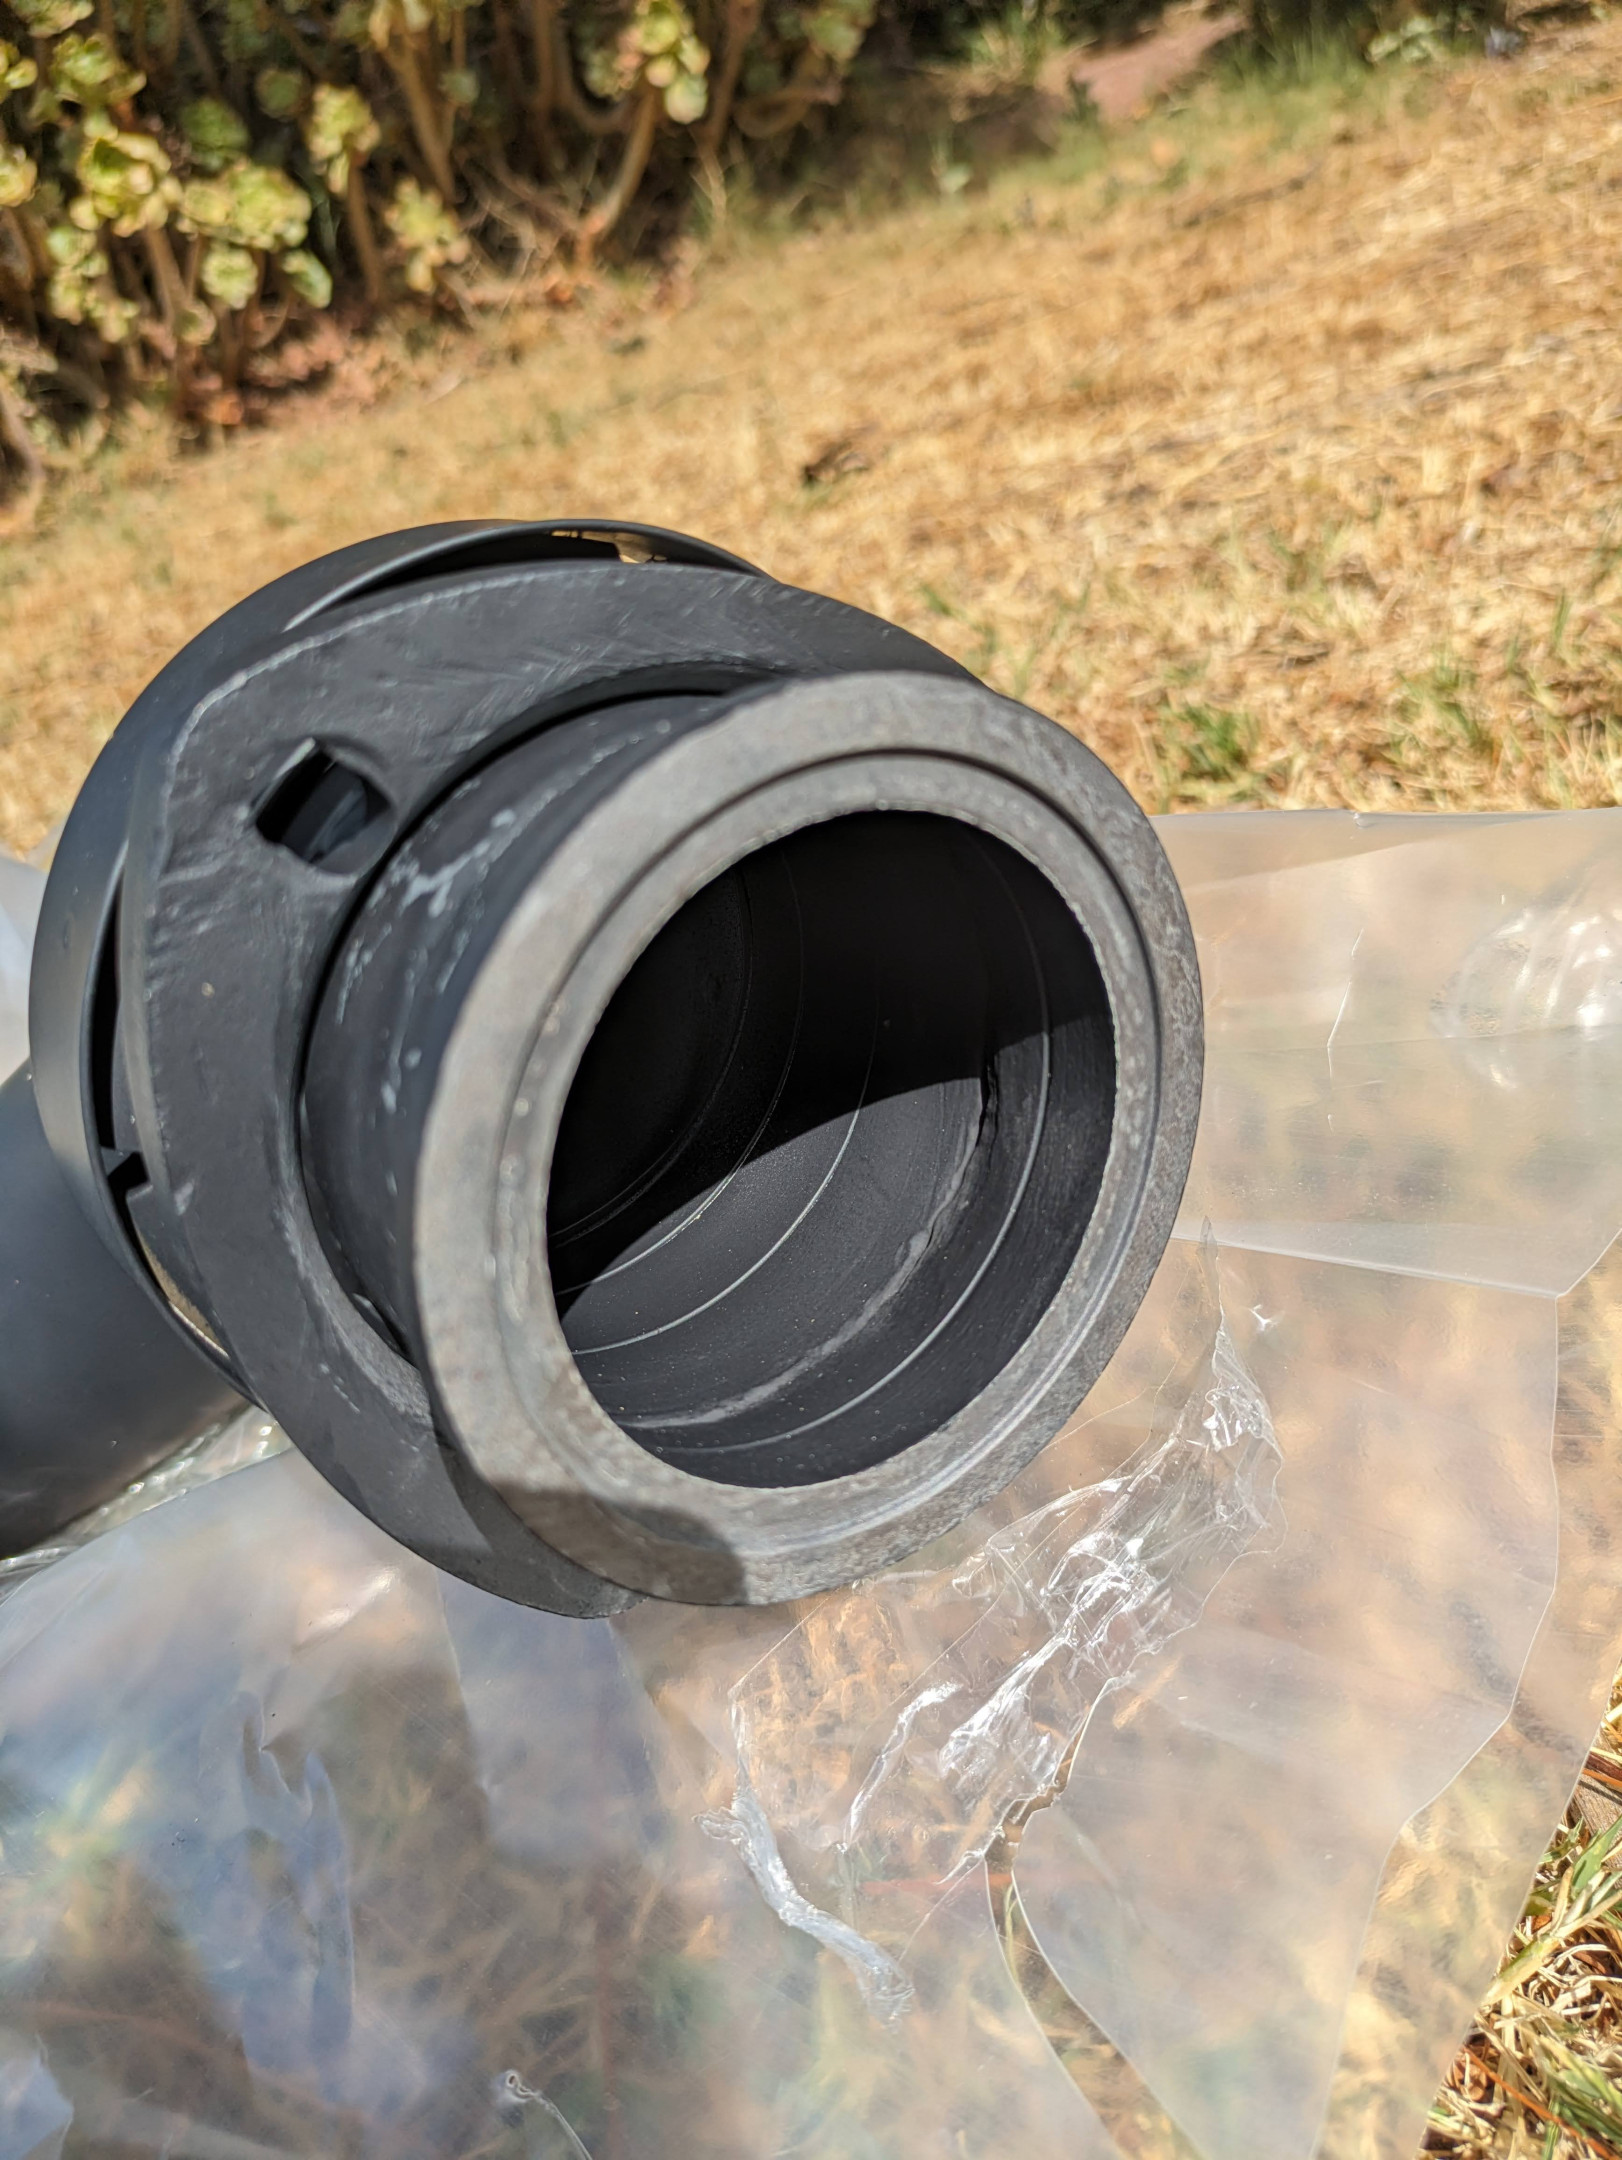
I decided after a great amount of difficulty removing the flange bolts that I’d make v-band adapter to make it easier to service in future, as I had a leftover 3” aliexpress v-band from the last exhaust adventures. I got new locknuts and a couple of studs that got munted for the flange, too.
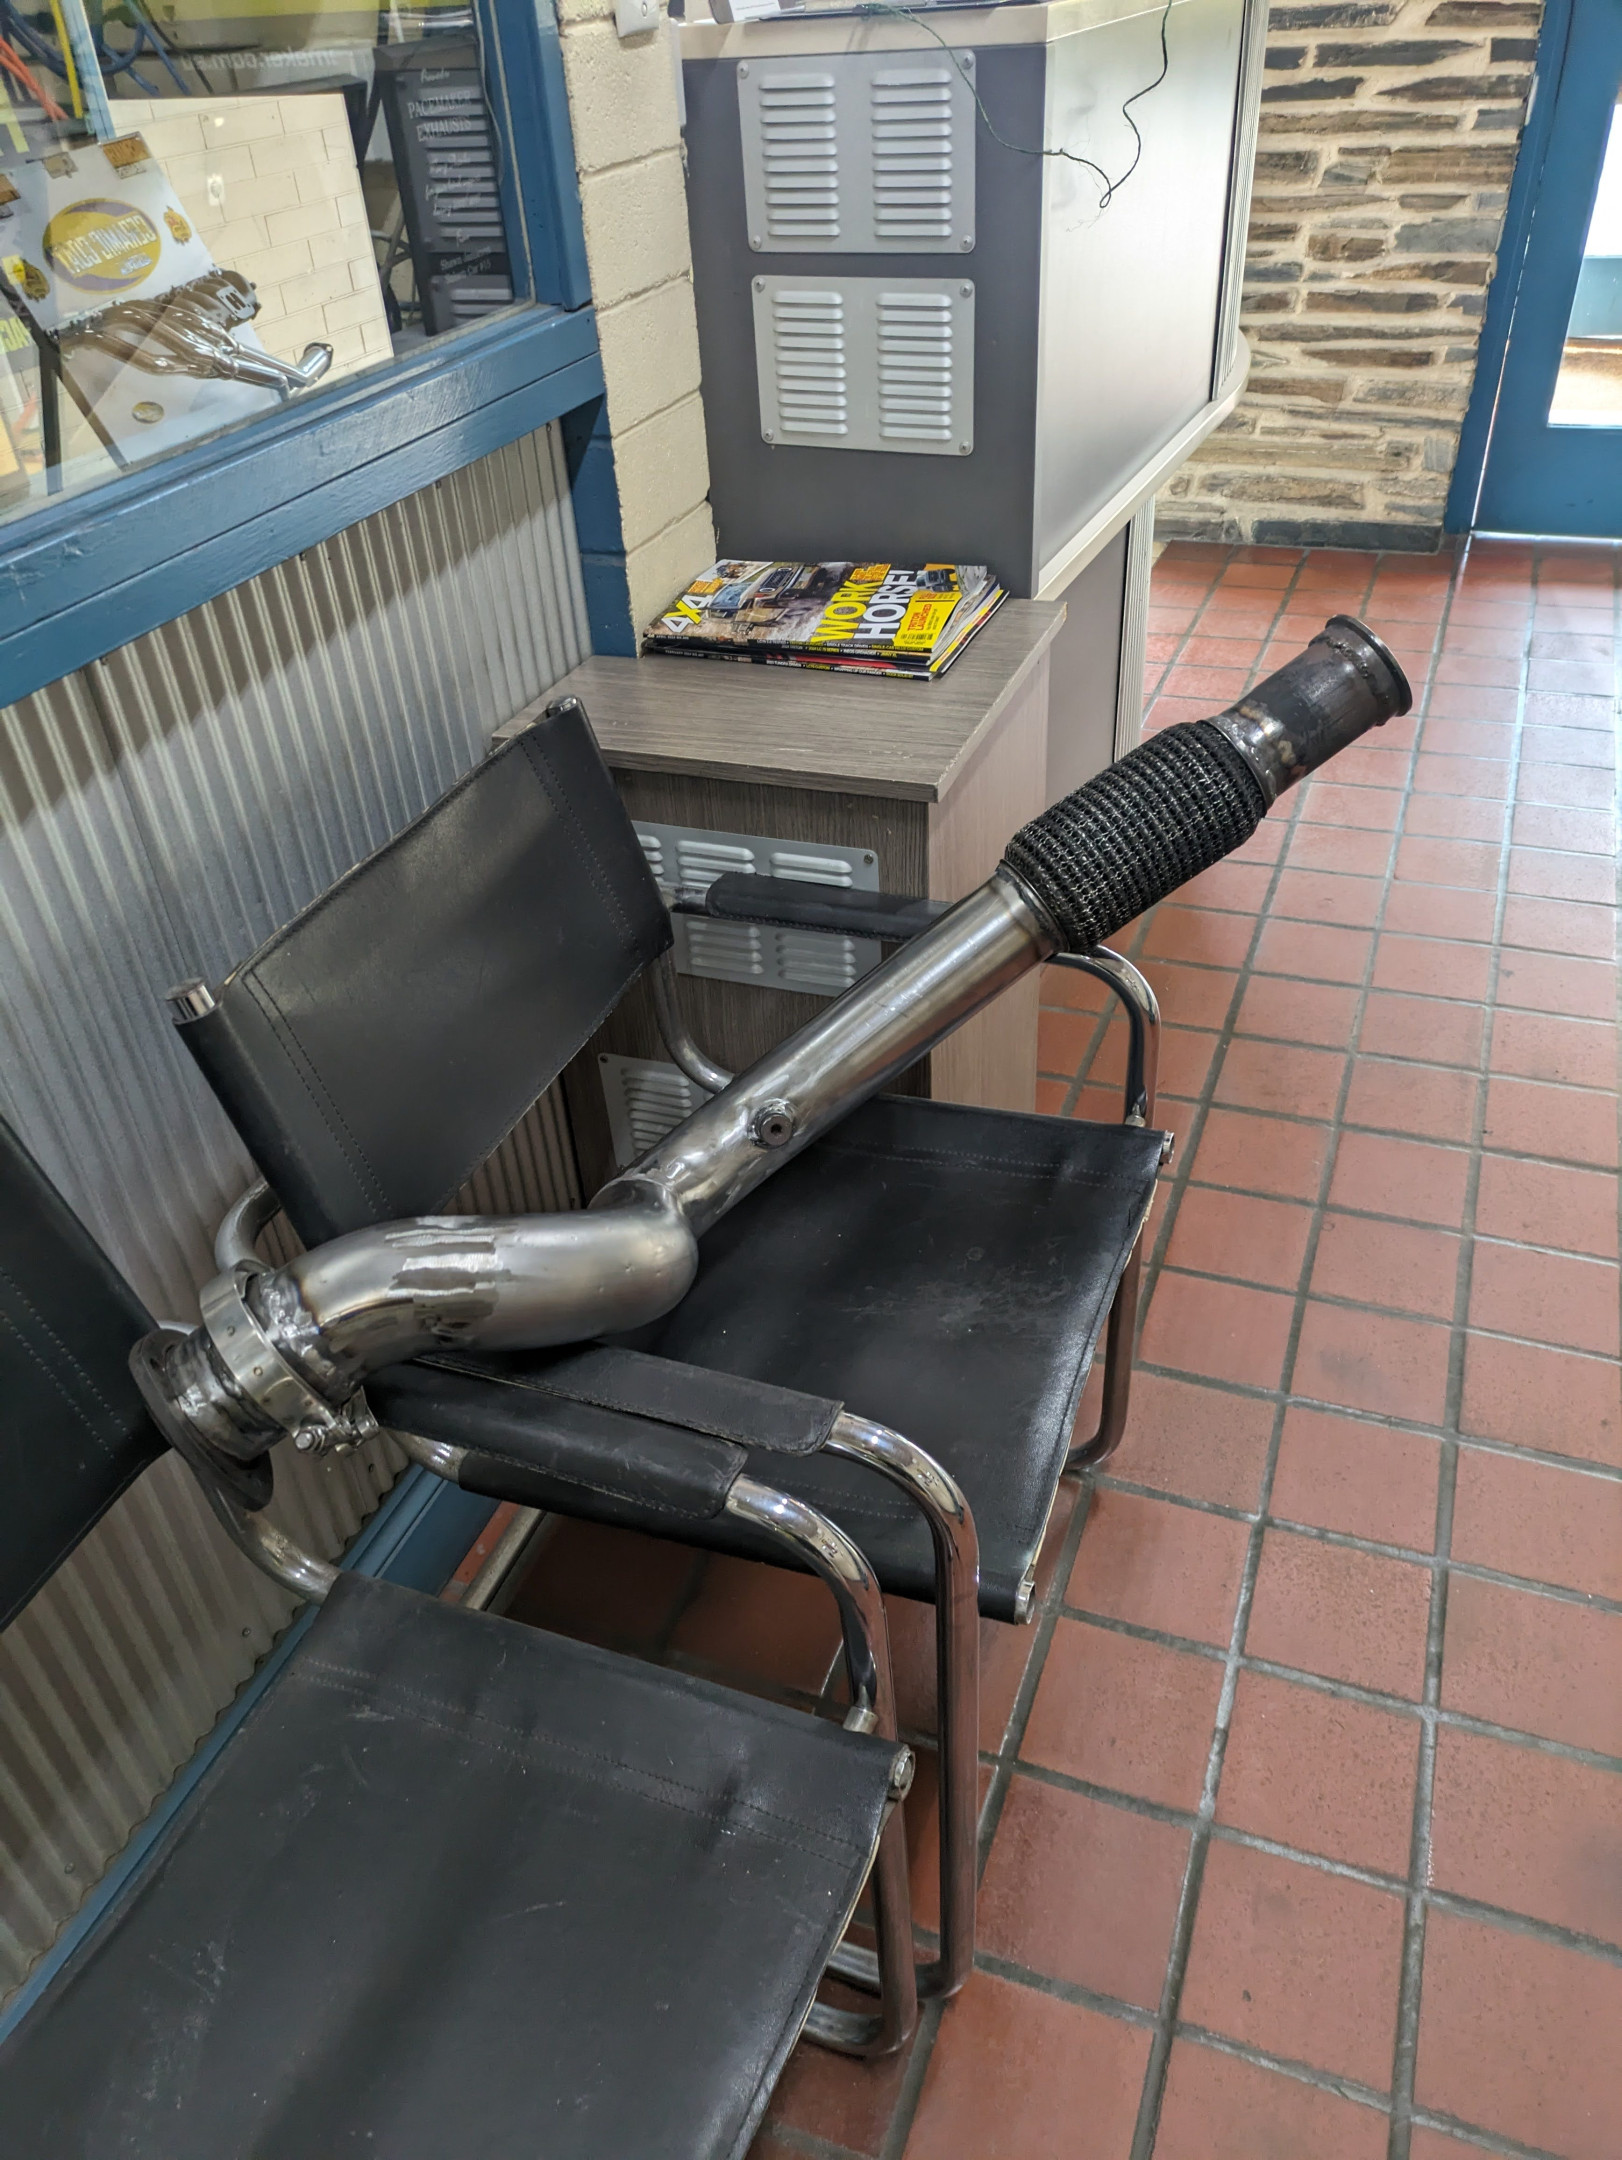
I asked around some places and ended up picking up two mandrel 90’s and a 45-degree bend in 3" from Pacemaker exhausts, who made it up to order, and when picking up I got to walk around their warehouse.. properly oldschool cool workshop - and huge. Nice to check out some local manufacturing.
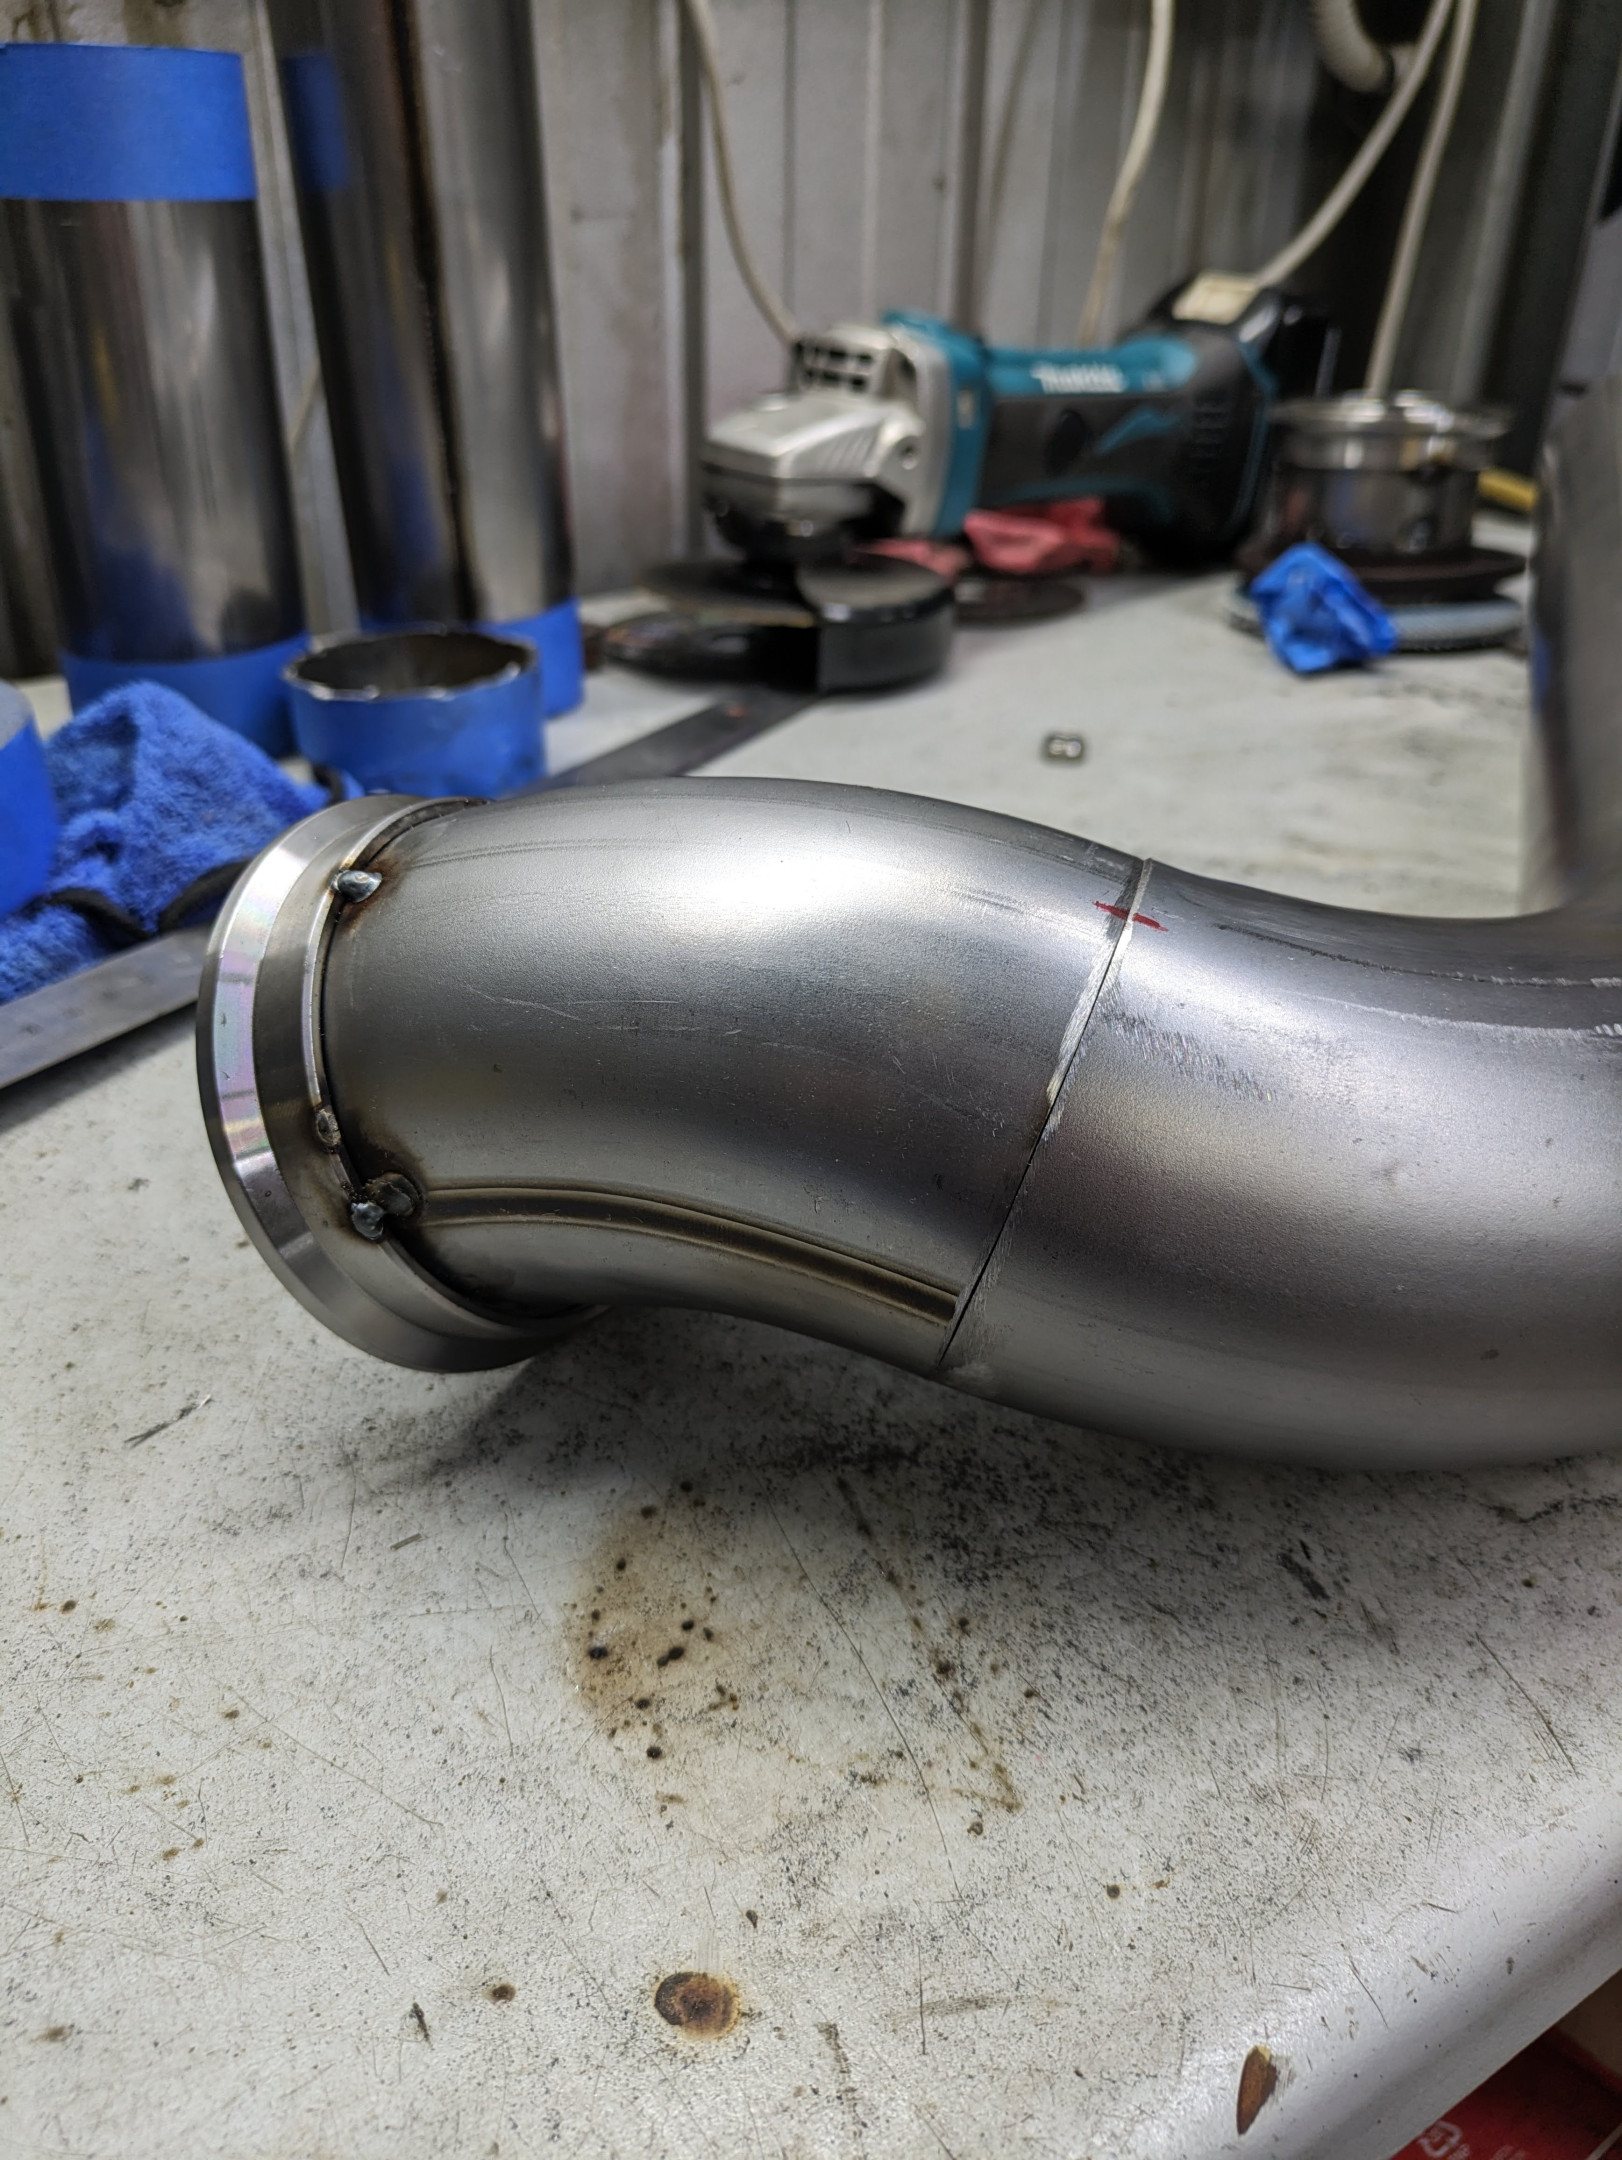
With the bits in hand, I set off fabbing up the new dump, only keeping the turbo flange from the original dump. I used this as an excuse to get a small desktop belt sander to help me get the pipes matching up, and it was a huge help.

The turbine flange was really thick, so I welded that side from inside well, and die grinded it down, as well as from the outside once I'd cleaned up the surface.

I am not a professional welder, and my mates suggested a tshirt saying ‘a grinder and paint make me the welder I ain’t'. I lol’d.
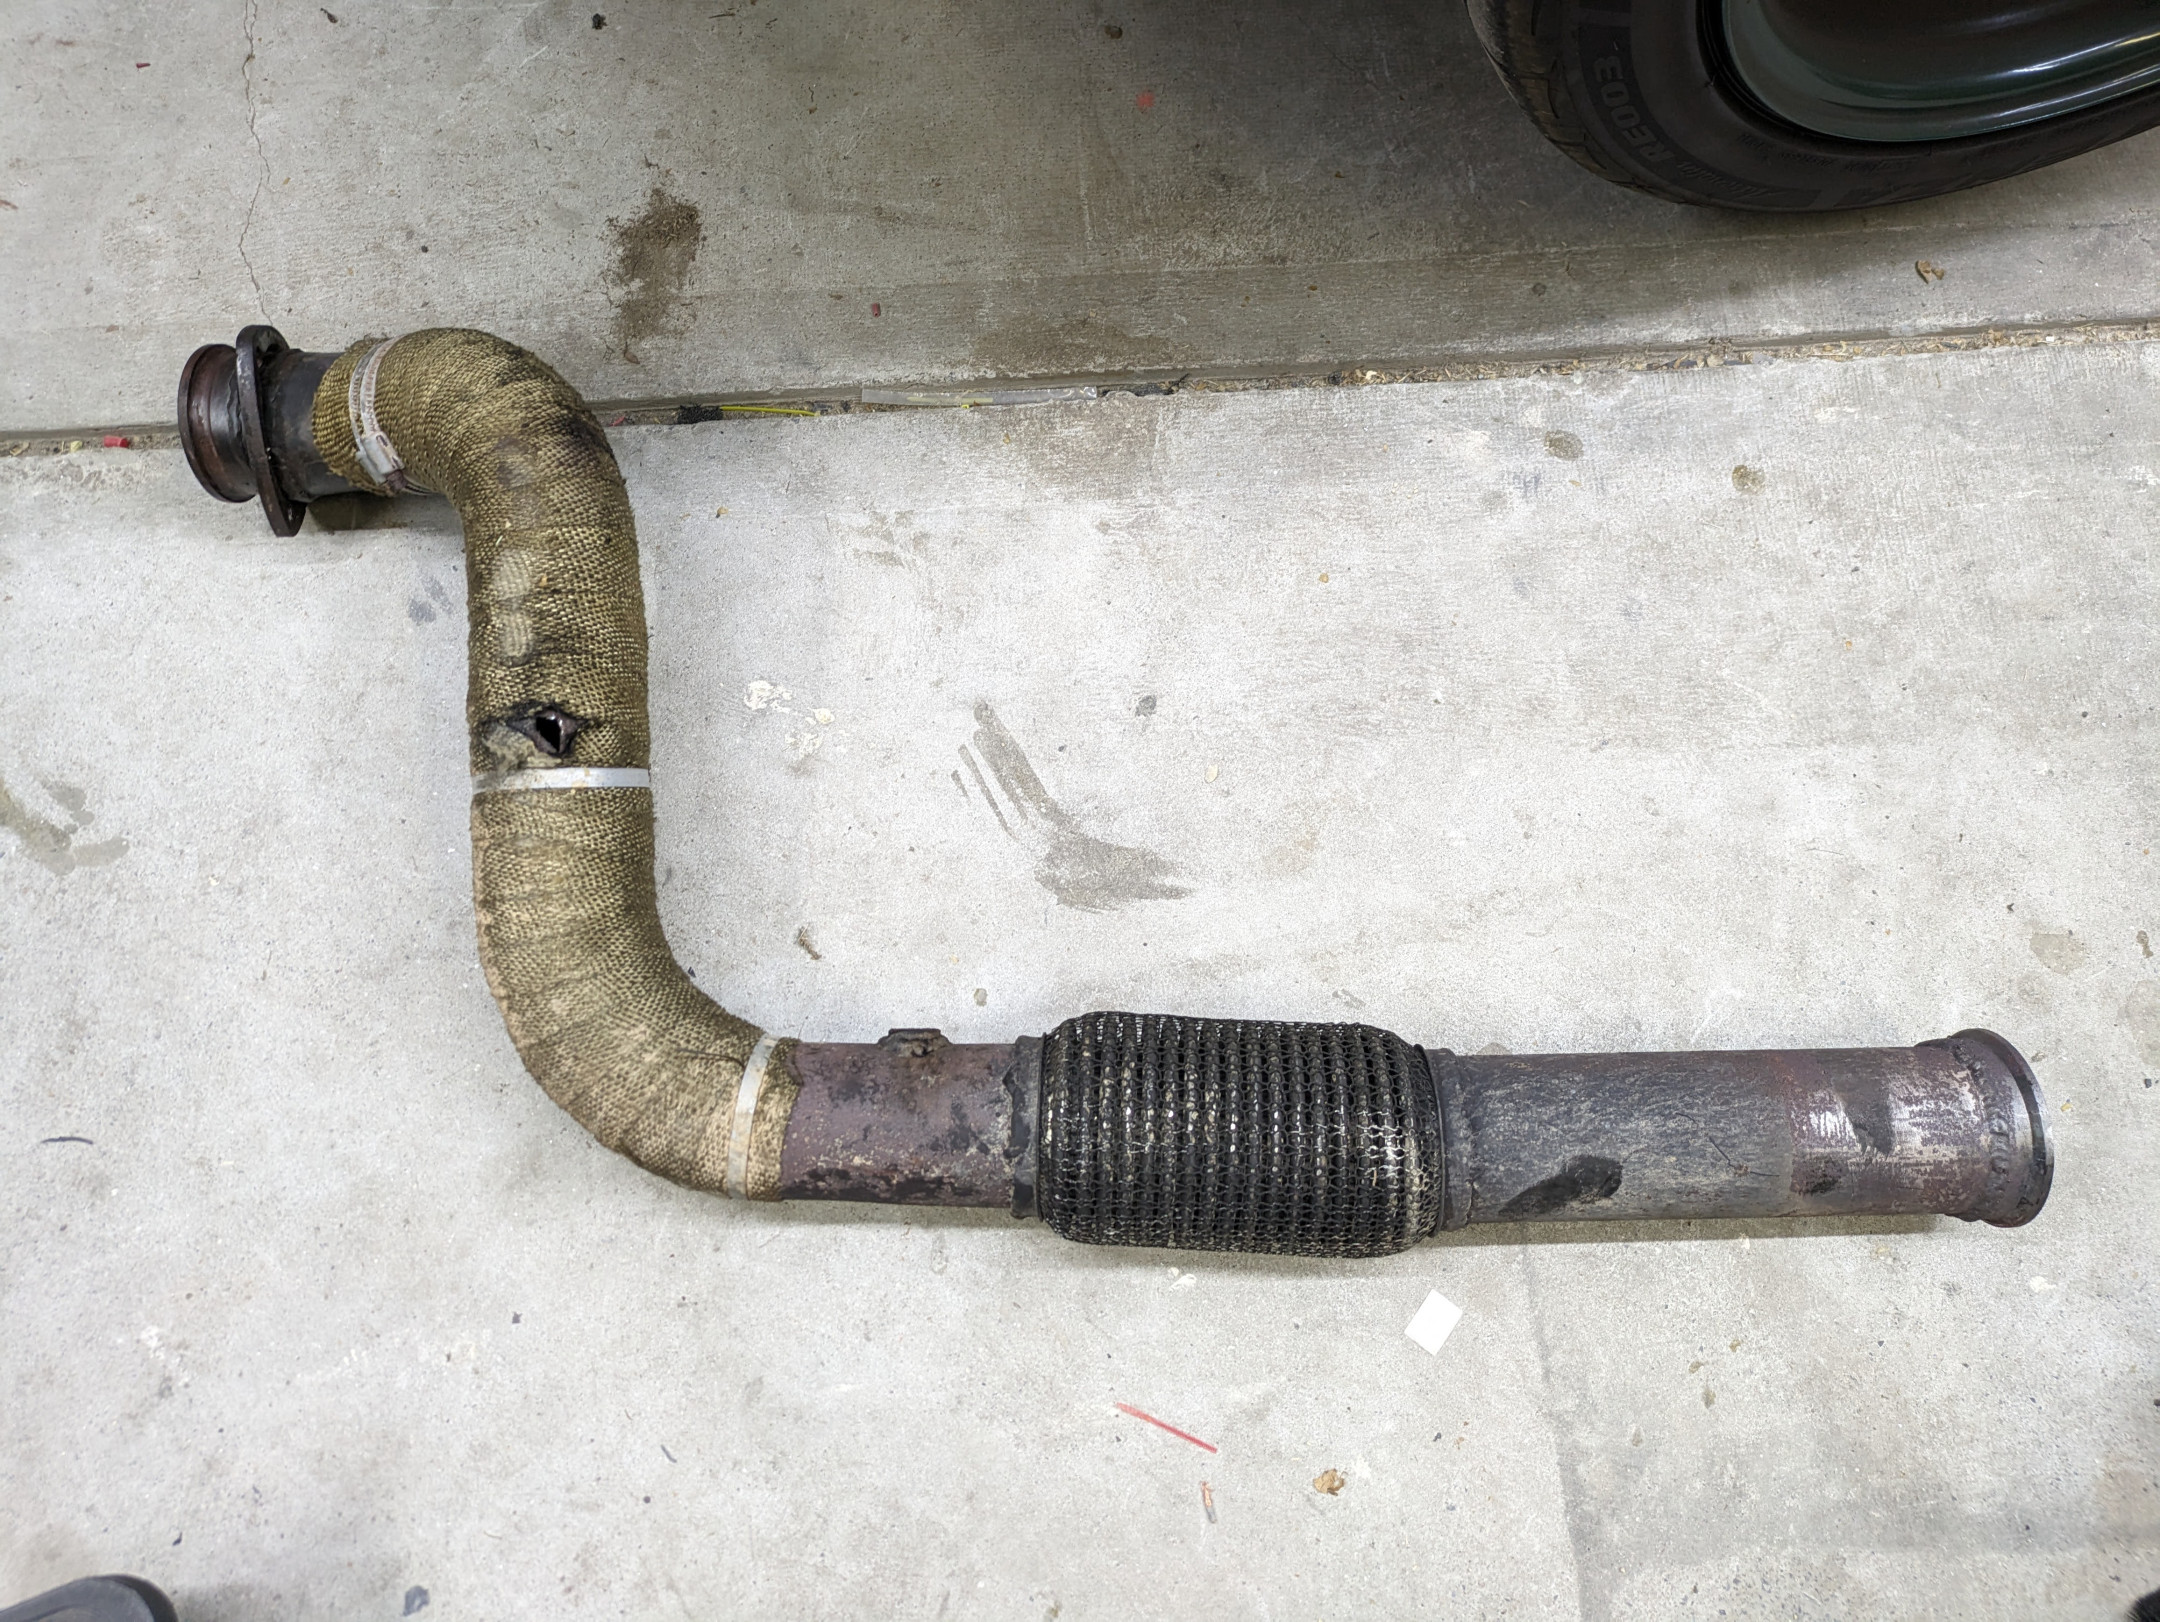
As I got through it, I figured if I’m gonna make it nice, perhaps I should have it coated. I hate exhaust wrap, and figured it might be a good option. Pacemaker offer it as a service as well, and for $180 I decided to give it a go. It’s blasted and ceramic coated with a matte black finish inside and out, and came out looking pretty decent. They do a chrome coating finish for extra, but their most durable finish is the matte black so they say, and it's also the cheaper option. I have no need for bling on this, but the headers they make with that finish would look amazing on a shiny engine bay.
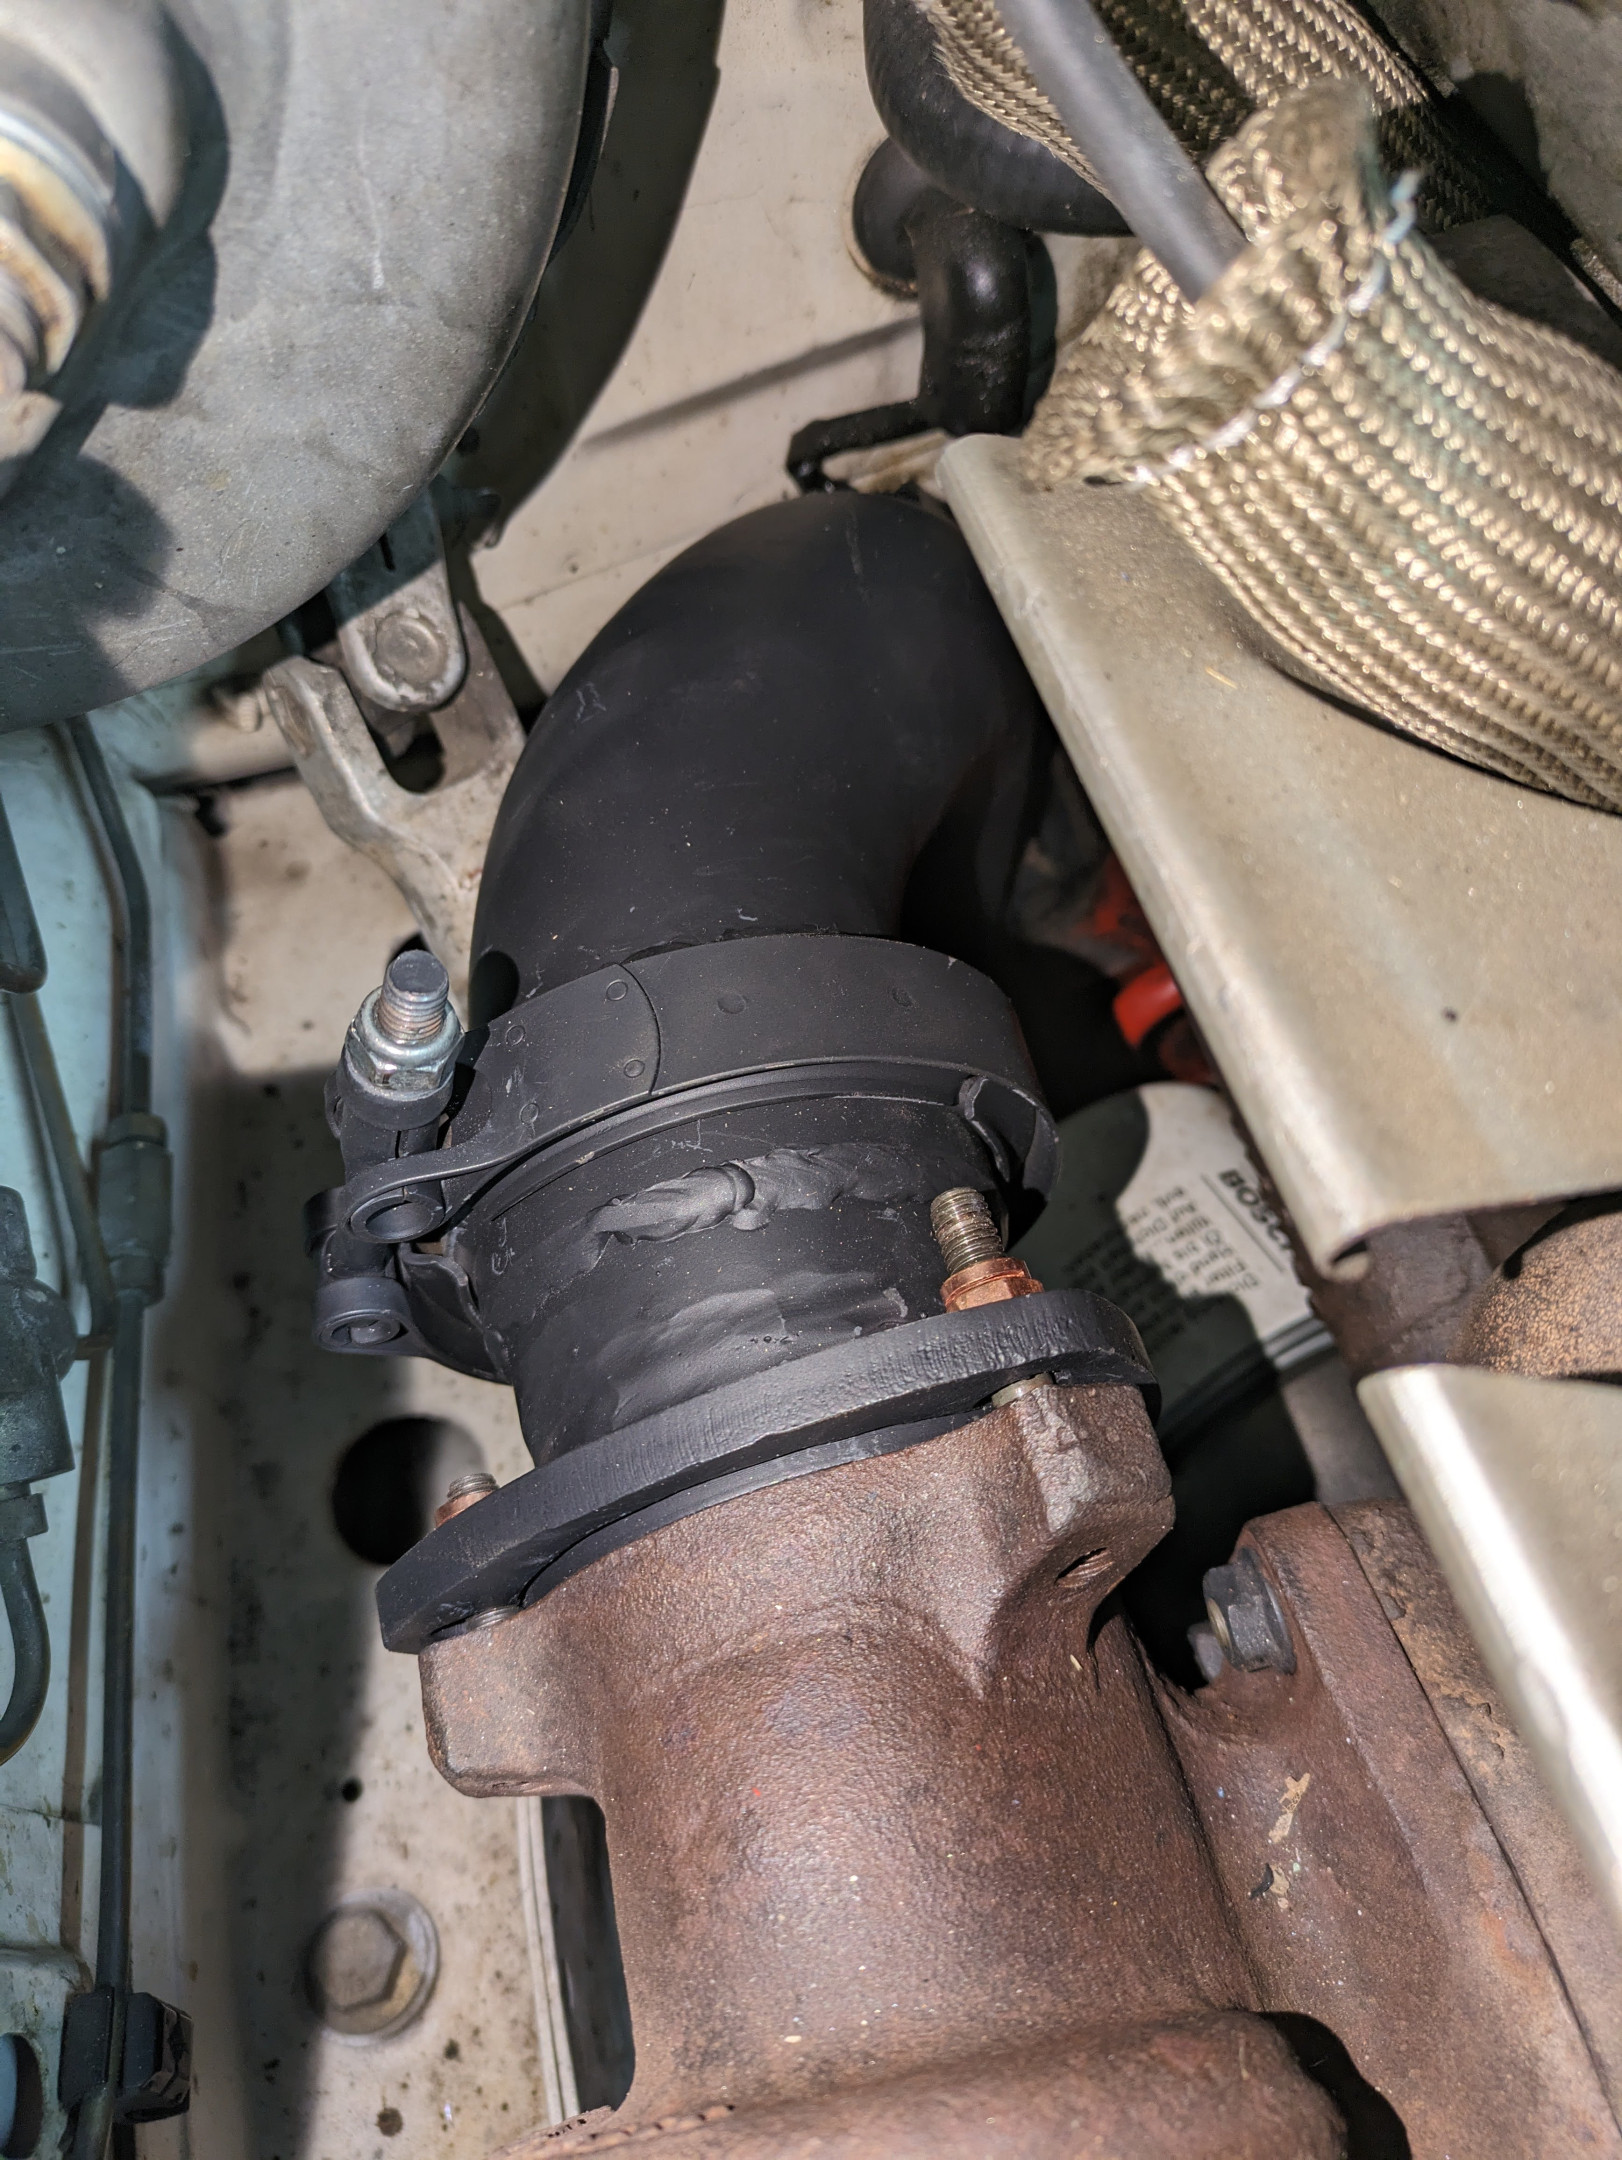
Got it installed and I’m happy with the result. One other thing I fixed up but didn't take photos of was the coolant hard line to the oil cooler that had been leaking for a while, so removed it, resealed the block and fitting and it's now no longer leaking. Huzzah. Was heaps easier to do without the dump in the way.
April 2024 - DIY Intercooler/Radiator/Condensor shroud
I was not happy with the radiator performance after installing the aircon a year or so ago - I was able to immediately notice that it was cycling the rad fan more, and could see from my UTCOMP that it was simply not getting the airflow it did previously.
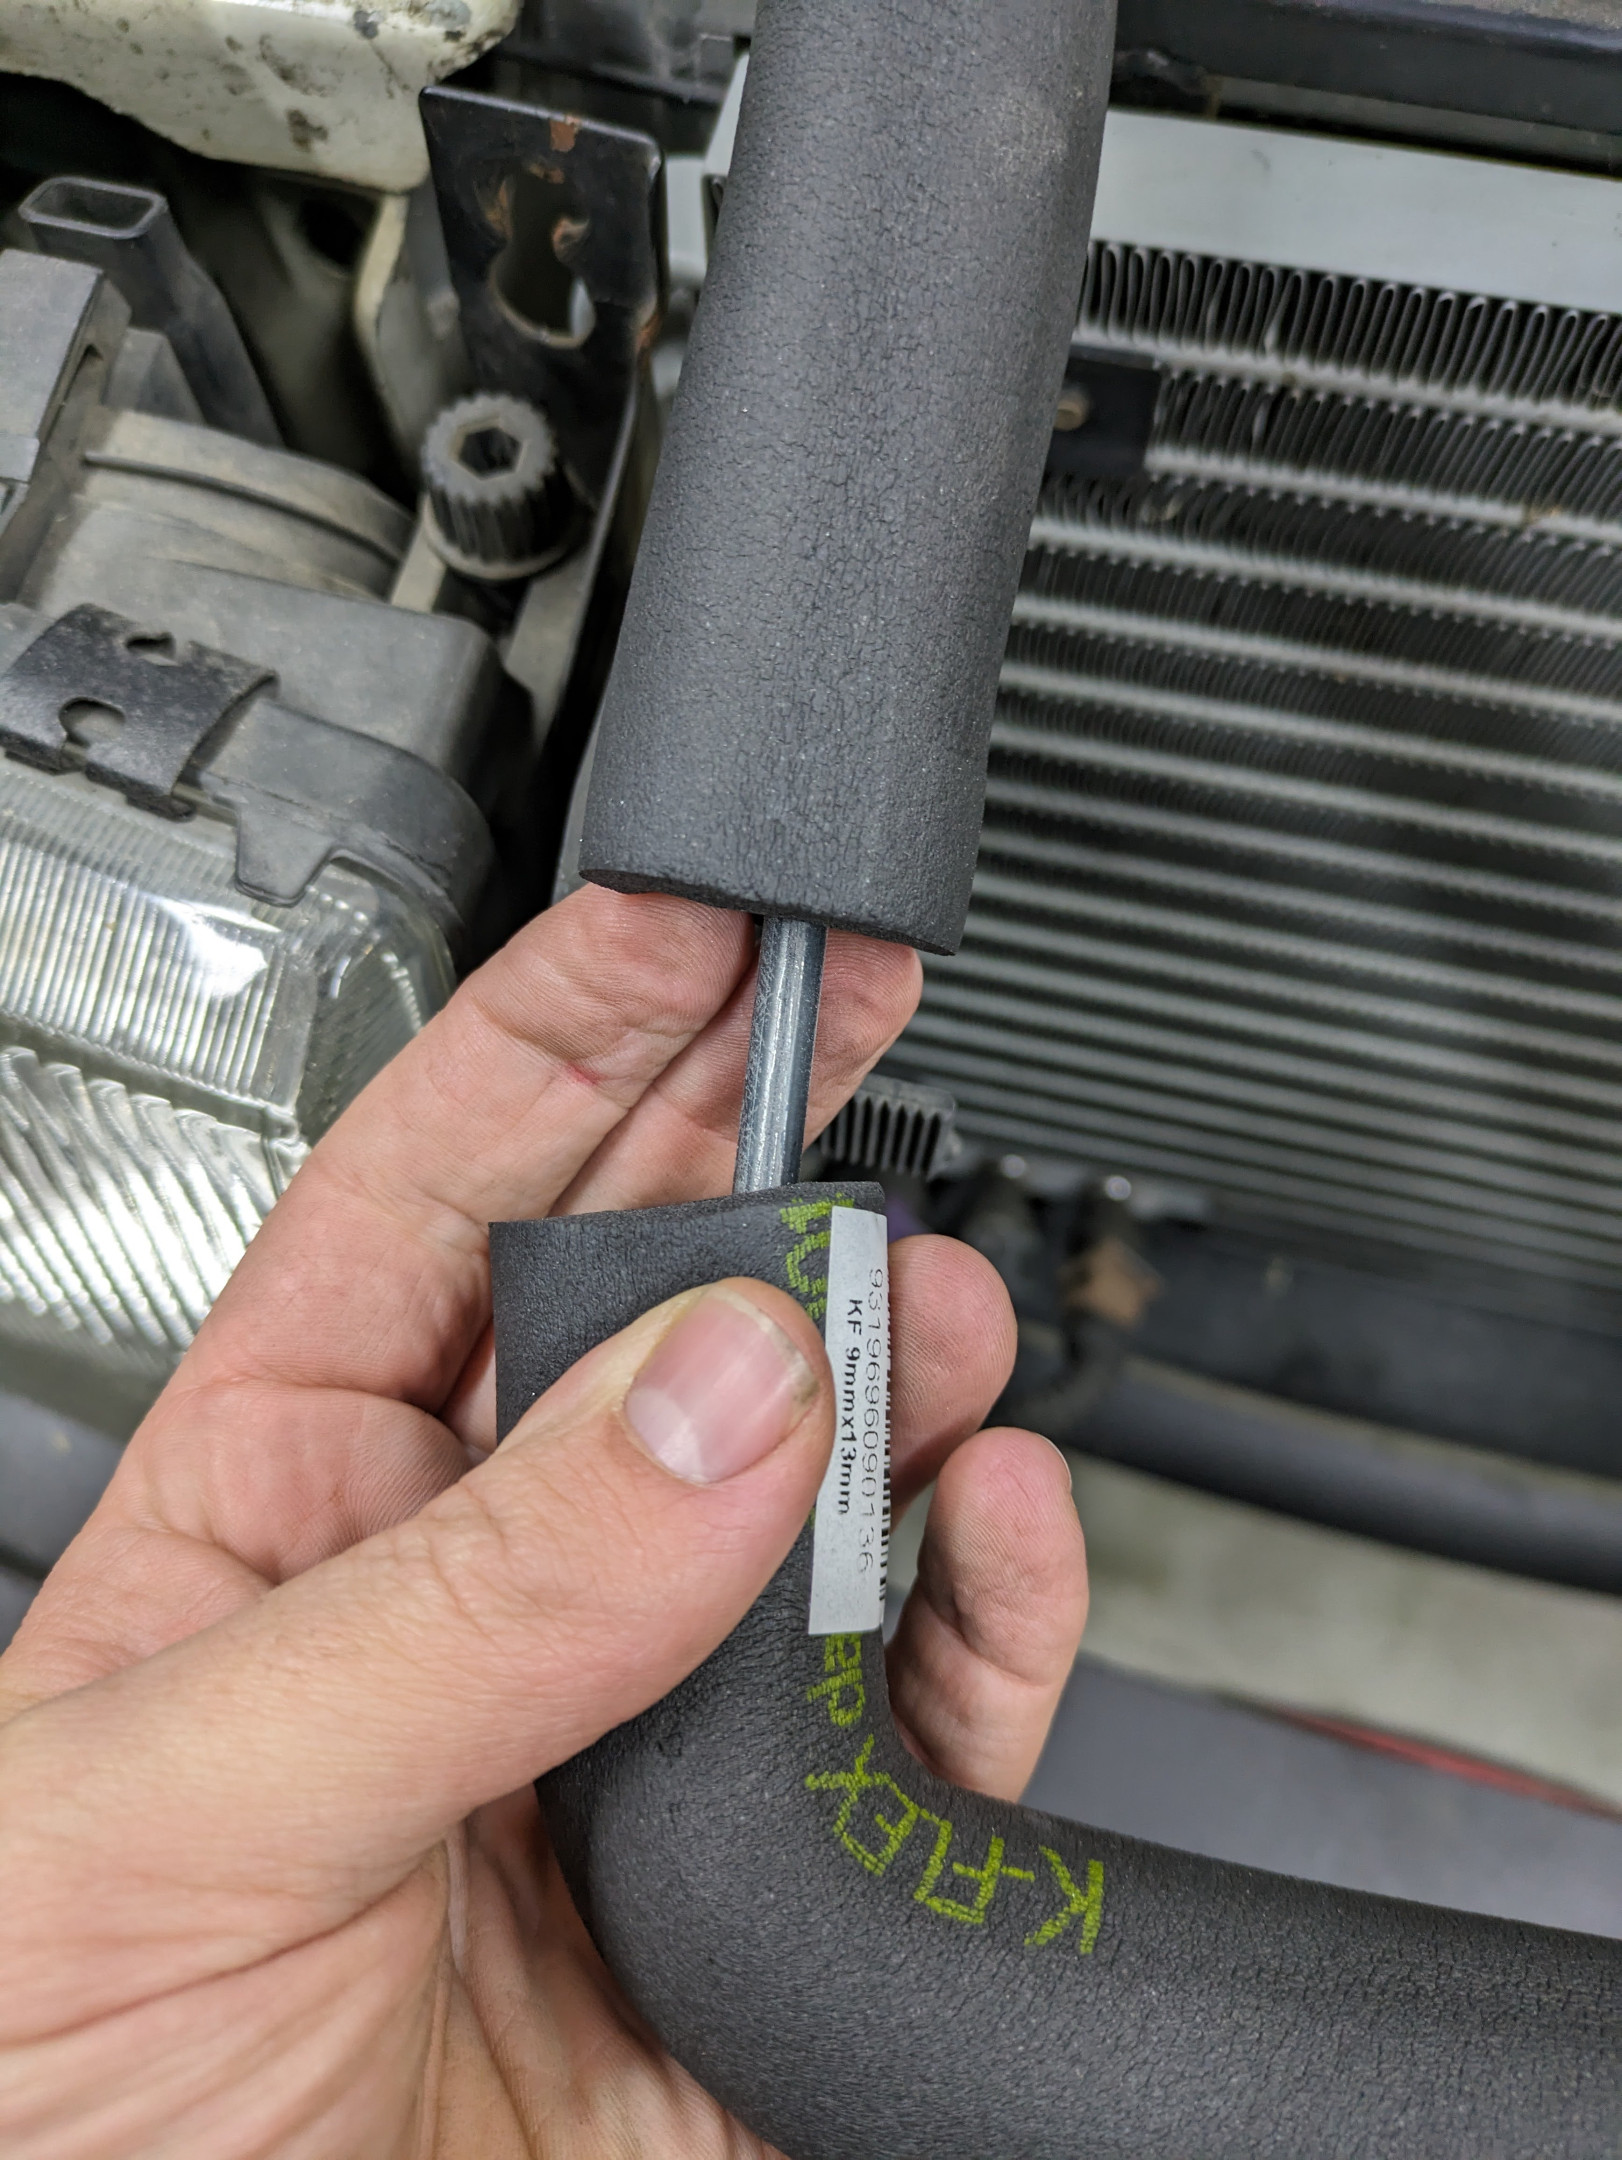
After a lot of googling and thoughts, I came across some suggestions of using pipe lagging as a DIY method of sealing up between the sandwich of the 3 components, to force air through.
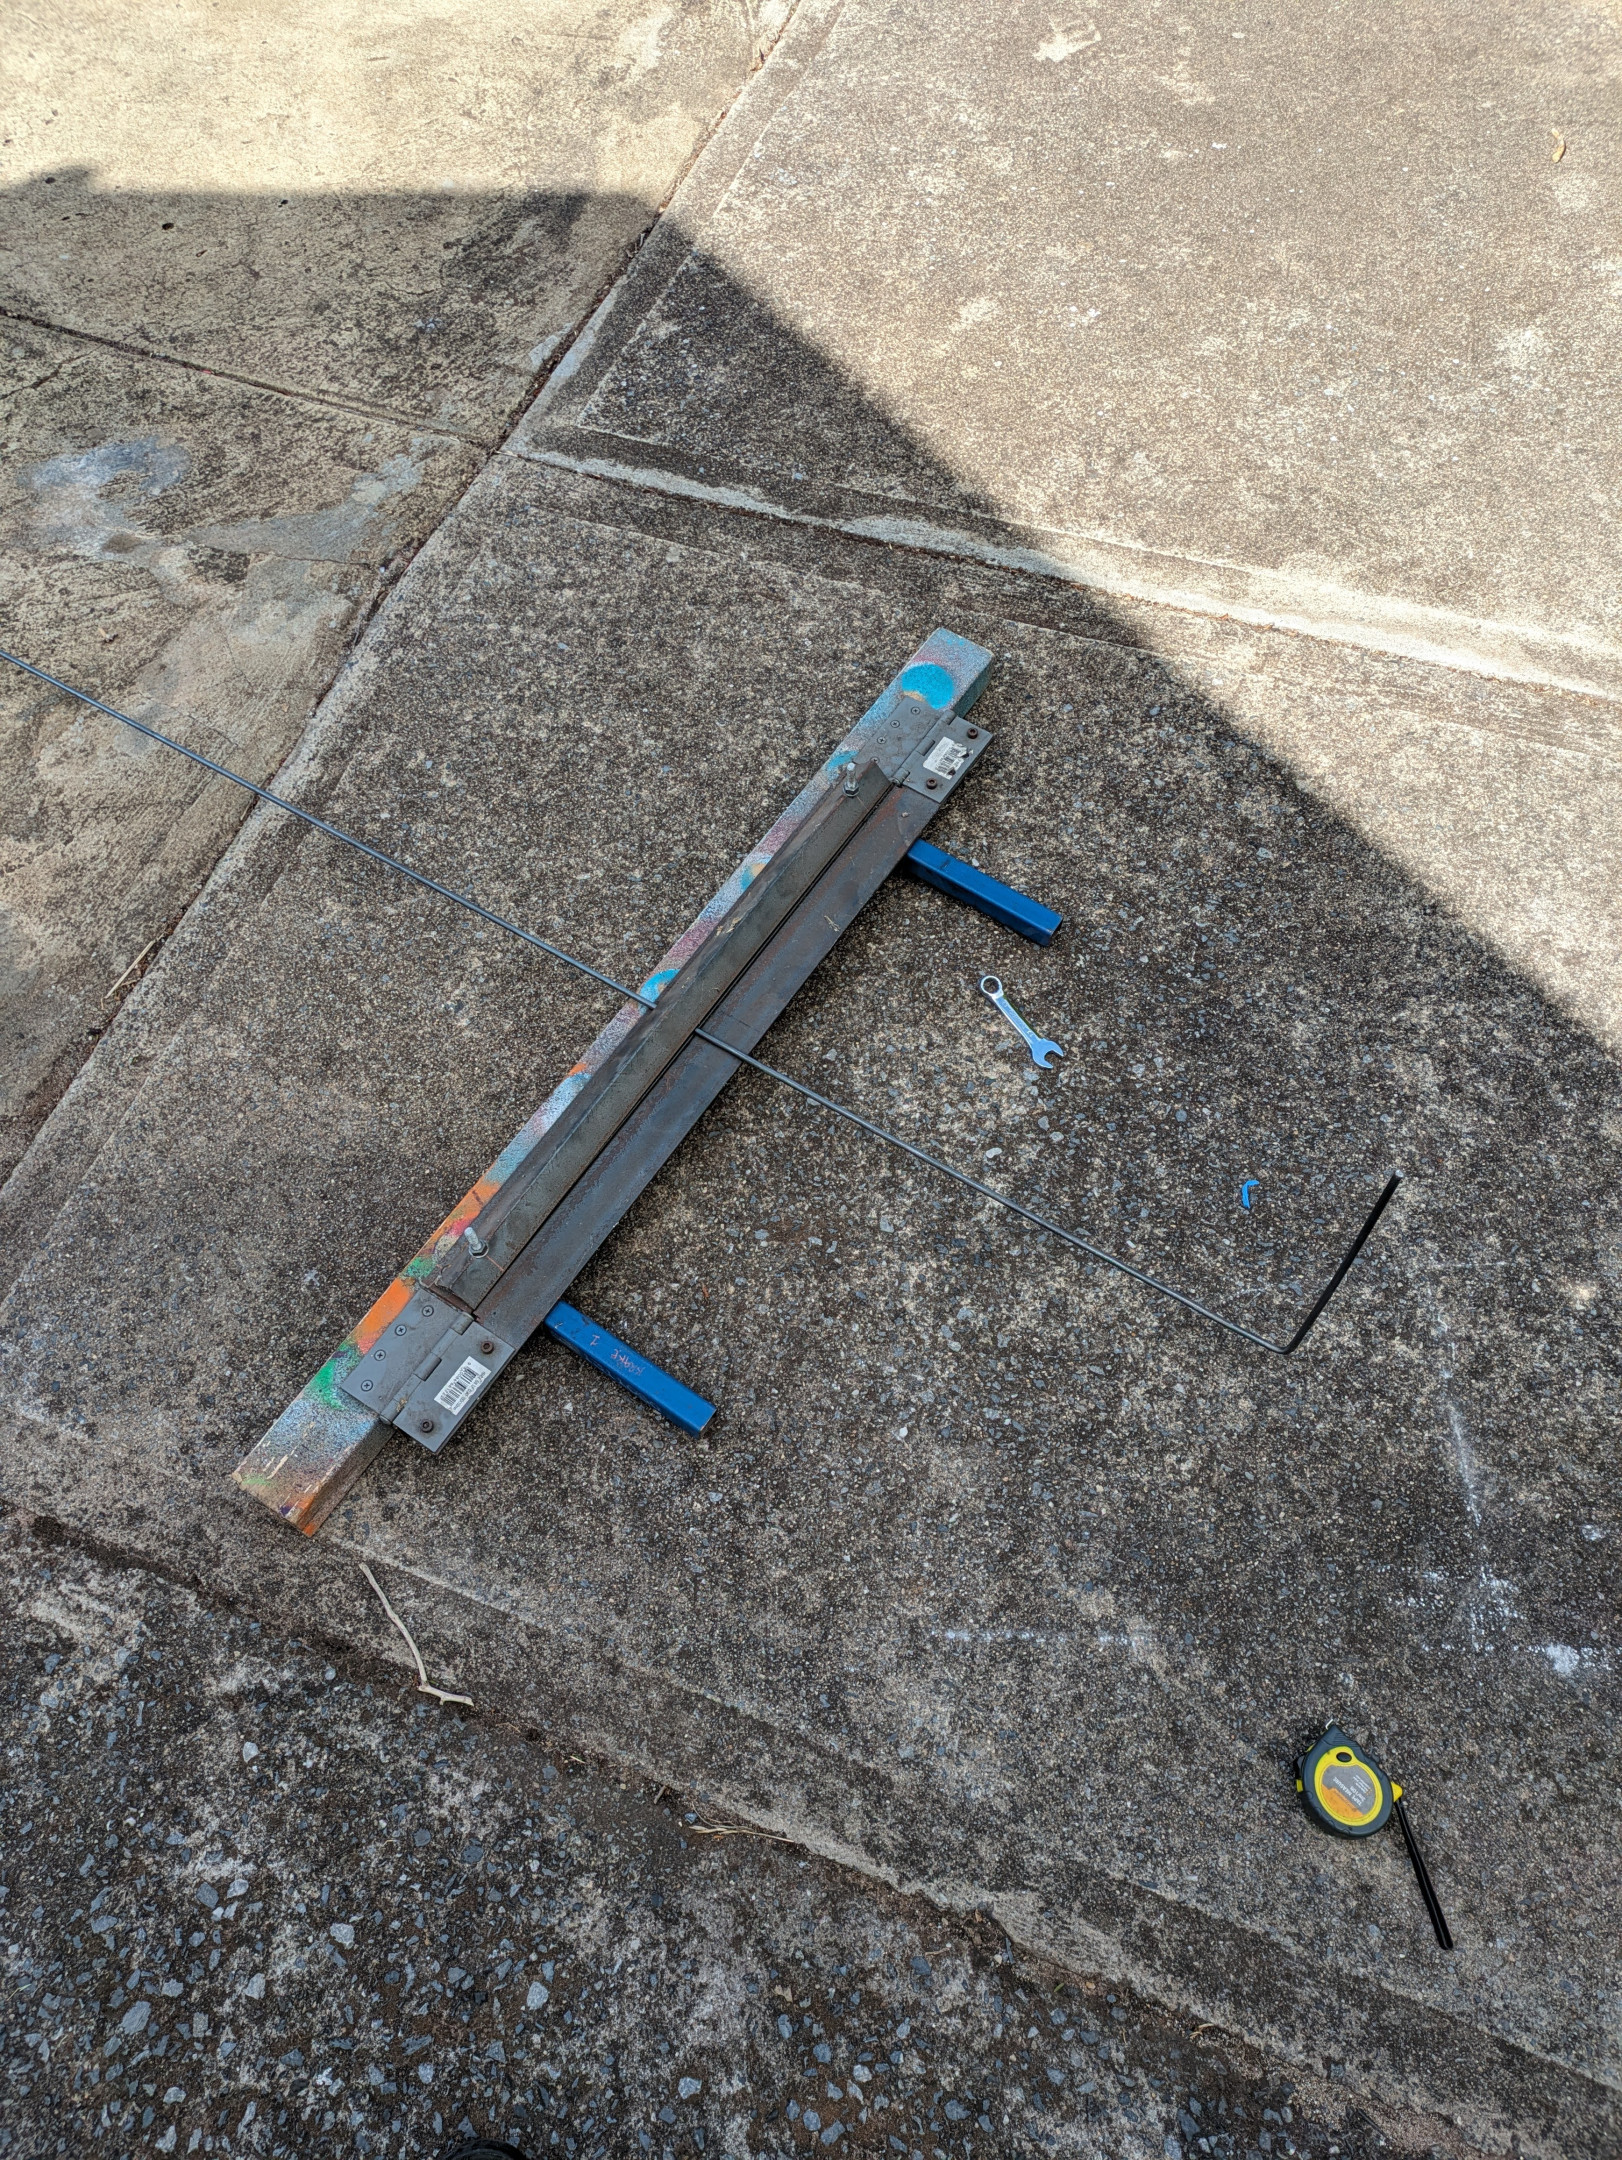
I thought I’d take it one step further and get some 6mm round steel stock from bunnings, bend it up to size with my old sheet metal brake, and weld it together after slipping on the pipe insulation.
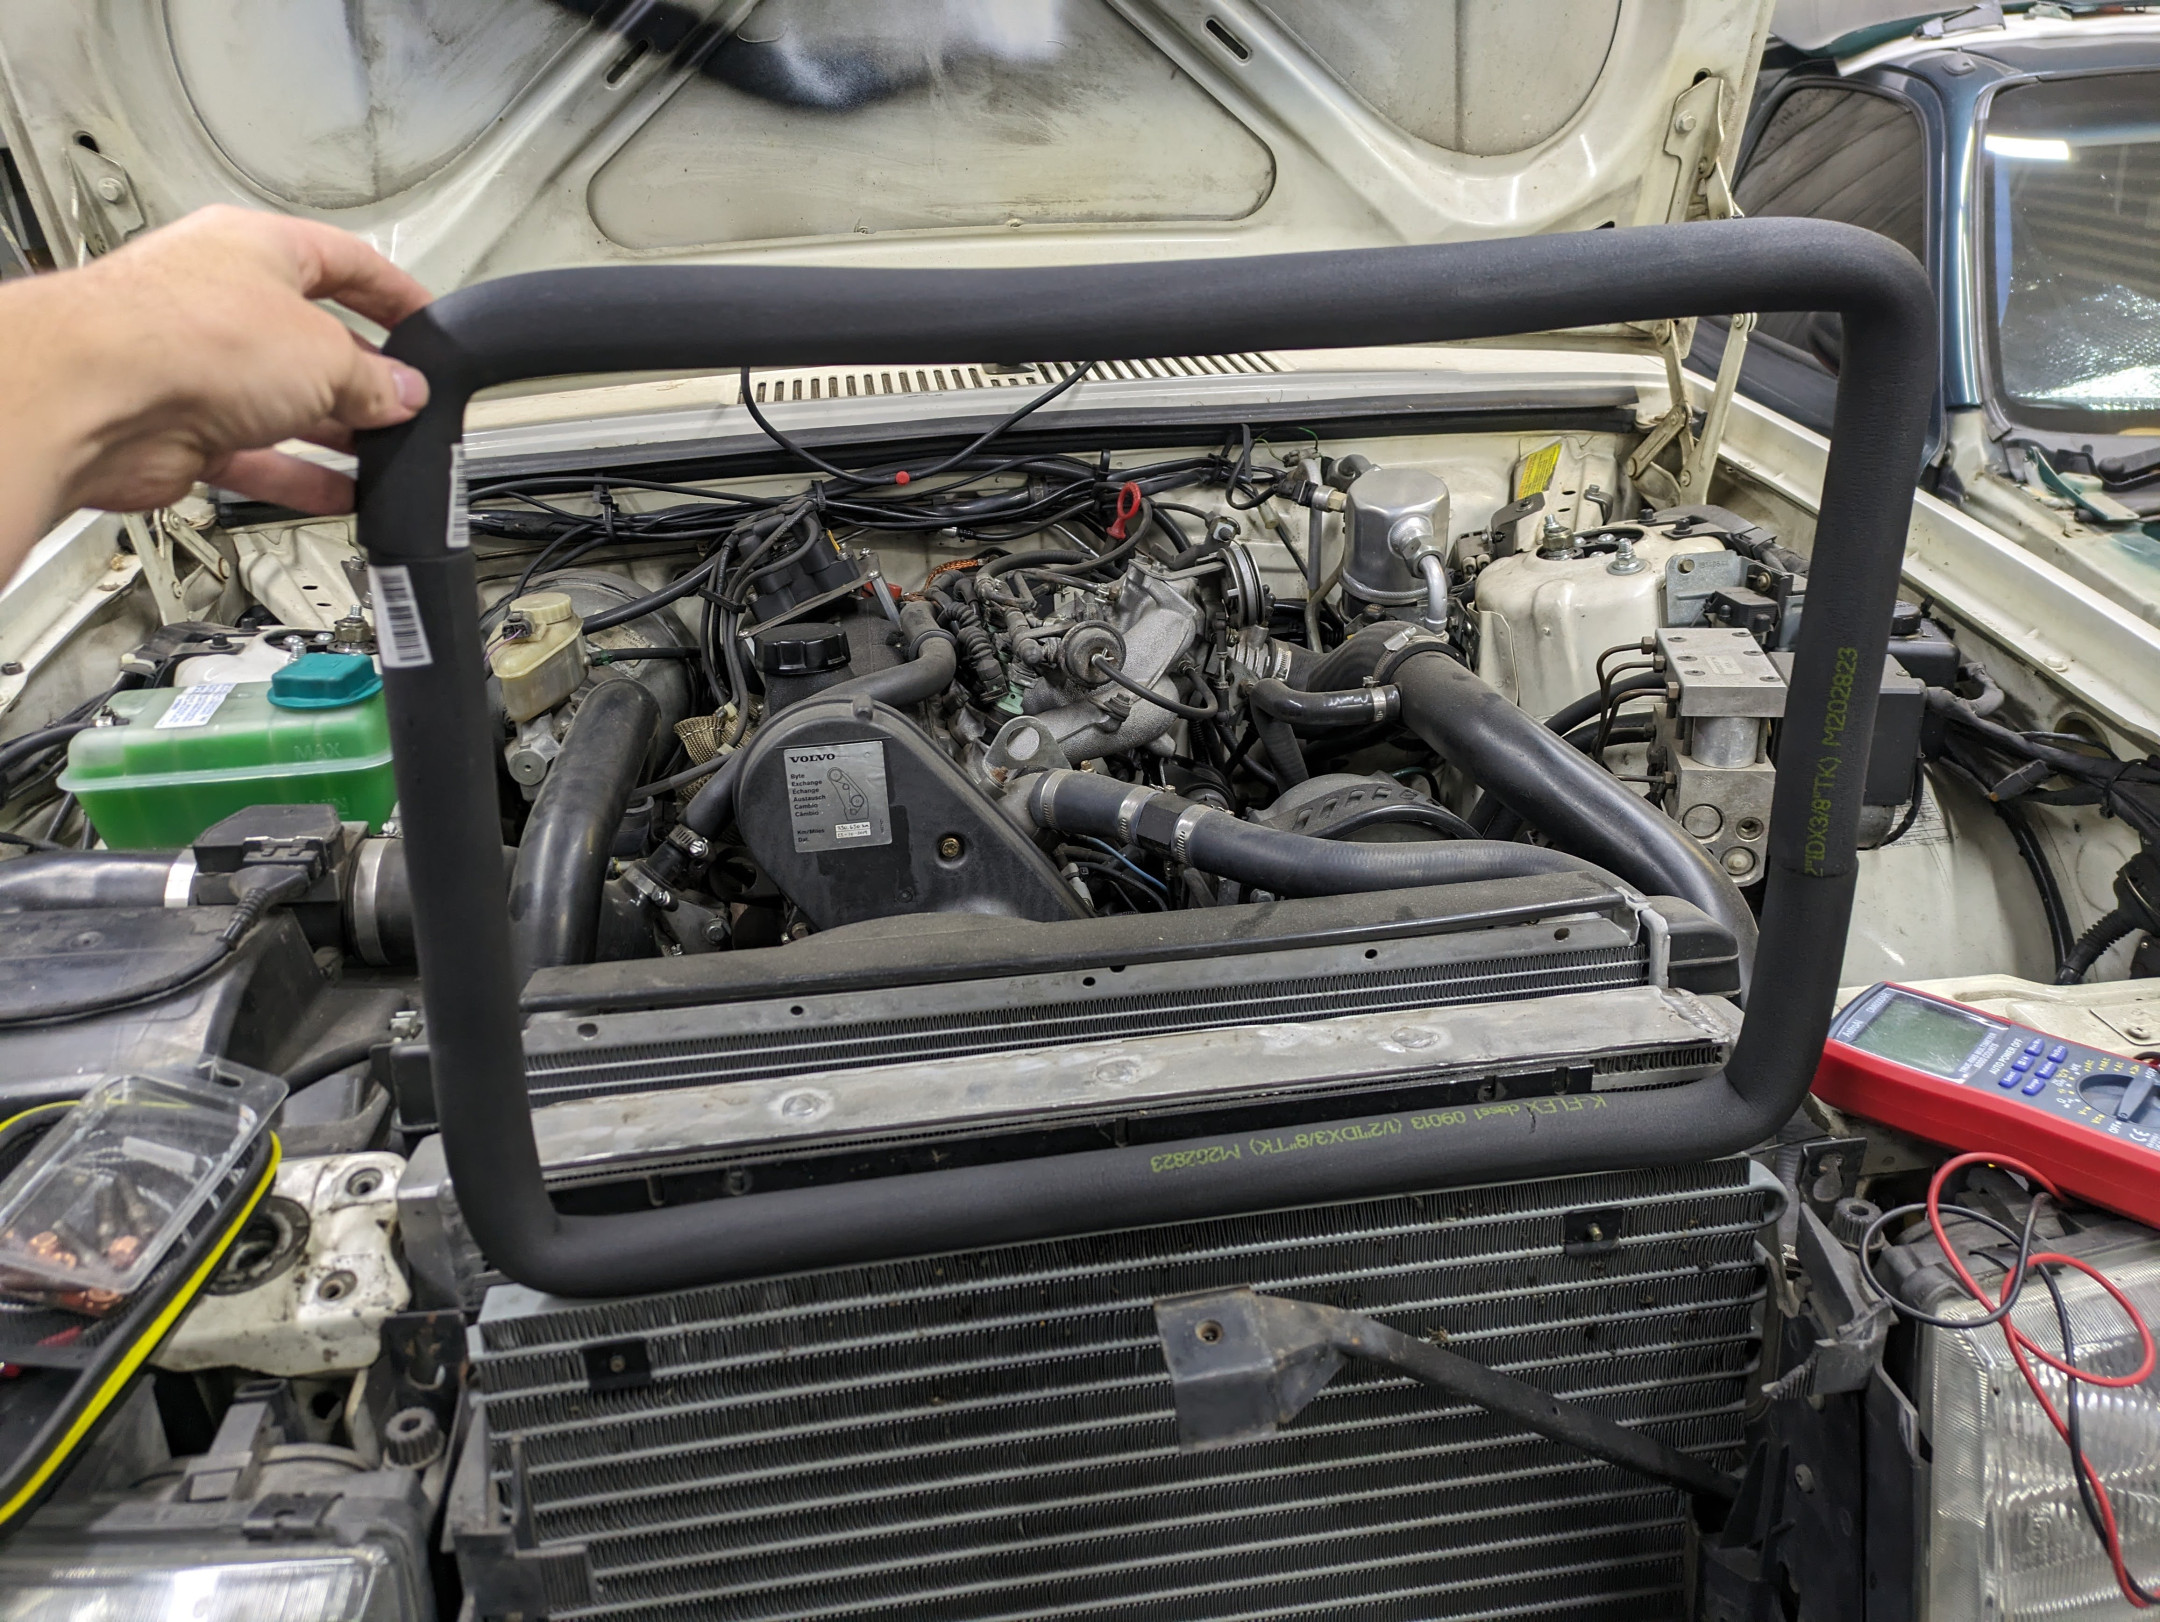
I then glued the two ends of the pipe insulation together with contact adhesive designed for foam and other stuff and slot one in between the intercooler and rad, and the other in between the condensor and intercooler.
As for how it worked? It has worked so incredibly well. It only ever cycles the fan if it’s a warm day in traffic which is night and day compared to what it was before. A+++ would recommend. For less than $20 in materials and a little bit of time, I'm so glad I did it.
