So finally dealing with that axle seal from a few posts back.

Volvo 240 rear axle RHS tube end showing inner seal

The old one was pretty cooked, the seal lip is hard

Volvo 240 inner axle seal old and new

The outer seal is in better condition, which I'm grateful for because it means I don't need to pull the wheel bearings.

I ran out of lunch break so I'll come back to this tonight, just need to clean the wheel bearing and re-grease it then slap it back together.

a month later

Finally got around to a small job, replacing the mesh under the driver's seat. The old one was well and truly done.

Volvo 240 driver's seat underside

(PS yes I did fix the tangled up seat support up the top of the photo before installing the seat again)

    2 months later

    Image description

    Caved and got an R-Sport cluster. To be honest, what put me over the line is that I can't easily see my speedo with the original cluster, due to a combination of my height and the small steering wheel. This cluster is much better, although I think I am still going to extend the seat rail another inch or two back.

      I’ll repeat my comment from the other thread … “sexy”! 🙂

      What’s the go with the seats? I’ve definitely sat in older 240’s where you can slide the seat back so far a 6’1” person such as myself with disproportionately-long legs can’t touch the firewall even with tippy-toes, but I’ve also sat in 240’s (I think 1986+) which I assume are more like yours?

        Forg I'm 6'5", which I think makes all the difference here. In autos it's less of an issue, but with a clutch it's just plain awkward to hit the pedals, and if I'm not careful it can be difficult to actually get my foot on the brake pedal. I usually drive with my shoes off to get the extra bit of clearance. Smaller steering wheel solves it but, because the column has no adjustment, now I can't see the cluster unless I tilt my seat well into the steeze zone. I prefer to sit fairly upright while driving so getting the seat further back seems the best next step (or putting in a nice set of Recaros but they're crazy money these days).

        One of my mates in Brisbane is 6'8", 240's were about the only cheap old proper-car he used to fit into(*), for the reason that the seats (and we were talking about older ones) went so far back that even he could just about straighten his leg with foot flat on the firewall (and plus the seats have the up/down adjustment to give enough headroom).

        You'd probably have looked into any seat-base differences ages ago by now, I only raise this 'cos if a 6'8" person can fit comfortably into Car A and a 6'5" person is tight in Car B, and the two cars are very very similar (without knowing exactly what year or trim-level Car A is/was unfortunately), there might be some sort of arcane/obscure seat-base or mounting or rails/runners difference.

        PS. I don't think the Recaros would necessarily help, I'm using Toyota Smurf Recaros with oddly-affordable-at-the-time new Recaro rails/mounts and I don't think there's any more room than stock - you'd have to fiddle with them too methinks.

        (*) Oddly/aside - he was also comfy in the first generation of Renault Clio 2dr they sold in Oz - you could adjust the front seat to touch the back seat, and the front-seat was almost on the floor when you did that. 🙂

        James. There’s a guy in America that makes something for the 240 seat rails that spaces them back 2 inches I think. I’ll find out who it’s from and let you know if you’d like. I’ll be getting a set for my drivers seats. I put a 350mm steering wheel in and I can’t see all of the Speedo which isn’t ideal.

        Yeah I know the product you're talking about. It would be something like $400 landed, it's much cheaper for me to make my own given I'm pretty sure I already have all the materials I need in the workshop. I just need to get around to it!

          They look the perfect mix of retro & race-car … it’s the sort of thing which you saw in 70’s race cars, and yet it’s a factory part, so Smurfy!

          jamesinc Caved and got an R-Sport cluster.

          Oh man that looks sick!

          (I've just worked out how to use quotes on this forum)

          4 days later
          23 days later

          So today I got loads done, and now I'm exhausted. Put 70km of city driving on Momo after changing the shocks, bleeding the brakes, and replacing the rear spring upper bushings.

          Image description

          Image description

          Image description

          Image description

          Car rides so much better on the HDs, it had too much spring for the OE-spec KYB shocks (PS if anyone wants a pretty much new set of 4 x KYBs for $120, DM me).

          4 months later

          Replaced the passenger side axle inner seal today, I did the driver's side a few months ago but procrastinated on this one as it hadn't failed. Still, glad I did as it was pretty stiff. I also threw some new parking brake hardware on which has eliminated an annoying clunk, the old parking brake shoes were binding up or something, I'm not surprised the springs were rusty, I pulled on one with my pliers and it deformed really easily.

          Image description

          Image description

          Didn't take many photos unfortunately. I gave everything a thorough rinsing in brake cleaner, buttoned it back up, adjusted the shoes, and haven't been able to reproduce the clunk since, happy days.

          Next task, a clunk has started developing on the front left corner, need to investigate what's going on. The suspension is pretty fresh, I'm wondering if maybe the gland nut on the shock has backed itself off a bit. Stay tuned for the thrilling conclusion!

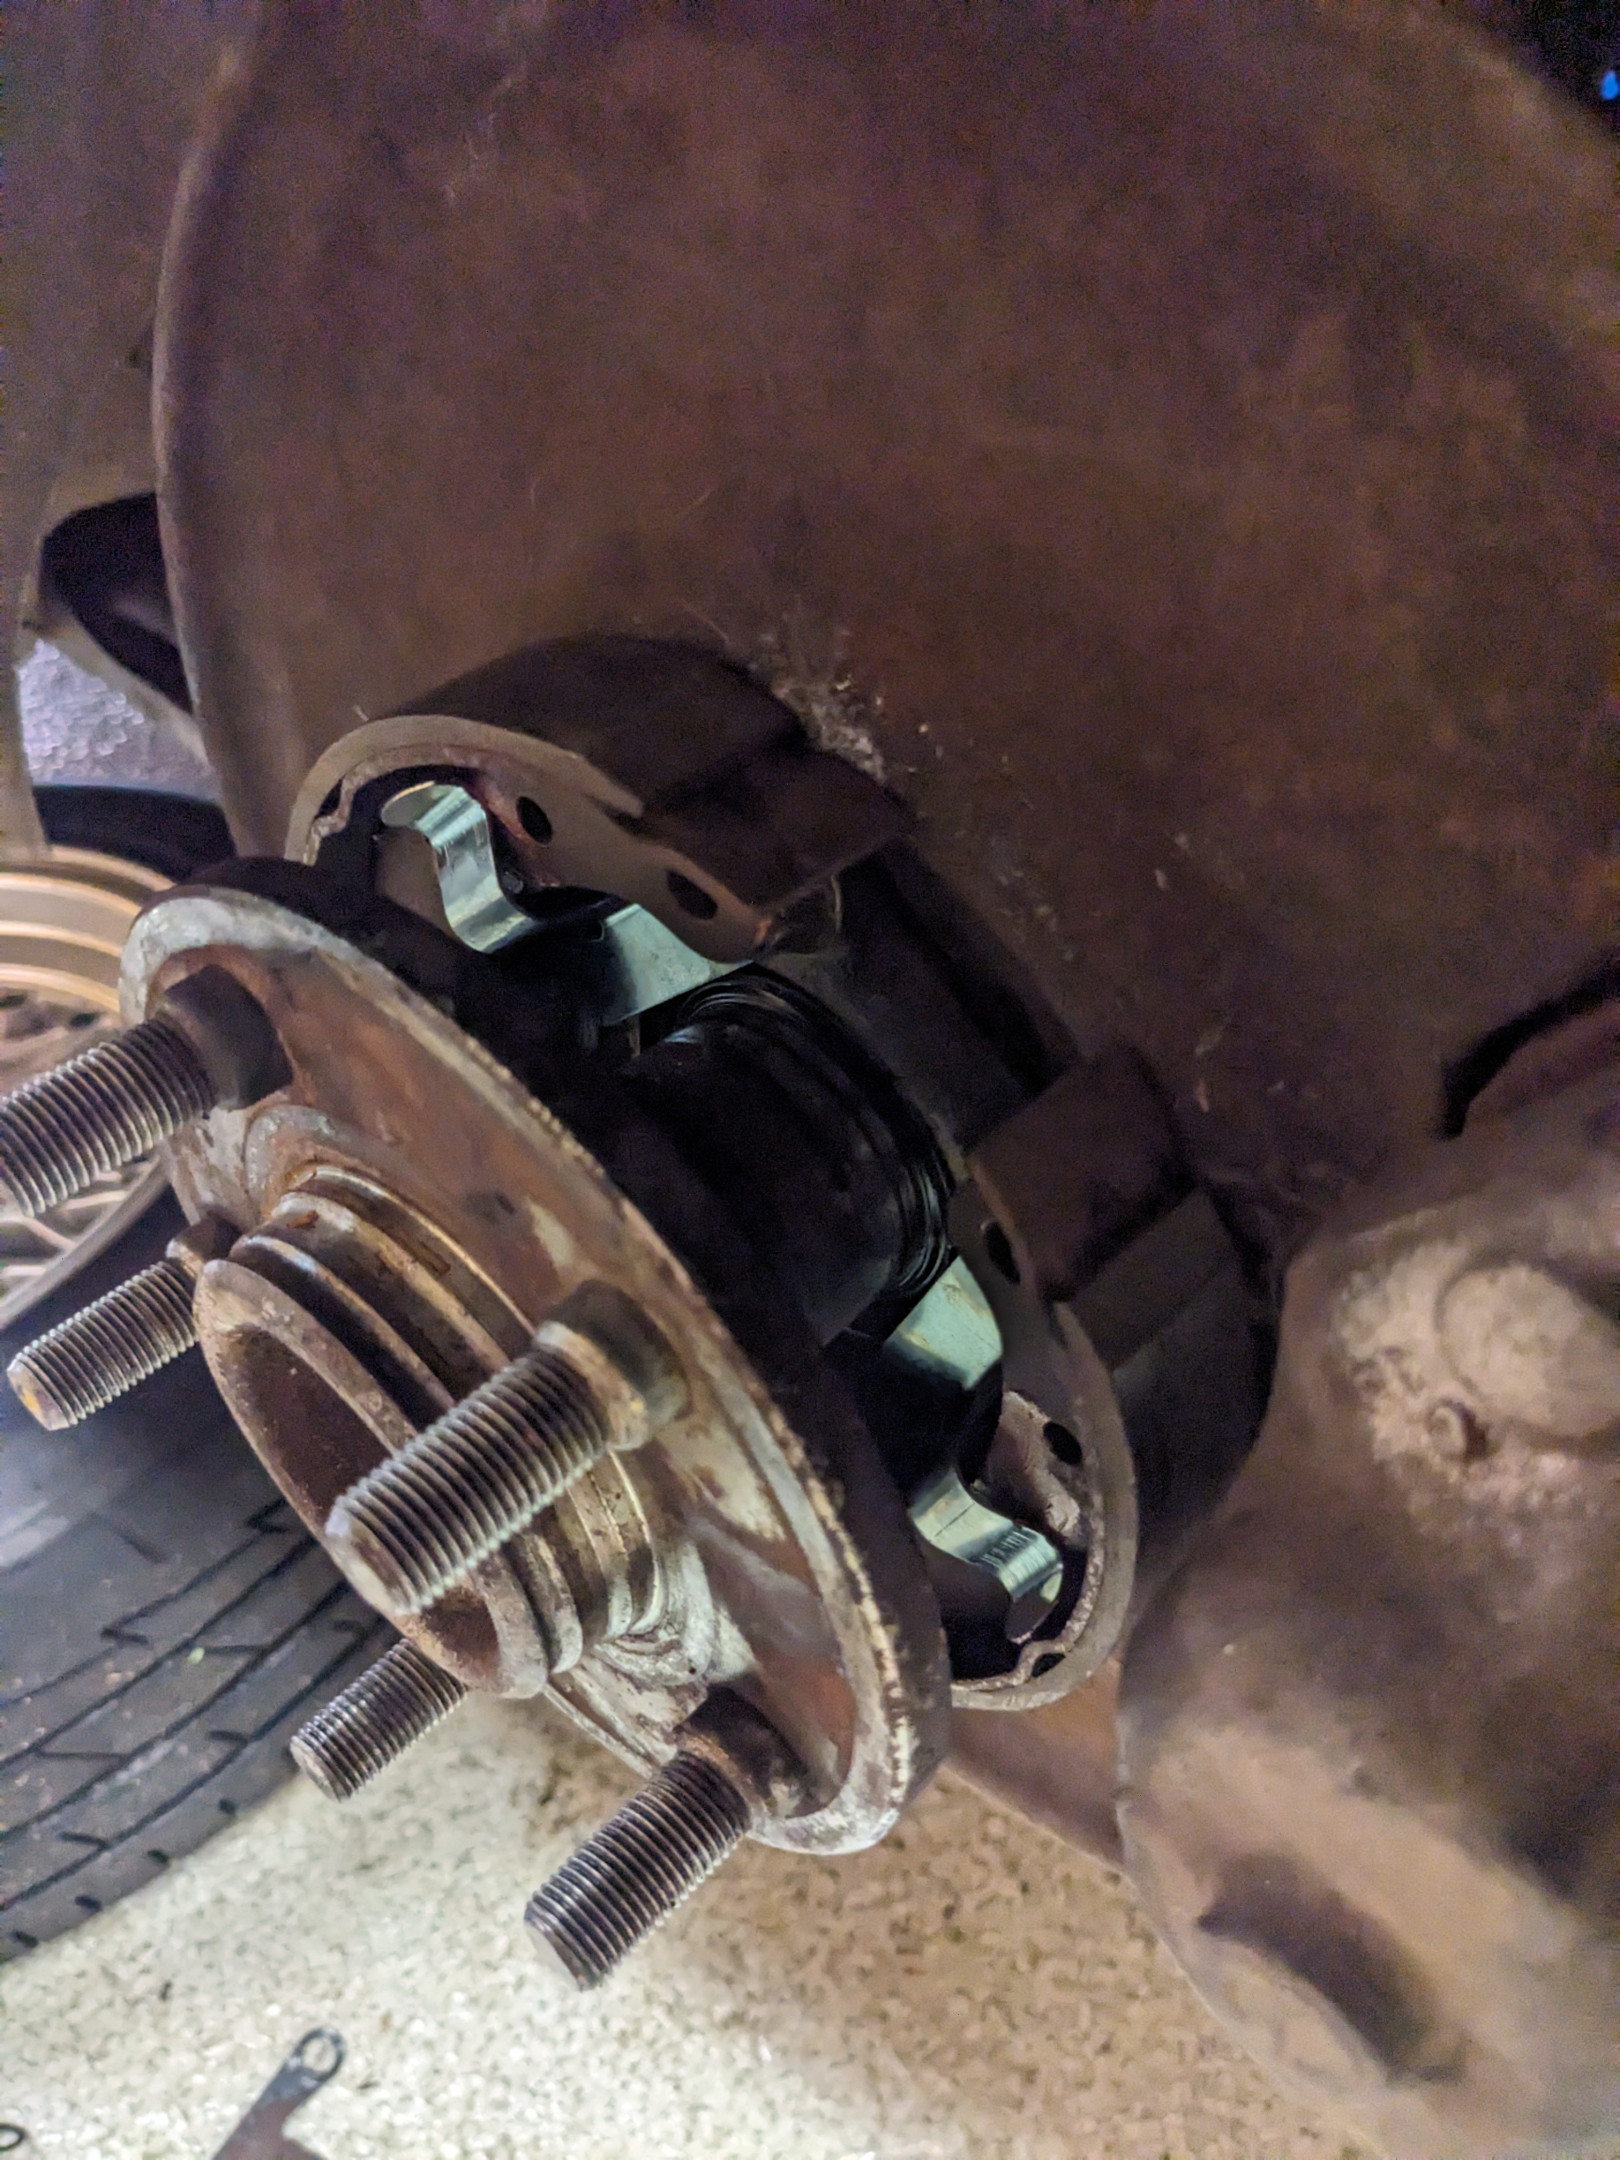
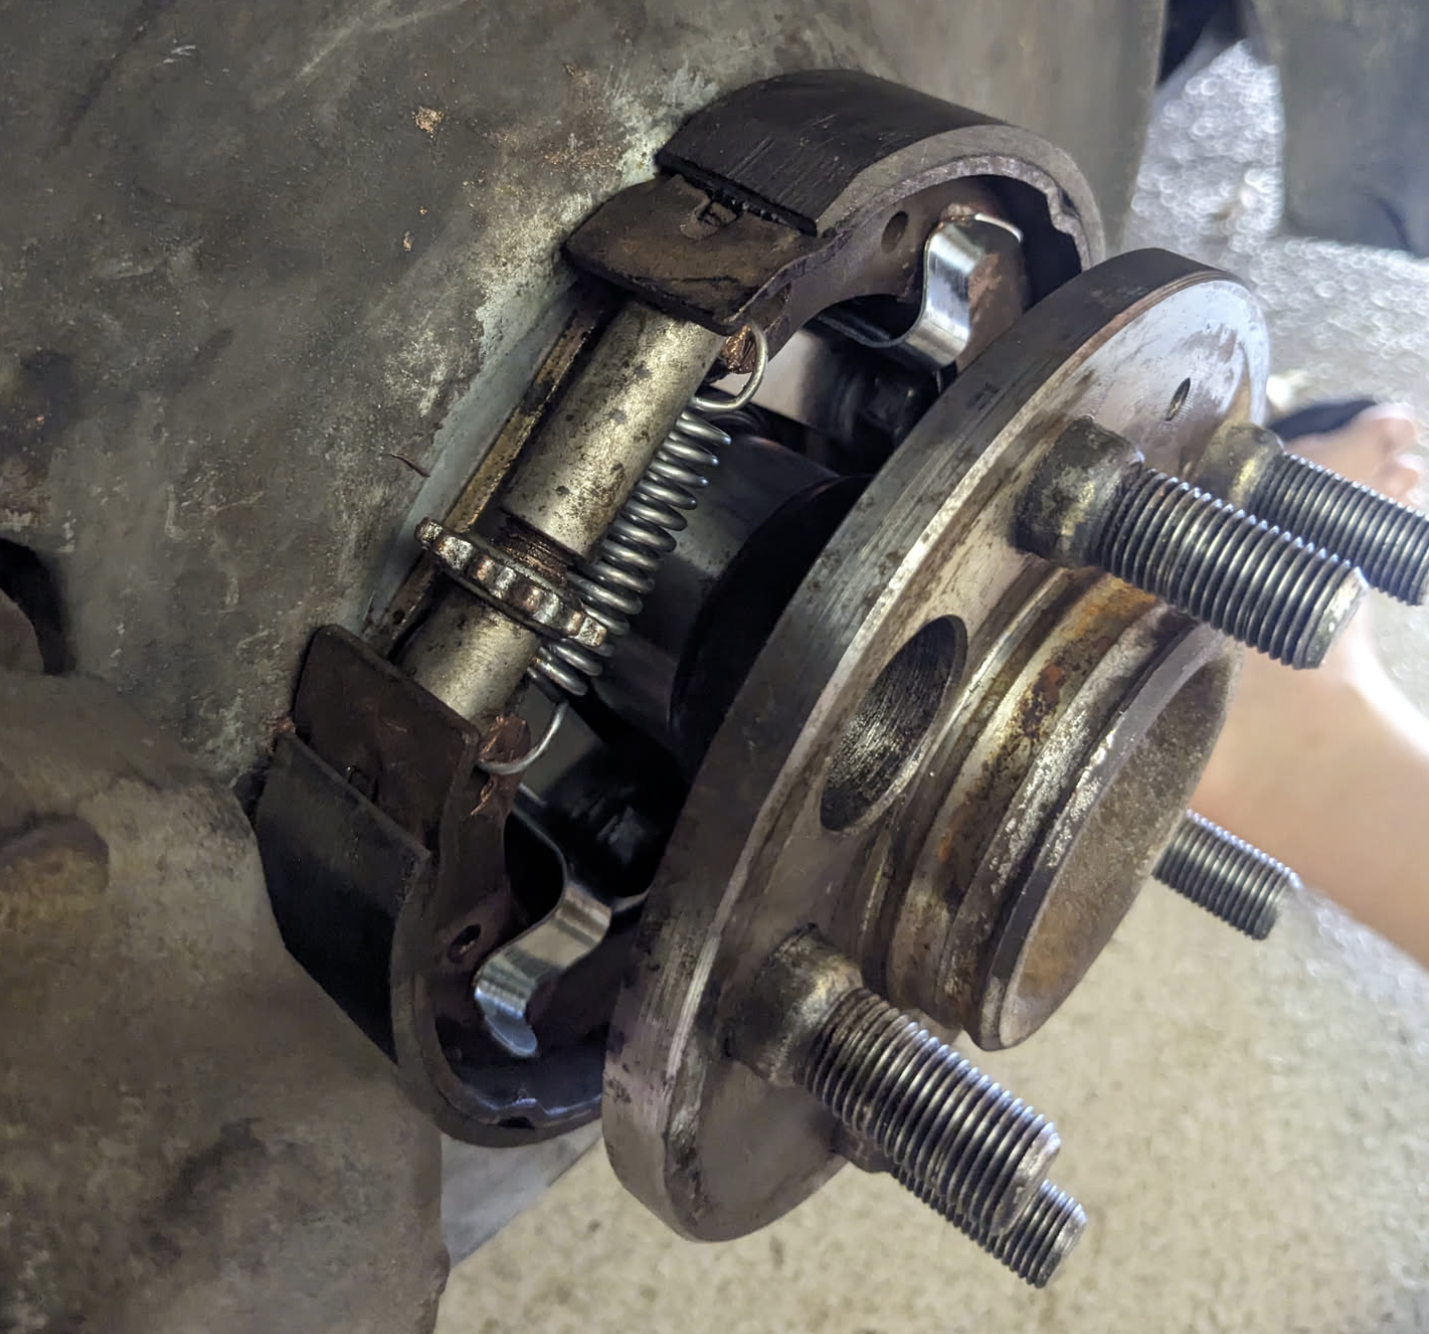
          I went back to the driver's side handbrake to replace the hardware there too:

          Image description

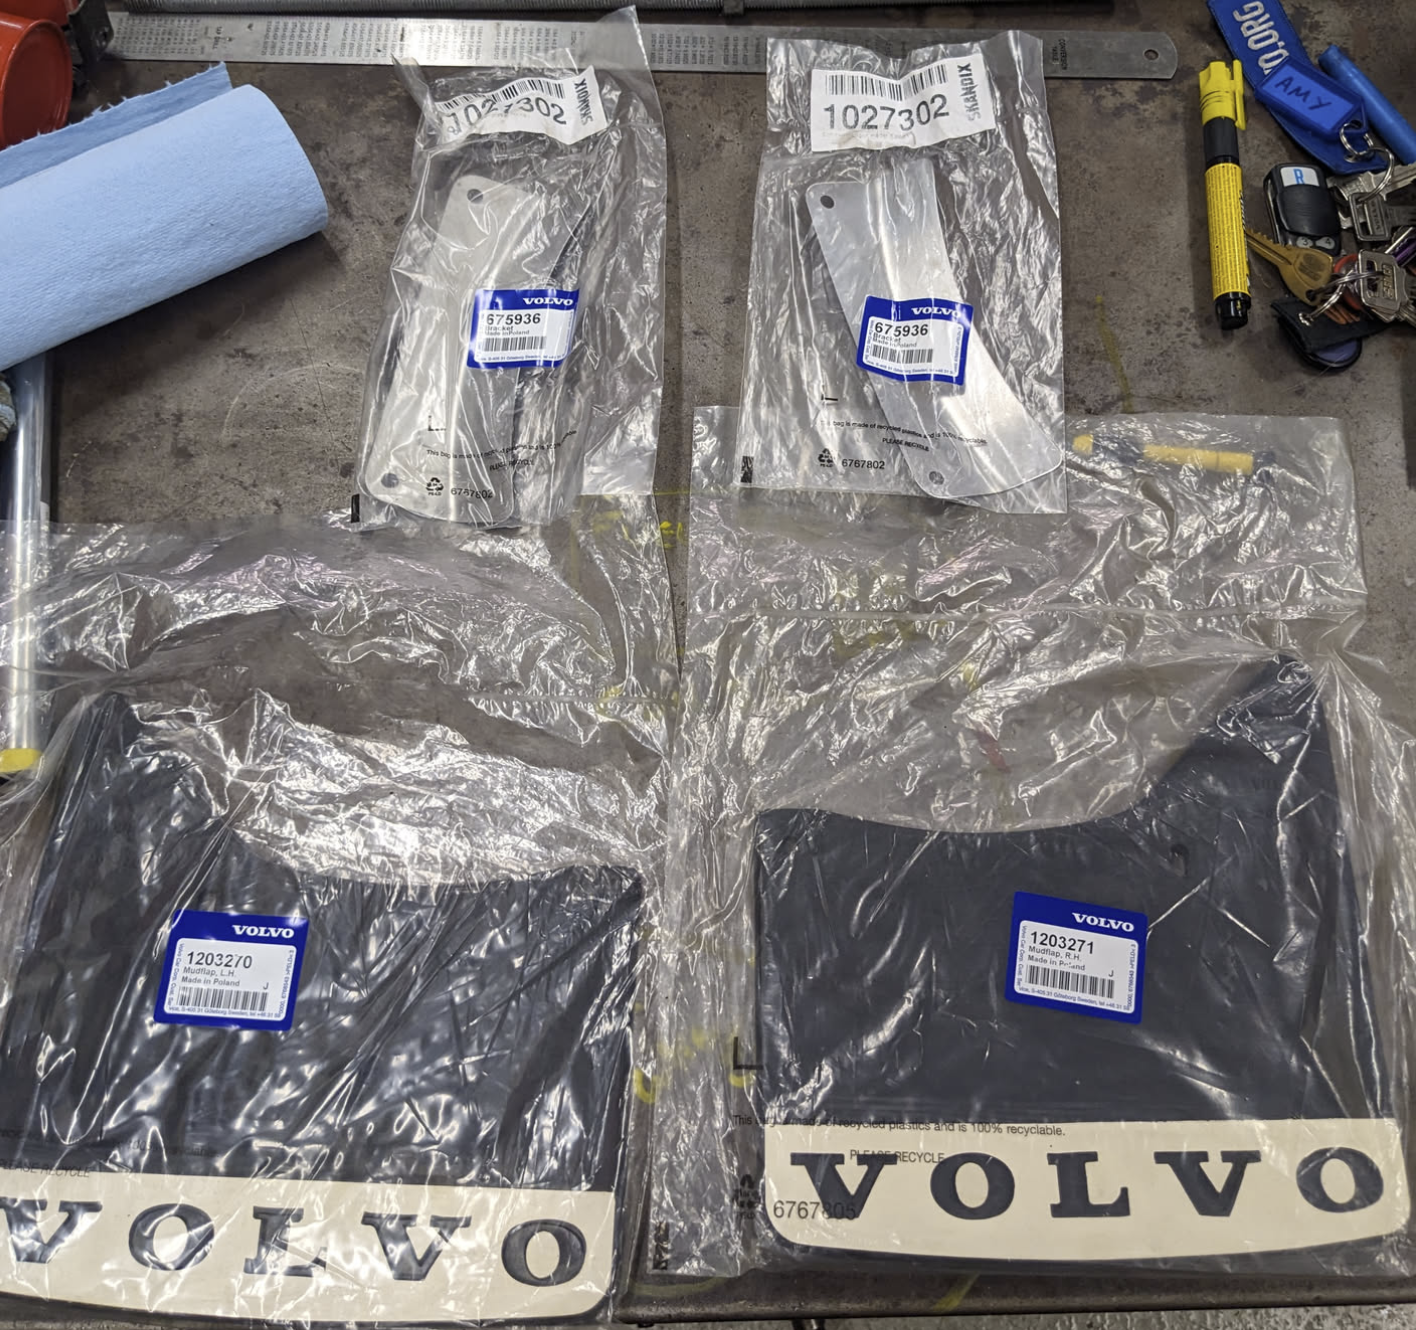
          Onto the next thing - at some point in the past, the rear mudflap brackets were cut. I originally just made up an extra bracket but it wasn't up to the abuse and the mudflaps were falling off after less than a year.

          Image description

          So, I opted to do it properly and weld on new brackets:

          Image description

          I scraped off the underbody coating and marked the spot welds out:

          Image description

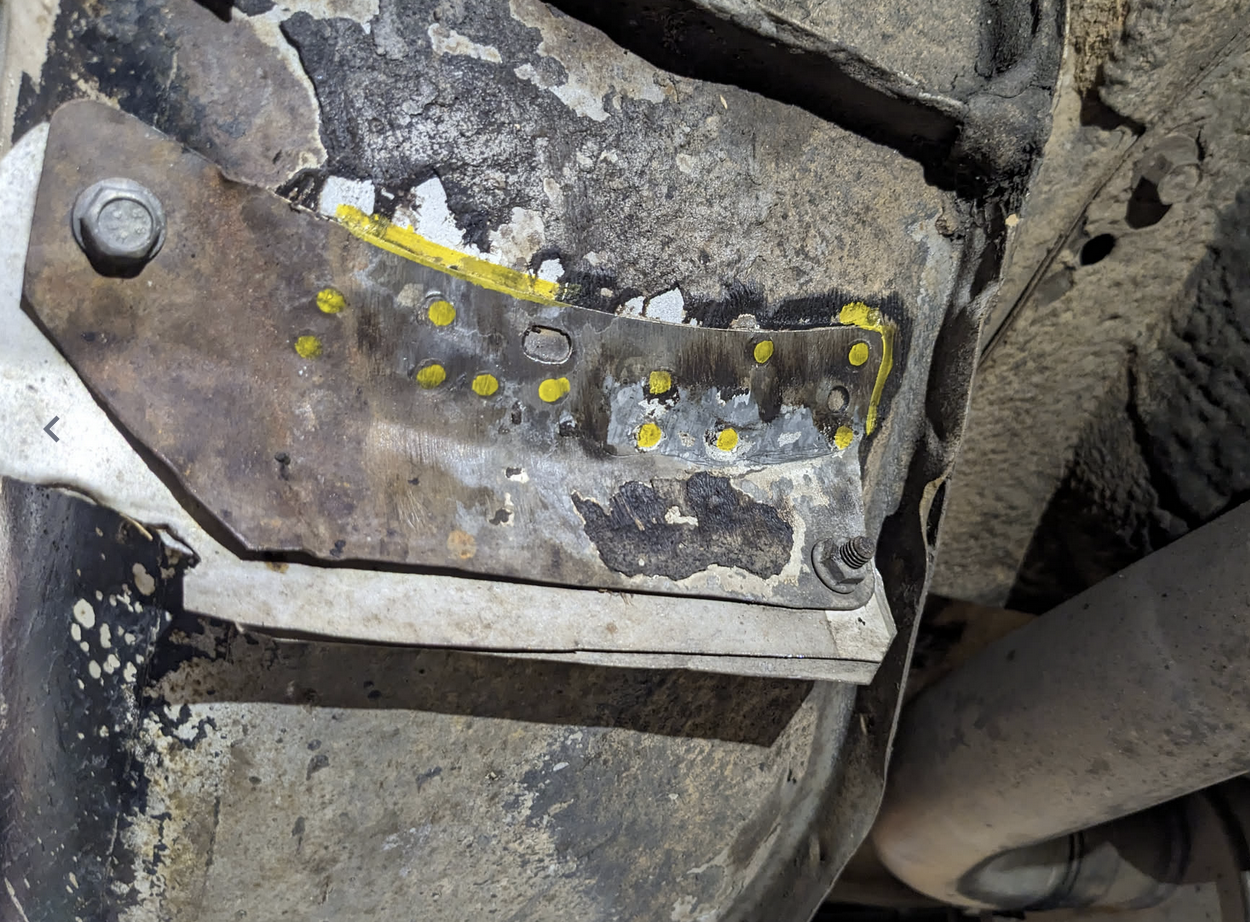
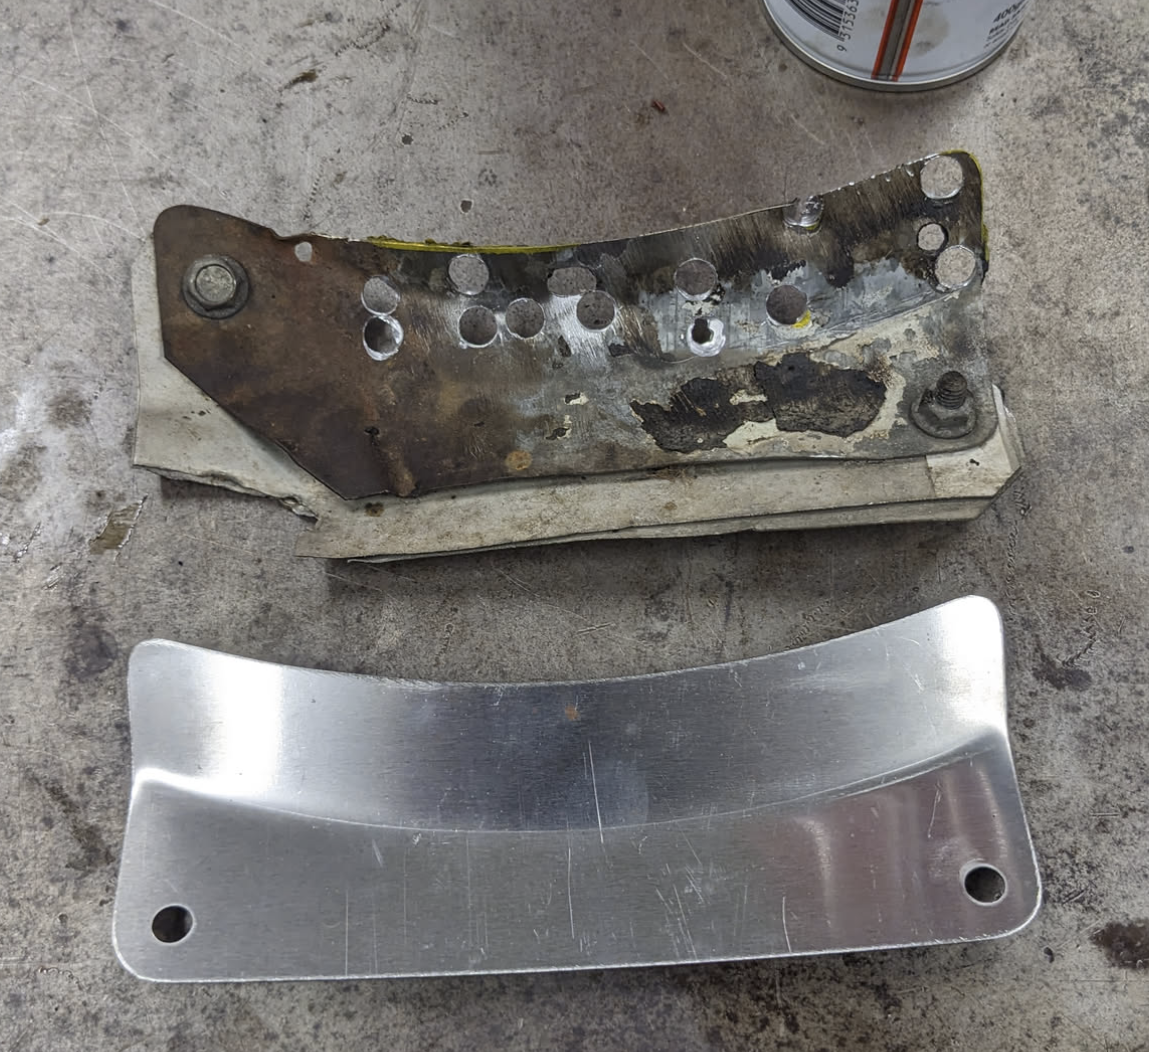
          I drilled out the spot welds using a spot weld drill bit, and separated the old brackets:

          Image description

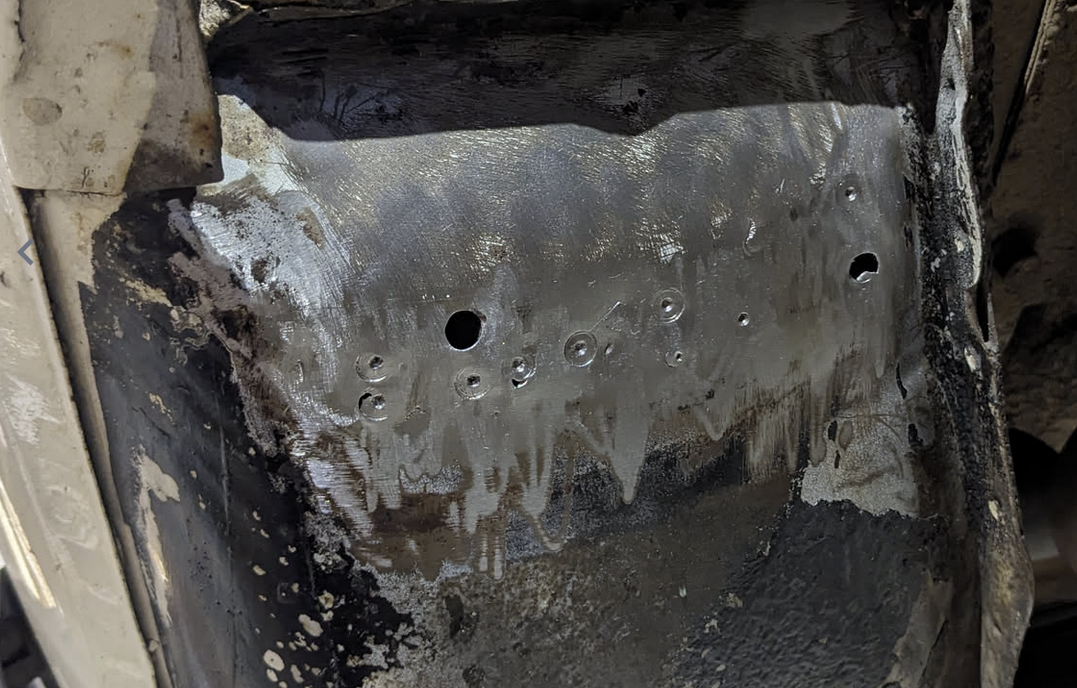
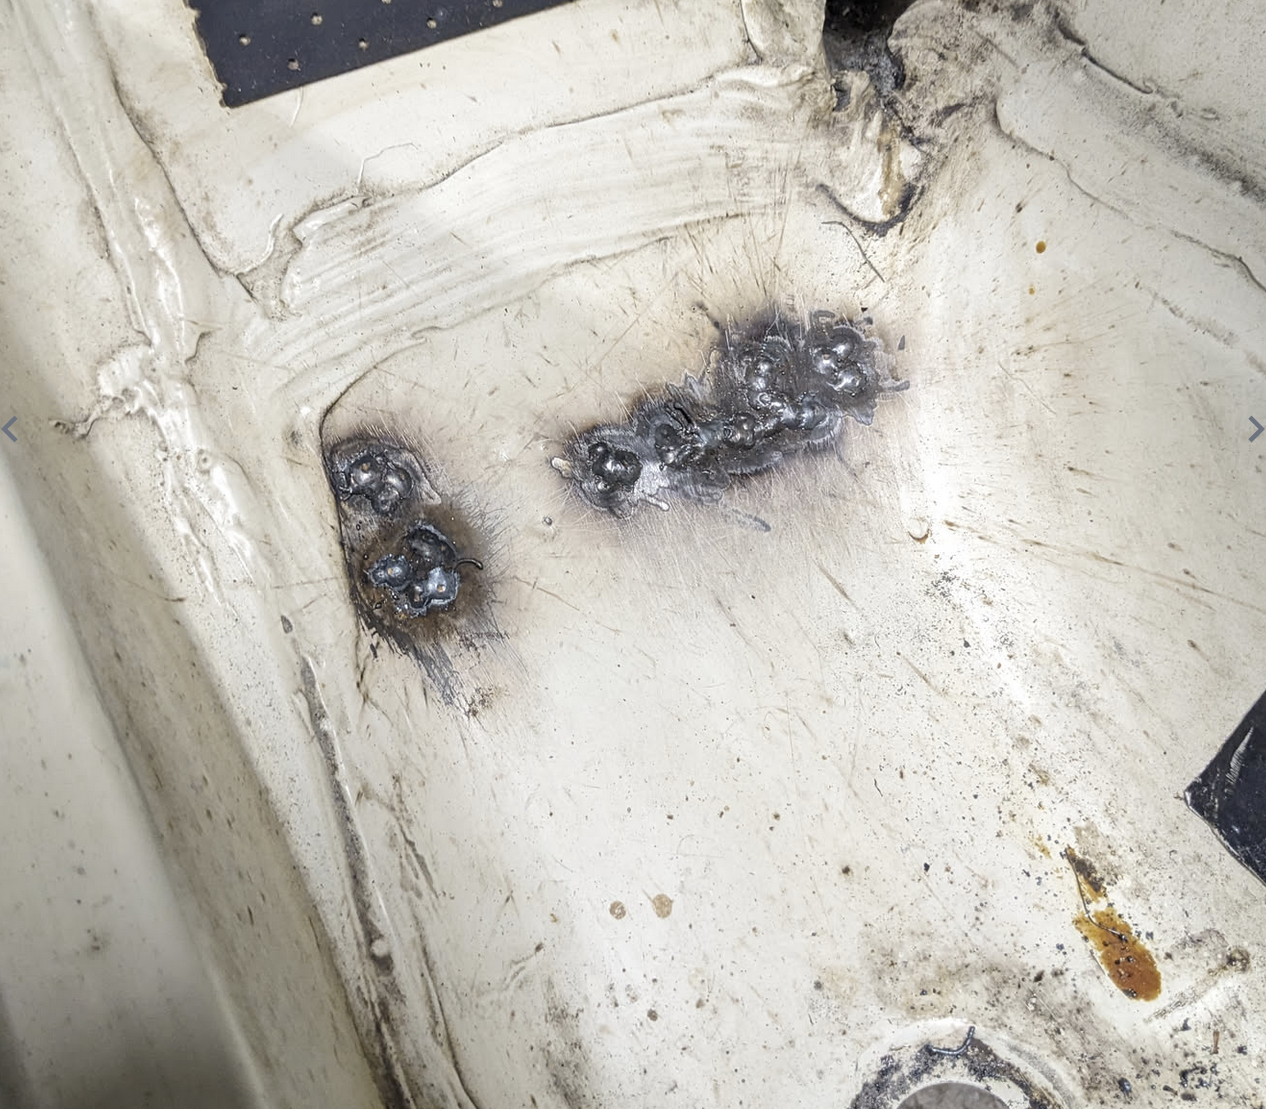
          I drilled too deep in a couple of places and went through the body:

          Image description

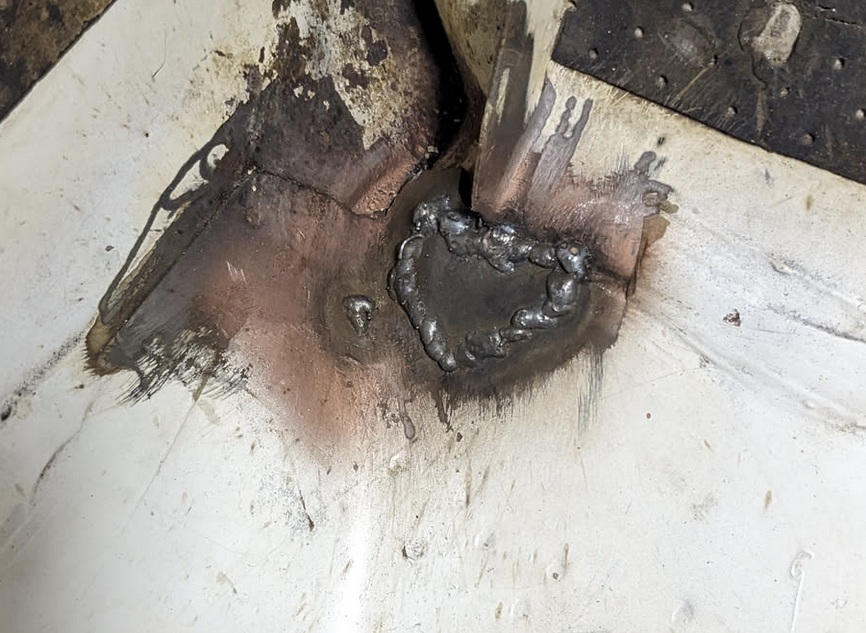
          Over on the passenger side, I found some rust I didn't know about, and decided fixing it was worth the scope creep:

          Image description

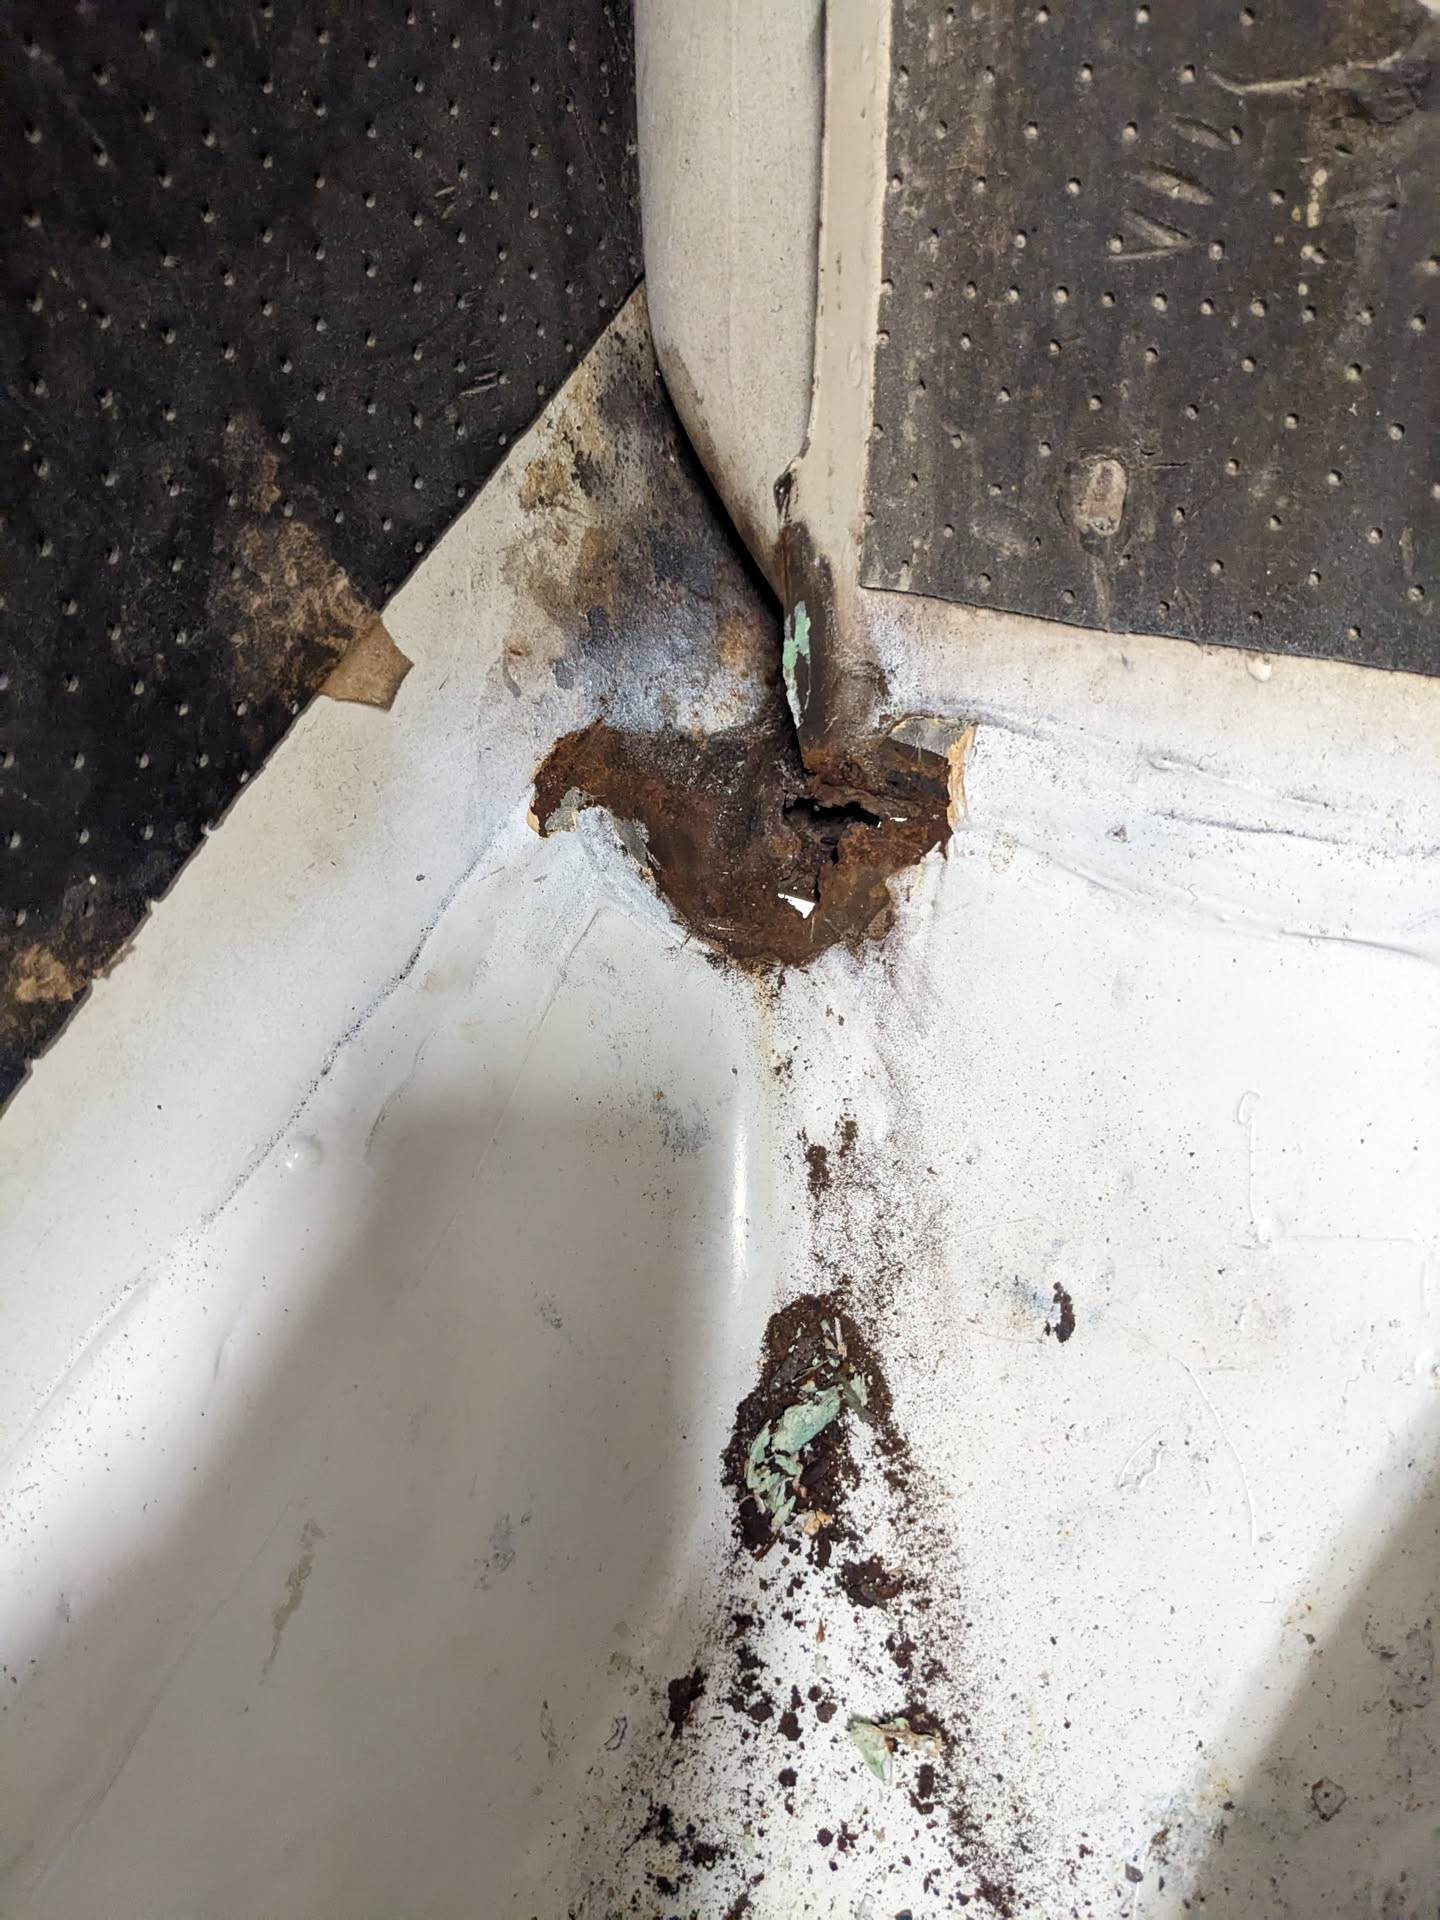
          I cut cut away the rust and welded a patch on top. Because of the tight access and the fact that it's not visible anywhere (it will be underneath seam sealer by the end), I just oversized the patch slightly and lap jointed it. I took care of a pinhole I found at the same time:

          Image description

          I plugged the holes on the driver's side also, and chased a couple of holes around.

          Image description

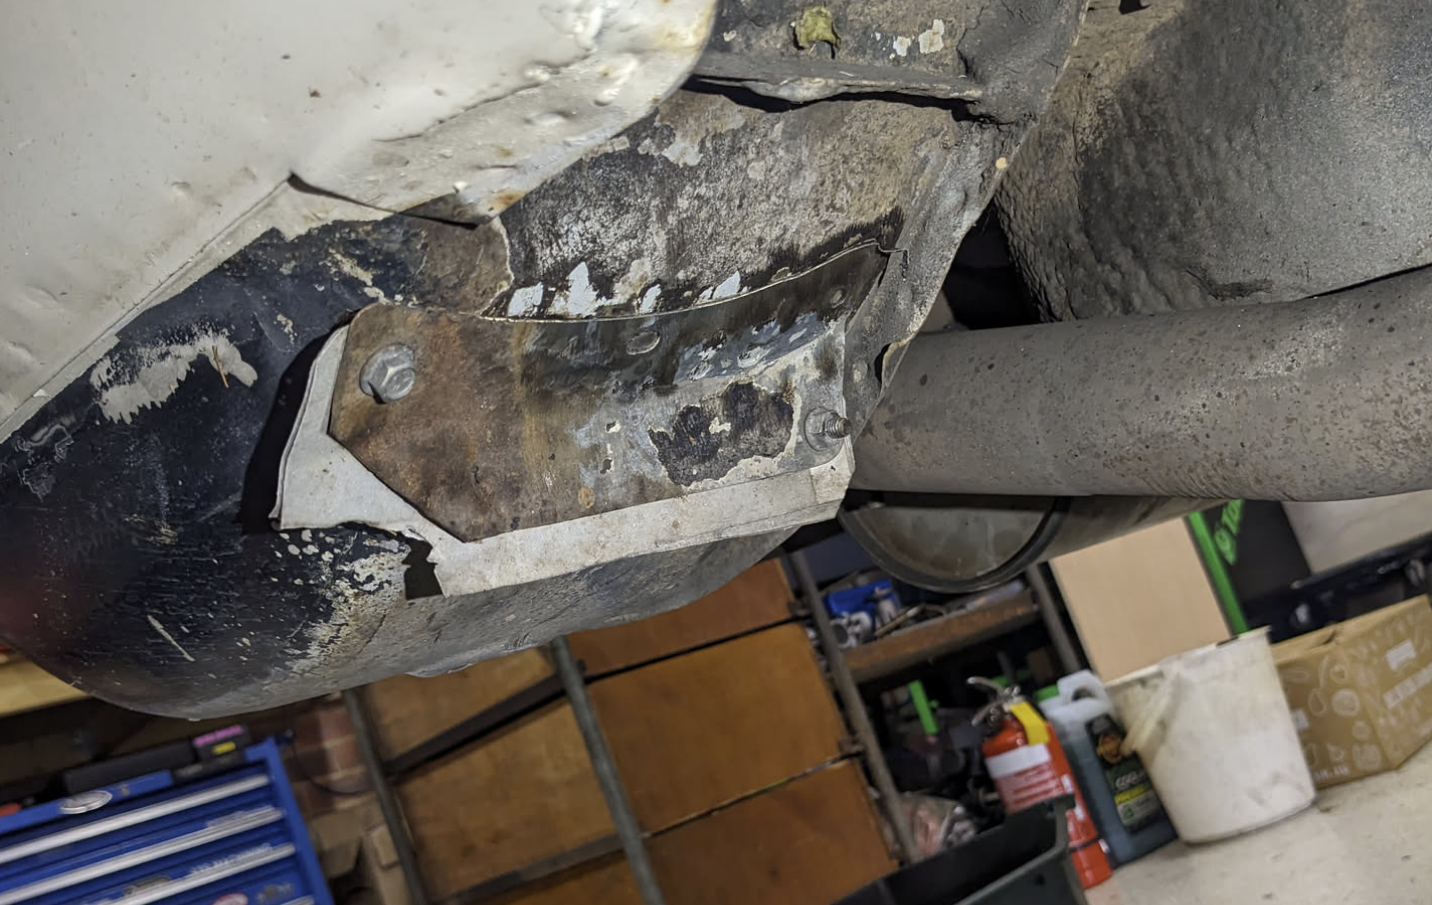
          Finally! I was able to weld on the new passenger side mud flap bracket:

          Image description

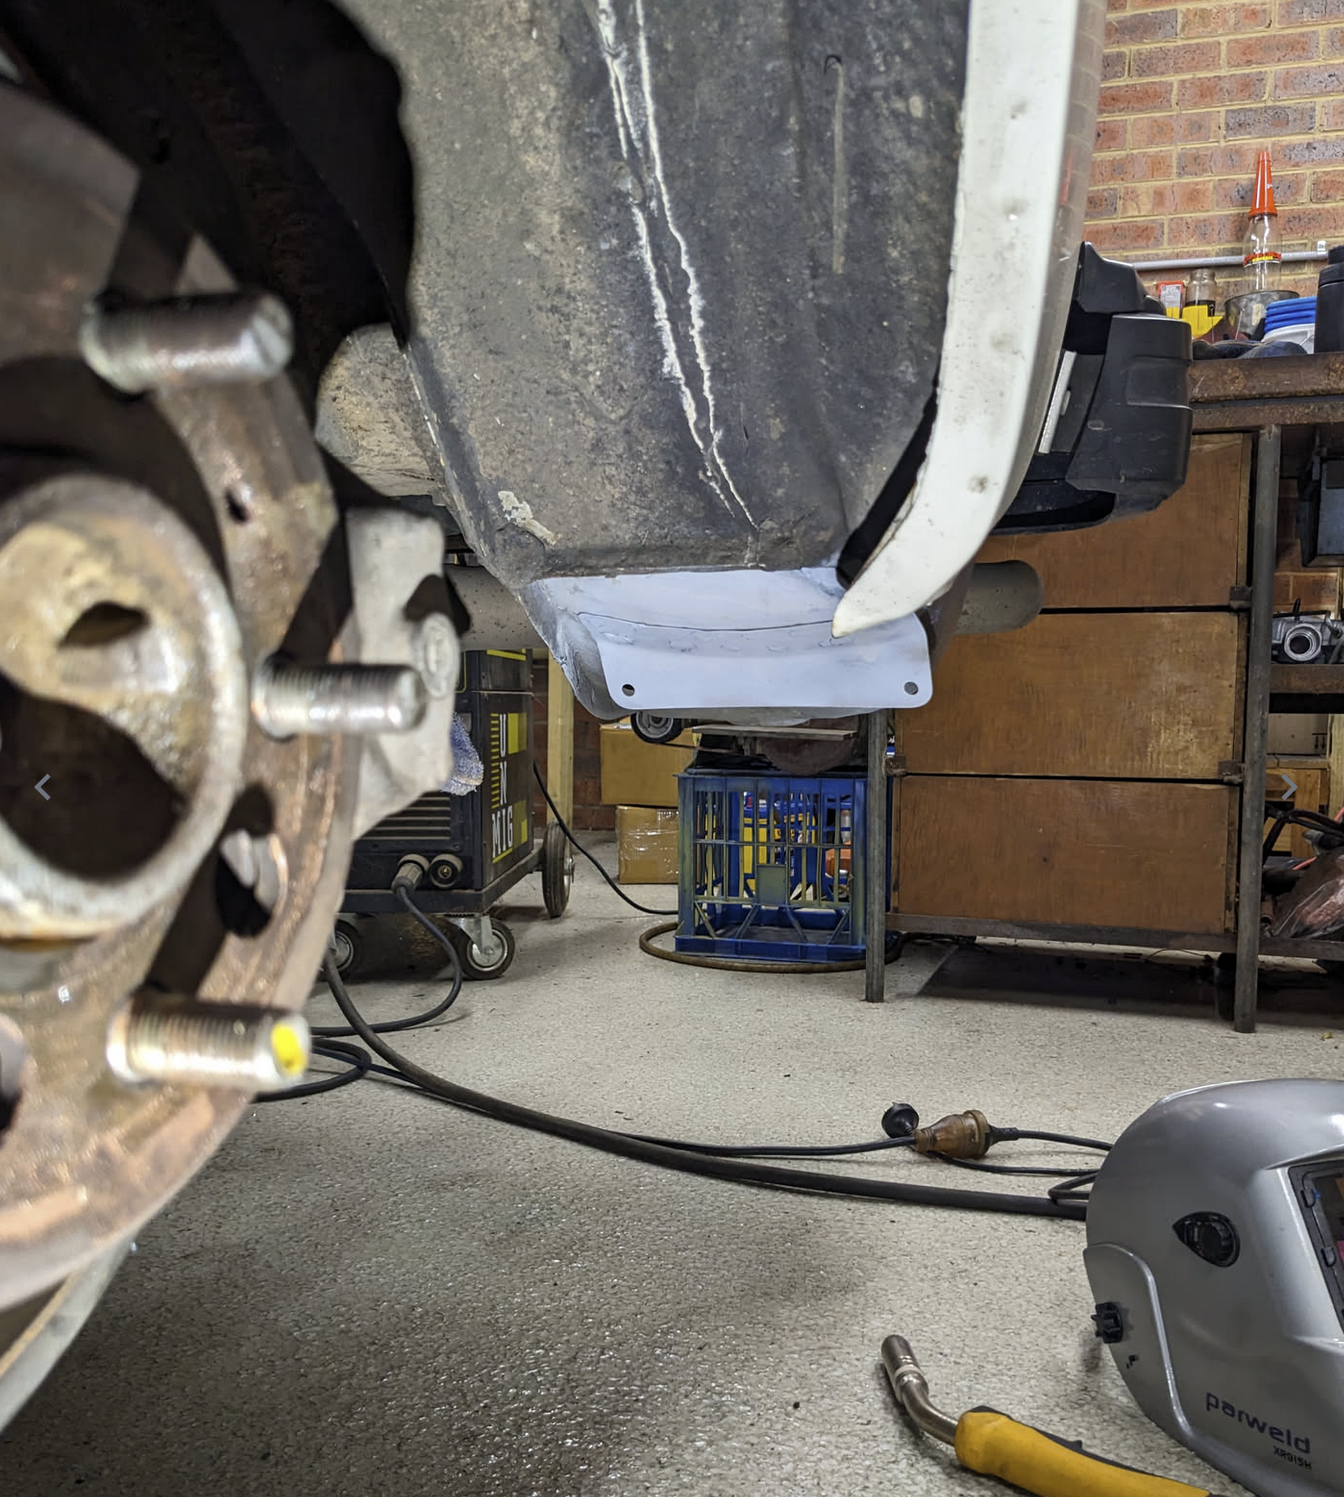
          This is where I got to yesterday. It got too late to be using the grinder, so I will be back at it over the next couple of days.

          Once the other mud flap is installed, I will fix up the seam sealer and then paint everything. I'm going to paint the butt cheeks with an enamel satin black, and paint the wheel wells and mudflap brackets with some stoneguard paint.