Check the nipple into the inlet manifold where the vacuum hose goes to for blockages, very common.
deNs' 1993 940 GL Wagon - "Odin"
This is something which I really need to sort out on The Cleever. She's had a broken oil trap box for as long as I've owned her, and it's getting annoying - the wagon interior becomes The House Of Pong with oil fumes during spirited driving.
Years ago, when Yoshifab were doing their initial run of their crankcase vent plates, I bought 3 of them, but haven't fitted any of them yet.
The standard ones have a Dash 10 AN fitting (with a Dash 12 AN option) and a Dash 8 AN fitting for the return and are designed to be used with an oil catch can arrangement. The engines I'd planned to put them on were going to be used at high revs on the track, but track plans got shelved, and I still need to go shopping for a catch can / swirl pot arrangement which won't bust the bank. One of them is destined to go onto the 142's B230 16V+t engine when it gets done.
I don't know yet if I'll put one of them on The Cleever's B230FT or not; depends what I find when I go shopping for a catch can for the Never-Ending 142 Project.
- Edited
Good shout - I did pull it off and inspect it as I was almost going to replace it, since the ones on the manifold are straight, don't have barbs and using silicon hose makes it hard to clamp the hose to without going nuts on the hoseclamp. Everything seemed clear there I think, but maybe I'll just double check in case I glossed over it.
@Major Ledfoot - Give me a yell if you ever want to part with one of those I'd thought about going with the 'more proper' solution once I found this issue, but figured a free solution I had on hand would do for now. Ultimately I'd like a better, more easily serviceable PCV system like that, with a decent catch can.
Clean box, JB Weld the two halves together, clamp it for 24h, will last for years. It does need to be properly clean though, for the epoxy to be effective.
Or, purchase a genuine oil trap, kill two stones with one bird as they say
jamesinc
In a similar tbricks thread I saw someone mention plastic 'welding' the box together with an old soldering iron to melt the two halves together, which I was tempted to do with an old iron, but right now as there's no immediate need I figured I'd leave it for now and think about what I want to do with it long-term. Thanks for the ideas though!
ramrod
Tempting, but I'm more likely to invest the coin in a better alternative and upgrade the PCV system with something else. I do wonder if using full synthetic oils make it less of an issue with clogging that in used to be - does anyone know?
Changing the oil every six months keeps everything clean
May 2024 - Additional Sound Insulation
I installed a bunch of butyl sound deadener in late 2022, in an attempt to reduce some of the drone from the 3ā exhaust. It made a small impact, but I wanted more, having lived with it in its current form for a while now. I could change the diff to a lower ratio for lower cruising revs, butā¦ 4.10 is a lot of fun, ok?
So, some Car Builders stage 2 insulation was in order.
With two rolls of the insulation, I did:
Front footwell up as far as I could get, about halfway up the firewall
Transmission tunnel
Rear footwell
Rear lower seat area
Also added some additional butyl deadener beforehand where panels still had some resonance
It took a few days, and wanting more space, did it outside of the shed, which meant some rather cold late nights outside while doing this, but itās fine. I did a bit of swearing when the paper back of this stuff kept tearing and being a pain, but itās done now. Hereās the finished result:
After taking it for a drive, I immediately noticed a difference, particularly with regards to transmission noise - the rattly sound of the M90 was reduced noticably. I still have some noise reduction to do, and no, not replacing diff (yet).. but will be replacing the rear muffler. Also, I gave the car a wash. It was dirty.
You would only need a catch can with massive boost
Plus proper install of one to imitate the original.
June 2024 - New rear muffler
Because the 10 year old within me knows that more exhaust pipes equals more power, I decided to double my power output and replace a single with twin tips. Besides the modified piping and cat converter this was the last remaining part of this hacked up JT-Tuning exhaust. I'm mainly doing it to further reduce cabin drone, and because I've never had a car with a shiny muffler and wanted twin tips.
I don't own a TIG and right now don't intend to invest the coin into a new welder and learn on the muffler, so handed it to a local race fabrication shop which welded it in for a few dollarydoos.
Muffler is a Vibrant, model 1111. 3 inch inlet, to twin 2.5" tips with straight stainless pipes welded on.
Gave the lower trim a lick of paint and mounted it up as best I could to ensure it was in the right place when the muffler was aligned.
Also gave the rear bar a fresh coat of bumper black as it was looking a little shabby too.
Good enough for me! The bloke also helped me fix an issue where the axle was fouling on the pipe in one place under full compression so two birds one stone. I hadn't noticed but there were 'clearancing' marks on the pipe. Not terrible, but is good to fix.
Has a nicer note now - didn't completely fix the drone, but it's a little better and I still have cards to play, in order to get the noise down.
- Edited
July 2024 - Fuel pump
I backed out of our driveway one day and thought Iād stalled the car from not giving it enough revs, but then the car didnāt want to start back up. I could hear the main fuel pump running so figured it might be spark or ECU or something else..
I was stuck diagonally across my road, and with the help of a neighbour and the starter motor, I got it off the road and back into the driveway.
I tested injector firing to rule out CPS, ECU and injectors and tested a timing light on the spark leads, so my eyes turned to the fuel system.
I'd read on a turbobricks thread that a failing lift pump can sometimes cause this issue, particularly when it's just under half a tank (which it was) so started looking at that.
I tested the fuel pumps individually and both seemed to be working from what I could hear, and with no further diagnosis I consulted fellow 940 enthusiast @nugget_940 for advice after coming across his thread on the topic.
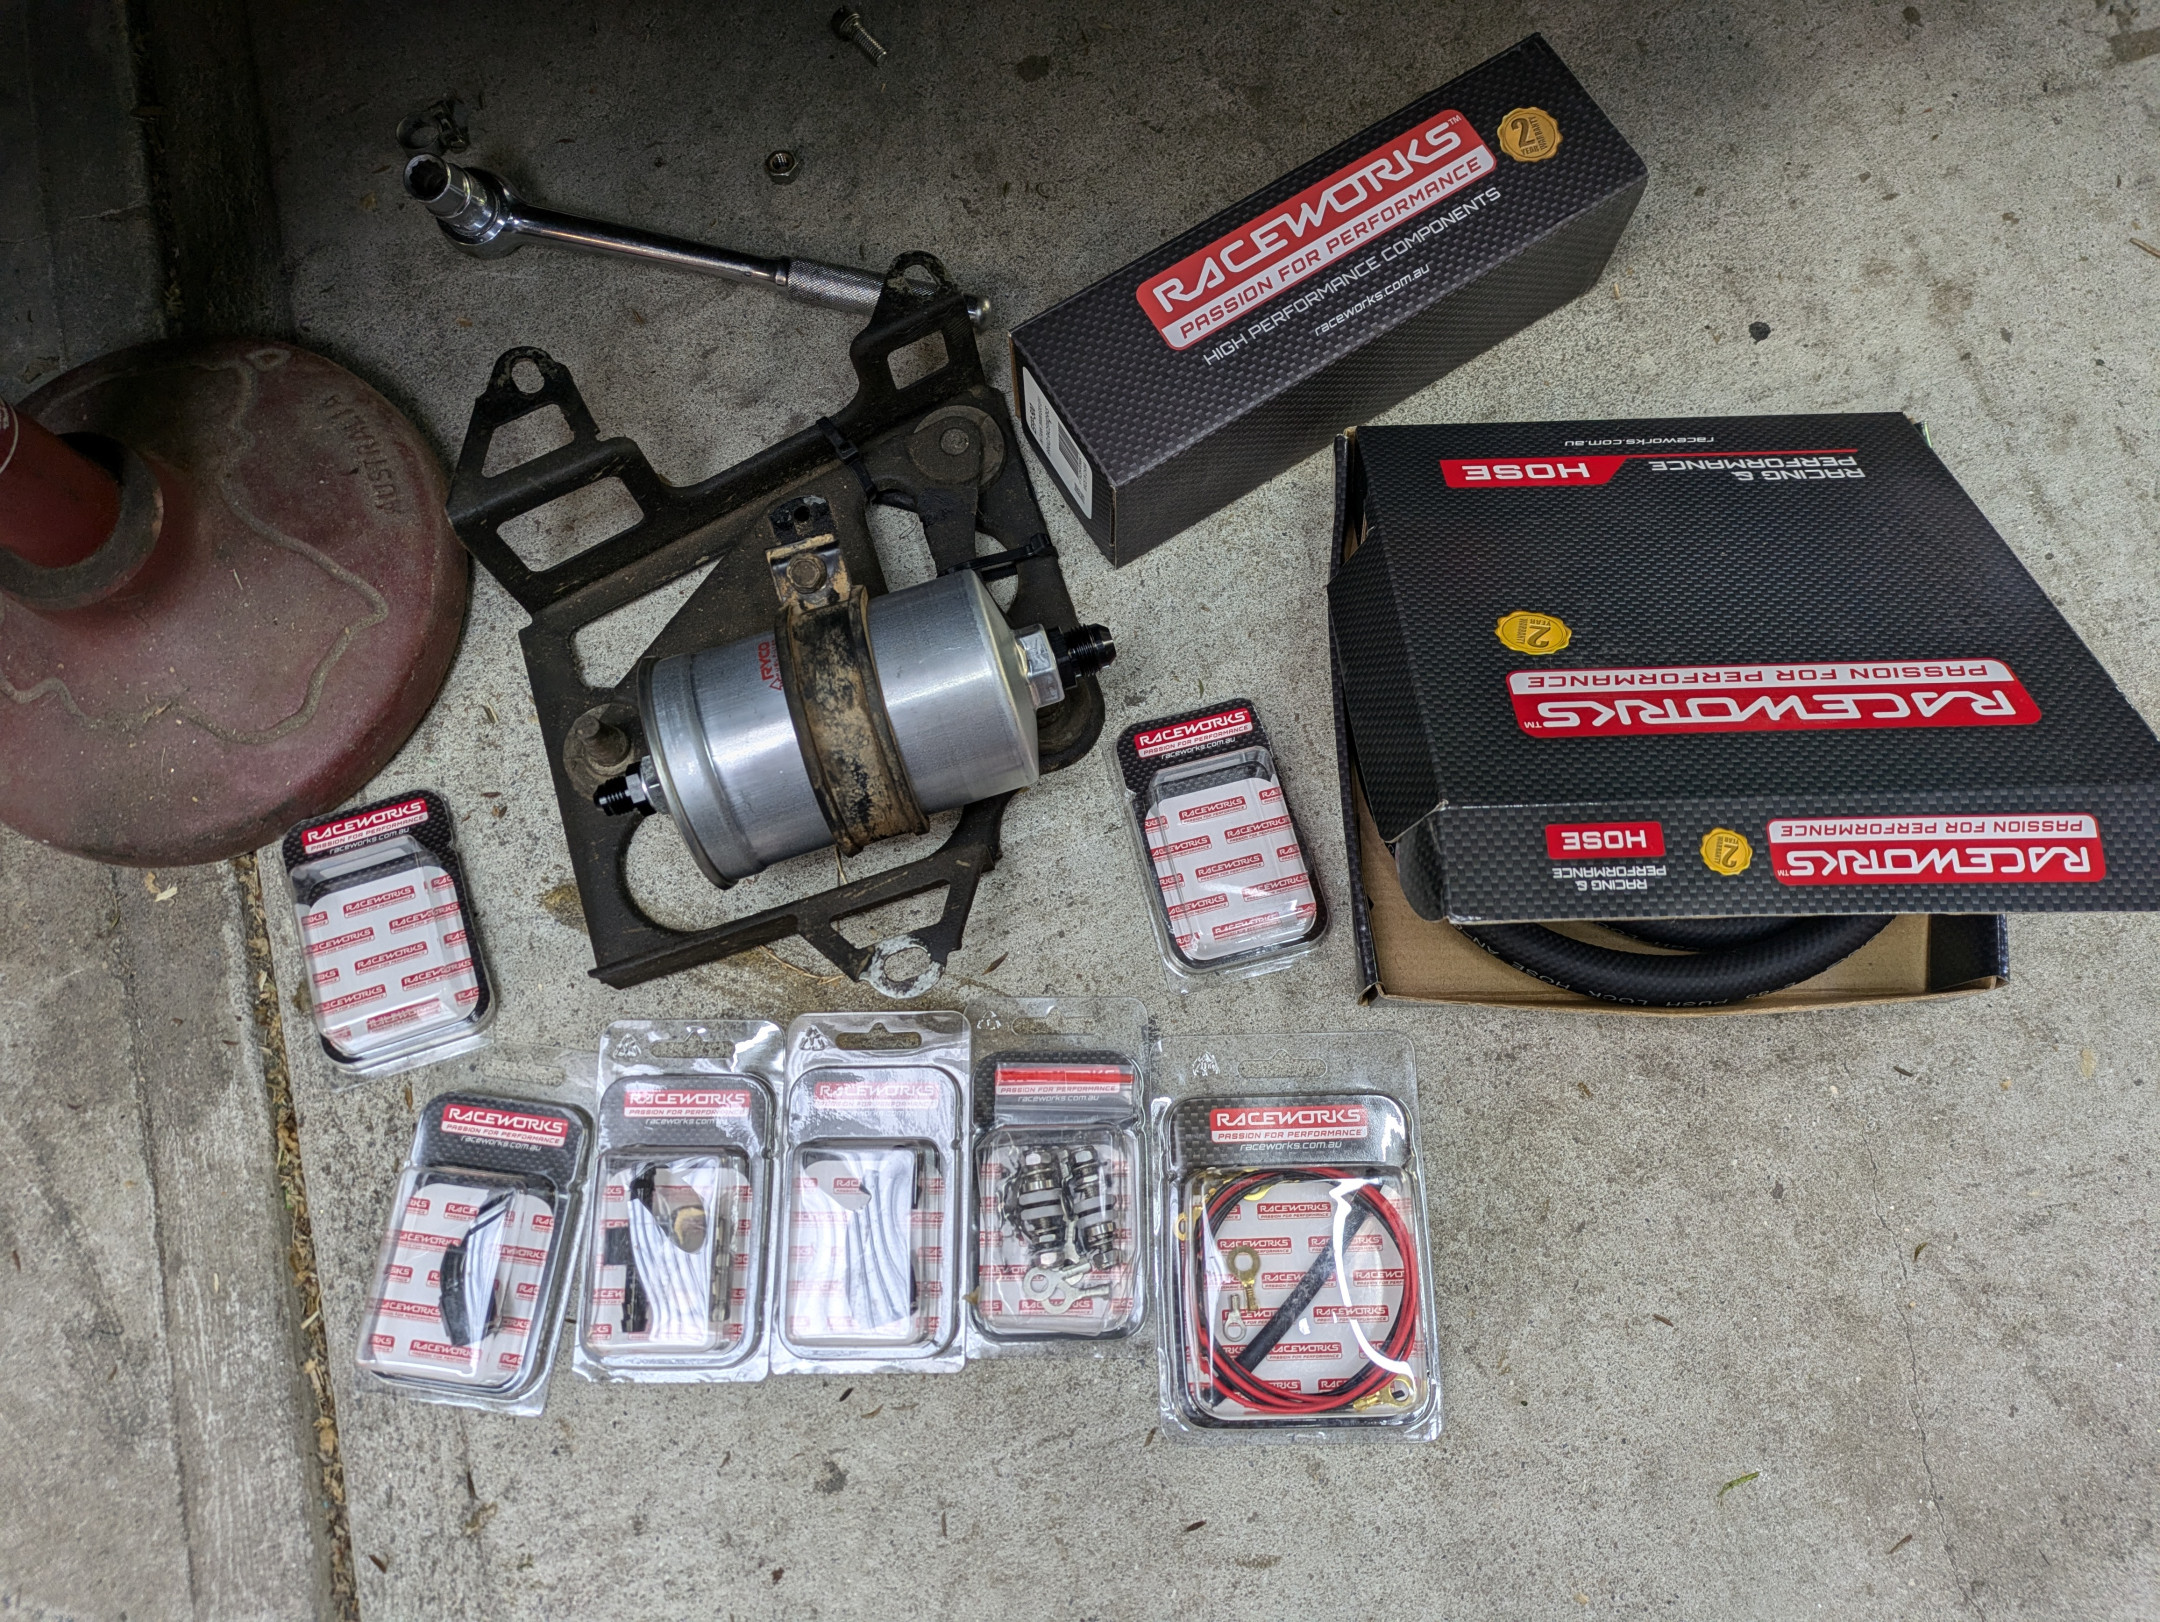
After some rather exuberant spreadsheeting in collaboration with him regarding parts required, I fired up the parts cannon and taking advantage of EOFY sales, got some shiny new parts for the fuel system, specifically:
Raceworks EFP-500 340lph E85-compat fuel pump
New E85 compatble hoses (5/16ā and 1/2ā) - (HPH-080-05M, RWH-400-08-1M)
New stock Ryco fuel filter (Z311)
Wiring bulkheads (FSA-499)
Fuel-safe heatshrink, wiring and fuel hose (FSA-095)
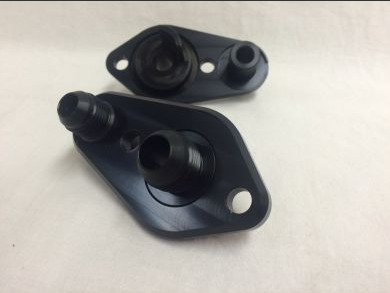
Fittings for fuel filter (RWF-731-06BK, RWF-732-08BK)
Barbs for fuel filter fittings (RWF-402-08BK, RWF-412-06-05BK)
Submersible 8mm hose - (Dayco 80160)
With everything in hand, I started pulling the old stuff out and got a bit of a surprise.
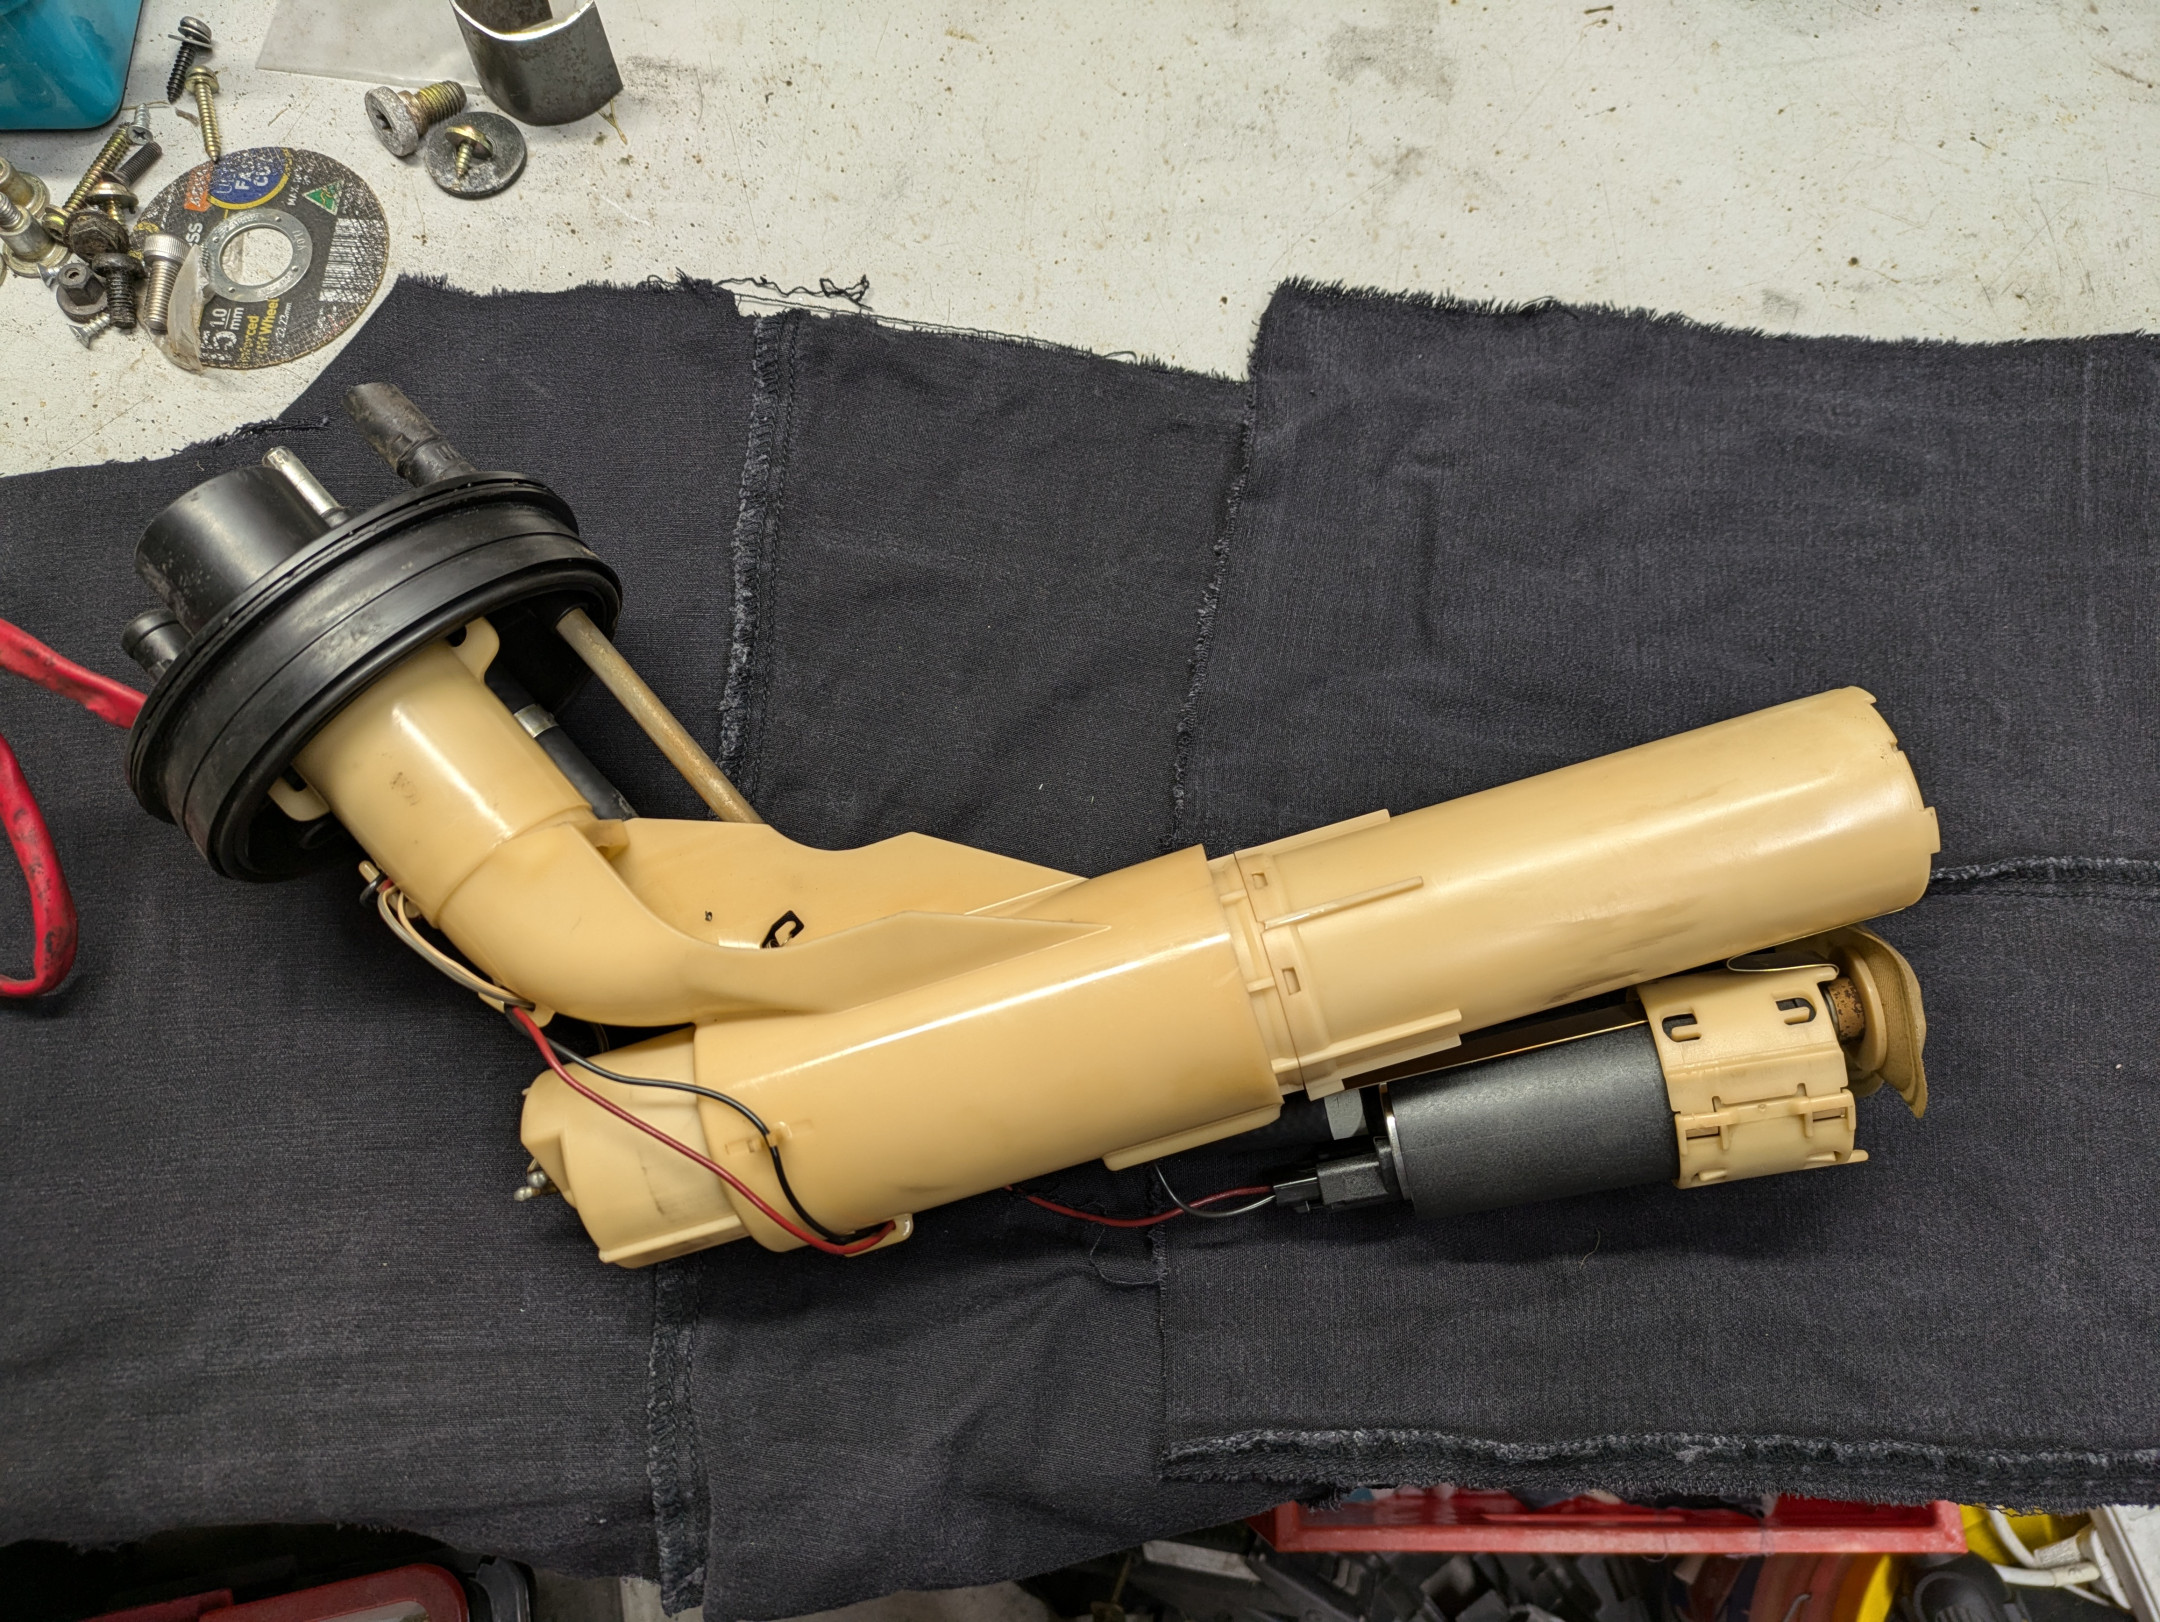
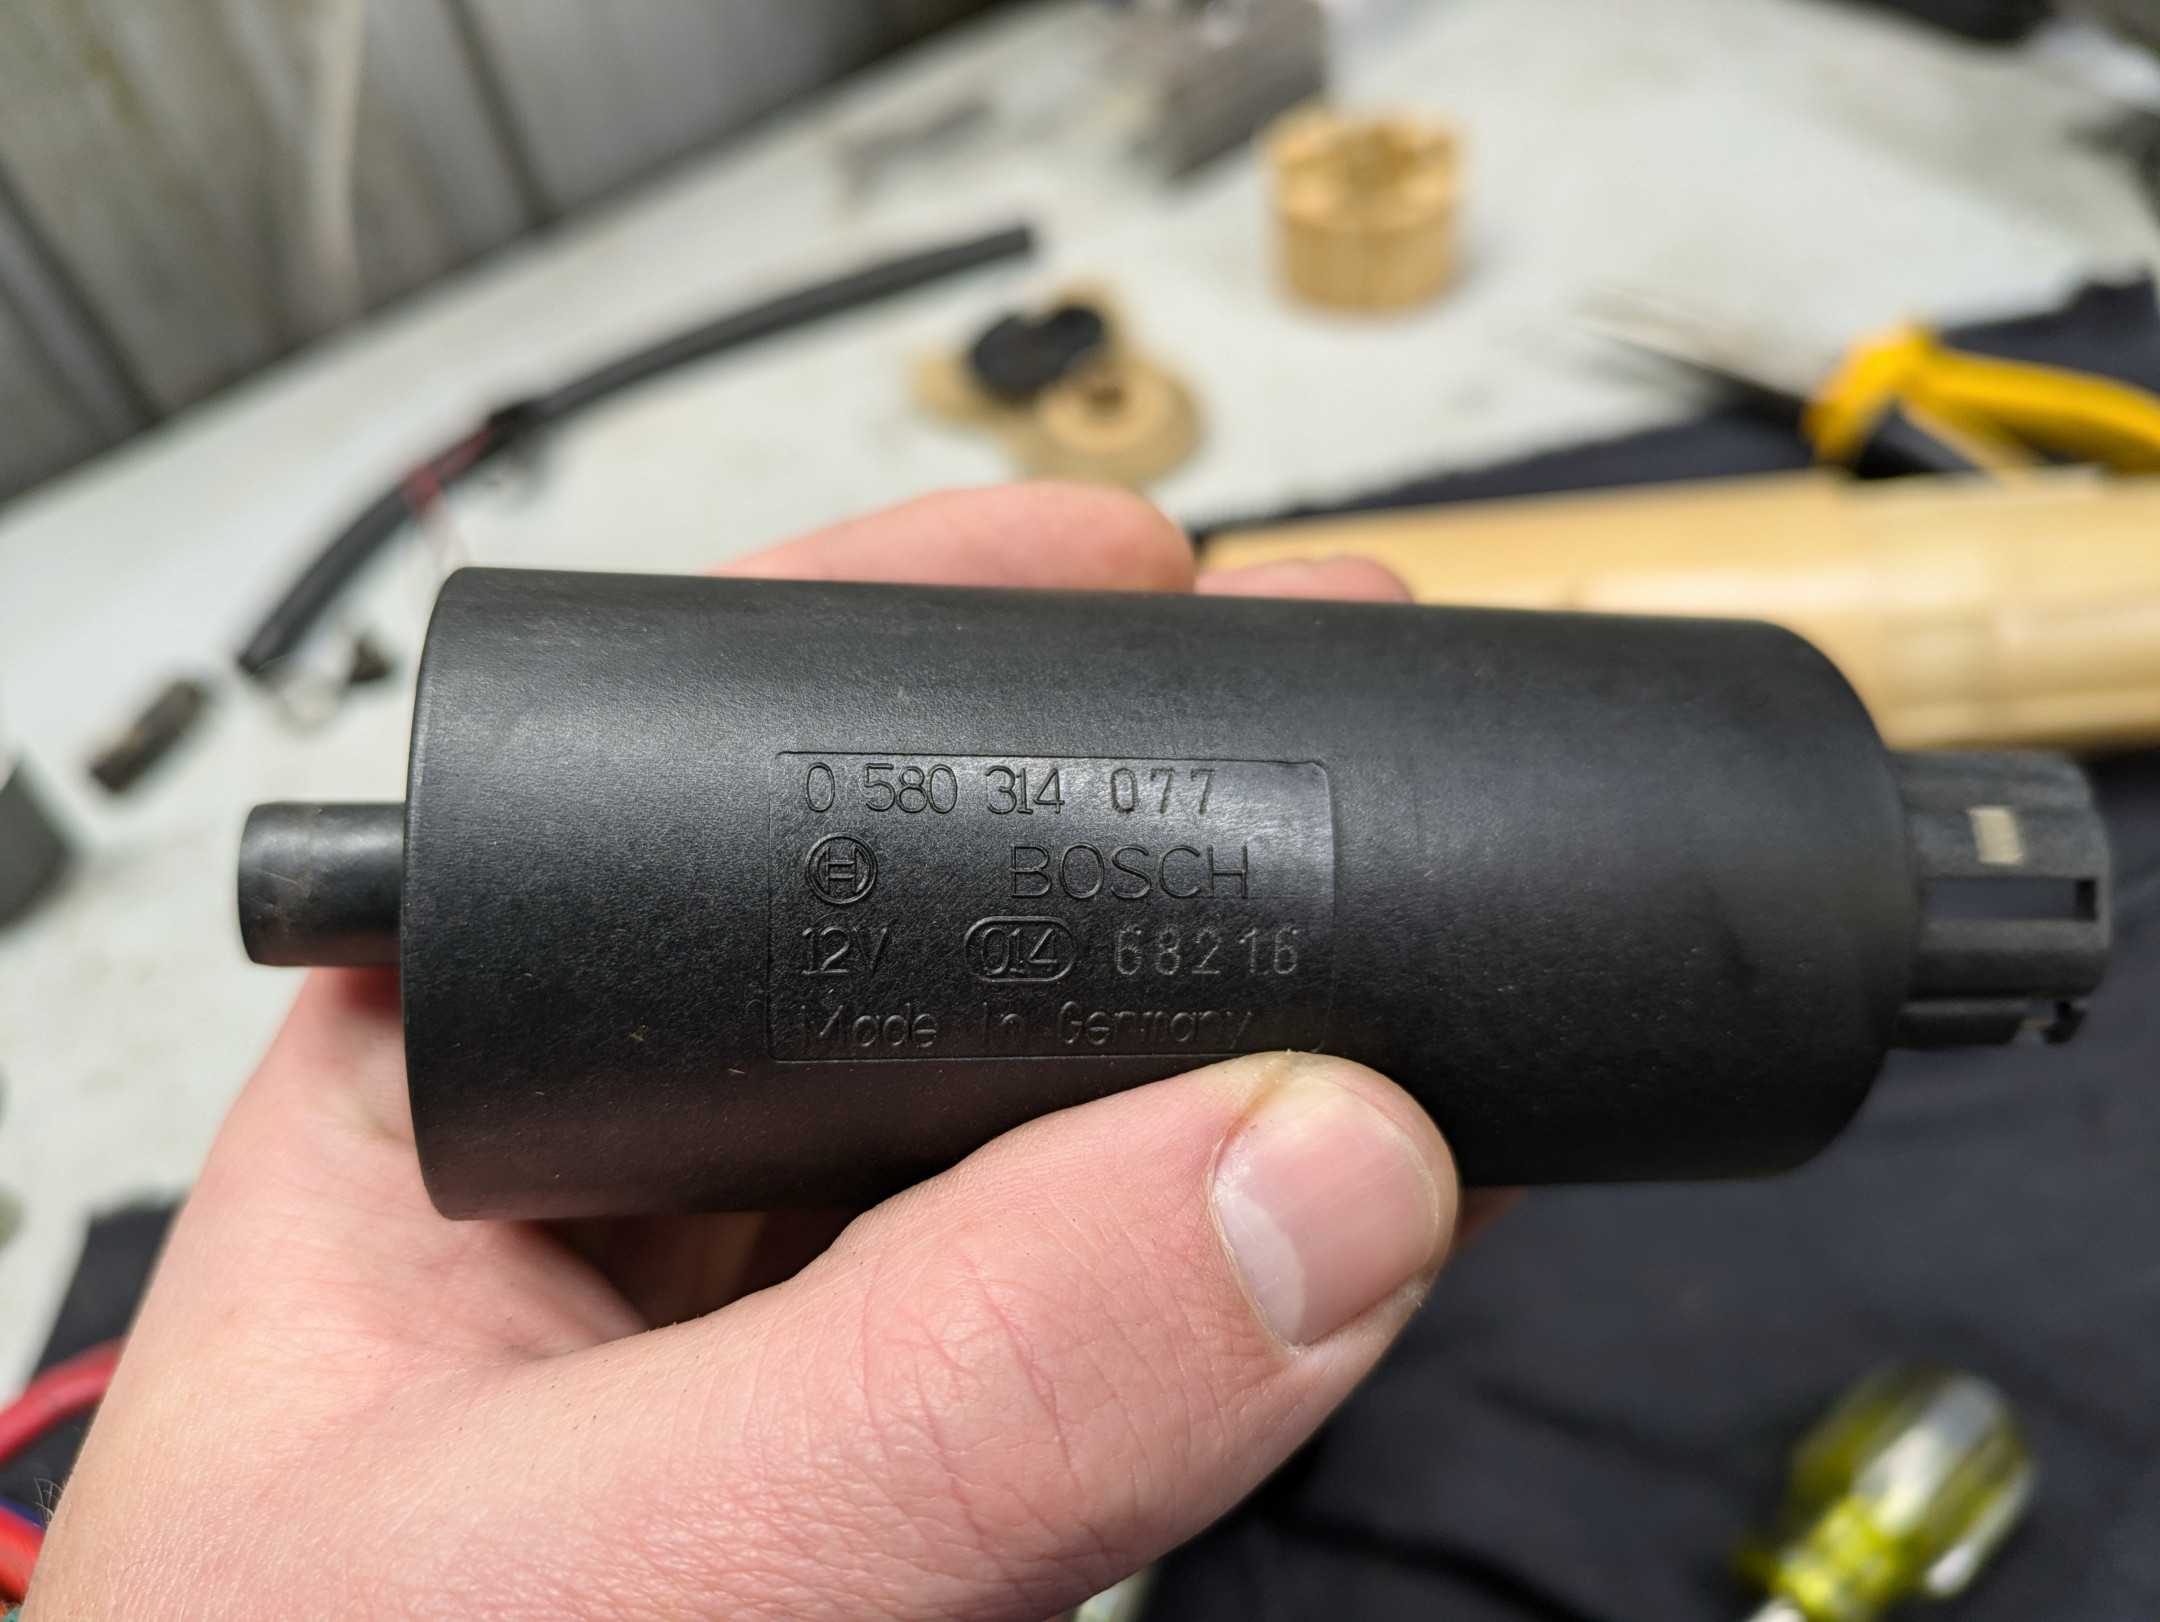
The in-tank fuel pump was replaced with a high-pressure unit at some point, likely when the previous owner turboād the car on the old engine before that was ripped out and the shell was sold to me. I was under the impression it was stock, and I put a high-pressure unit under the car. Turns out thatās probably been unnecessary the whole time, but meh. In-tank fuel hose was marked as 1995.
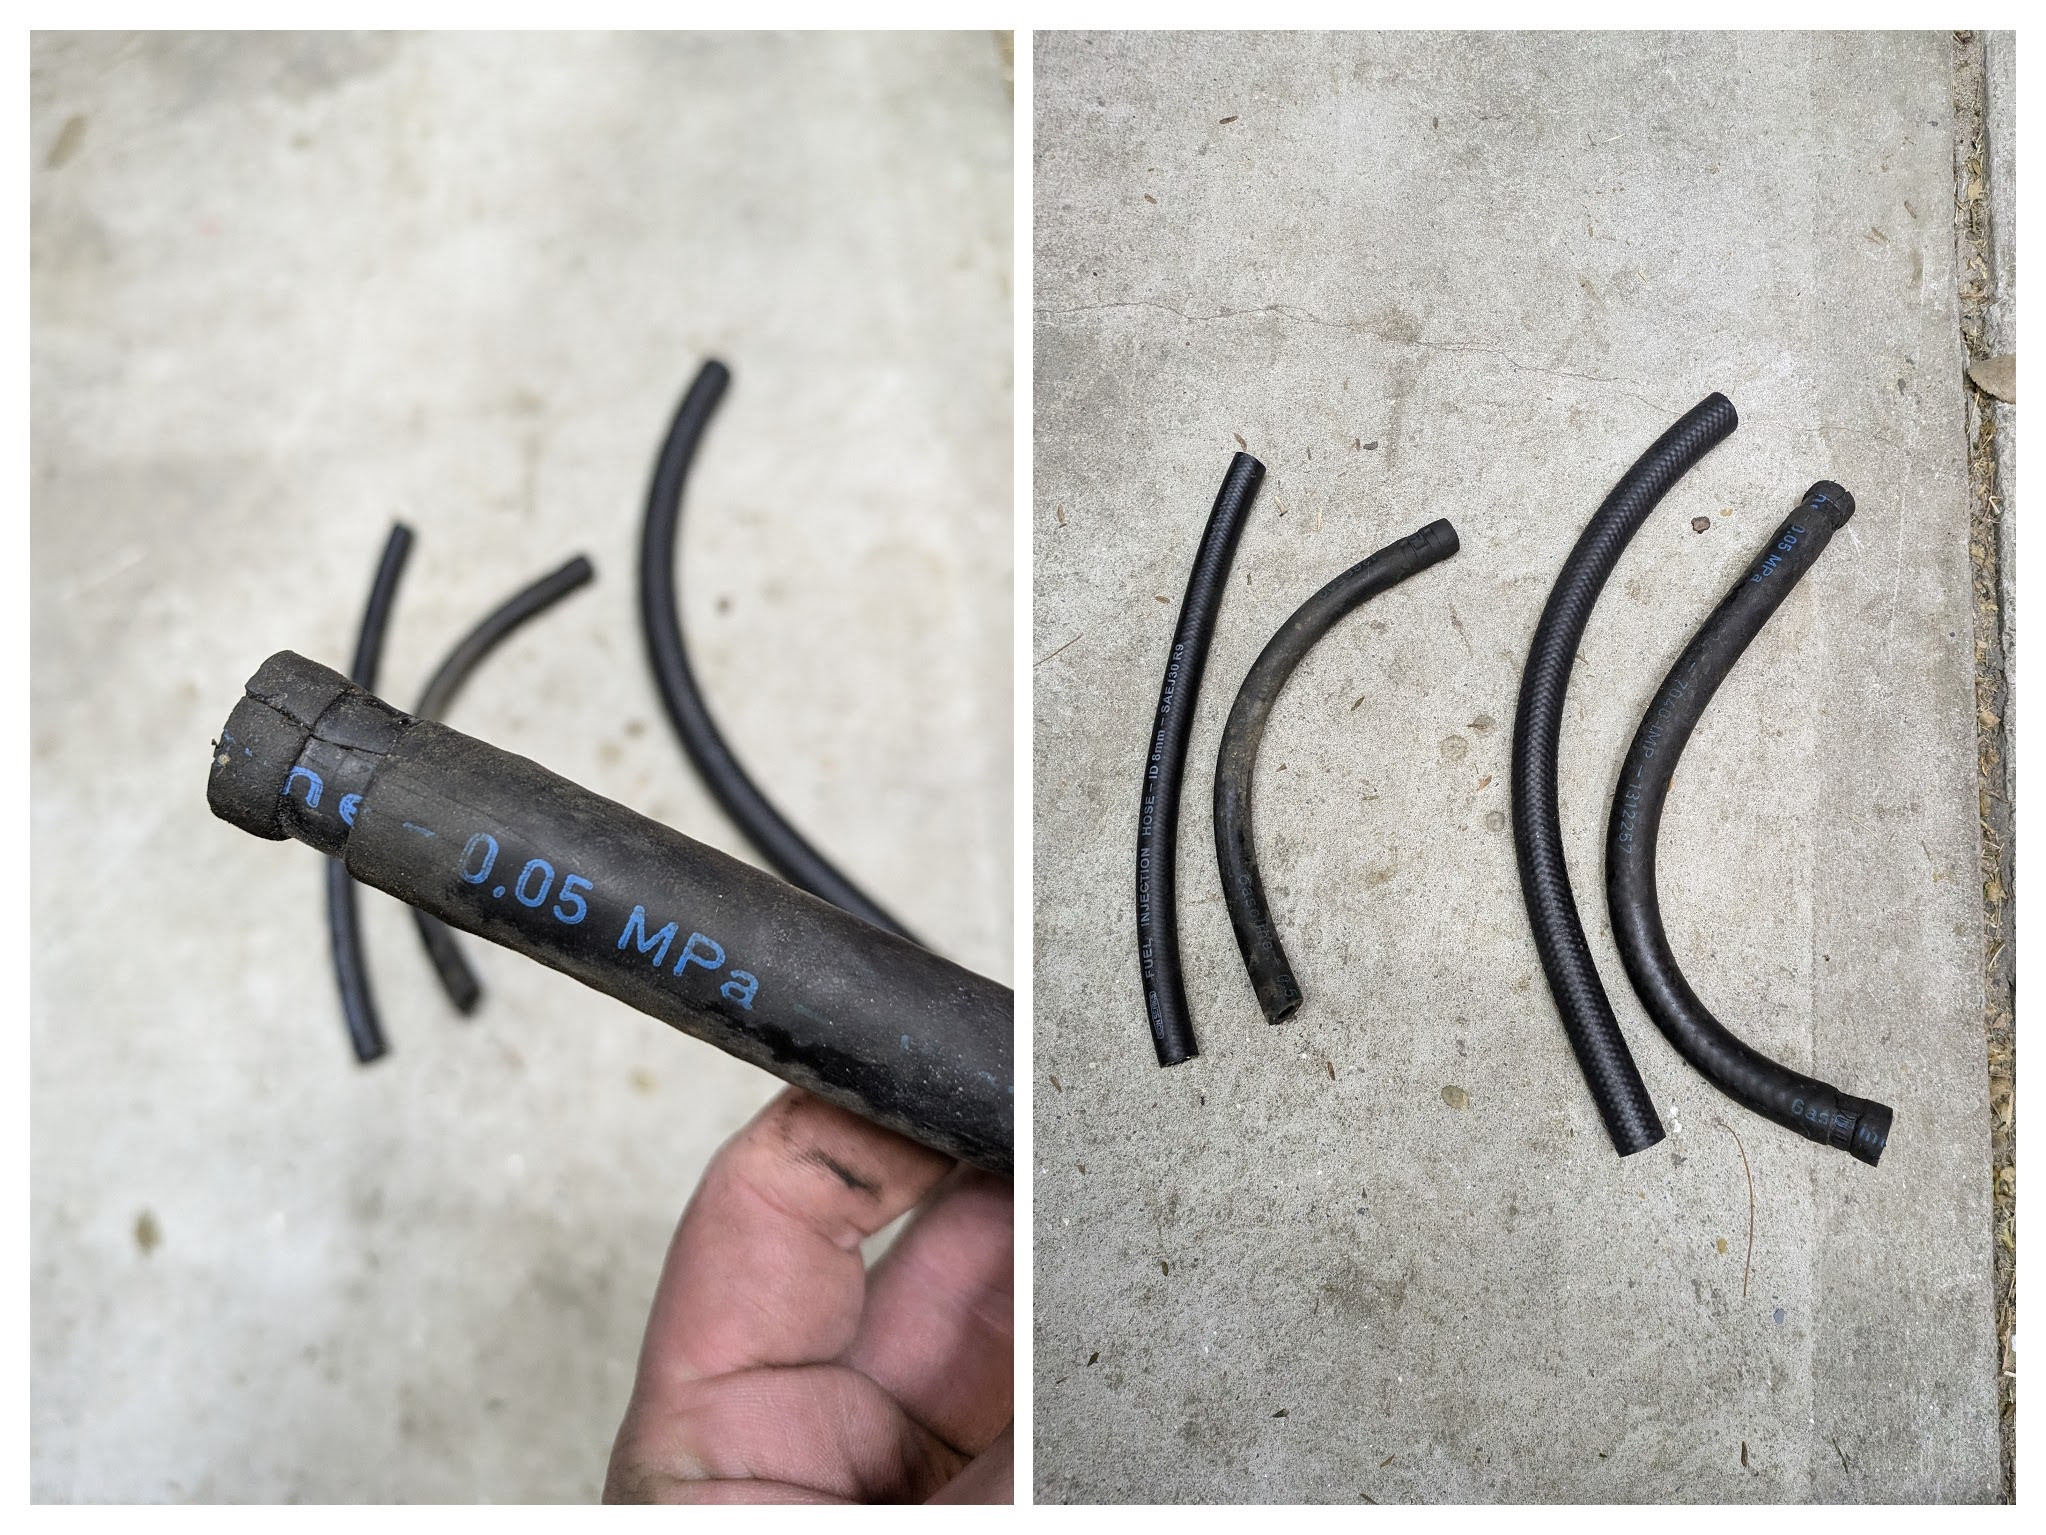
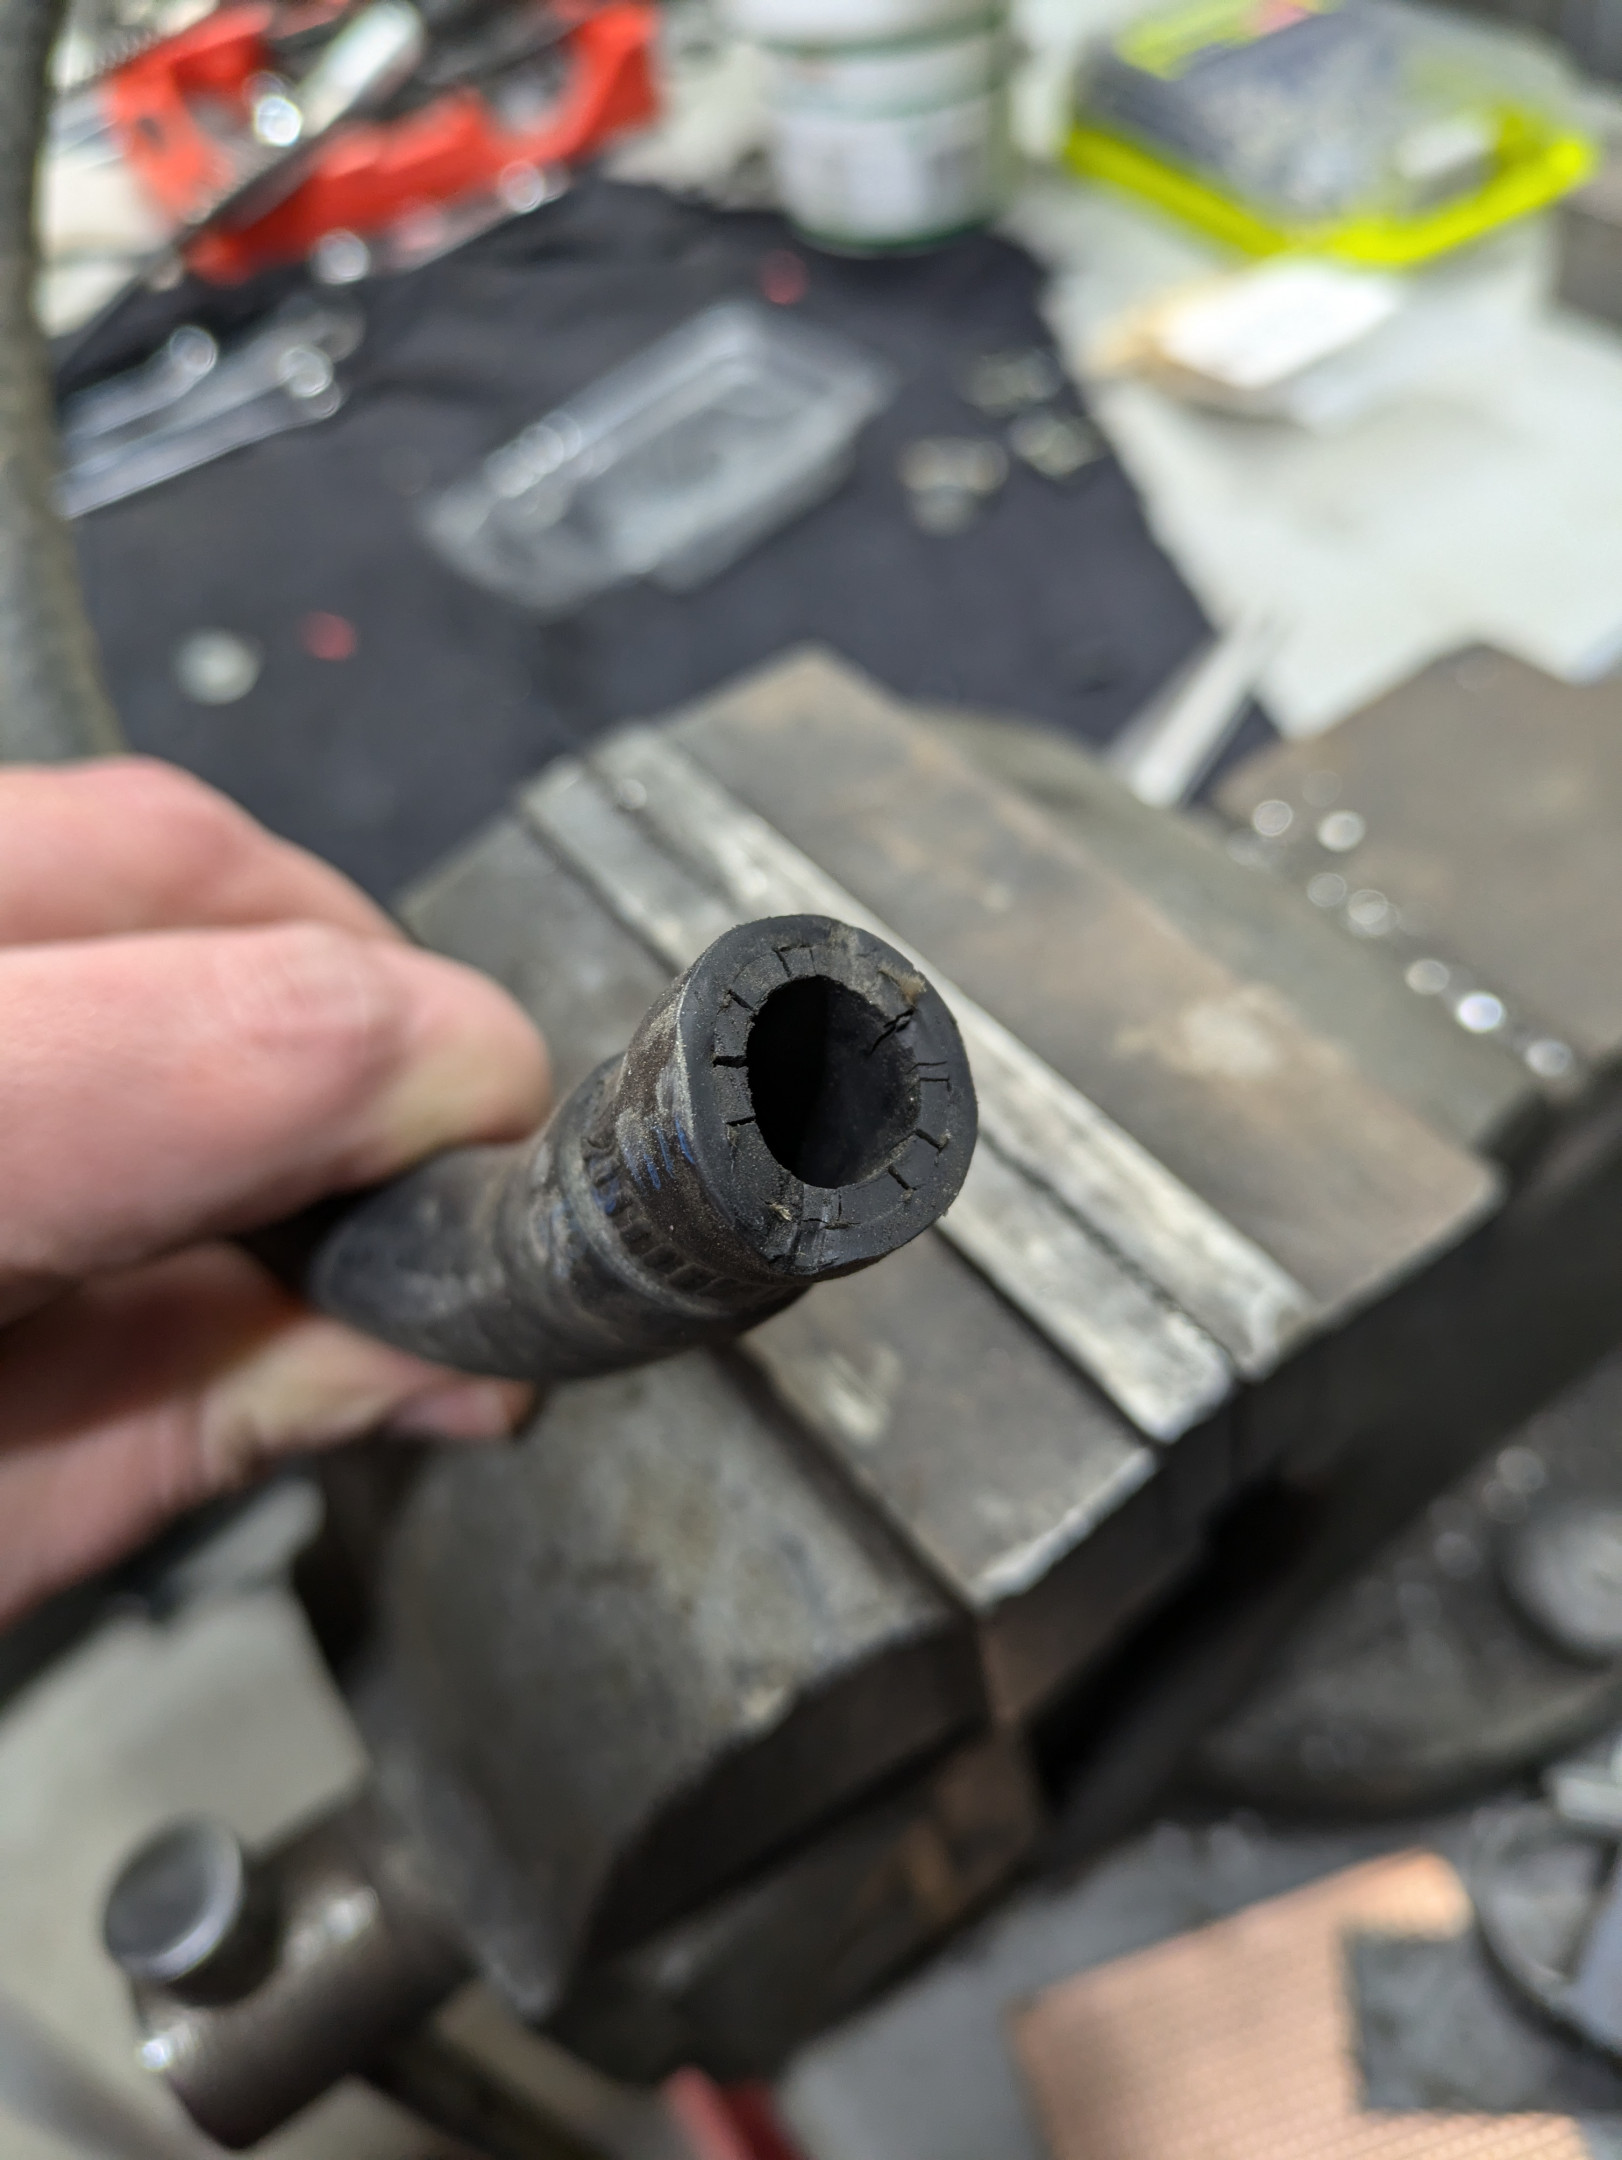
Though the pump was upgraded to a high pressure unit, the 11mm fuel hose coming out of the tank was not rated for high-pressure, but was the original 0.05mpa (i.e. ~7psi) hose originally on the car. It was marked as 1993, so original, and was cracked at the ends. Iām pretty glad it didnāt burst and set things on fire.
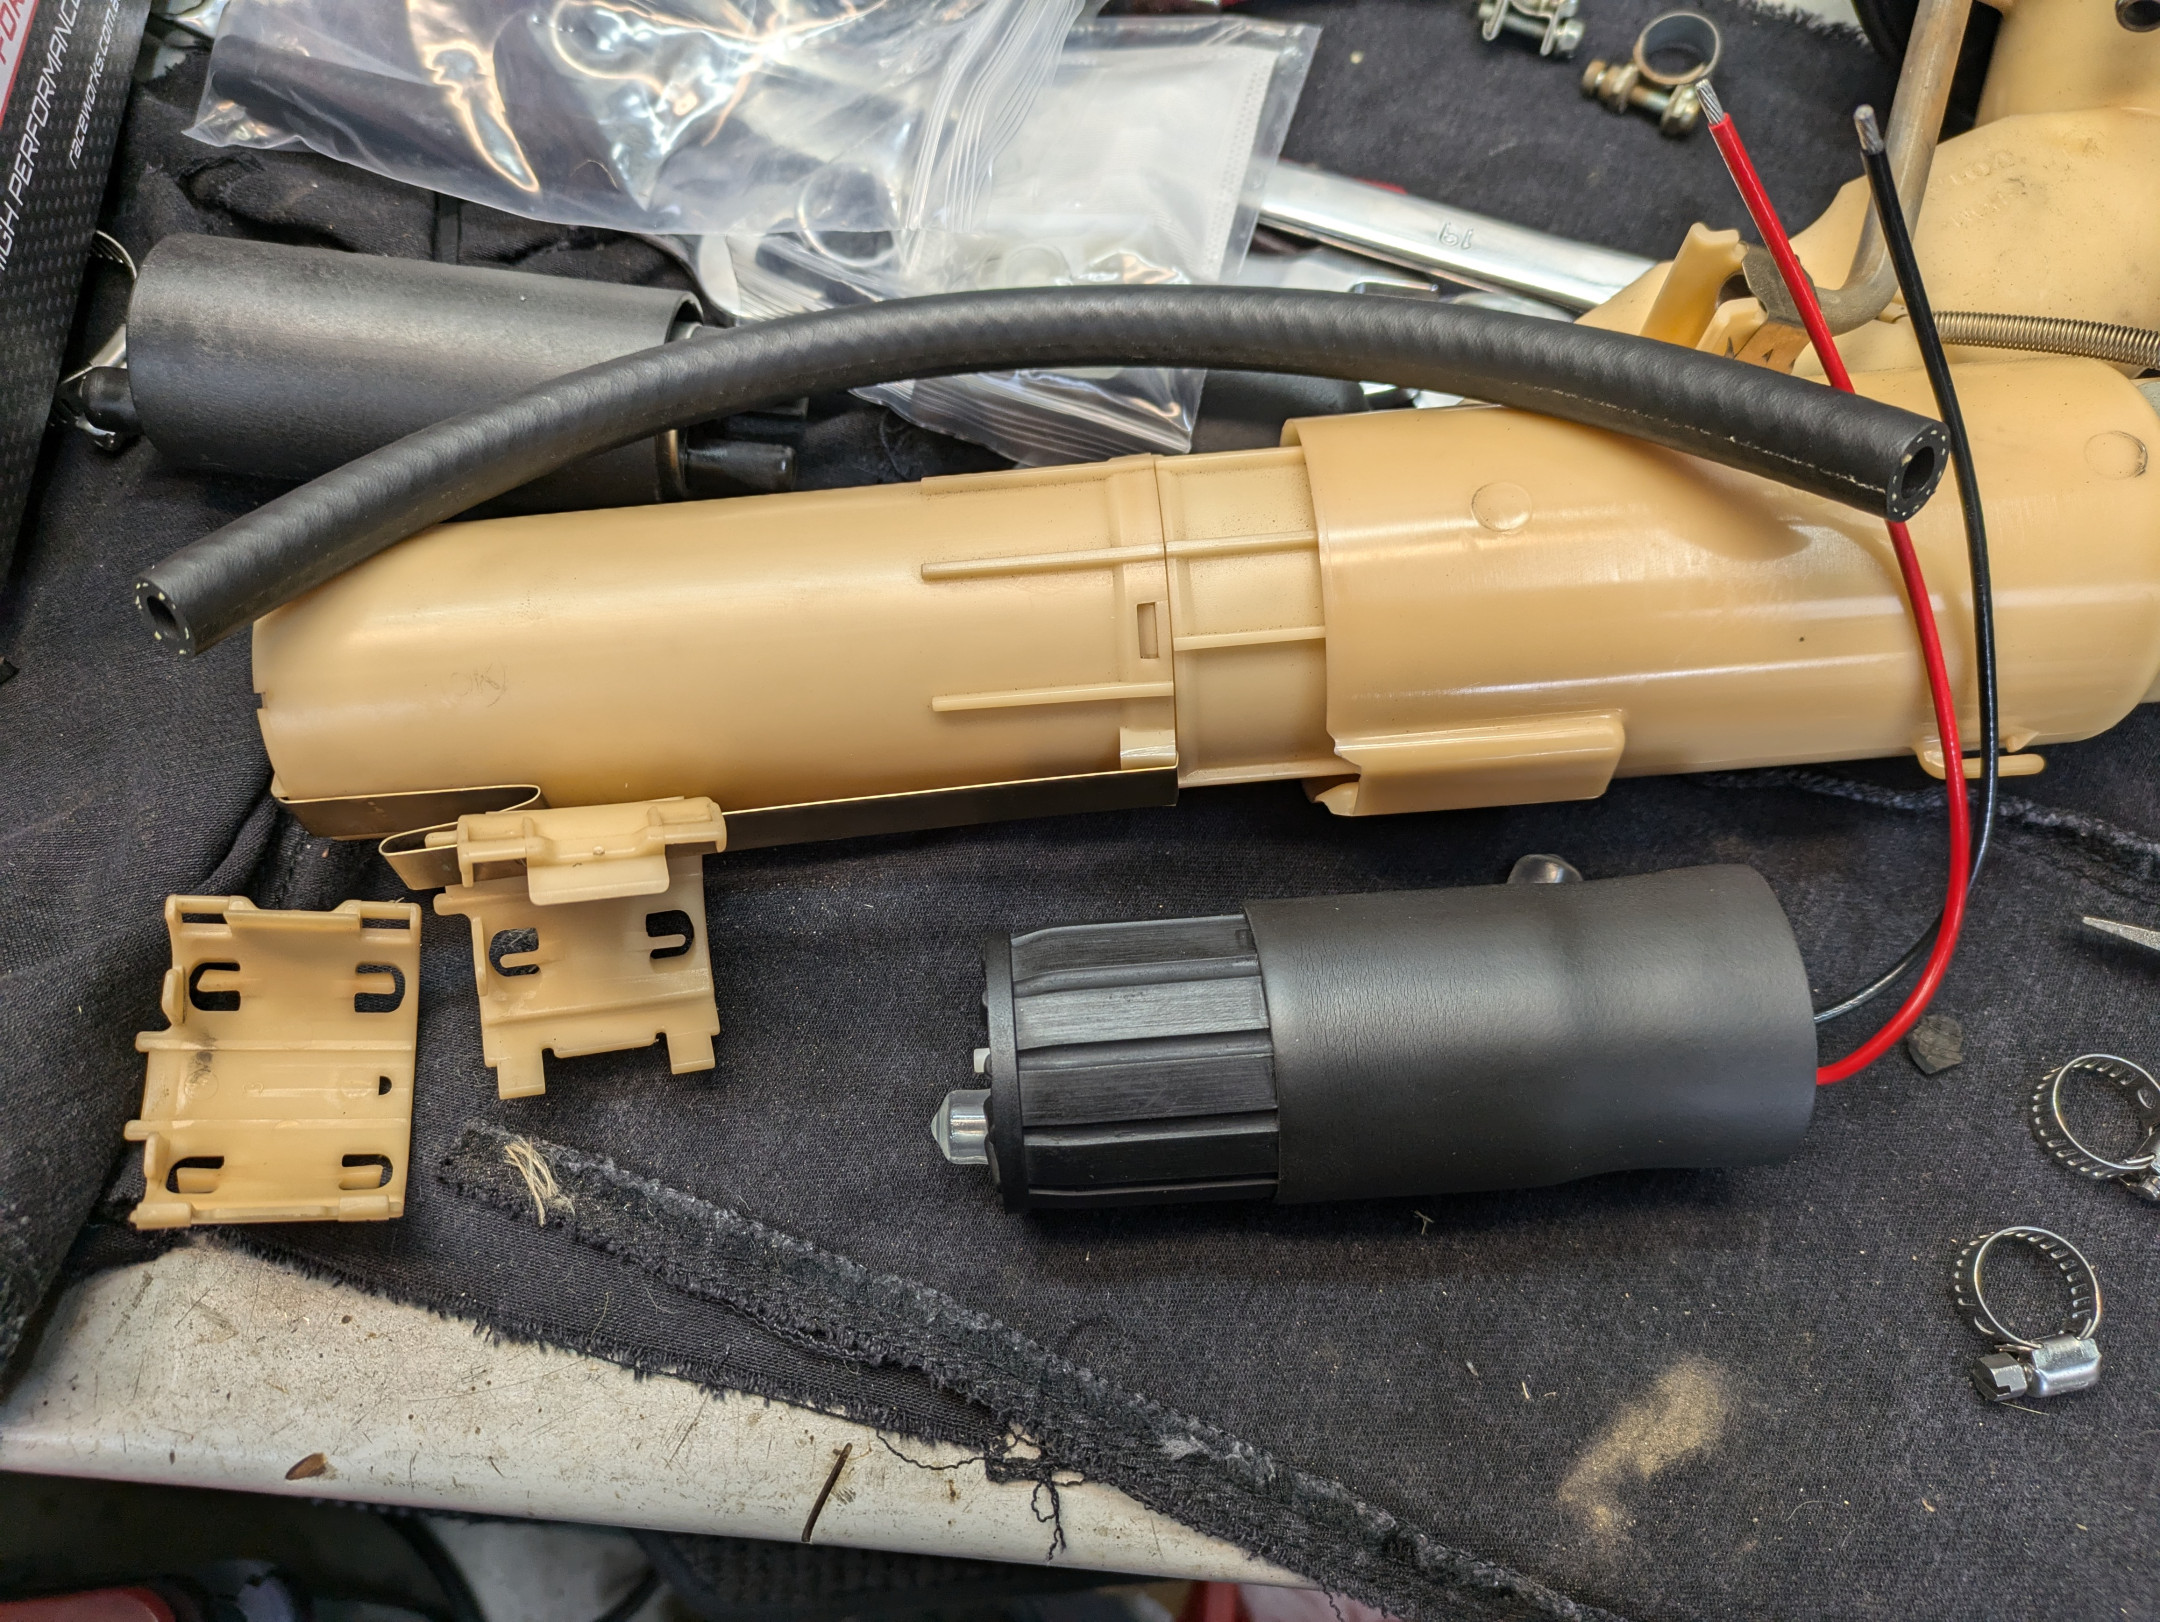
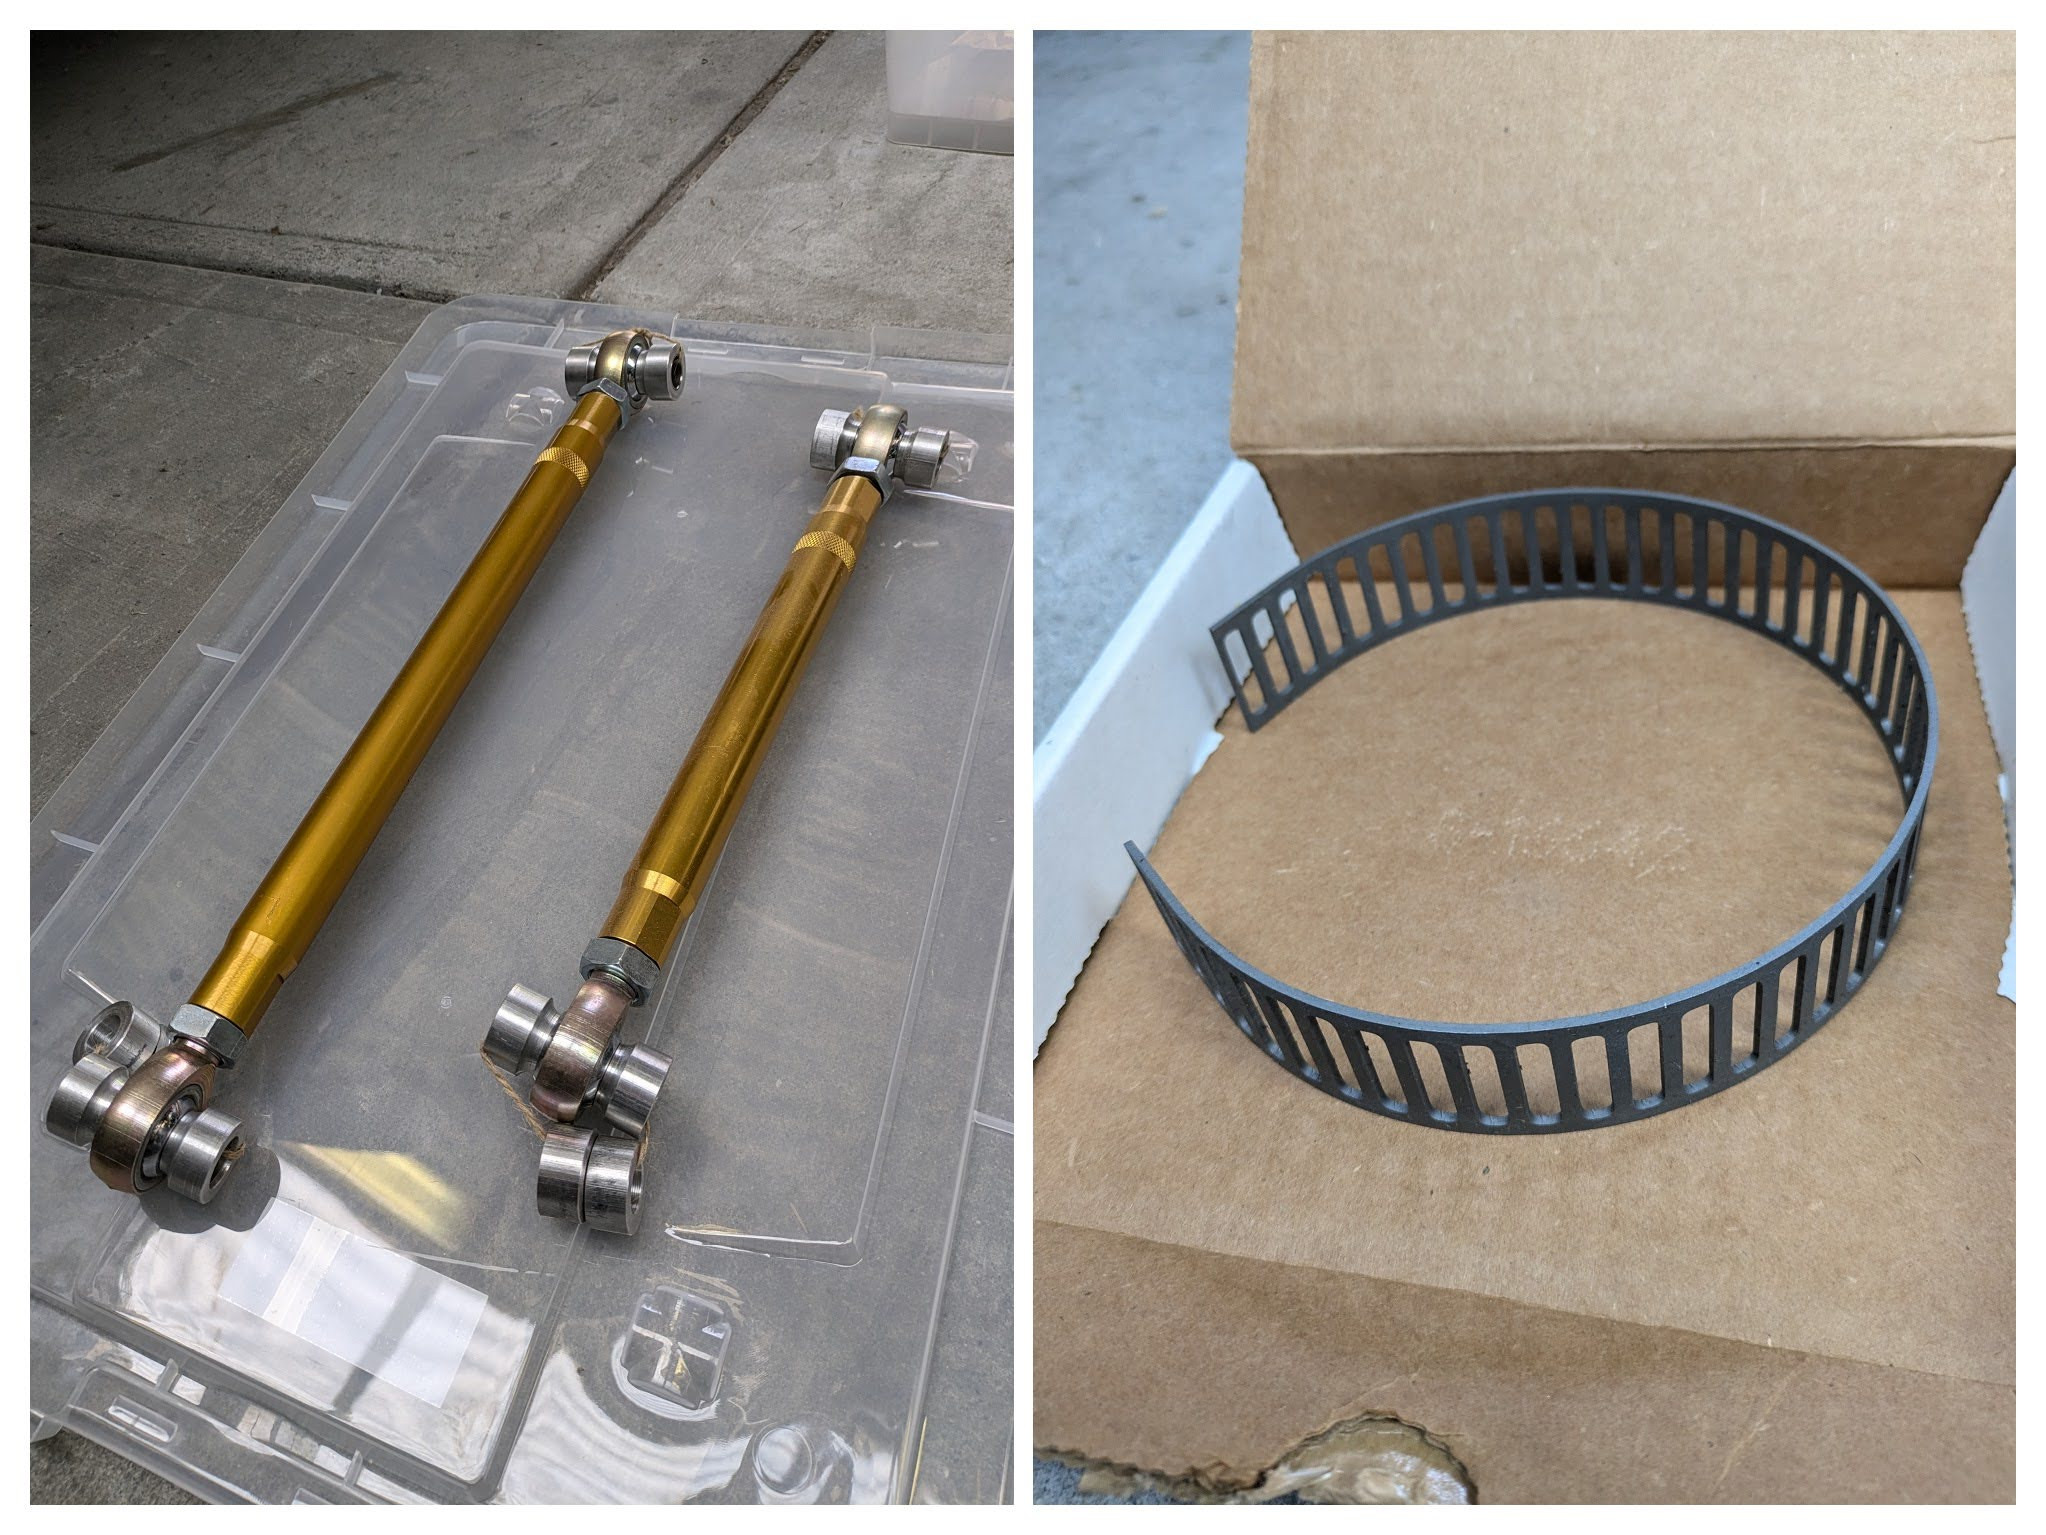
The old pump was removed from the hanger, and the Raceworks pump was installed, securing it with hose clamps in the original position. I tried using the plastic cage used on the bosch pump but I wasnāt happy with how it fitted. With the sock fitted, it was time to splice the wires to extend them to the bulkhead and plumb it all up before putting it in the tank.
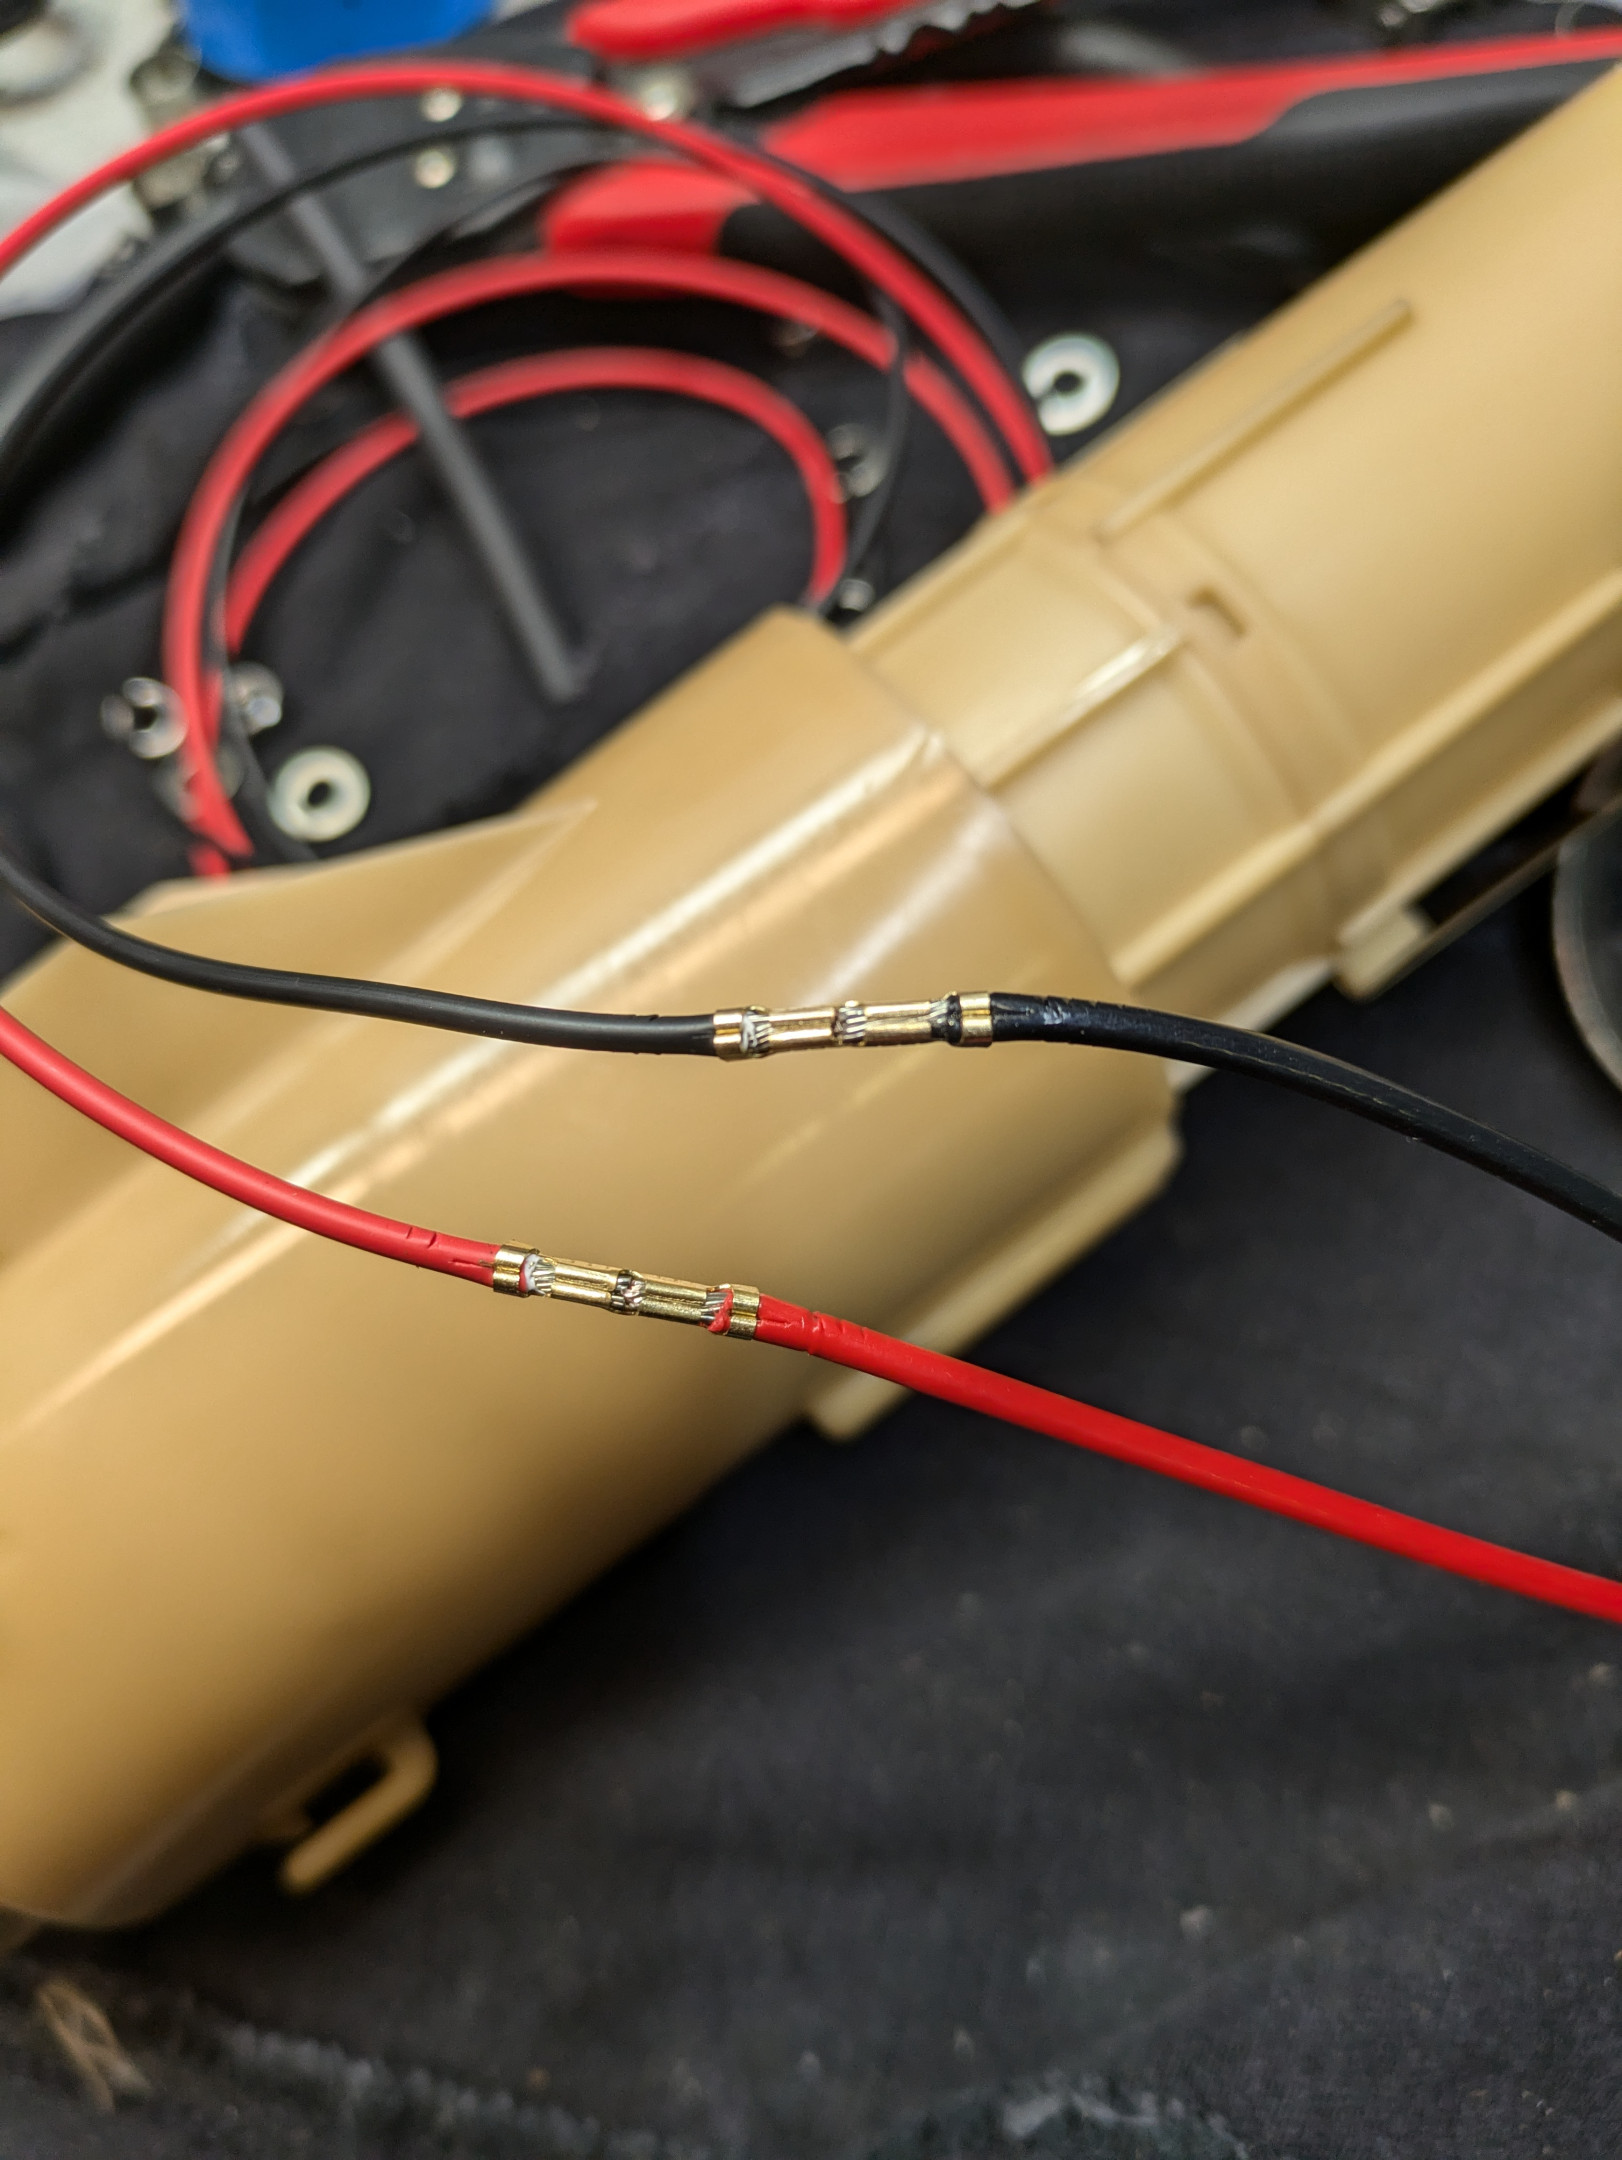
It was then covered with fuel-safe raychem heatshrink.
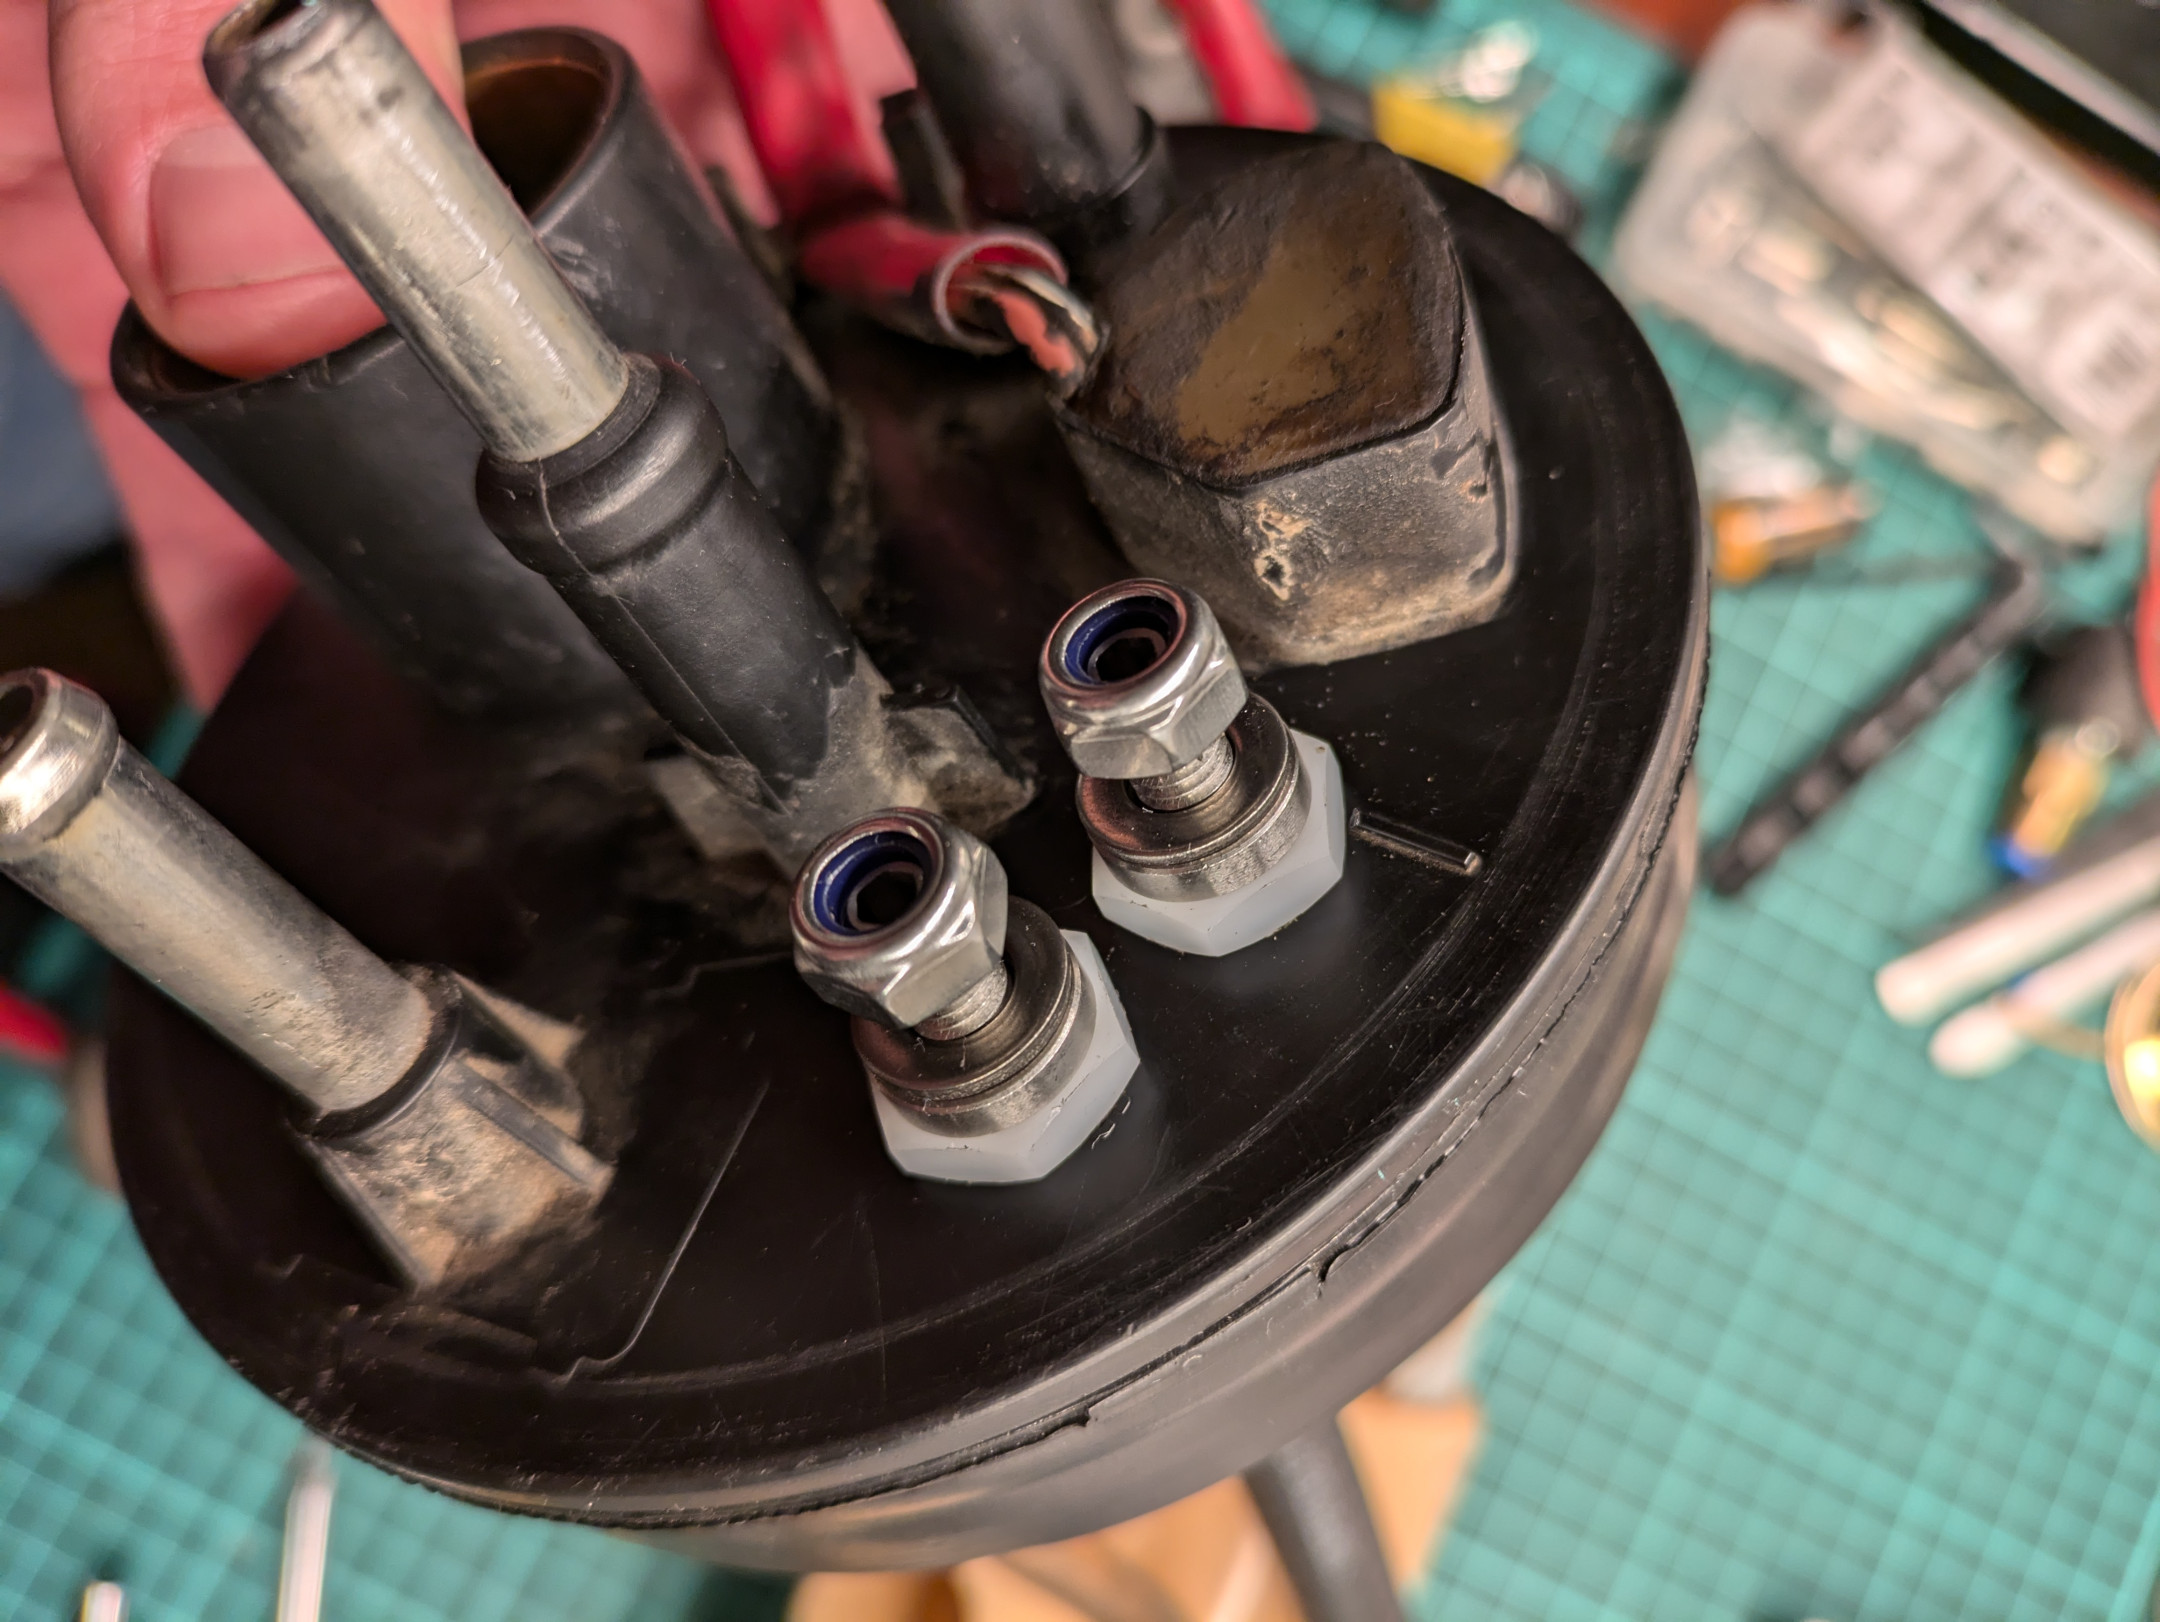
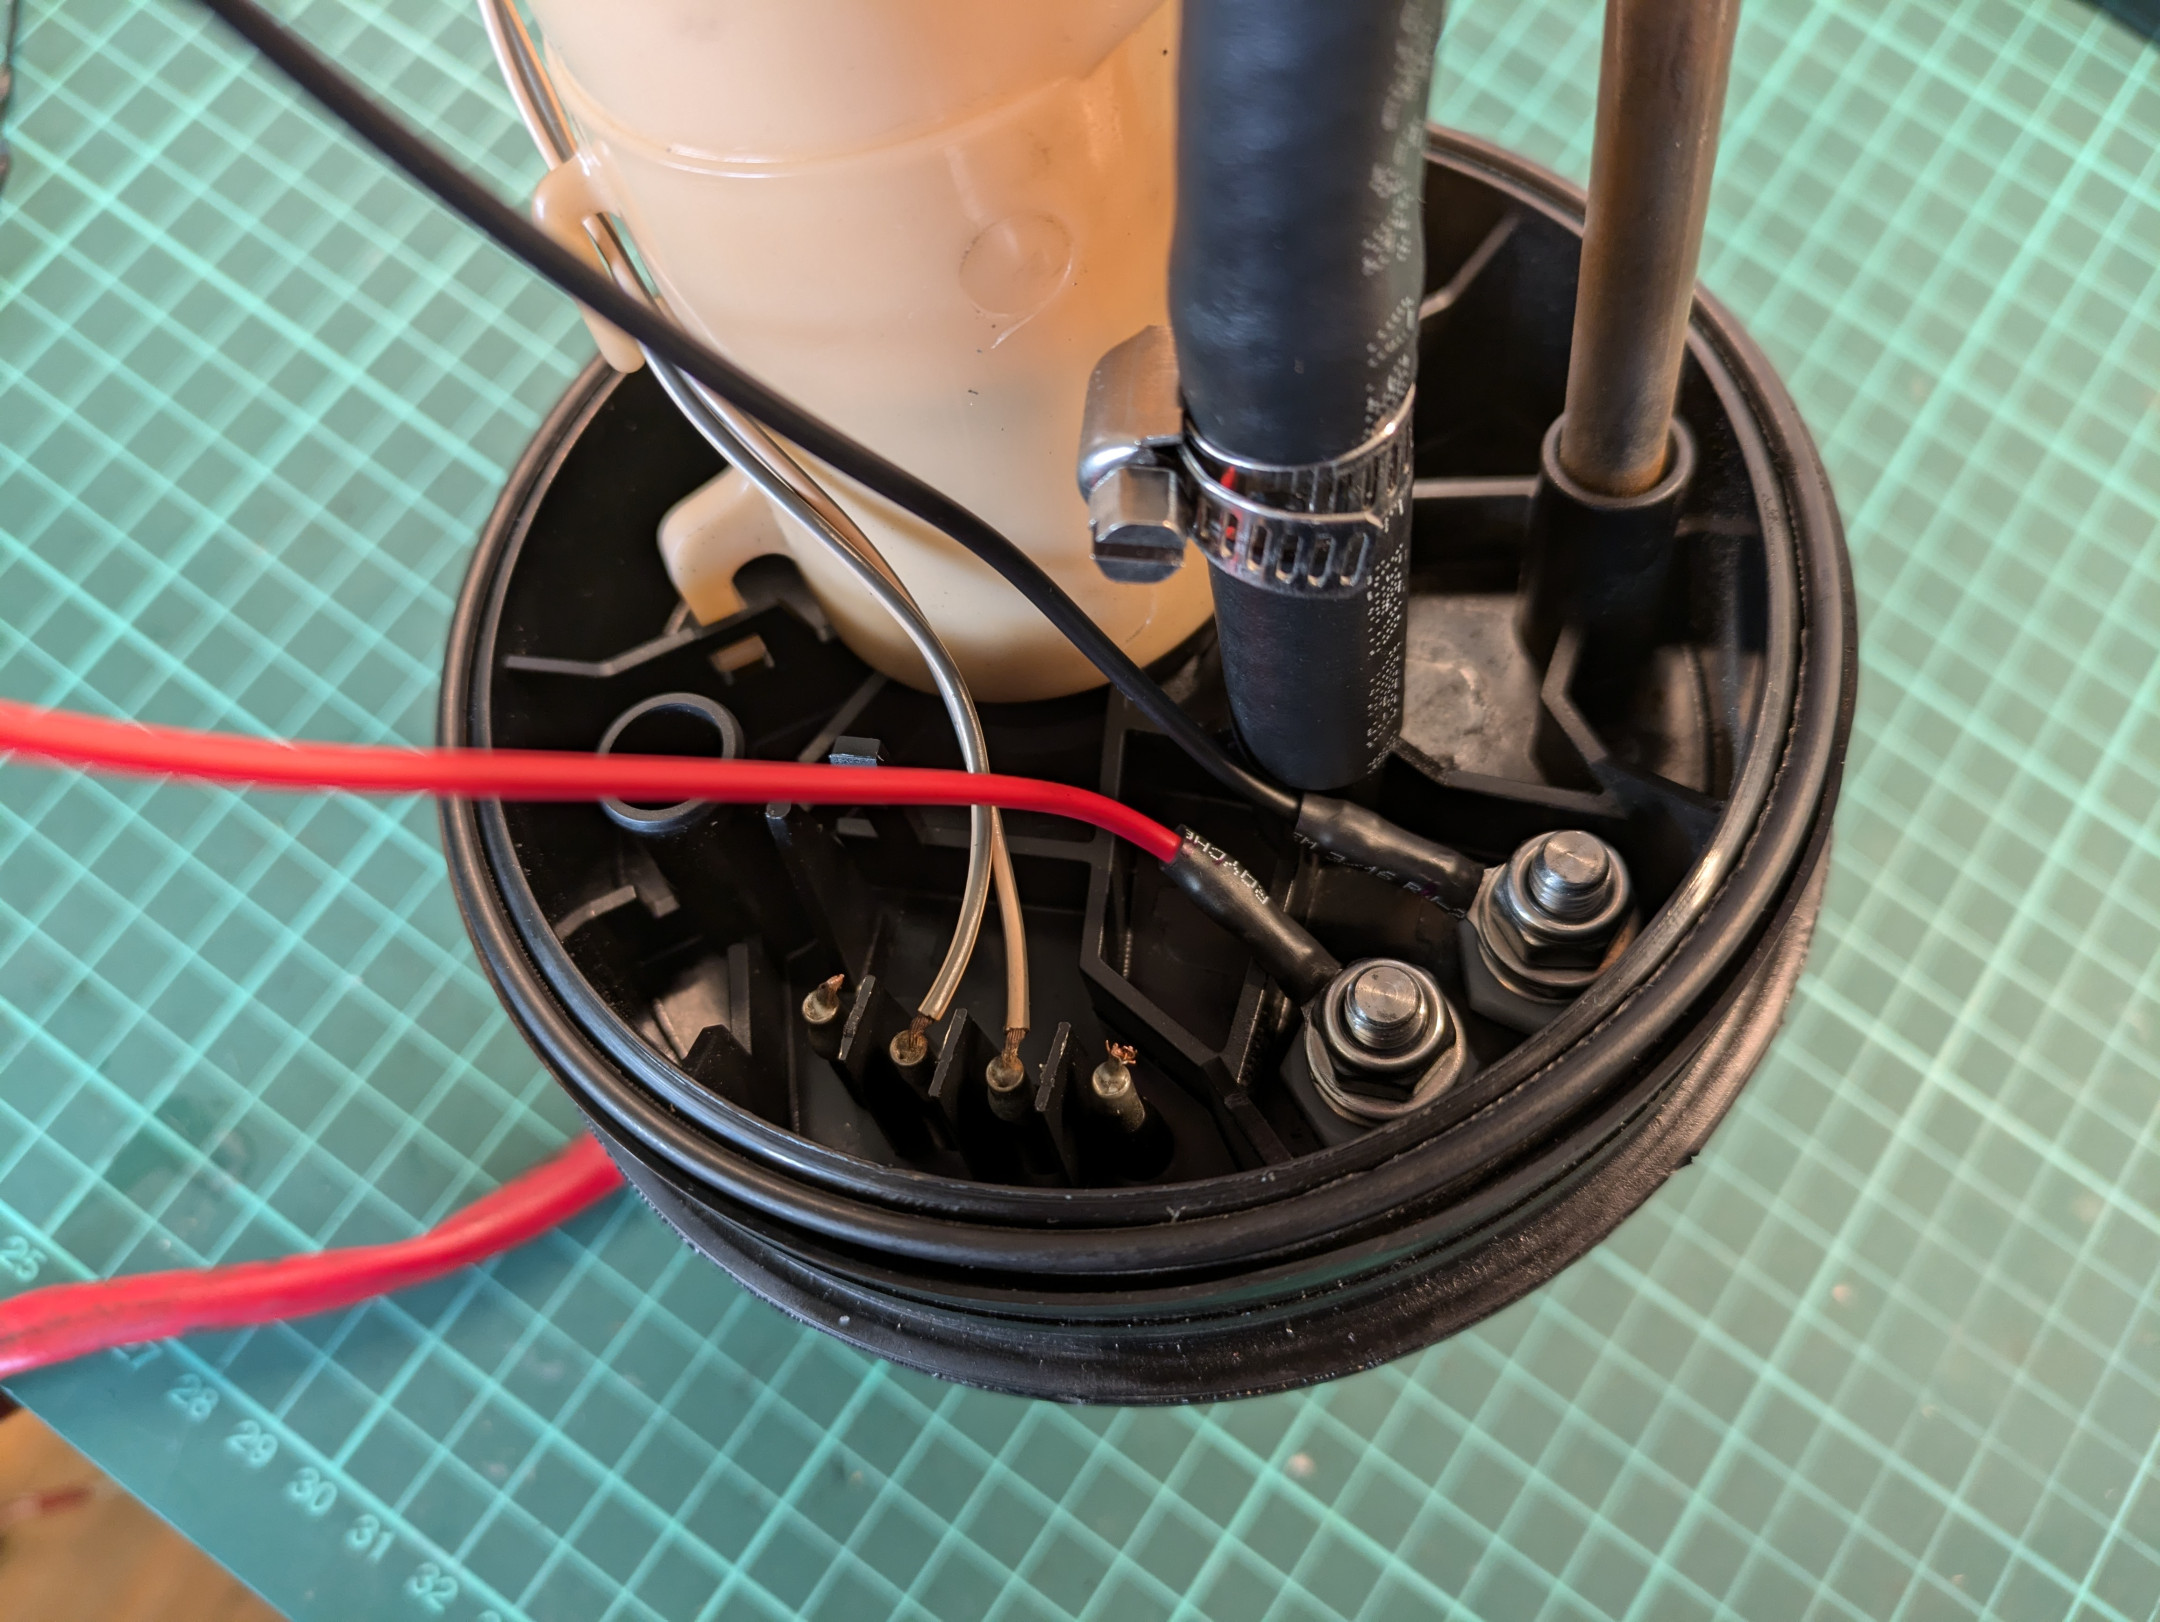
The raceworks high-current bulkhead connectors were installed after drilling two holes in the lid, and then it was all secured, ready for install.
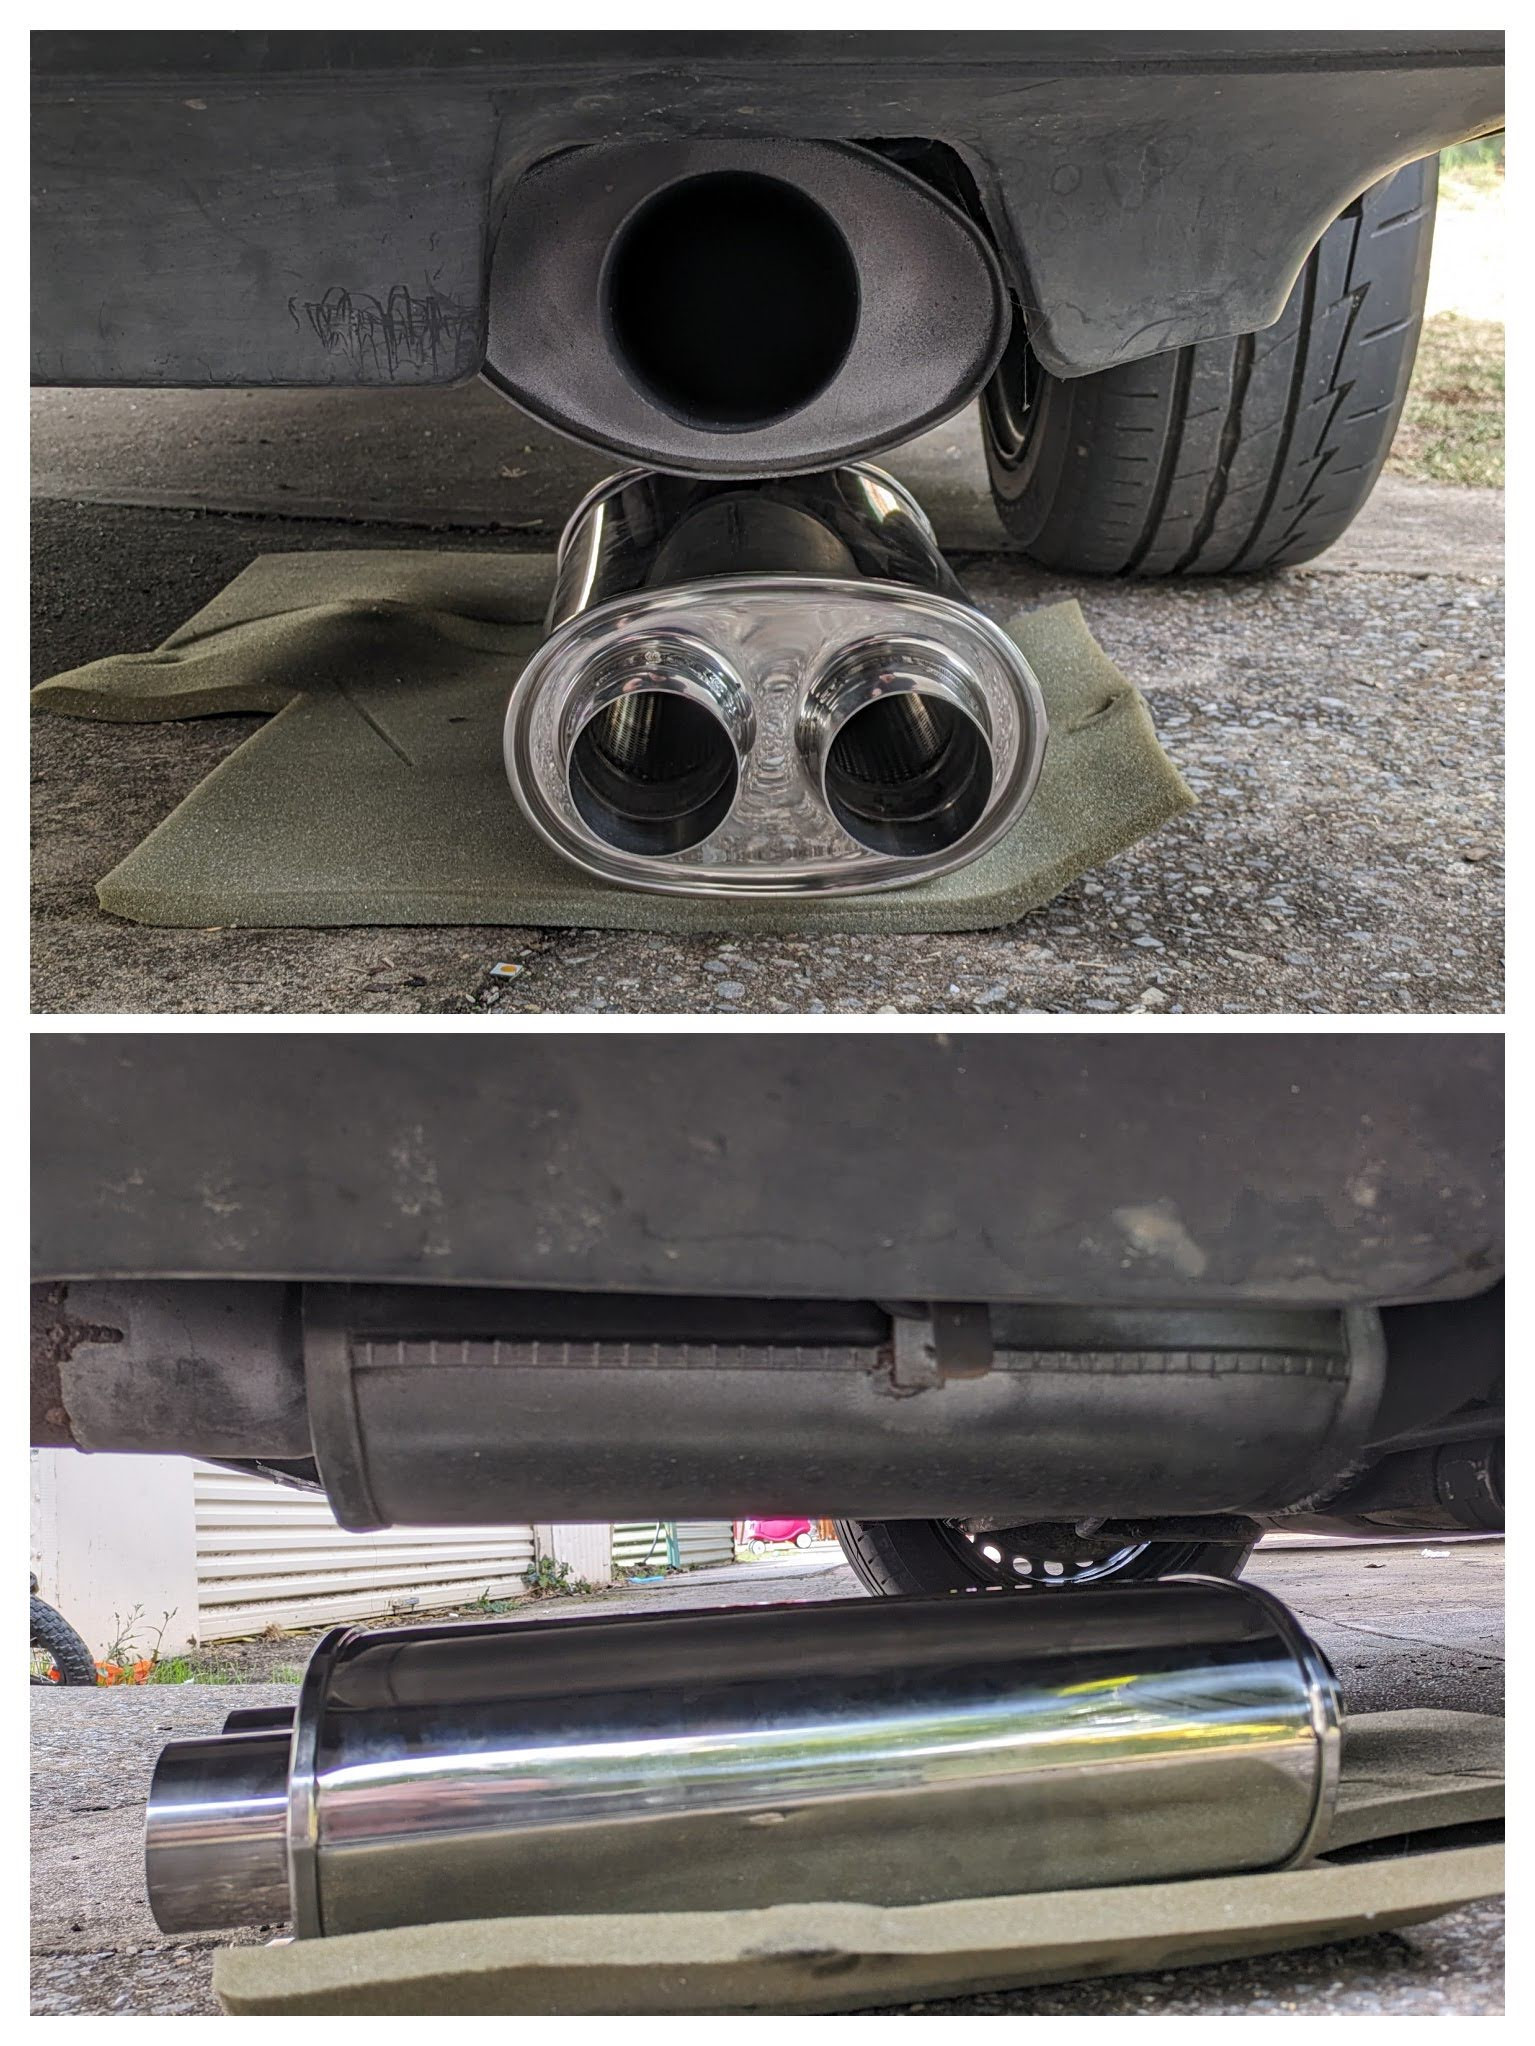
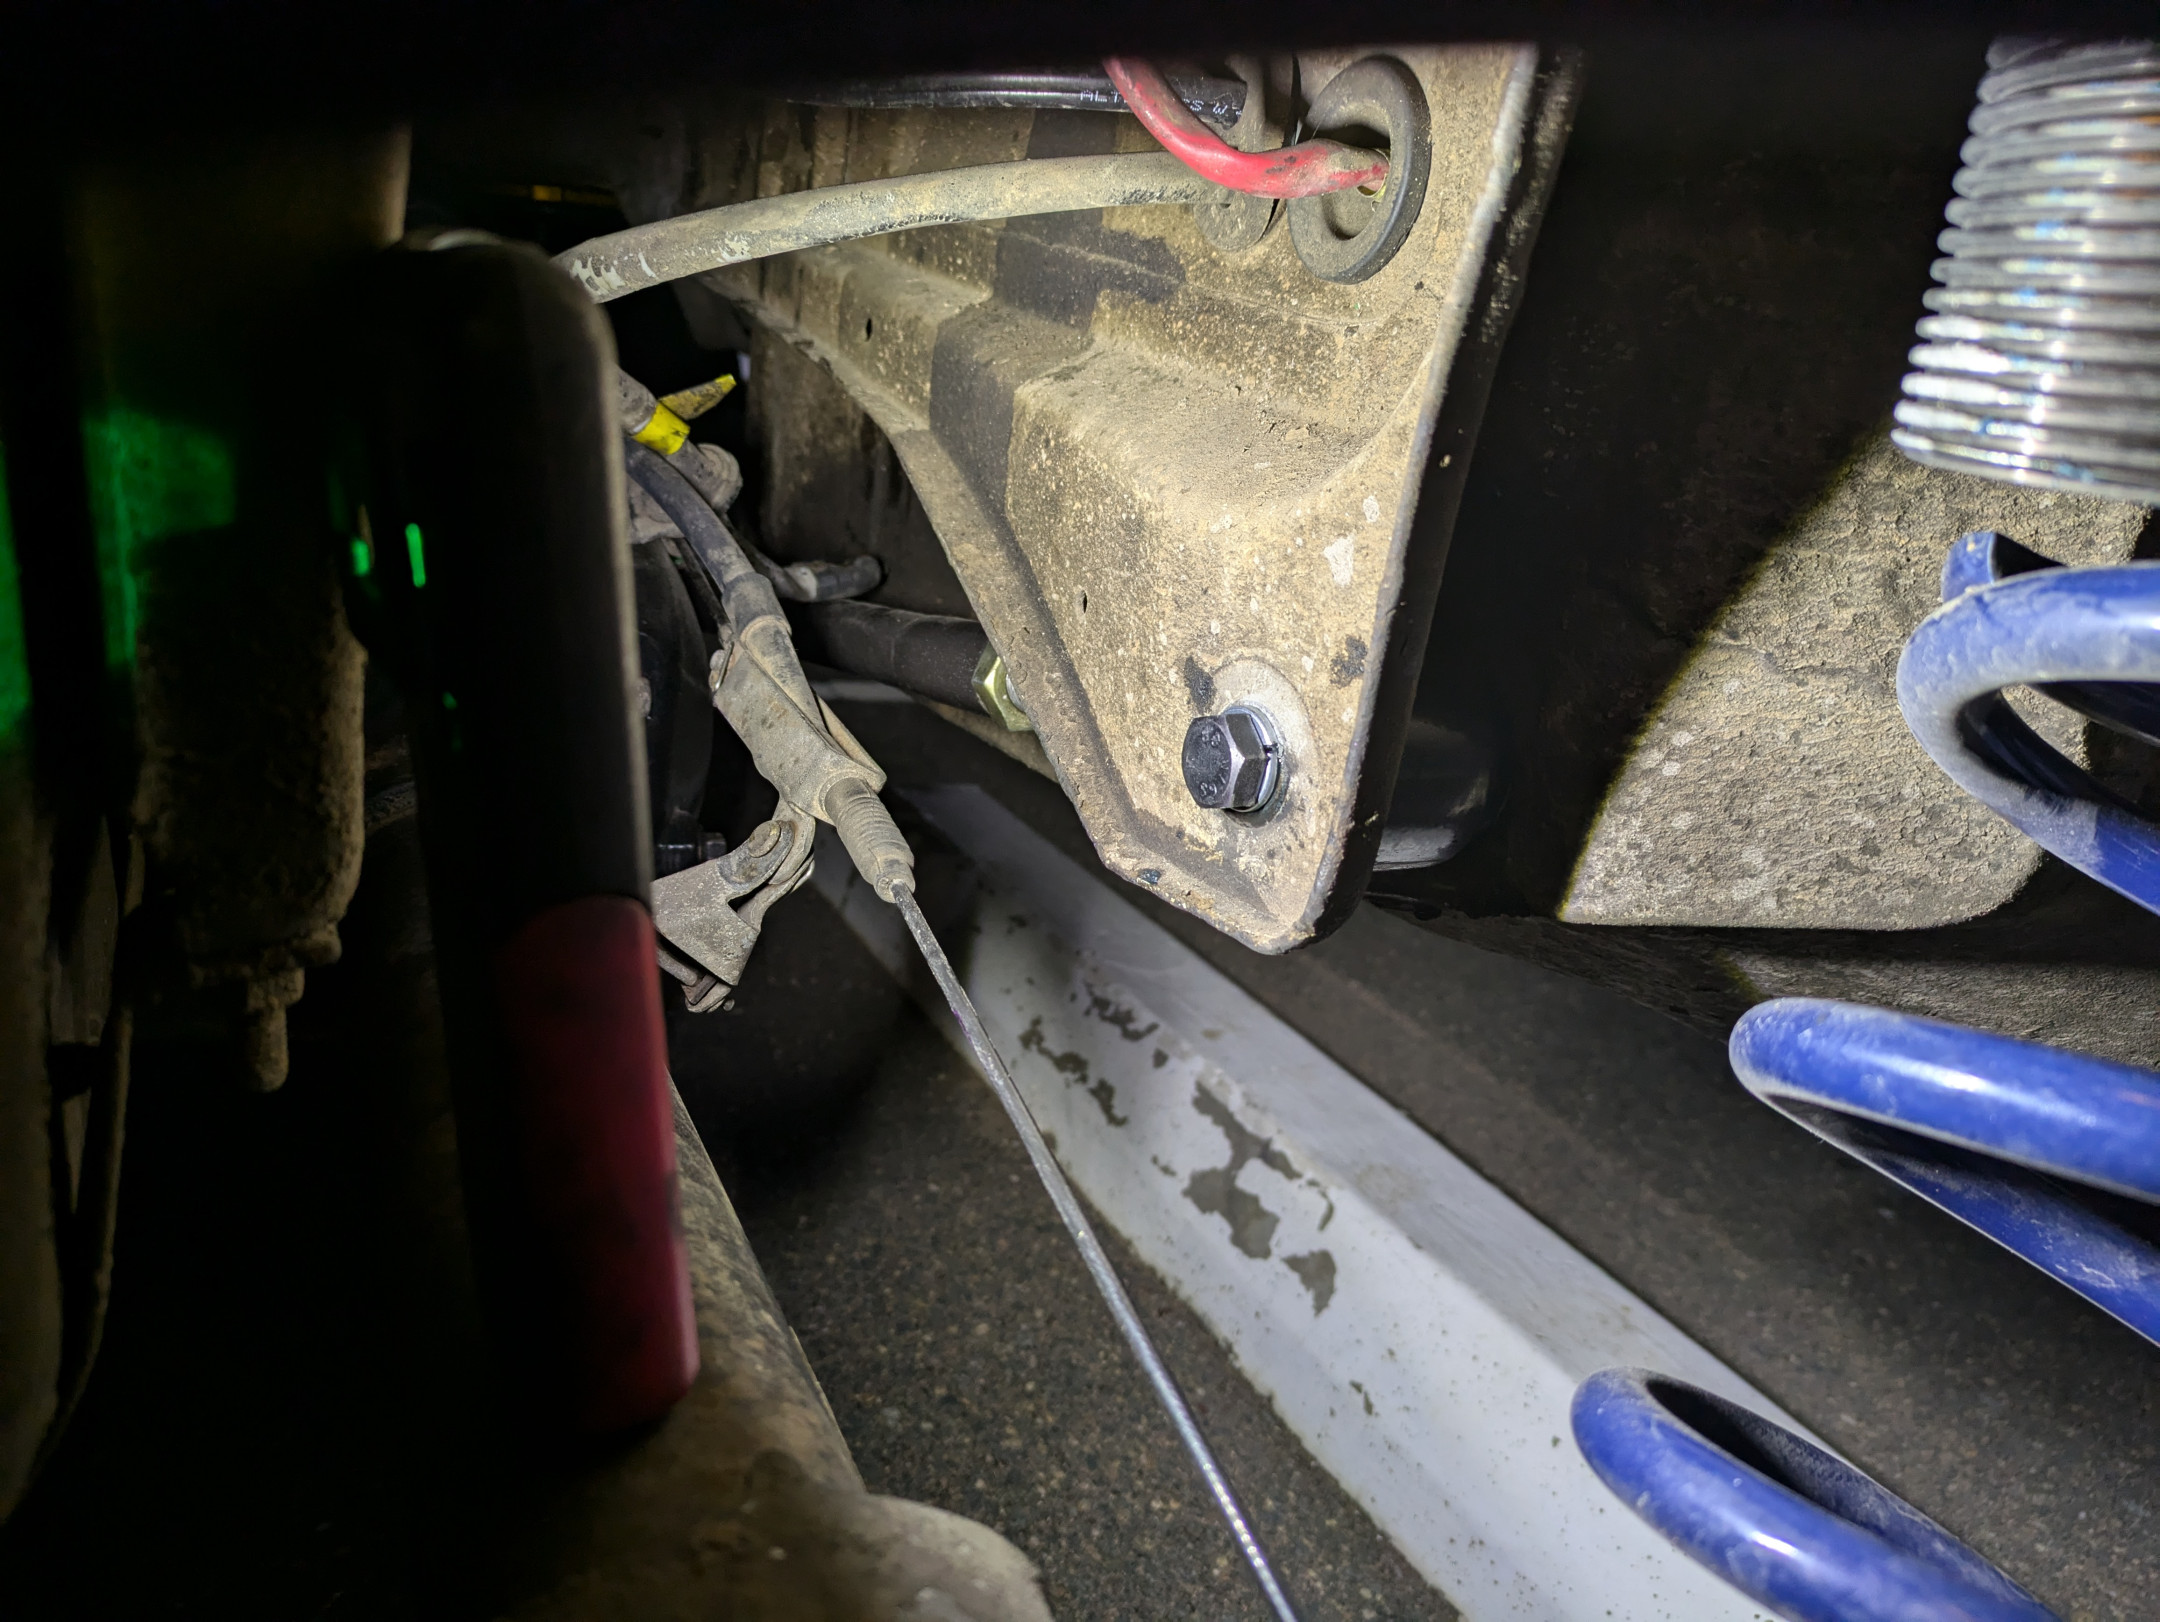
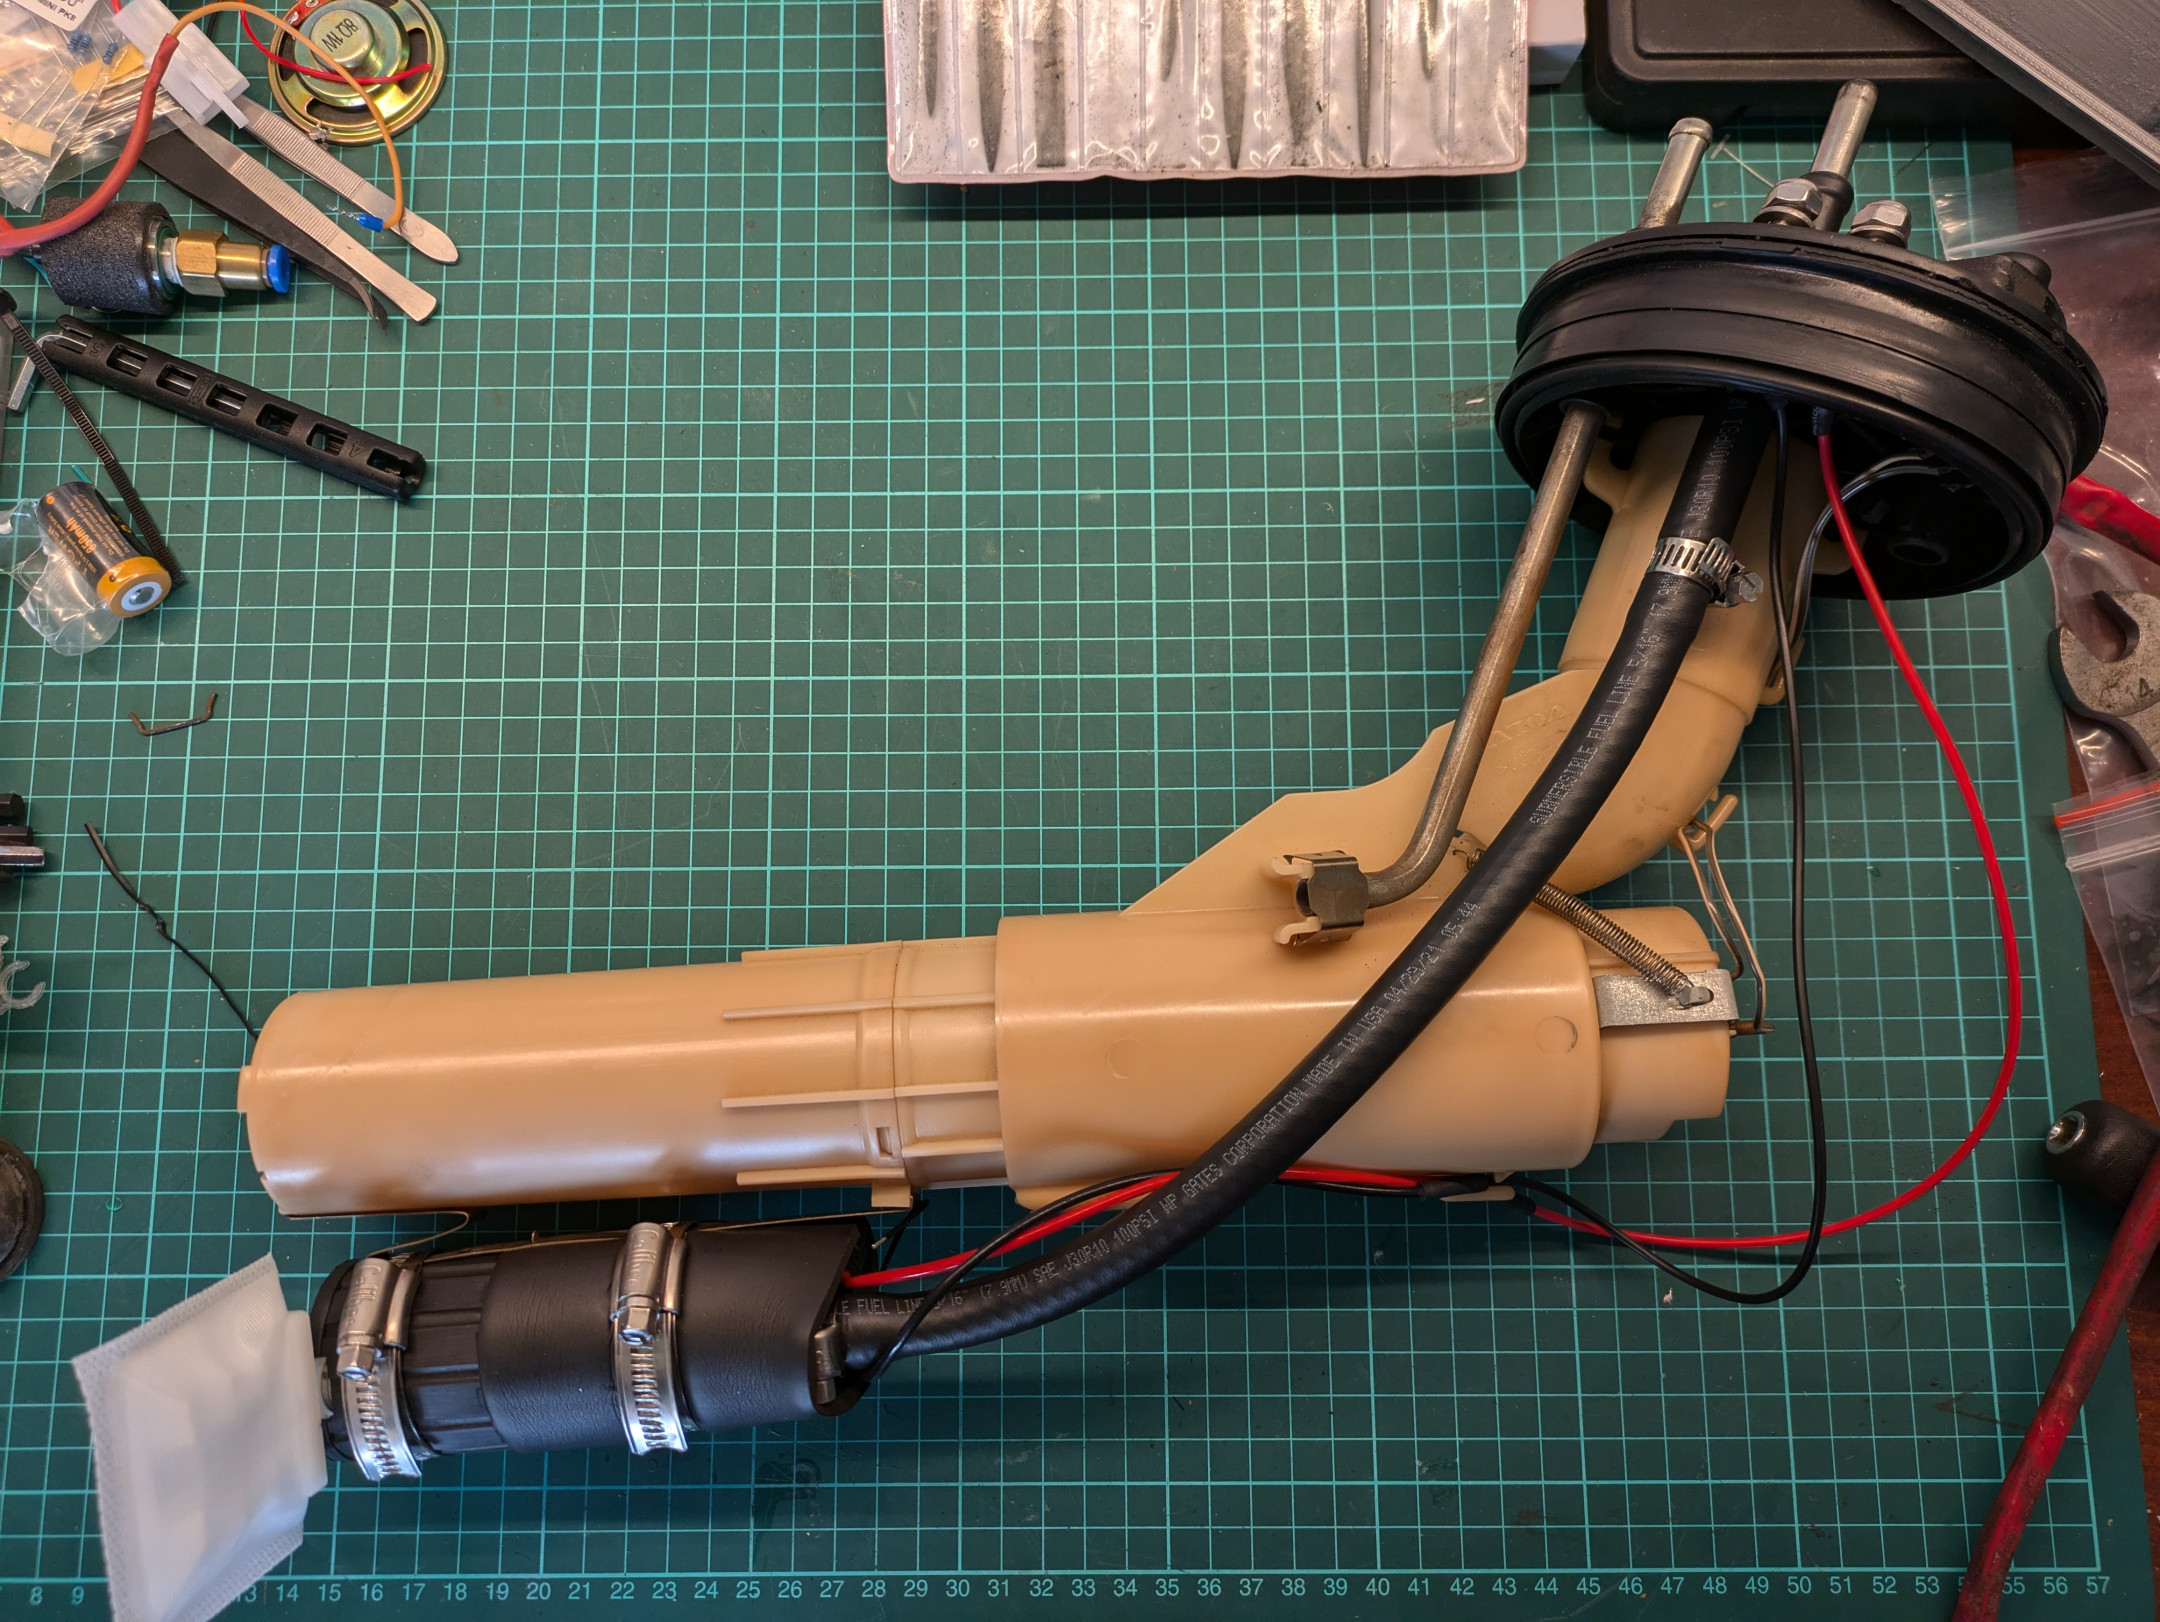
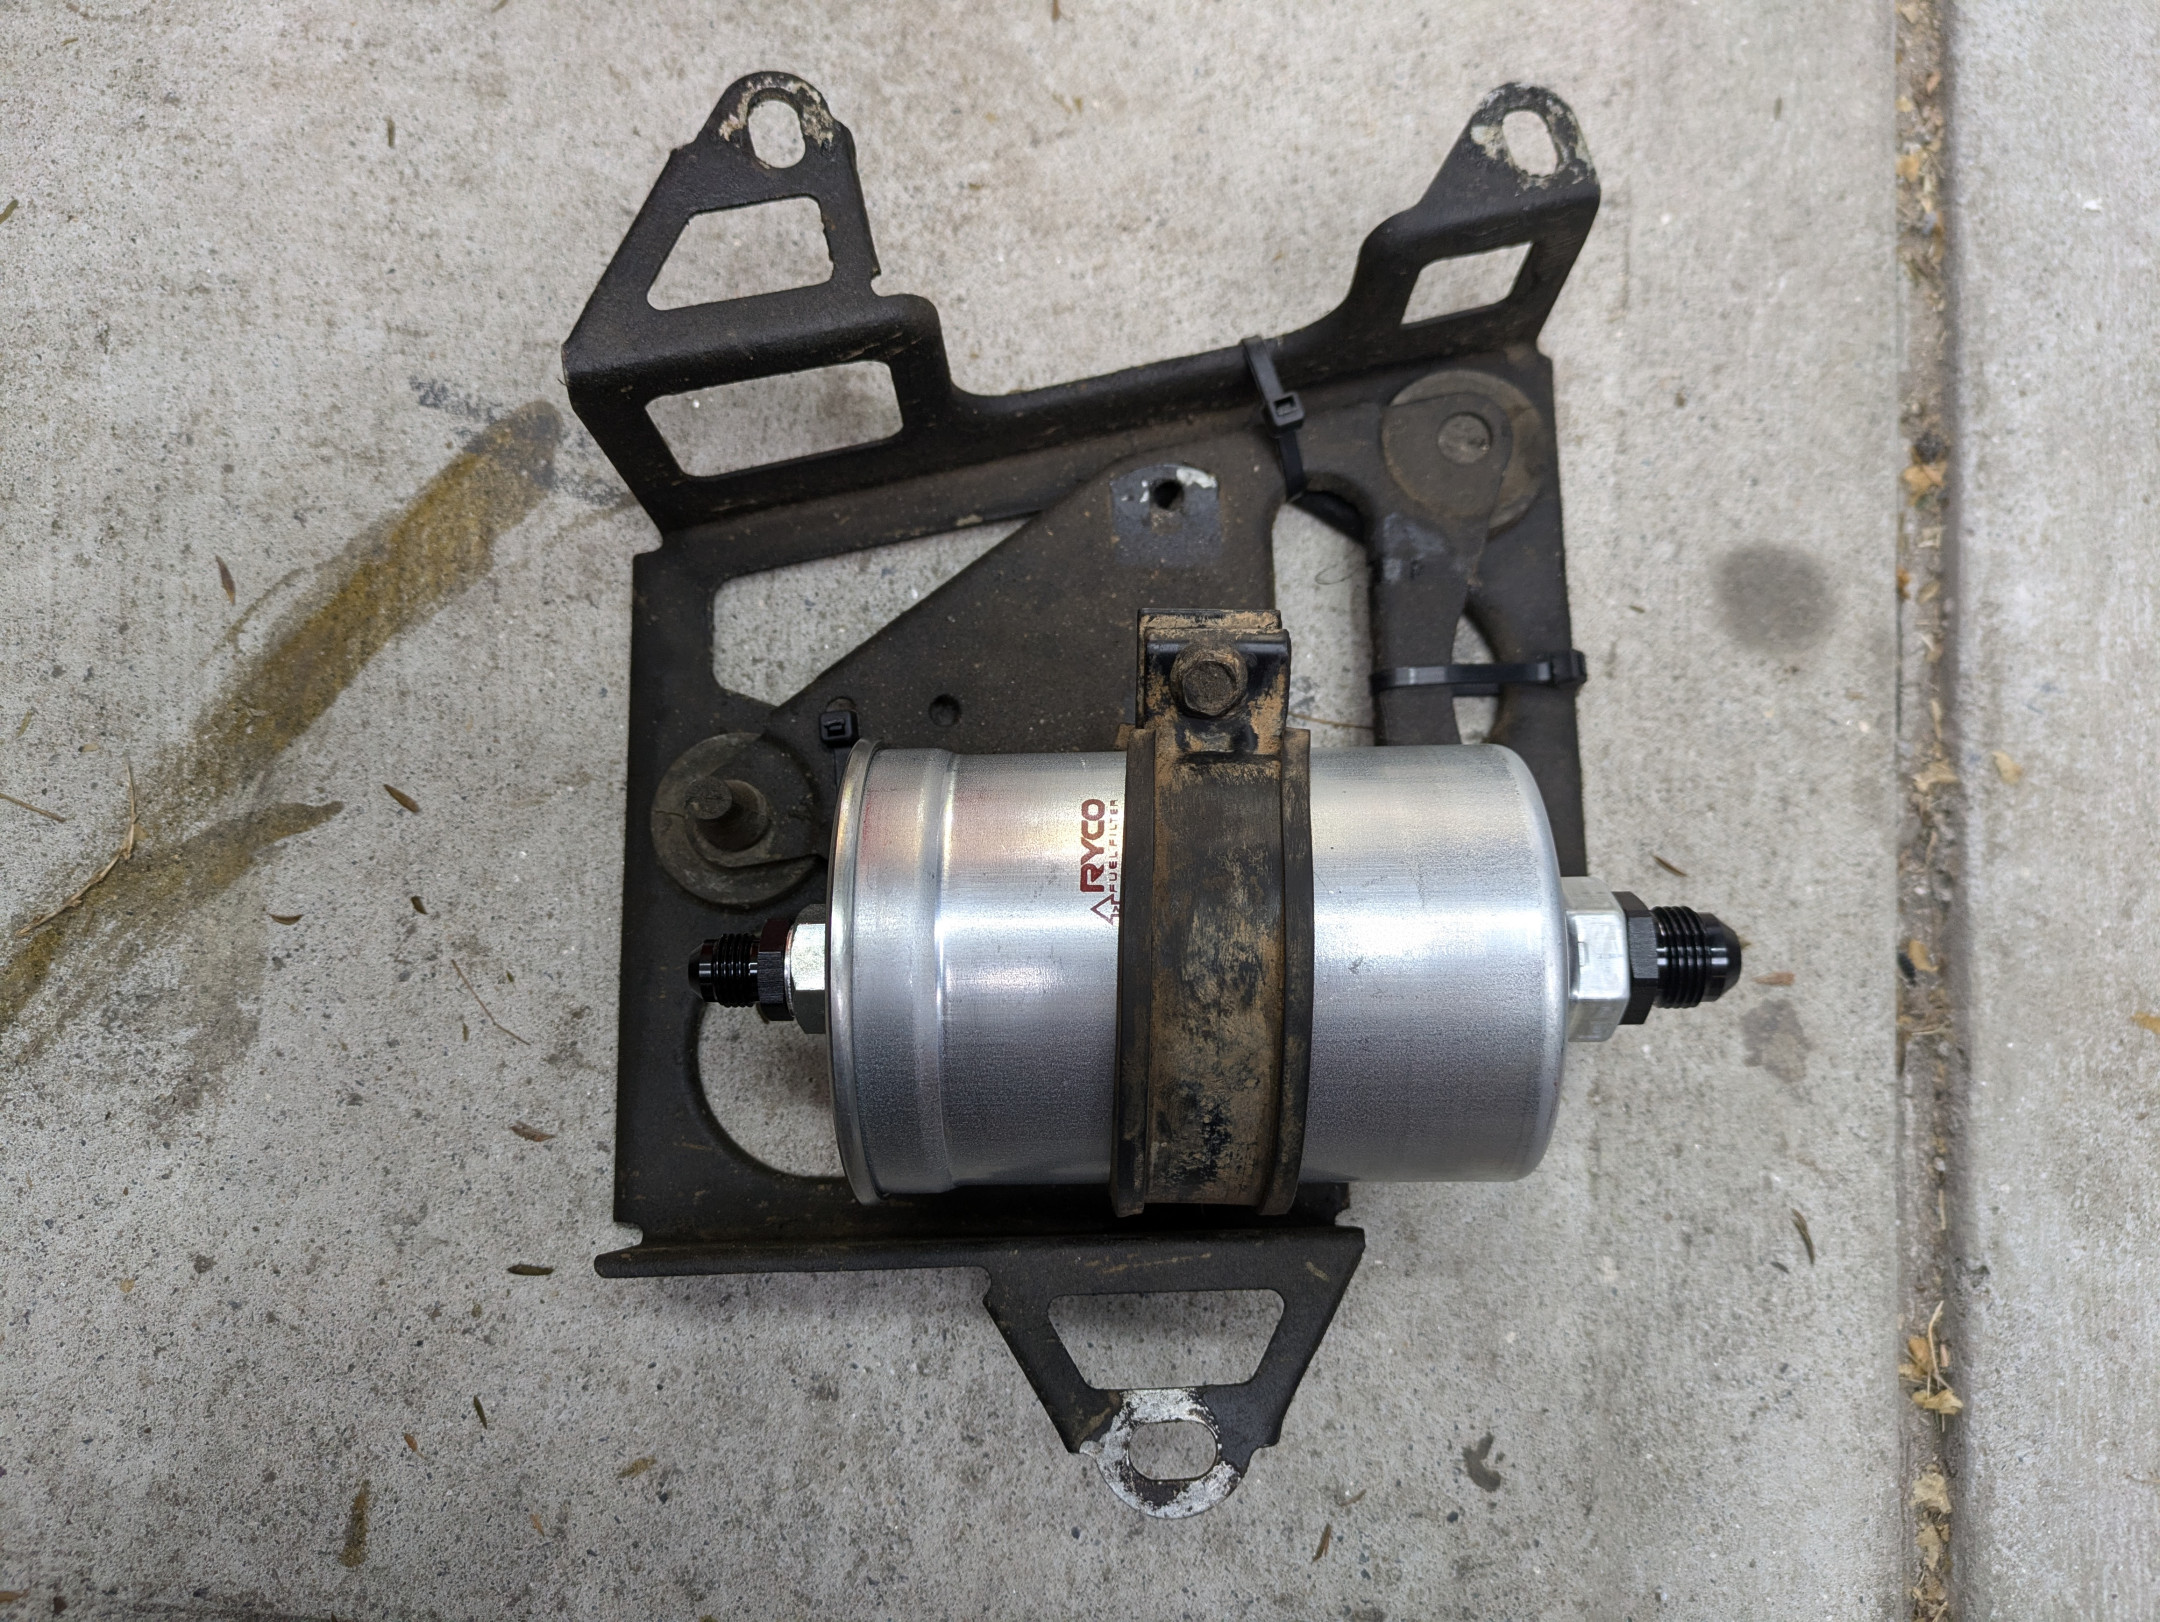
The old under-car fuel pump and filter were removed, and a new (stock spec) filter with the right AN fittings were installed in the original location.
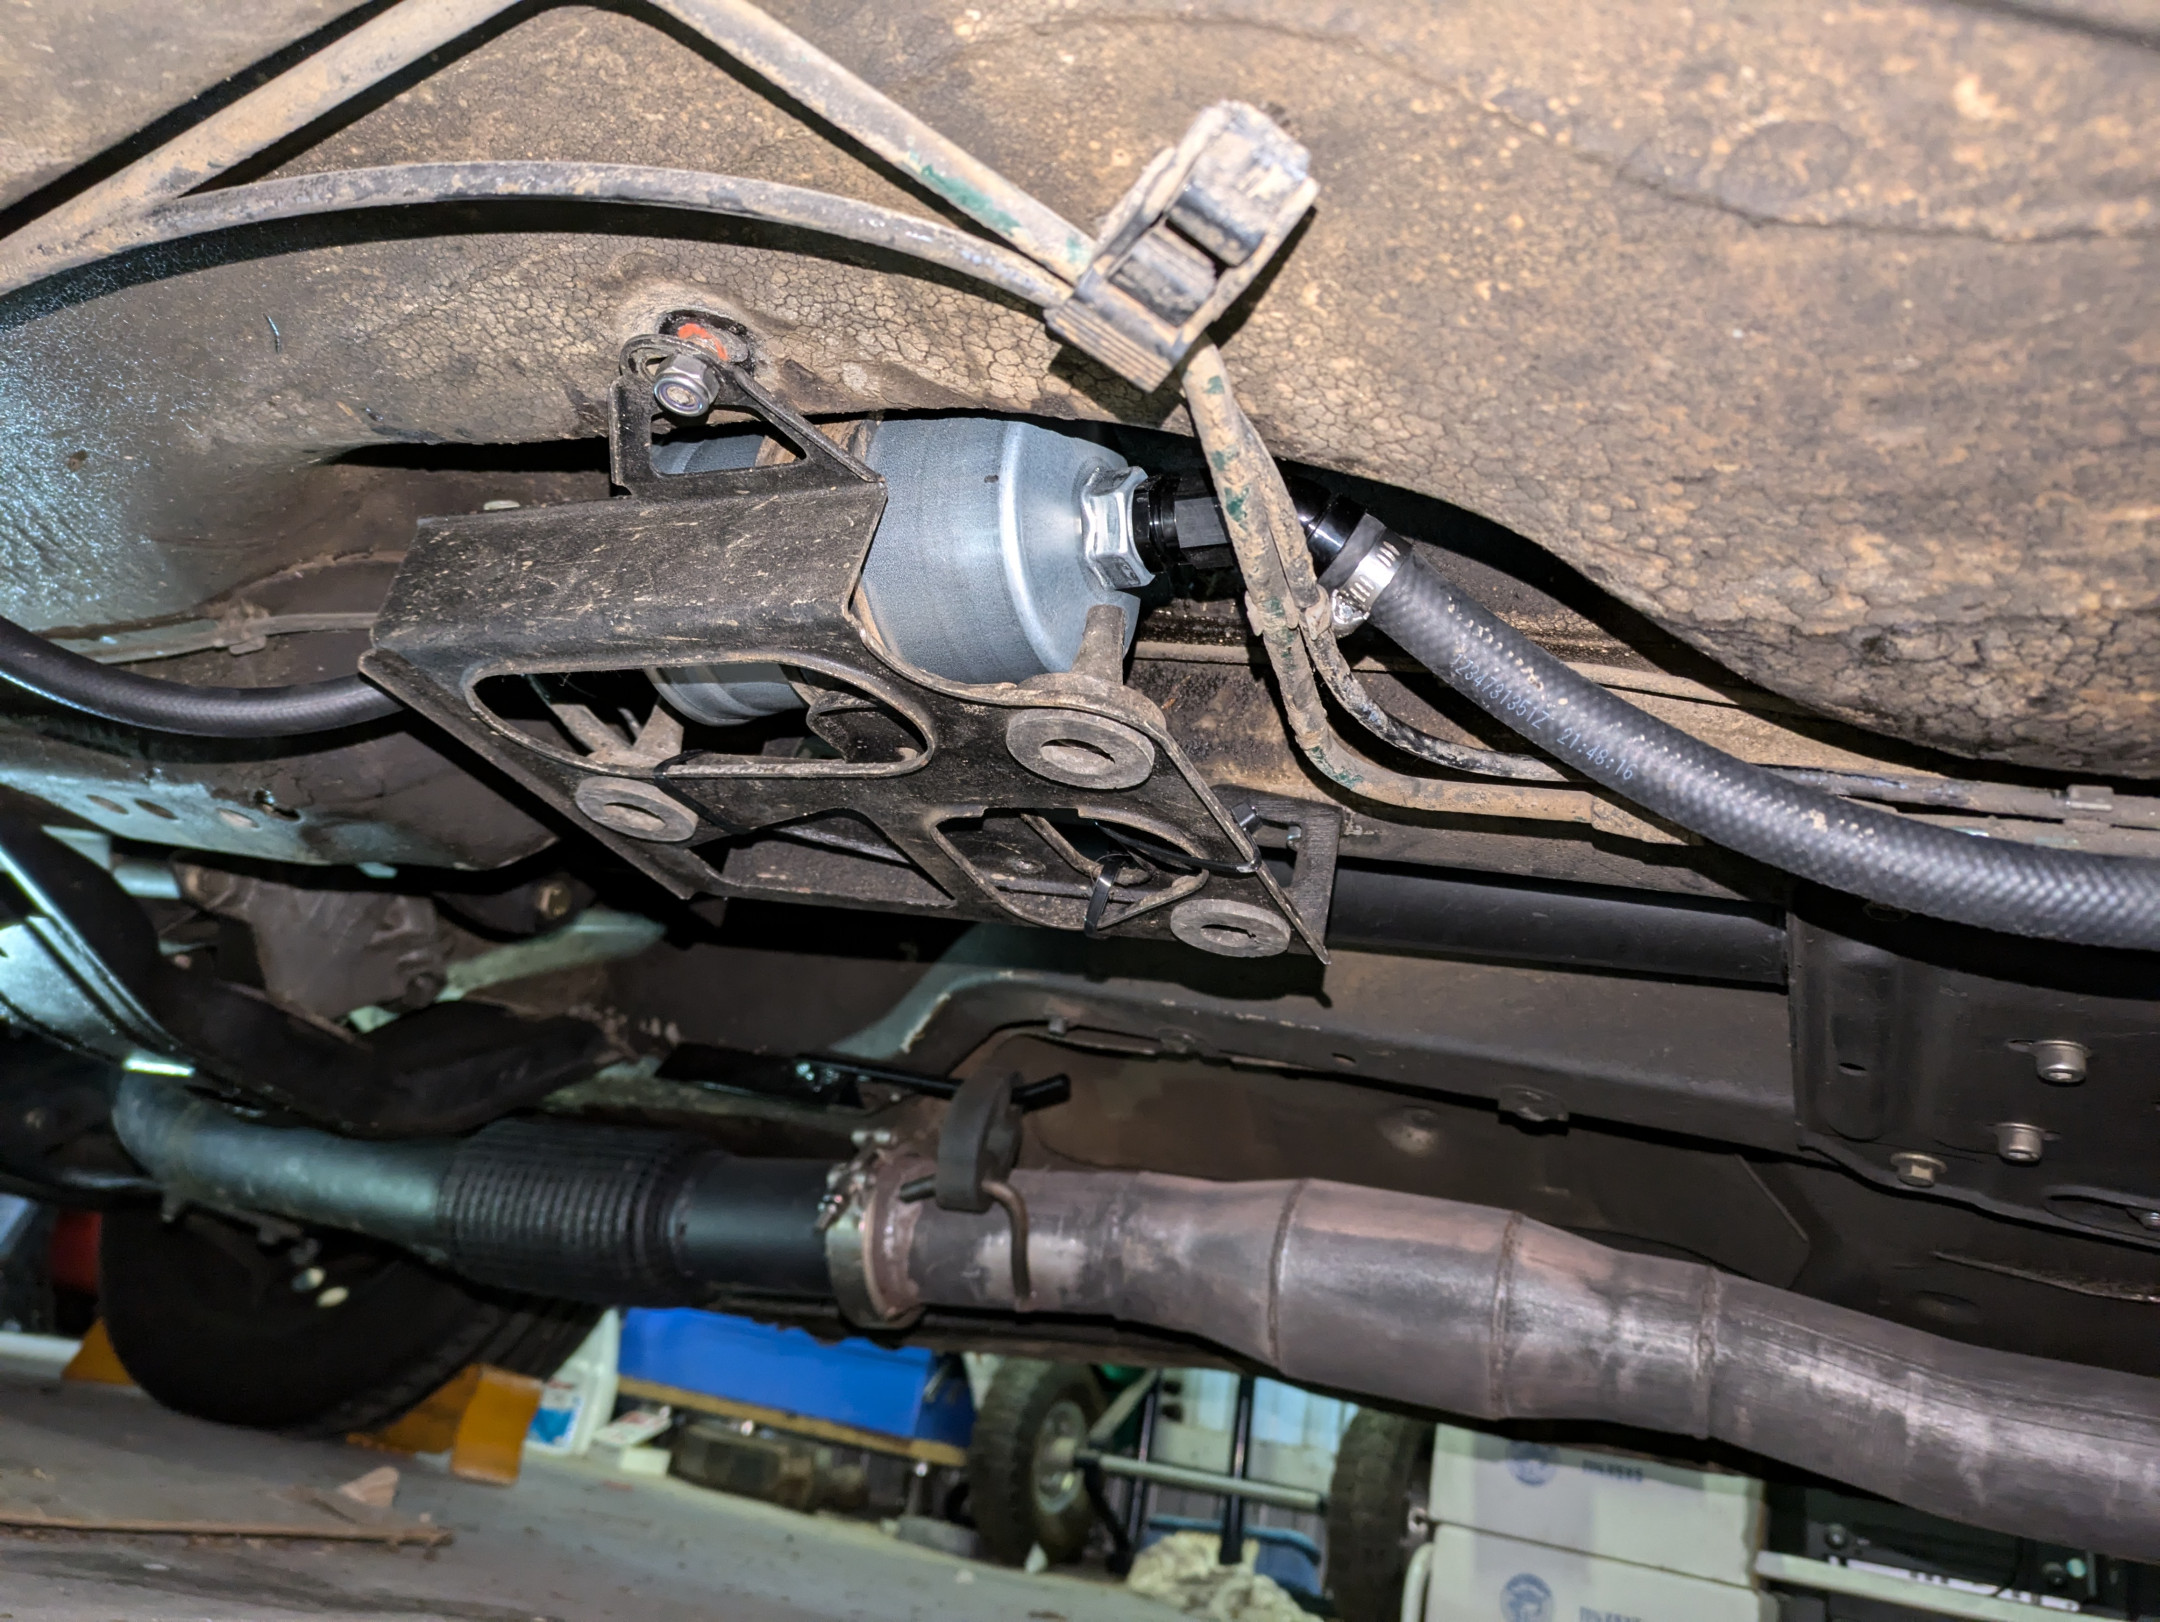
The new 5/16" (8mm) hose was then run up to the rail, and the return hose was replaced too. Everything except the hose connecting the rail to the reg is new, and I'll do that last piece shortly.
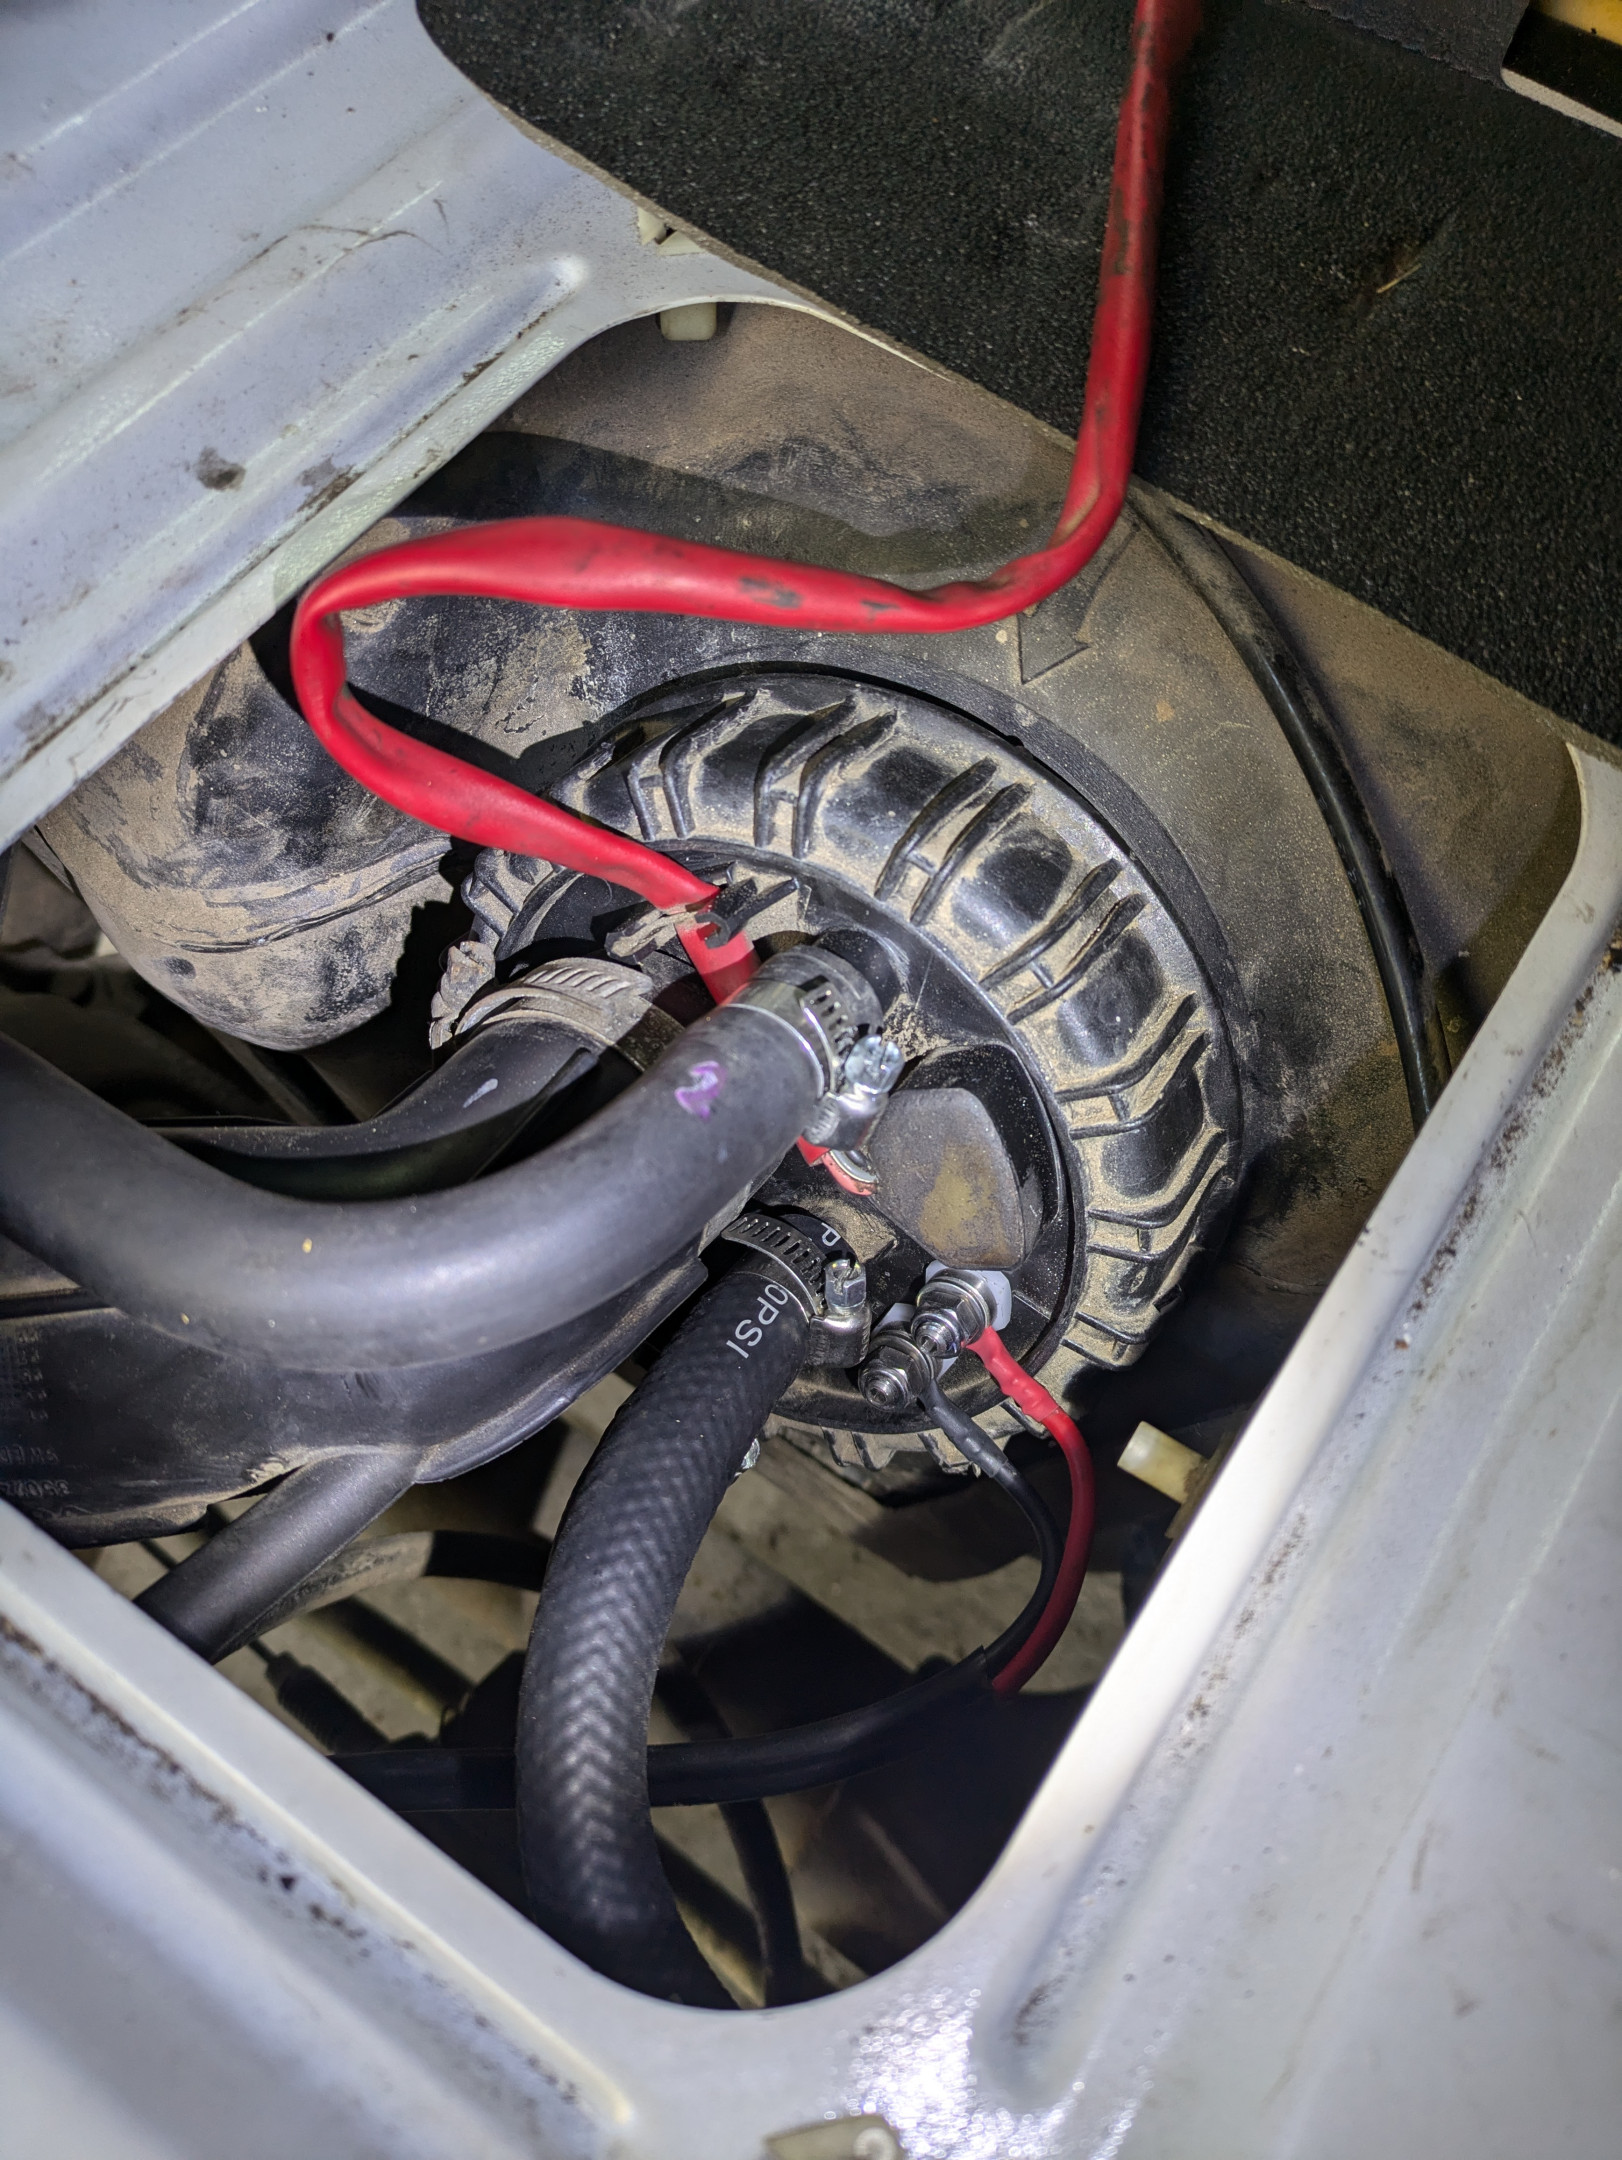
After some swearing, the carrier was installed back in the tank, new hoses were connected and the filter, and new feed/return lines were installed. It's a bit of a pain to run the new hoses to the hard lines near the tank, but I'm glad I did given the condition of the old main feed hose. Tank vent hose looked in fine condition so didn't replace it.
I ran new 12AWG wire from the tank bulkhead connector all the way (~6 meters?) to the connector that originally powered the under-car pump.
I put some new fuel in and it started up first crank, and no longer dies after moving around like it did. So far so good. Noticed thereās less power draw on the electrical system too with the voltage it sits at idling now. Clearly having two high-pressure pumps was putting a bit more load on it, and a single pump removes a point of failure so thatās nice.
The best part? After some laps of the block, I realised the stumble I had coming onto boost is completely gone now, and it just freight trains. Itās completely different now I wonder how long itās been on its last legs for. Very occasionally if I drop a gear and give it a boot my UTCOMP gauge would beep at me warning me of a lean condition (monitoring AFRs while in positive boost), at which point I immediately back off, but I thought it was possibly a lag between sensors. Fingers crossed that issue is solved too and that no damage was done to the engine because of that.
After it was all buttoned up, I had an issue where the fuel level was stuck at the previous position, and immediately I thought it might be an issue with the float inside the housing that got stuck. I decided to brim the tank, go for a long drive in it and by the halfway point about 100km in, it had sorted itself out and reads properly again! Feels good.
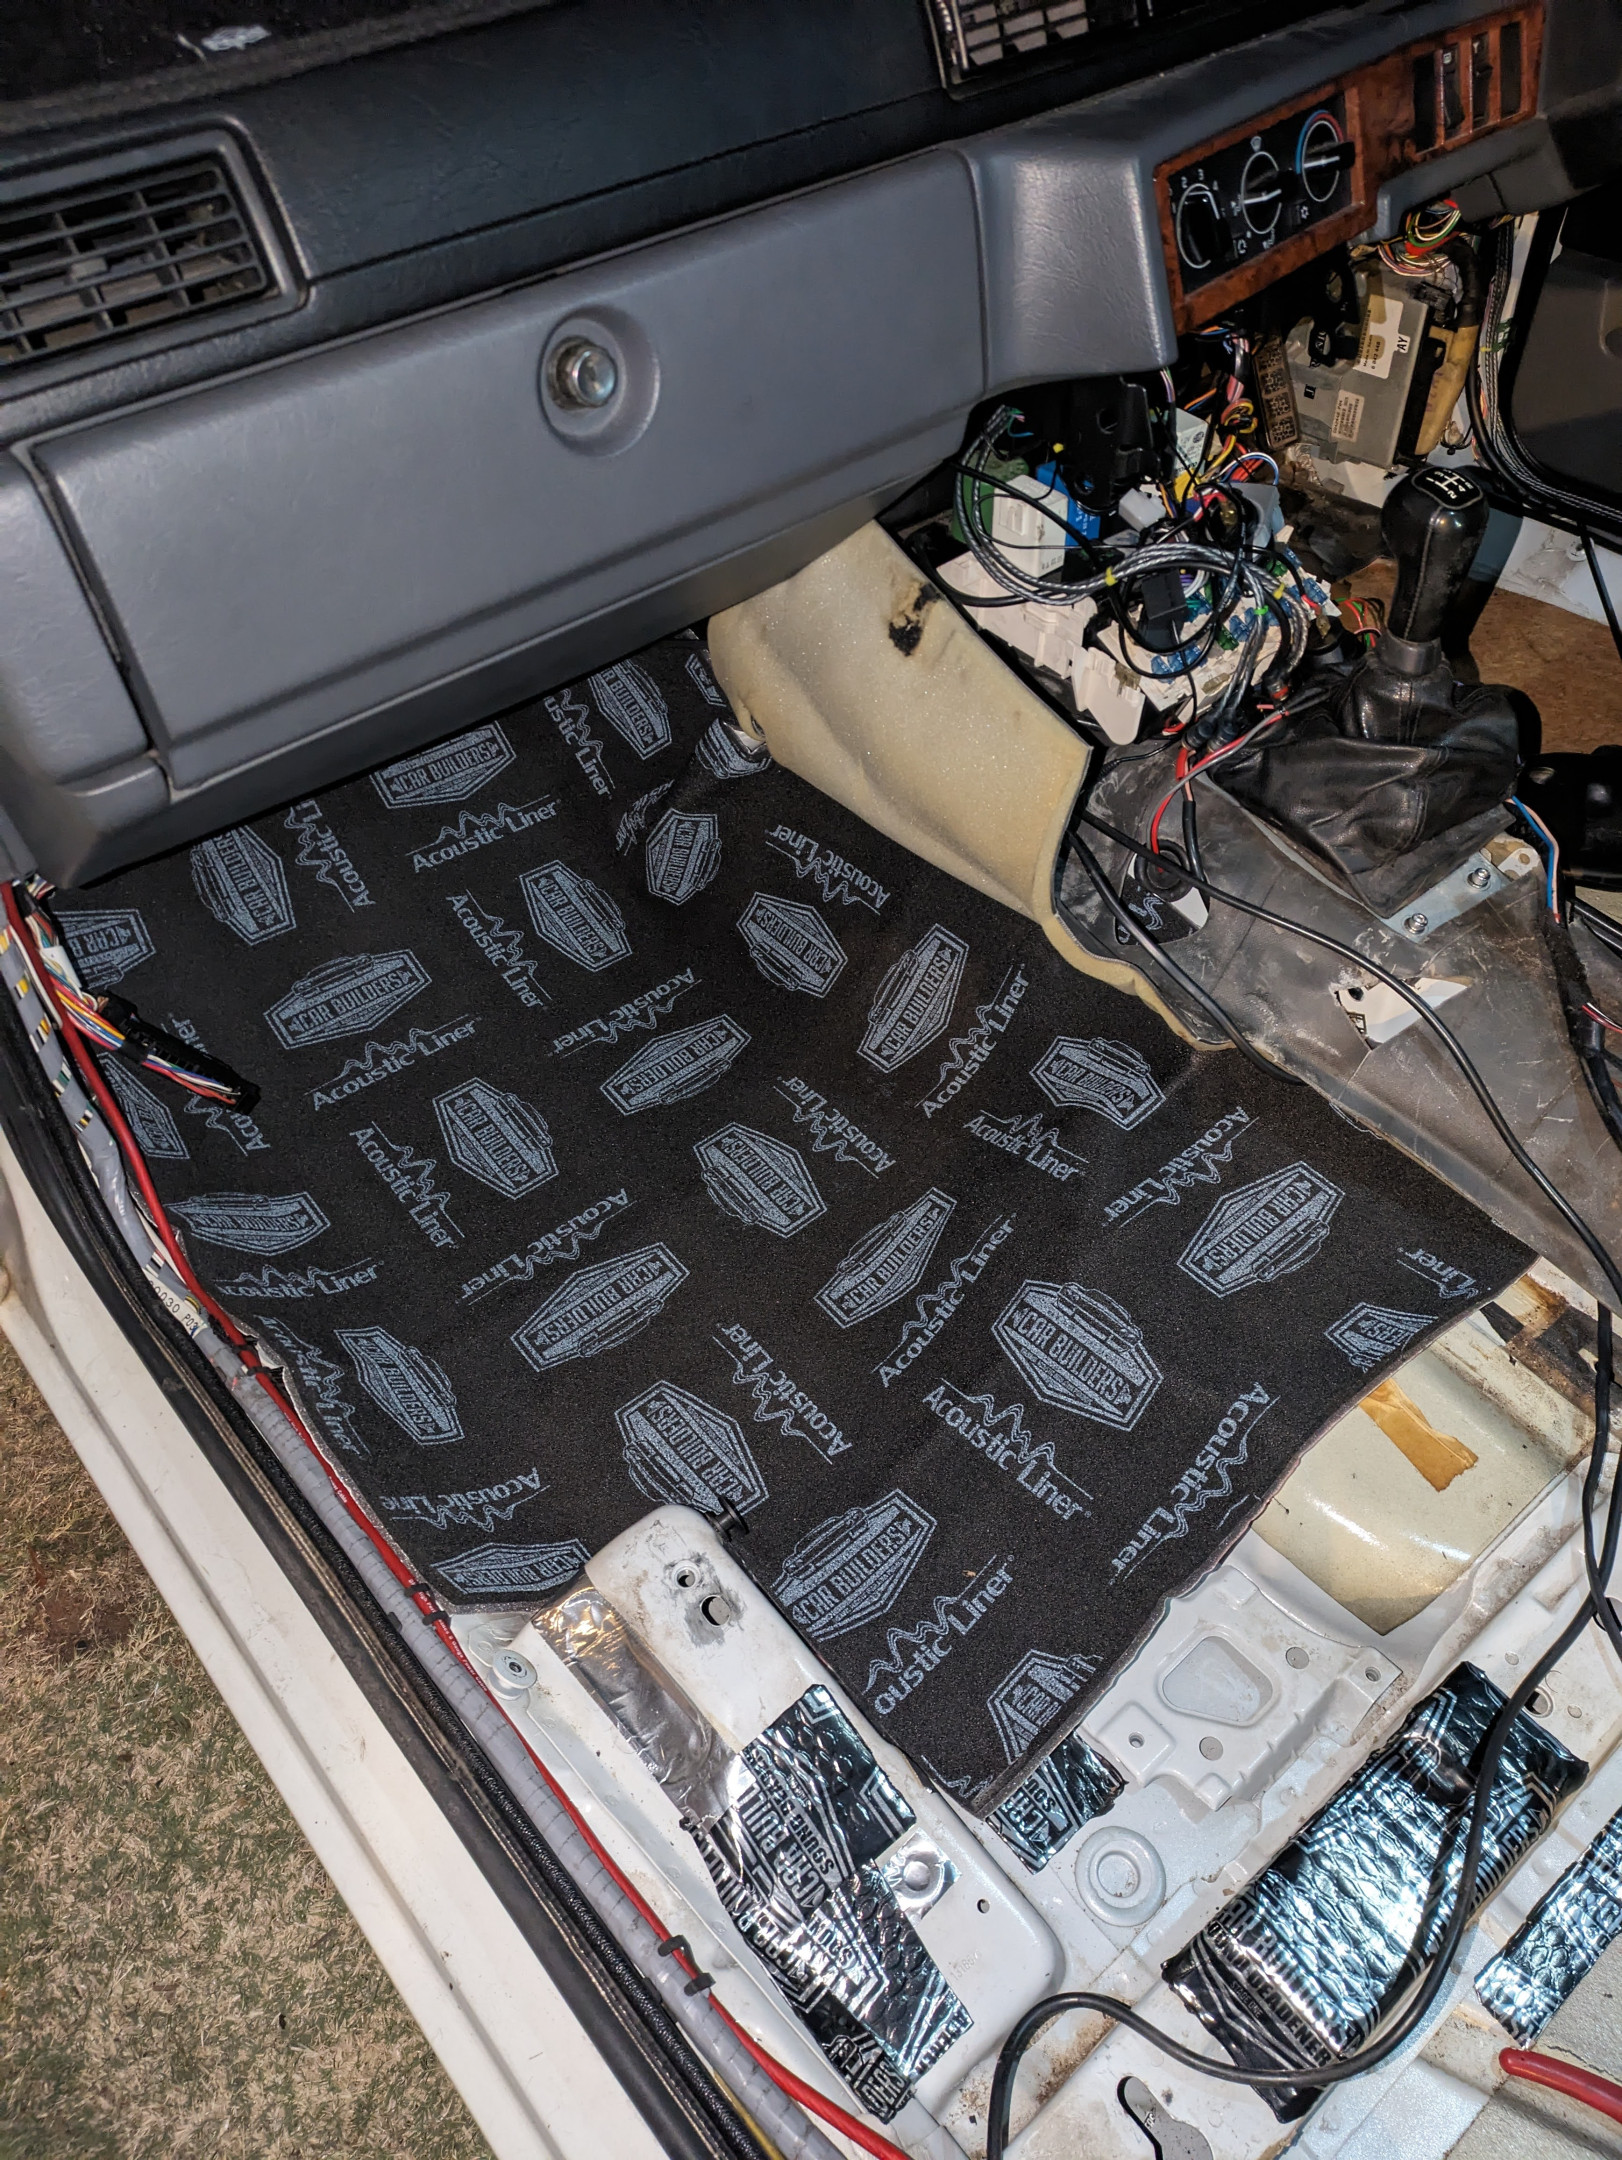
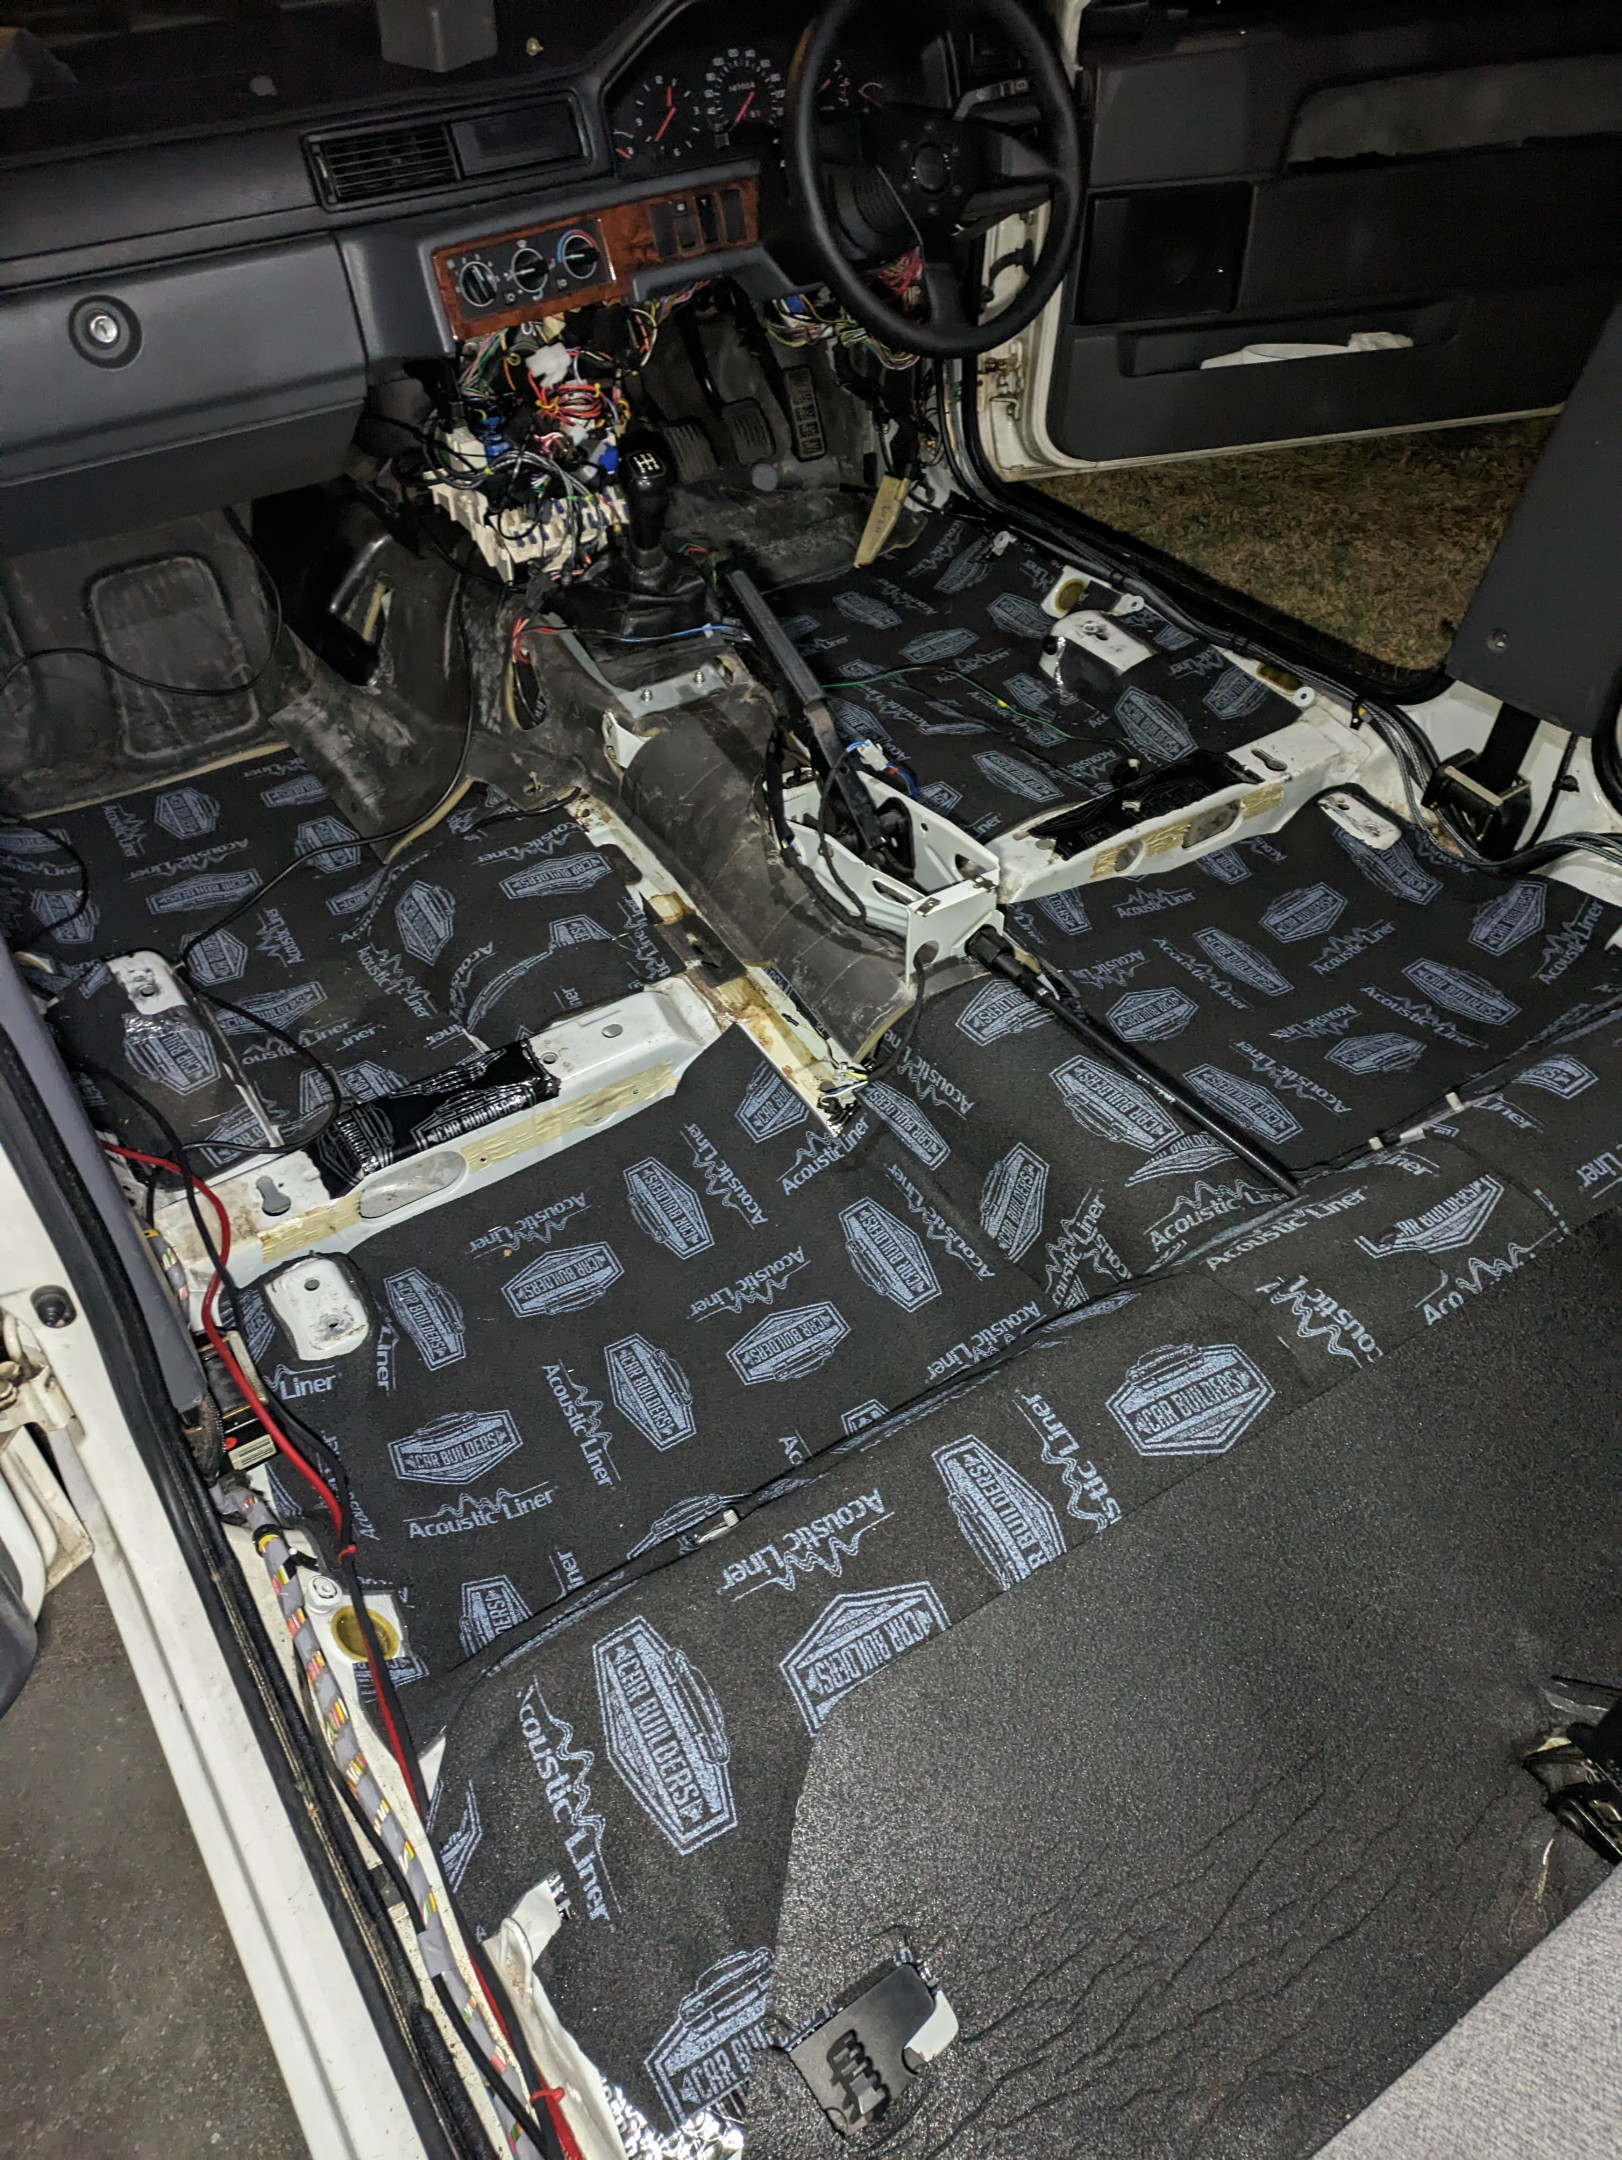
Edit: OH and there's even LESS cabin noise now, since that noisy-as-hell under-car pump isn't there anymore. I can't believe how much of a difference that alone made.
I've fast great experience on my 740t using the gaz shocks that were -30mm shorter after my Bilstein hd's failed. Classic swede can supply them easily. I remember contacting king springs about Thier Springs for 7/9 models and they were 165lb, cutting them makes such a huge difference. But I'm also going coilovers when my 16vt is finished.
Rip dump pipe! I'm glad the turbo is still going though!
- Edited
Aug-Oct 2024 - Diff Upgrades
It started off innocently enough, a decision to seek some 3.73 gears to lower cruising revs and thus cabin noise..
Then, since if I was going to change the gearing anyway, I bit the bullet on a TrueTrac and it was all downhill from there. I decided to give myself a couple of months to get this all sorted as I had no idea how long it was going to take.
The short of it was the following happened:
Remove rear diff, take it to shop (I don't have the expertise, time or tools)
Install Truetrac, 3.73 gears, and BNE tone ring
Take out subframe and reinforce
Replace dogbone bushes with PU superpro items
Install BNE torque rods I bought years ago
Slam it back in the car again.
I picked up the torque rods and tone ring back in 2021 and had been waiting (checks calendar) a while to install them.
Thanks to @Samman88 , while I was back in Melbourne, I picked up a set of 3.73 gears off him and we talked Volvos and whatnot for a while. Thanks again!
Once the bloke I decided to go with was ready, out of the car the rear axle came. The guy I got to do the diff was great - the only wrinkle in the process was that inner tube axle seals were unavailable locally from my searchings, so an order to GCP had them here within a week, so only a minor setback.
Edit: Oh! and for reference, the pinion seal was sourced from a bearing shop - SKF 15788. I also attempted to find the inner axle tube seals which were supposed to be SKF 14922 but I wasn't able to source these so that's why I went via GCP. There was also an equivalent National/Timken seal with number 1176 but I wasn't going to risk it given the local price was way more than sourcing seals via GCP.
I reinforced the subframe using the same methods most people do on turbobricks when plating up their 7/9 subframes - with the exception that I didnāt plate the upper underside bit as I wasnāt totally sure where the torque rods travel and figure that plating it on the amount that I did, added a decent amount of rigidity. I did the tacks with the torque rods bolted in, and the initial one towards the front I tacked in while in the car so I had the widths correct.
I also carefully slotted, welded and ground back the fingers that slot into the dogbone so theyāre not just a folded up piece as well.
I got the same mob that did the tig welding for the exhaust to tack on the tone ring onto the housing, and they did a decent job. Welding it over the housing meant there was about a tooth gap, but it only reads a little under now, and with the spacer the diff guy put on it, it still reads, but I have to fix my speedo electronics still as itās still as glitchy as it was.
Who knew they were red on the inside?
Getting the dogbone bushes out had me wasting a couple of hours with jaw pullers and sockets an vices, until I just sawed one lip off and pushed it out. I didnāt want to wreck them, but I got fed up. New ones pushed in easily and theyāre snug, so Iām happy about that.
Bottom line - with the new gearing feels like this is what a M90L2 gearbox would have had from factory. I havenāt tested skids yet, and no additional NVH, soā¦ win. It feels far less nervous while driving, which makes me less anxious behind the wheel, which is a huge plus. It wasn't a cheap endeavour, but I'm glad I'll hopefully never have to open it up again except for oil changes. I'm so glad this was done in time for nationals!
Well that should be attached..
Upper panhard bolt ejected itself in rural NSW, limped it to the next town 15KMs away and sourced a bolt and got back on the road, torqued to 85Nm and lots of loctite.
No issues today thankfully. Will post the rest of the details after nationals.
^ Ouch! Safe travels.
November 2024 - OzVolvo Nationals
I've been keen on making the trip for Nationals for years now, but finally decided that this year would be the year. It would've been a smaller trip had we still lived in Victoria, but oh well.
Our trip looked something like this:
Roughly 2500km of just the route, not including any other activities!
Where the red 'X' is, is roughly where the rear end started getting very floaty, and it didn't take long to realise something was not right, and then at the same moment, a kind tradie overtook us and shouted 'something's fallen off your car!'
Pull over, realise panhard bar is hanging down as I suspected, and then limp it to Hay, NSW. Arrived at about 4:45pm, and managed to guess what bolt it was after some googling and my phone dying immediately after. Got a couple of lengths of M12 bolts, which ended up being different grades, but both were high tensile (8.8/10.8) so used one of them and spent a short amount of time that evening sorting it out.
I think it was the first one I put in when installing the axle again, and was the only one I hadn't loctite'd and paint pen'd, of course.
Took the wheel off for torque wrench access and tightened to 85Nm. Didn't have an issue for the rest of the trip.
Didn't take any photos of my own car at the show'n'shine, just other, much cooler Volvos than mine. Didn't win any prizes, which is fine by me - it was definitely not the cleanest 3/7/9 and really, it was just nice that it made it
It was great to meet so many faces I only knew as forum names, though there were definitely more than a few I missed catching.. there's never enough time it seems.
Managed to catch @nugget_940 and get a photo with our two not-240's together.
I ended up at the front of the cruise a couple of times unintentionally, with no idea where I was going, but eventually made it to the place where we ended up:
And then finally, after another few days, we ended up back home.
Fin.
Got a few things to catch up that I changed prior to nationals (PCV system and maybe other stuff I've forgotten) but will get to that eventually.
Great to catch up with you and the family, the car has undergone a lot of development since your Tassie visit many moons ago. The car looked great in Canberra.
You too! I was hoping we'd get more time to chat, but there's always next time We loved getting to see your P1800 in person as well and catching up.
Car will continue to undergo development until I'm totally happy with it.. which means it'll never be finished I already have a significant list of 'things needing improvement' after the trip - some for the sake of comfort, and others for reliability and powarrrrr.