Ian's 145 Expressions
- Edited
Ahh, OK I thought that tread pattern was a P6. My mom’s 84 240 Turbo (USA) cam with P6 tyres on Virgos. I’ve had a soft spot for Pirelli tyres since then, but think I made a mistake putting some Pirelli Dragon Sport tyres on our C30 recently. They have good grip but seem to have a lot more coarse road noise than the previous tyres. May try some Continentals one day?Roinik;c-155602 wroteThey're Bridgestones. I found Pirelli too soft and tended to follow the ruts too much. Pirelli on a 140 made it feel like a soggy sponge. Michelin was a better choice. I had a P1 V40 with stock 205/55 Pirelli. I hated the feel, the road waffle and the incorrect speedo. Changed those out with 195/60 Kumho and it changed everything. It became quieter, smoother and it handled like it was on rails. It also corrected the speedo error.
We’re waiting for the rest of the story....
And moar pictures. :)carnut222;155603 wroteWe’re waiting for the rest of the story....
Well it's been a while since any updates and the continuation of the story. Winter got in the way of things and progress basically stopped for a while. I don't have the luxury of a heated garage and the Mt Gambier winters are pretty cold.
During the rebuild to get her driving I found that Tom, the painter, had not reformed the front guard properly where it had obviously been damaged at some point. This meant that the RHF indicator had a 1/2" gap behind the base. My heart sank into despondency at the sight. The paint is metallic with 6 layers fading out to 2 coats of clear. The paint looks great, but matching it off the gun was going to be a PITA. Luckily there is almost 2 litres of colour spare. To get her moving I pulled dad's old engine and an early 140 M40 gearbox out of the shed and 'slapped' it all together. After a cool 500,000 km, the old B20 fired, ran and did what it was meant to do.
A couple of weeks later and full of bits and pieces, I retrieved the van from the transport company in Adelaide, shifted it into storage and closed the door. At the time I was spending most of my time working, renovating and generally not being at home. I did retrieve her from the storage place when they wanted to jack up the prices, but still she sat, waiting.
Two more moves and a lot more time later I found OzVolvo and started to get enthusiastic again. All of your build threads have put mine to shame. I have carted this old girl around for too long and watched things start to degrade. I've had my B20/1 8-bolt ready to go for a while, sitting there with the K-cam and all of these plans, complete with modified cam and timing cover to take an Evo-1 TDC/CA sensor, completely rebuilt injectors and fuel rail plus a cable operated fuel injection manifold. Enthusiasm had finally kicked in. Thanks OzVolvo crew.
In reality my current rebuild burst of energy has started in 2019. I don't have many hours to spend on this car and I have to make the dollars go a fair way. To that I'm probably not alone.
So the first thing to do was to remove the dad's wheezy old engine and M40 gearbox from the van. That was pretty straight forward as it's only a B20 and there's plenty of room around everything. Here she is with the old engine and gearbox out back in April.


At the same time I had a look at the front suspension to determine what was causing the sproing-clunking sound when I travelled over the driveway entrance. This turned out to be the springs not seating correctly at the top of the spring tunnel. Not only that, the springs had cut the rubber seating ring and ripped off the bump stops. Luckily I had replacements of these to work with. While I had the opportunity I pulled the lower control arms off, scraped, sanded, pickled and painted them. And that's pretty much where I left if for a while as winter well and truly set in. Cold (aka brass monkey cold), wet and windy. I really need to get my shed upgraded so that the roof doesn't leak and the wind doesn't howl through during winter.
Good to see a bit of progress Ian! It’s turned back to winter here in Daylesford at the moment. What happened to several weeks where I could have the shed roller door open? Looking forward to following your updates as the weather improves! :)
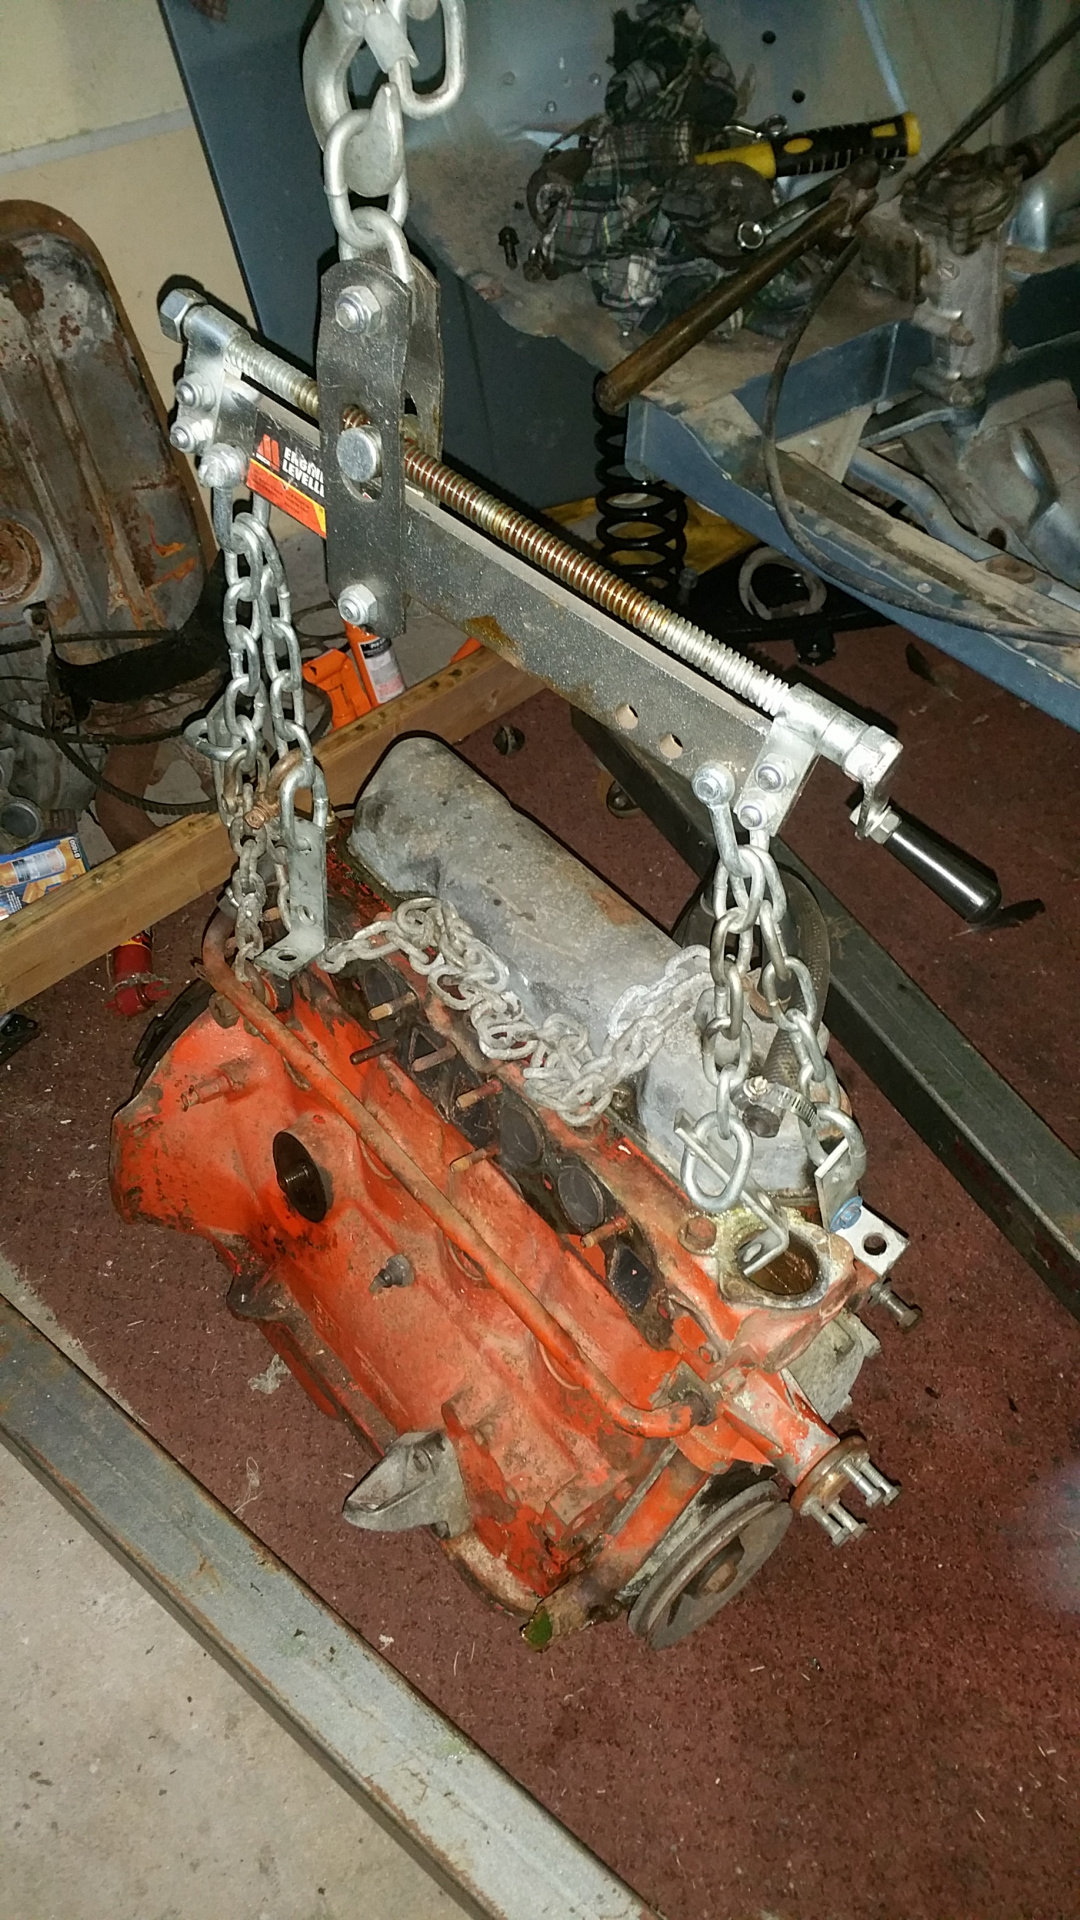
Winter wasn't a complete and utter loss of progress. I used the snippets of time to work on the engine to change a few things for good running. Off came the modified cam cover, TDC/CA sensor, modified cam nut and B30 pulley. Out came the K-cam and off came the flaky paint. In went a near new C-cam, on went a clean B20 cam cover, B20 pulley, NOS water pump and a fresh coat of red (ok, not the good Volvo red). By the end of July the engine was ready to go in.
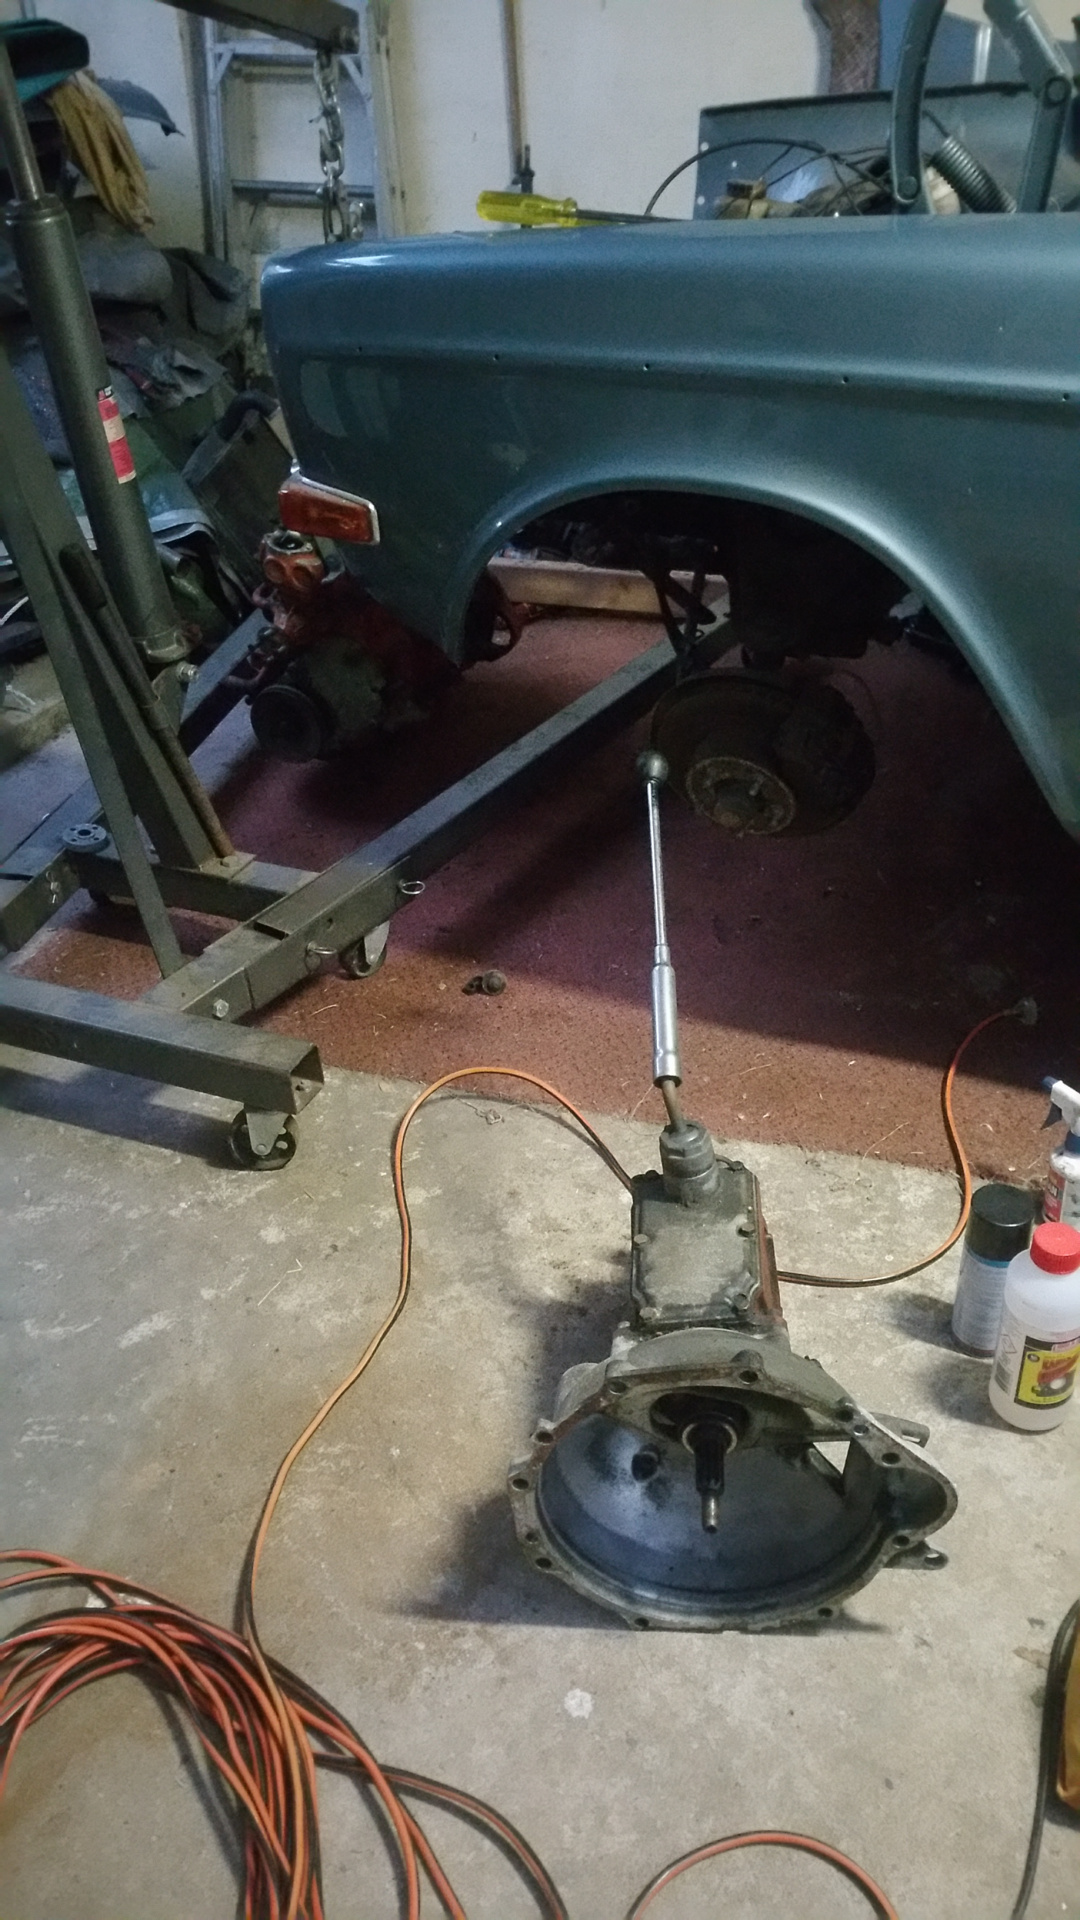
One thing that should be noted about the Express van is that they are fitted with a good old 4.3:1 rear drive ratio, perfect for a M41. So, why not? Out came the shiny rebuilt M41. Here they are together, saying hello and goodbye to each other.

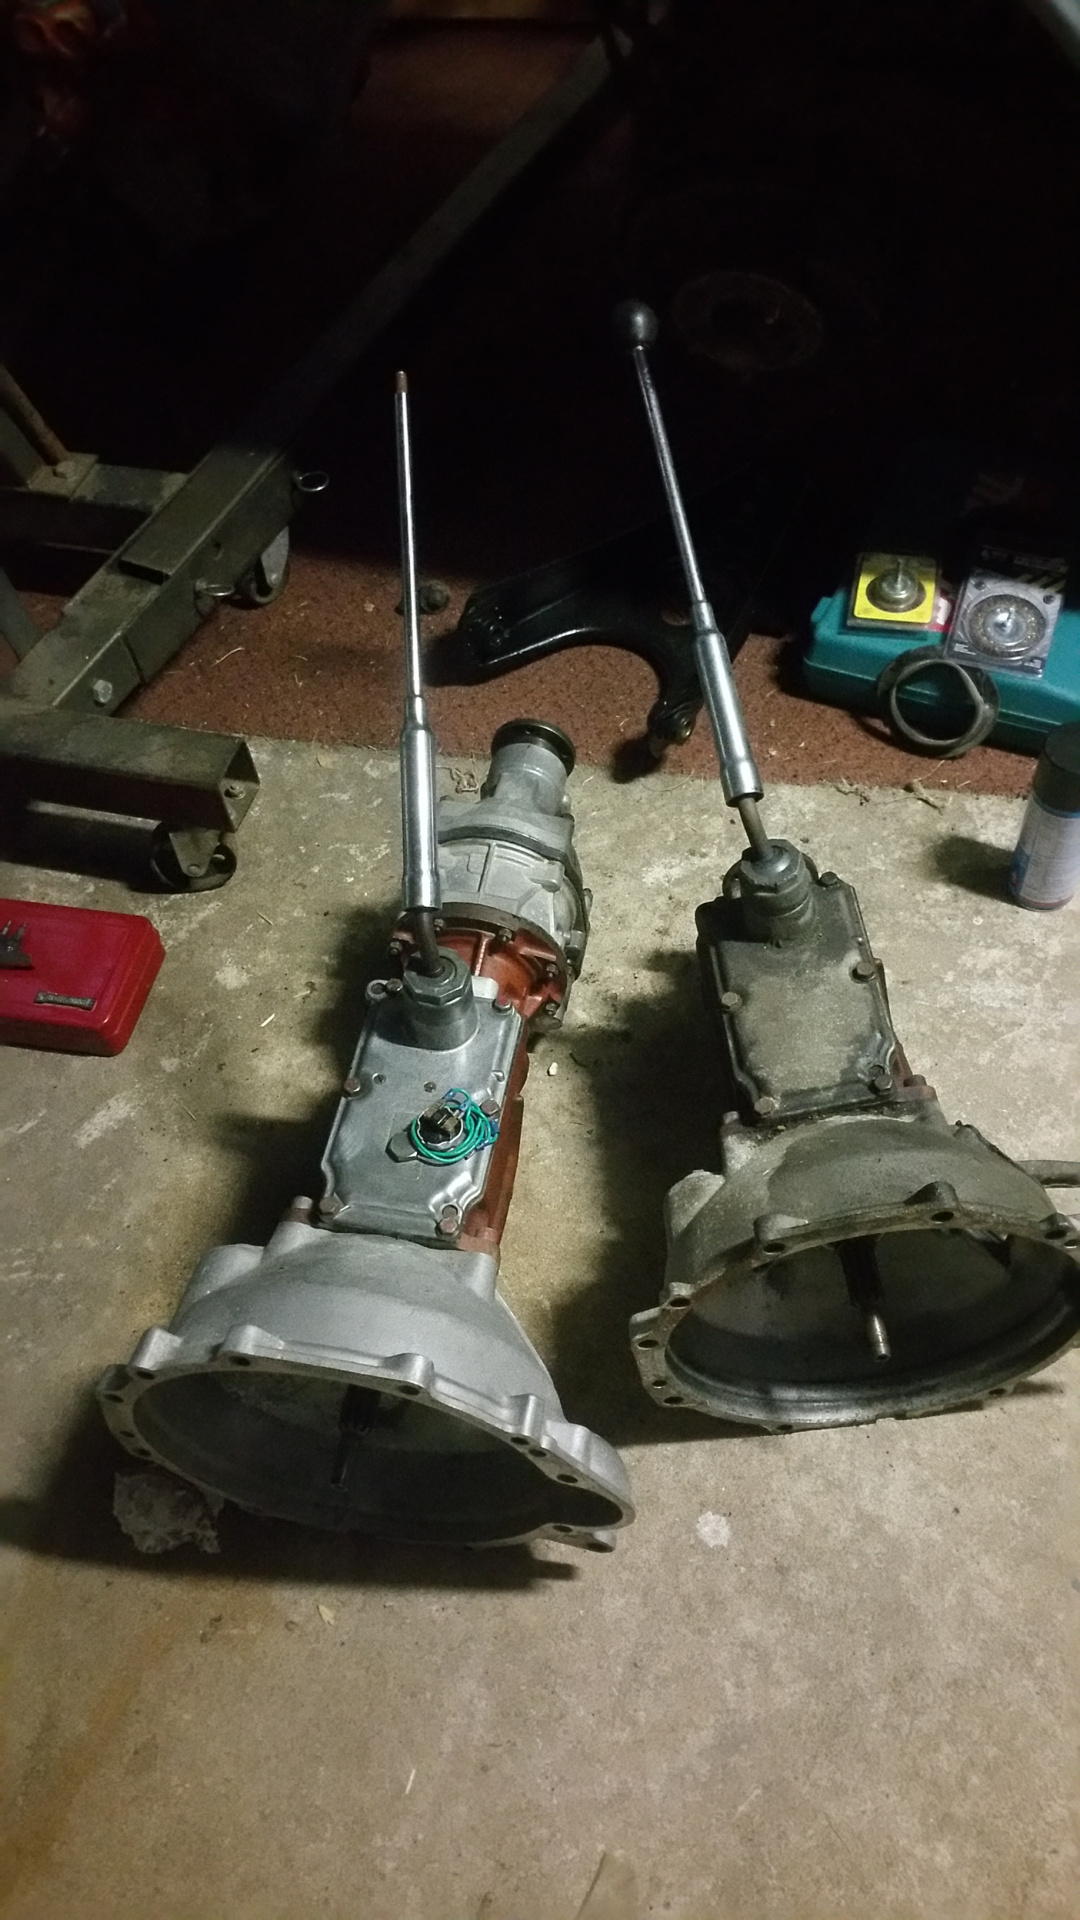
Truth be told, I had this gearbox rebuilt back in 2001 in Melbourne. The box is great and the J-type has been fitted with near new internals. Even back then it was nigh on impossible to find NOS J-type internals for these OD units. I'd always intended for this van to have the M41 so I've had the box wrapped in plastic in the shed(s) for all that time. The box is out of a deep red British import 1969 142 that was beyond salvaging.
As winter dragged on and slowly morphed into something that resembled spring (it felt like the date changed and remained damn cold to be honest) progress was pretty slow. A few teething issues were found, like I'd installed the incorrect NOS release bearing for the new pressure plate. After a bit of rummaging around in the parts buckets I managed to find the correct release bearing (the really tall one). Pulling the dust cap off I was pleasantly surprised to find the grease in pristine condition after all those years in storage. Winner! Reinstated in the bell housing the travel and position felt like it was a good match.
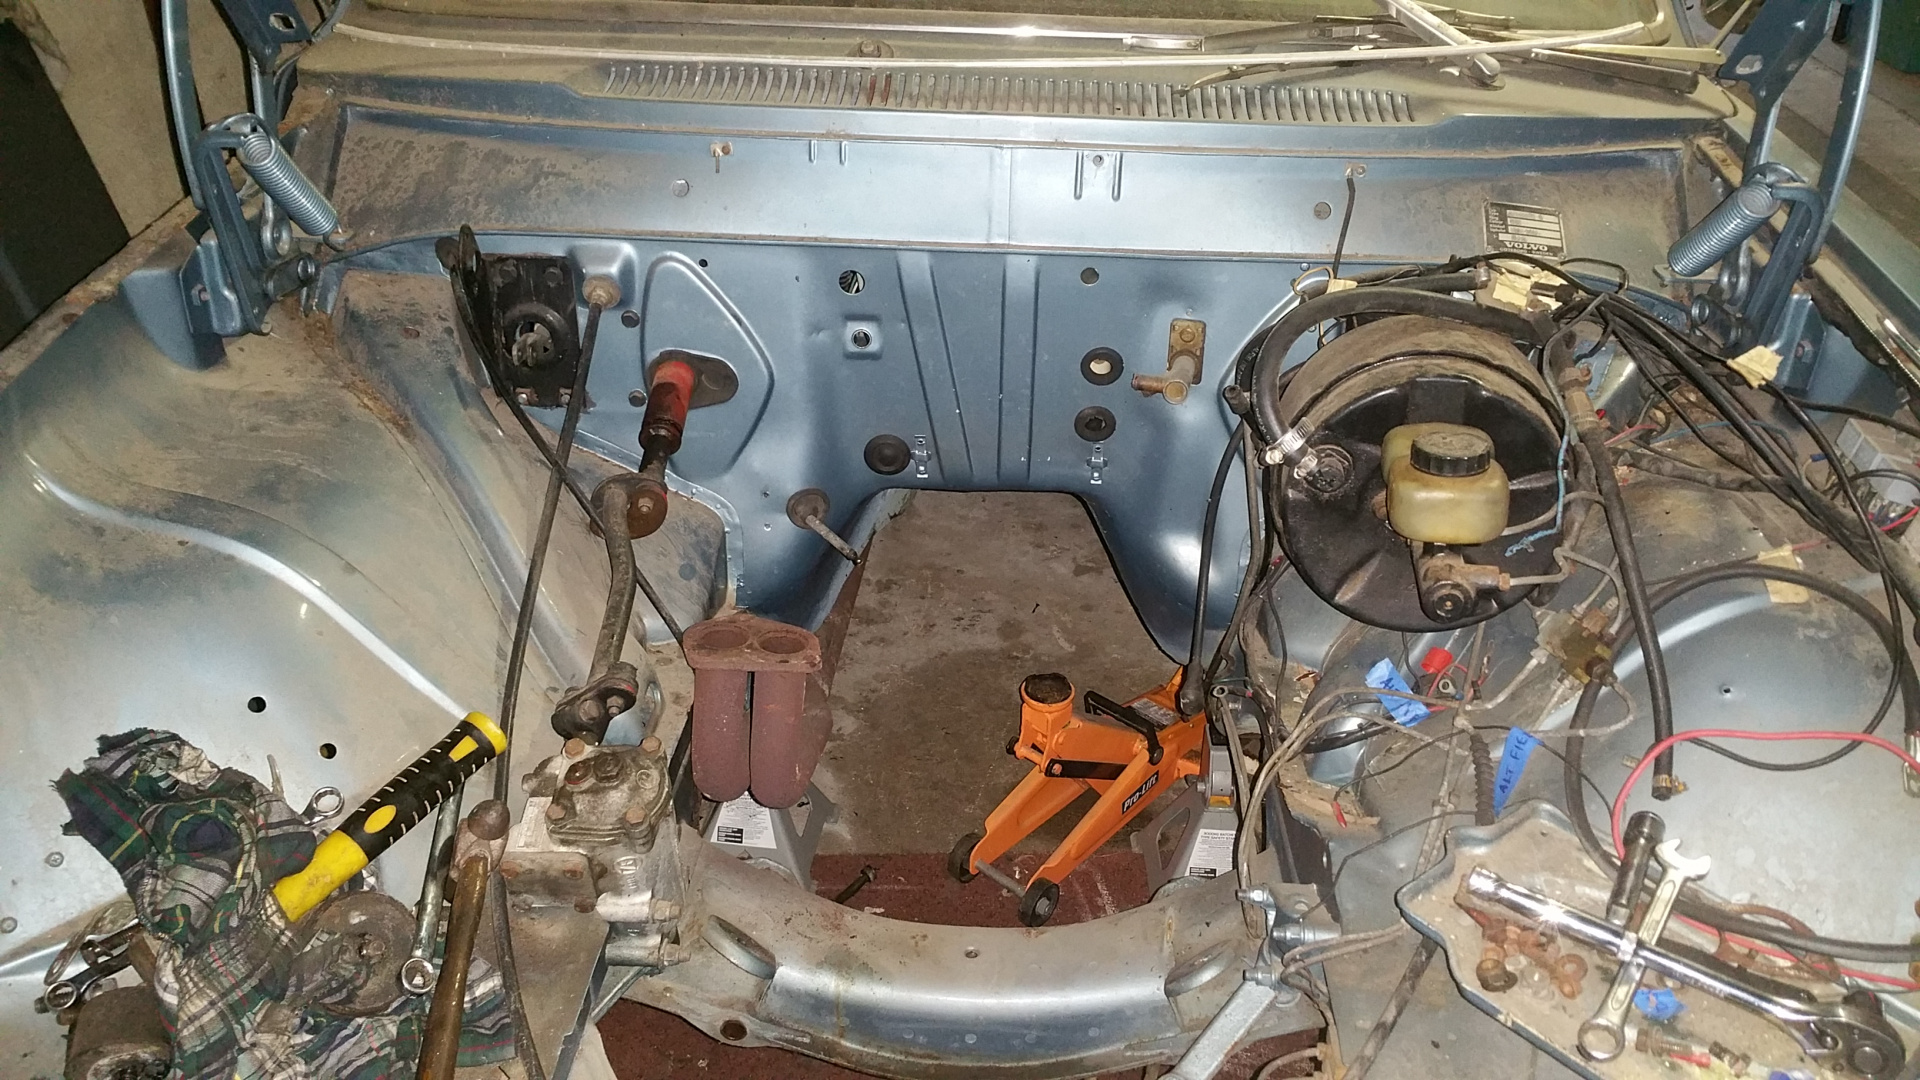
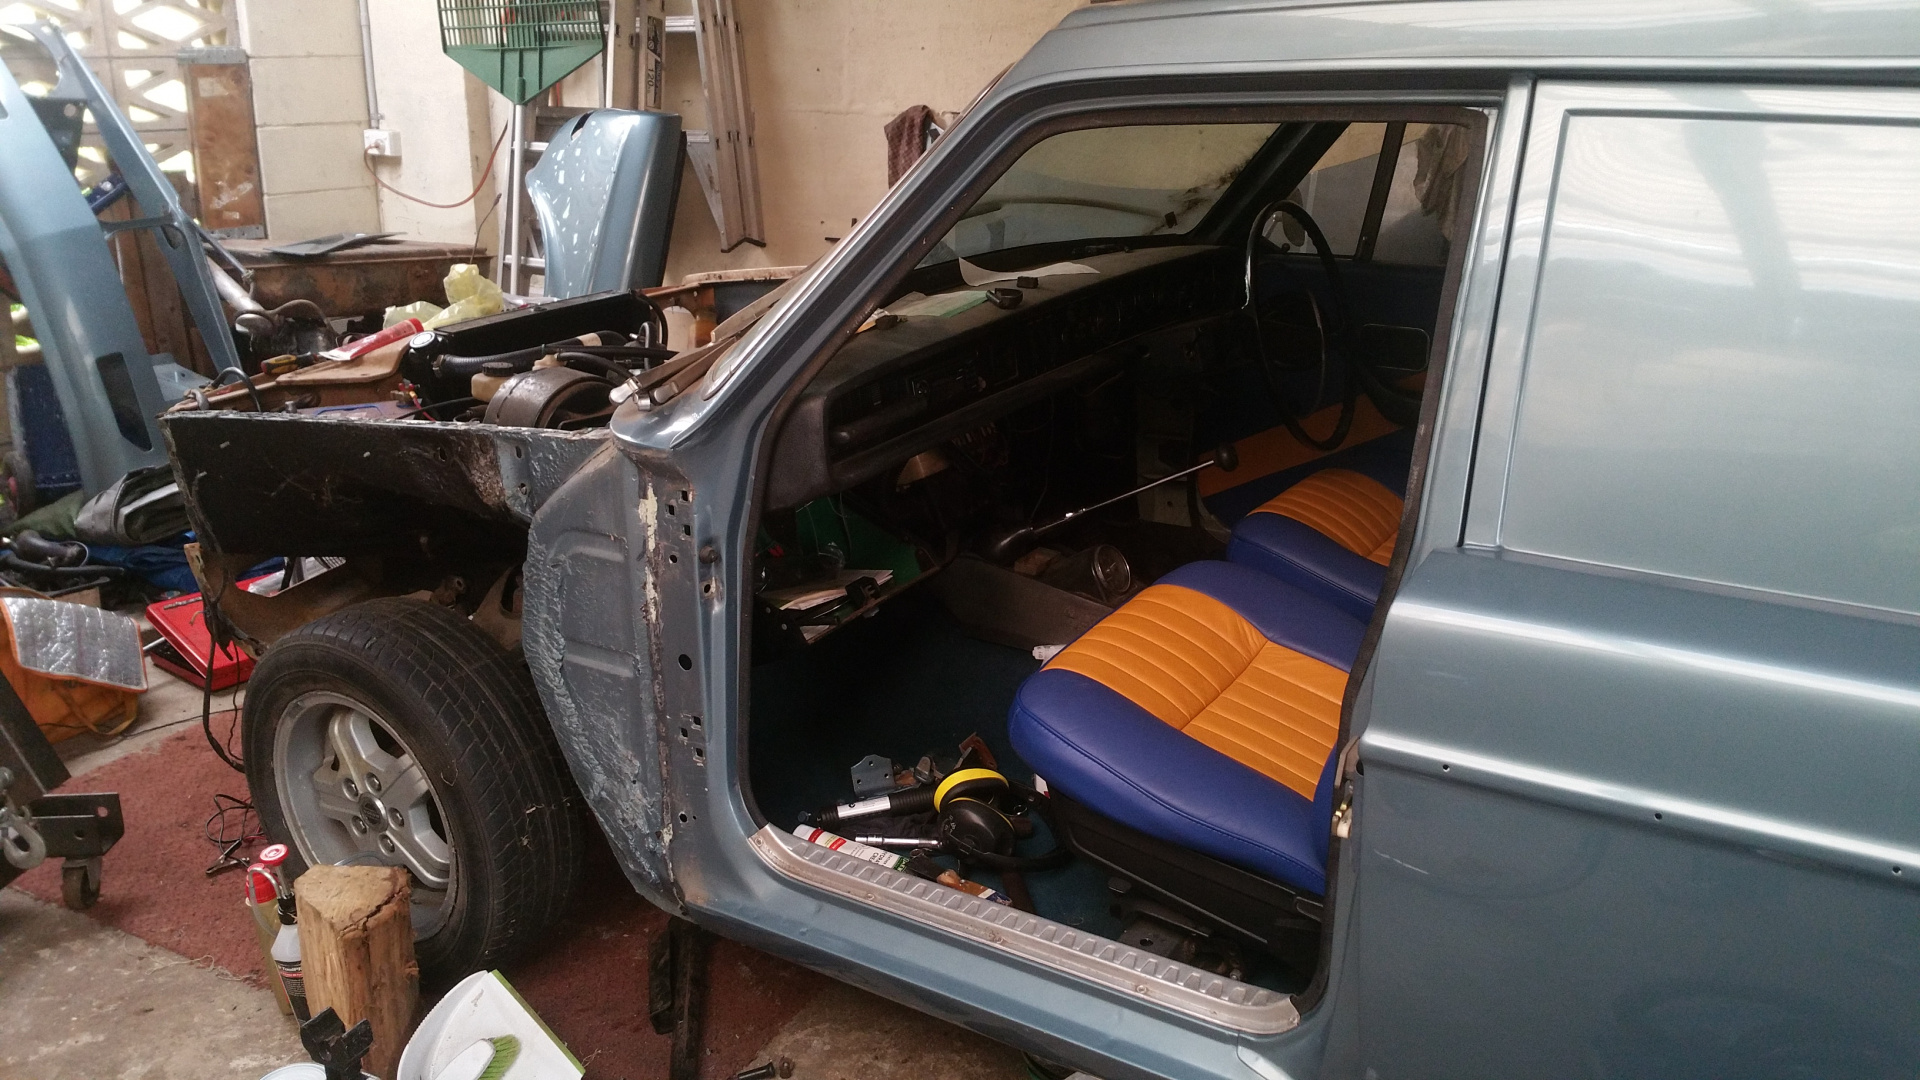
Towards the end of the hockey season I took a couple of weeks holidays and set to work. The engine was installed (thanks to the help of #1 daughter), static timing completed, electrics checked from end-to-end. New wires run for tacho, OD solenoid, OD column switch, fuel pump and carby choke/fuel shutoff valve. I decided to go with a 32/36 DGAV Weber carburettor instead of the original 1-3/4" Stromberg purely and simply because a: I had one and b: it is a sh!t load easier to tune for the B20/1 to get power and economy.
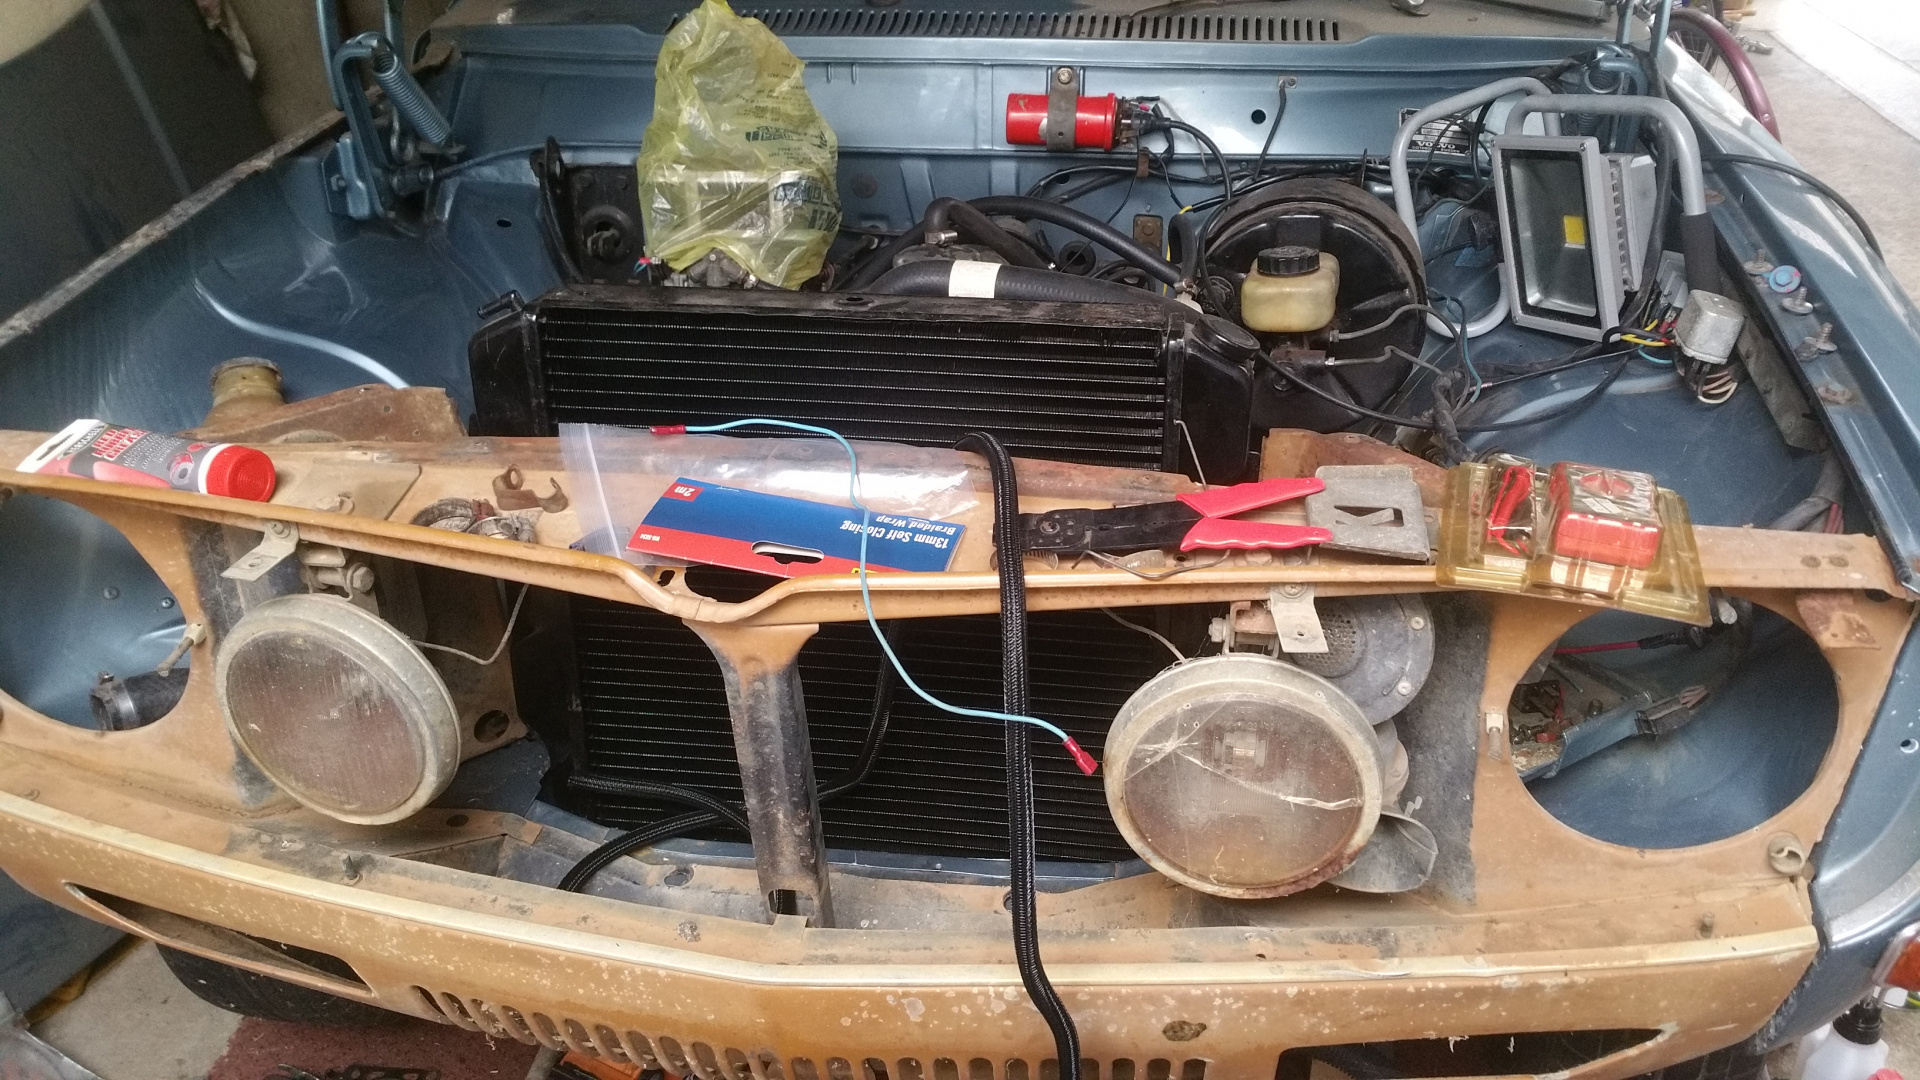
To go with the B20/1 I chose to use a radiator that I'd had upgraded years ago. Running this B20/1 with a D-cam in a 122 for about 10,000 km we ended up installing a B30 radiator for the additional cooling requirement. This radiator is a 4 core copper unit with the metal tanks. I thought that it would slip in nicely to where the upright radiator from the donor car used to sit. Nup! It turns out that the subframe nose section and radiator bridge is subtly different between the two radiator models. No worries, a bit of panel beating and it fits like a glove.
Almost there and I tried to fit the bottom radiator hose. FAIL! It turns out that the hose in my possession is for the upright radiator, so, $18.50 later and I had a NOS radiator hose. In my eagerness the hose went on and late on a Friday evening she fired up first time. Here she is waiting for a bottom radiator hose.

carnut222Good to see a bit of progress Ian! It’s turned back to winter here in Daylesford at the moment. What happened to several weeks where I could have the shed roller door open? Looking forward to following your updates as the weather improves! :)
Winter here as well. I reckon we've had 3 days of spring and 2 days of summer so far. Tomorrow looks good to go and retrieve a M46 conversion for my (almost here) 245 from an 83 on death row.
Today's progress has been a little slower. A 'simple' door alignment for the LHR. The new seals on the back doors are making them difficult to close. I initially thought that it was misalignment, however that has been rectified and they're still difficult to close. Ah well, onto the LHF alignment. During the week I'll send the tailshaft in to get the front tube and uni joint replaced, plus balancing.

Keep up the good work
Very interesting project and history about the car, great work!
Like many of us here, progress is limited by a number of competing priorities that sap our time, energy, finances and sanity.
When I moved the car from WA I had to put a few things on in a hurry, like guards and doors. These have irked me for some time and I've finally put the effort into rectifying these issues. A closer check of some other things like the rustproofing identified some other issues that require attention before it hits the inspection, sometime in the future.
The front guard was put on with some 'really good' adhesive sealant which I now realise was not 'really good' for removal and relocation of the guard. The original sealant was a mastic that never really hardened. For those of us who've pulled the guards off these cars, the mastic is usually still very compliant. Not Tempro Seam Sealer. Luckily I only used this junk on one guard because it is a PITA to get things apart, even taking some of the paint with it.
The guard was finally removed, as was the front door. This allowed me to tidy up some areas of remnant adhesive.

Removing the guard allows access to the seam areas around the inner guard that always accumulate dirt and rust. I scraped these areas back, painted and then brushed on a nice thick layer of sound deadener. Looking at the floor I found areas just behind the front wheel (rock strike zone), along the sill seam and some spots where the floor plates meet. These will progressively get attention as I move from the front of the car to the back.
Fitting and aligning the front door with one person takes ages, but eventually you get there. The results are rewarding when you can finally get things lined up and feel that wholesome thud on closure. The front door on and aligned, I had a quick look at the front seatbelt only to find:

RATS! I somehow managed to get a rat nesting in the car a couple of years ago. Damn thing thought that the 'never used' seatbelt looked like a tasty treat. Now I have to find an aircraft upholsterer to get new webbing installed and certified.
Disappointment aside, I moved onto the alignment of the back door. This van has never had back doors that closed to Volvo standards. After a lot of realignment again and again and again I've settled on an alignment that is as close as I can get it right now. I may have another go at once I've managed to get few more things completed. I'll take another photo soon (pending).
- Edited
The door check straps have been sounding very dry when I've been using the doors so I decided to pull them out. Removed and reinstated I treated the very small amount of surface rust inside the door (beat that after 50 years Holden drivers!). A spray with phosphoric acid, a light sand when reacted, cold galv and then top coat and she's good to go.
I think it was one of Greg's posts that spurred me on to make my own door liners. Let's face it, the old wax paper door liners that came out in the 120/140/160/1800 were very poor performers. The old paper tape used to lose the adhesive, the paper would fall off and then become a soggy mess in the bottom of the door. No, a section of black UV stable plastic film, some scissors and a whole lot of patience we have a new door liner!

Just to be sure, I copied the old 140 liner and installed that for belts an braces too. The small version is one that I had previously made out of x-ray film.

I've since cut out the hole for the door speaker. I need to purchase and install the weather seal scraper and the internal felt window brush before I reinstate the door card.
Moving onto the back door I created a similar door liner, however it is probably an effort in futility because it will only be protecting a painted/sealed plywood door trim that will only be exposed via the door drain ports. Picture pending.
As you can guess, I'm moving around the van and completing outstanding items that are cheap and easy to complete. My tailshaft is away at the shop getting the front half-shaft replaced, a new uni-joint and balanced. The old shaft was too dented to recover and would be likely to deform under load. Without the tailshaft I can't take the van outside to give it a wash and polish, and I can't get to the driver's side.
The next cab off the rank is the most complex interior panel. I've had to make this panel from scratch, without a template. When I bought the van it didn't have a wheel cover or the rear right panel and the filler tube cover was pretty messed up. I managed to source another wheel cover and filler tube cover, but never a 145 wooden panel trim, of which I think they were only specific to the commercial vehicles. So, one foot in the wheel well and the other somewhere more comfortable I made a template.

I traced this onto a sheet of 3-ply and trimmed to suit. After about a dozen check fittings and further trimming I reckon it fit pretty well. What makes it more difficult is the complex curves and the overall concave curvature. I think that I might need to re-make the wheel well cover to fit properly, but I reckon the panel fit reasonably well.

A bit later I had all of the holes drilled, made some brackets for the bottom and had it all test fit. The next part is to cut out the vent hole and drill the final mounting holes. Once complete I will sand and varnish with mono-cel clear like the other sections.

Maybe next time my helper can be more 'help'.

Nice work and good to meet you on the weekend!
Sweet rig...
Minor update. Received my tailshaft from the local driveshaft place. New uni joints and remanufactured front half shaft. I Installed a new centre bearing mount and installed it in the van straight away. In preparation I've been servicing the calipers, cleaning out any corrosion and freeing them up so I can the van out to wash it after 15 years. Who knows what I'll find.