- Edited

This all started when I recently acquired a 144 and started cleaning it up and worked my way through a major service. The front pads and rotors needed replacing and rather than a new pair of solid rotors I started thinking of a vented rotor option in place of the solid rotor.
There are many stories online about this conversion and some of them are close to reality, very few reference actually doing a conversion though so the information is of limited value. As there were some 240 callipers in the shelf, and some 240 rotors and pads there too, it seemed a simple and quick conversion. Which did not really work out that quick, though it works a treat now!
There is probably little need for this brake update, Volvo engineers and designers have always done a great job with brakes, though if you are fussy about brakes then it is simple and will update a 144 to 240 pads and vented rotors - which are much less likely to fade or fail if towing or driving with spirit. I assume that the vented rotors would prolong pad life too, though do not have evidence to support that claim.
The car is a 1974 Volvo 144 GL, whether this works on earlier models is unknown, though a 1974 model is all Ok.
The main goal of the conversion was to use as many genuine parts as possible, both for reducing the cost, keeping inside Volvo's intended designs, and keeping it maintainable into the future for potential new owners. The calliper piston size is the same between the 140 and 240 so there would be no need for any major changes in the brake system. In fairness, some (rusty and rough) 140s are available for sale for about the cost of the upgrade...
Initially the 240 rotors were looking great and everything was falling together well, until the rotor was 3mm too small diameter and did not reach the outside of the brake pad. It all still worked, though it was 'incomplete' as the pads would not wear across all of their surface and were working well outside their designed limits. Investigations for 164E rotors was a tough one too, they are not available in Australia (as far as I could find). Thankfully they are still in production from Brembo, the OEM, and can be ordered online and shipped out here from Germany, and probably many other places too.
There was the problem of the brake hoses too, the 240 has two flexible hoses on each caliper while the 140 has a hard line and a flexible hose for each side. I could not find a reference to make these work without having custom hoses made so started chasing adapters and found that a small adapter can transform the 240 calliper fitting into one that the original 140 hard line will accept. The small fitting looks suspiciously similar to the brass fittings on each end of the brake line splitter block mounted on the inner guard, as there was no spare splitter block, and the replacement fittings were $5 each, new ones were used. Using this adapter means that all of the original Volvo hoses are used and no custom hoses need production.
The wheels studs later presented a problem as with a thicker rotor (the 164E rotor is 5mm thicker than the solid rotor at the top of the hat where the wheel studs go through it) they did not show a lot of thread for the wheel nuts, which was a problem. This was sorted via using wheel nuts that are a strange design and protrude into the wheel and can use part of the wheel stud that is inside the rim as well as the visible part outside the rim. They look very similar to the factory wheel nuts from the outside too, which is a bonus. Thankfully it all appears fine with the new nuts and the wheels should not fall off. Only now there are different nuts on front and rear axles, which is Ok. If alloy or mag wheels are to be used then longer studs will almost certainly be required. These are difficult to source due to the large knurl size of the Volvo 140-240 studs which is 16.3mm (5/8ths of an inch?). It appears Volvo R-Sport made longer studs for the 240s and they are still available, though at about $30 each they are expensive.
As the project is now finished, and conclusively proven, it would only be a two hour job to do the conversion. Having spent many hours trawling through internet based forums and posts about the topic, multiple visits to Anthony Hyde's brilliant web pages for measurements and research, and many more hours going through hundreds of pages of brake rotor dimensions, wheel stud dimensions and brake part adapter listings, it is working. Hopefully anyone attempting this can now do it with a minimum of fuss and the knowledge that it is both possible and easily achieved. All part numbers and measurements are referenced at the end of the article.
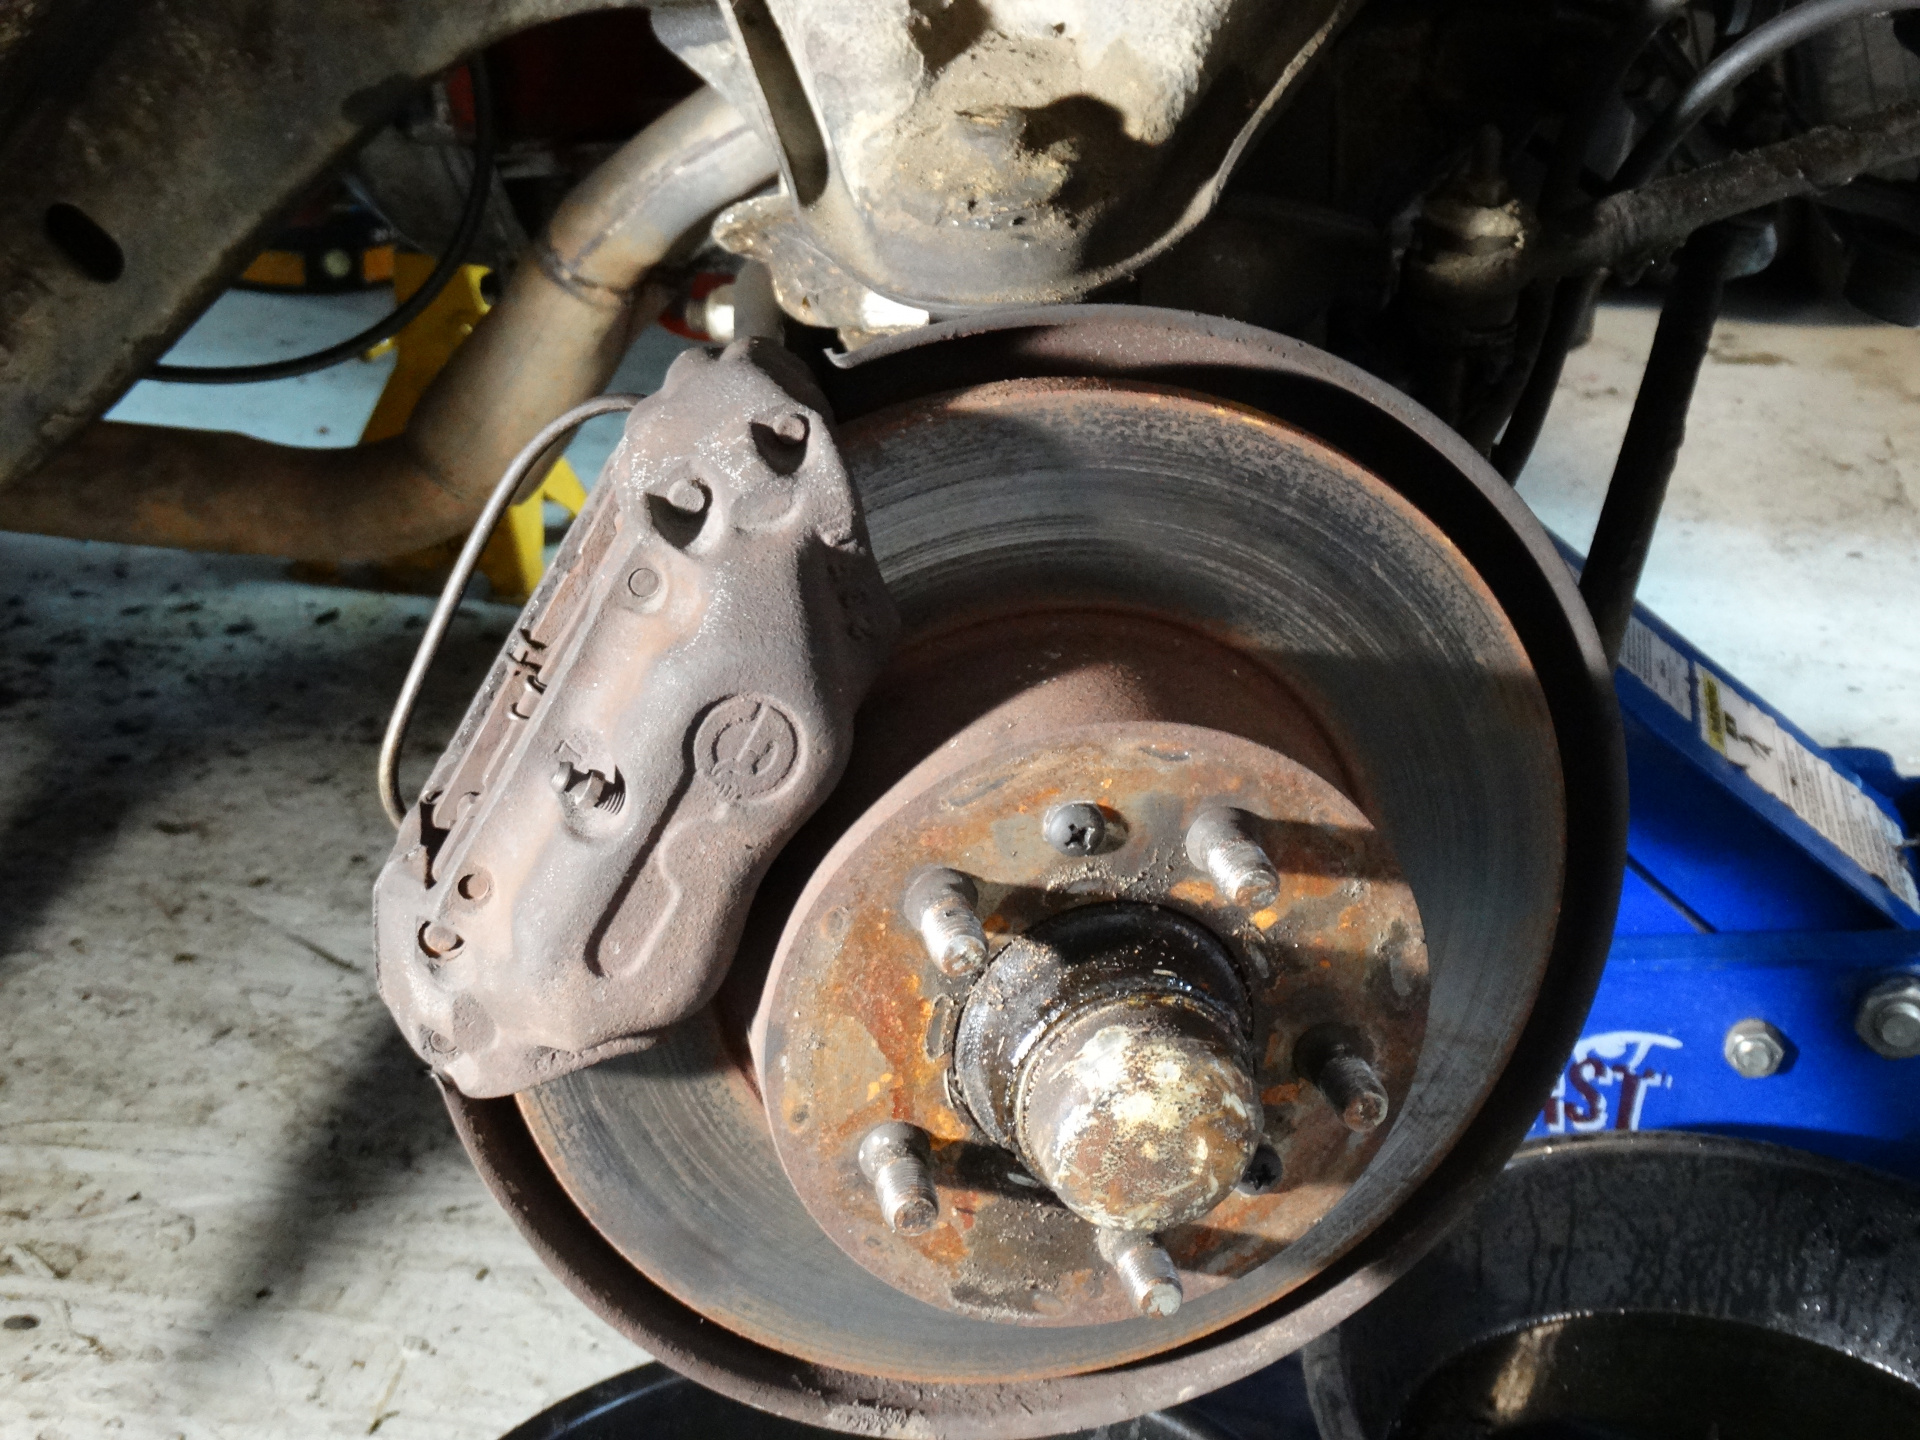
This is the starting point. A standard specification rotor and calliper. Nothing fancy here.
Step 1. Remove the old callipers:Loosen the front wheel nuts, jack the car up and secure with axle stands under the jack points. Remove the wheel.
Place a drip tray under the wheel hub, fluid will drip from there.
Loosen the 11mm hard line nut on the rear of the calliper a turn or so, then loosen and remove the 12mm nut at the other end of the hard line, above the backing plate. Once the top is removed the lower fitting onto the calliper should come out easily.
Crack the flexible hose in the calliper loose and leave for a moment. Remove the small retaining plate for the flexible hoses off the sway bar mount tube, a large phillips screwdriver for this or maybe an impact driver if required.
Place a second drip tray under the bracket held on by the bumper bolt, more fluid will drip from here.
On the bracket near the bumper bolt remove the lower 12mm hard line pipe while holding the other end of the hose with a 15mm spanner. Once off remove the 14mm nut holding it to the bracket. There will be a washer too, keep that. The other hose/pipe can remain where it is unless flex hoses are to be replaced - which is recommended.
Once the lower hose is free unwind it all the way out of the calliper. drain the fluid from it.
With a 19mm deep socket (I used a breaker bar used for the wheels nuts) remove the two bolts holding the calliper on.
If the calliper is difficult to remove try removing the pads which should make it easier, though this is unlikely.
IMPORTANT! Keep the shims from between the calliper and hub mounting - they are required for re-assembly.
 Step 2. Remove the brake rotor
Remove the two phillips screws from the rotor and keep them (They are a different thread to the late model pins that retain the rotor and locate the wheel on the hub). Grab a handful of rotor from where the calliper was and push/pull back and forth, rotate the rotor 180 degrees and do again, it should work the hub off without too much trouble. Avoid hammers etc, if it is tight use a block of wood to persuade it to come off.
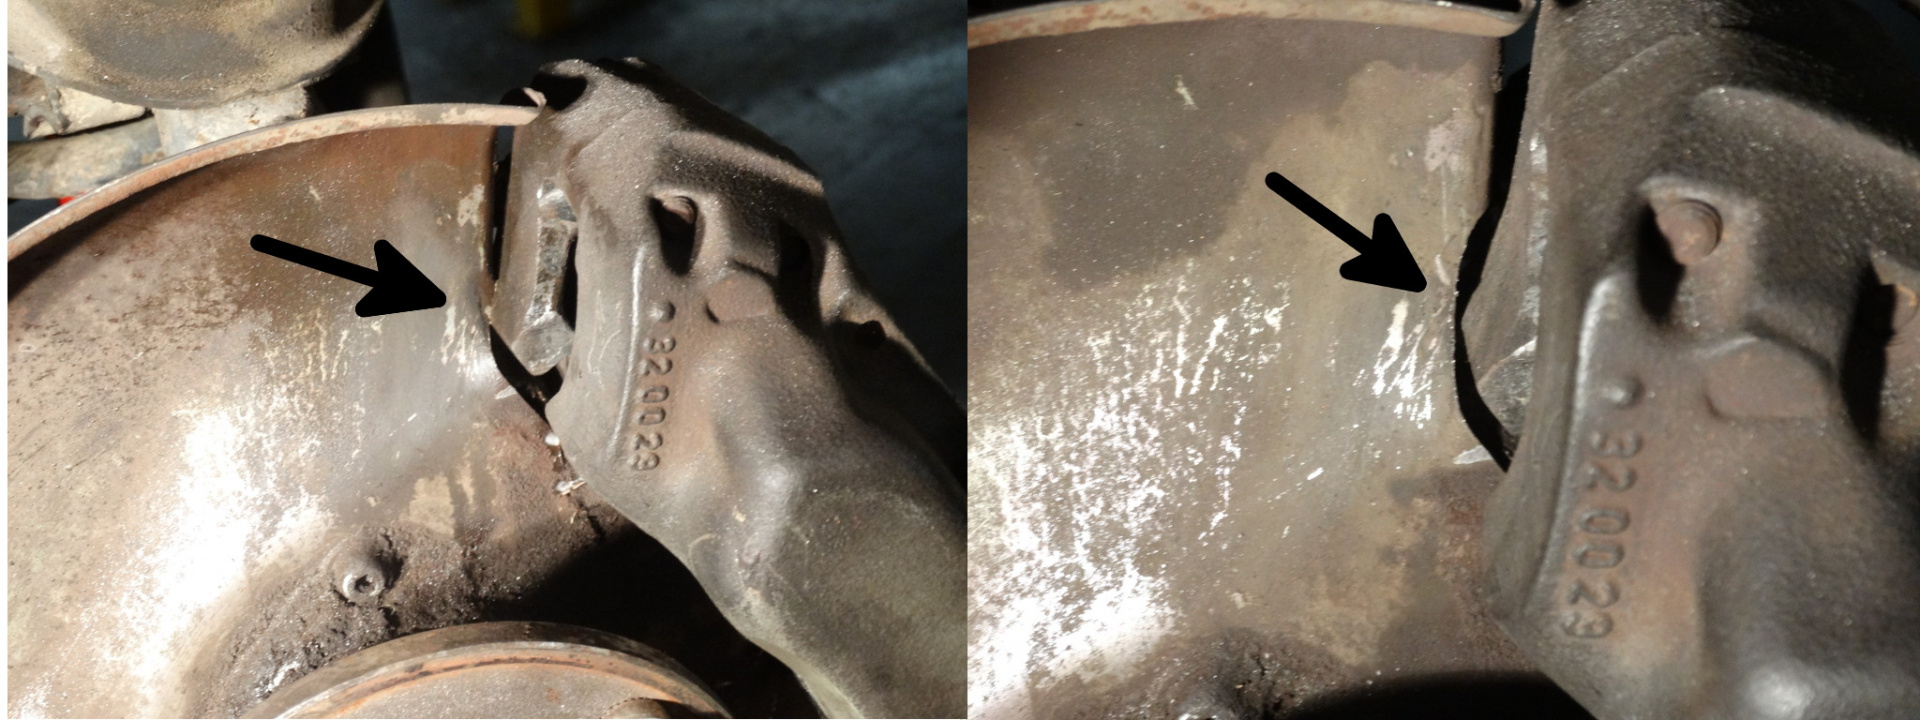
Step 3. Test fit calliperTest fit the new calliper to the hub and tighten up the bolts with the new washers attached. Check clearances around the calliper and if required machine out the backing plate so there is at least 2mm of clearance.
See below for the before (left) and after (right) shots of the backing plate fouling on the calliper and some gentle machining to create some clearance. A die grinder was used here, though a round file would also work just fine. Remember to clean the area and spray a little paint on it to prevent it rusting as the galvanising is now gone on the edge.
Remove calliper once clearances are Ok.
 Step 4. Fit the new rotor
Ensure the hub is clean, run a cloth over it to make really sure it is clean from dust, grease, gunk and anything that will cause the rotor to sit crooked.
Rotate the hub so the two bolt holes are at 10 and 2 (of a clock).
Align the rotor with the bolt holes and slide the rotor onto the hub. Insert new bolts and tighten.
Spin the rotor to ensure it runs straight.
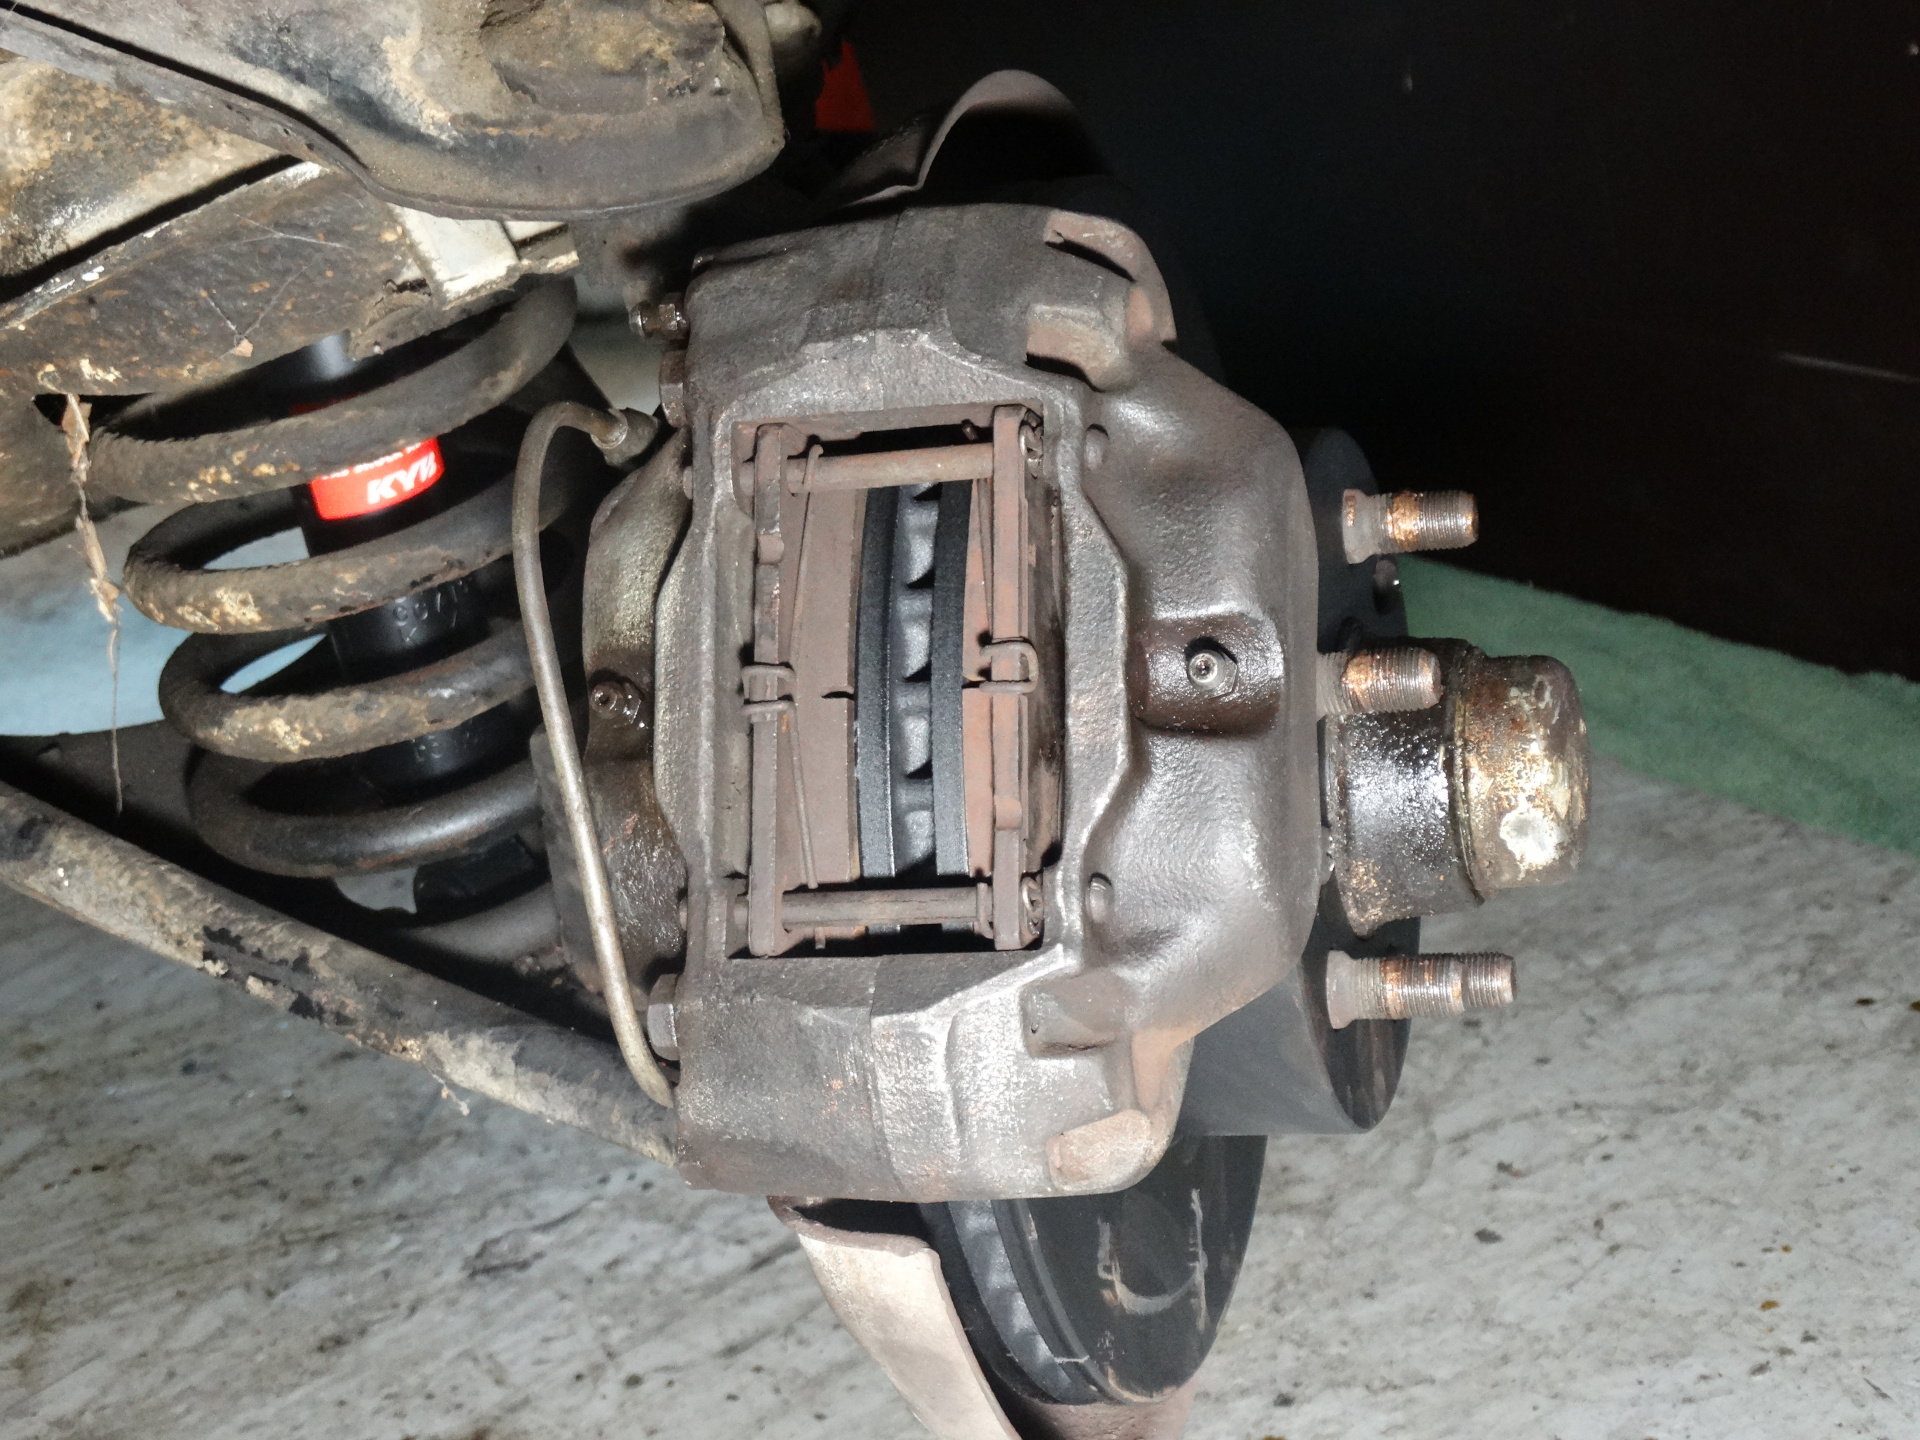
Step 5. Prepare calliperClean any dust or rough edges from the inside of the calliper right up where the outside edge of the rotor will fit. This is a very tight fit - there is about a millimetre of clearance here between the rotor and calliper, a very clean surface will reduce any need for a file or die grinder to machine out the calliper to fit the rotor.
The callipers are different left to right. There are three bleed nipples on the calliper, when installed there must be a bleed nipple at the TOP of each calliper.
Once the callipers have been identified left from right, fit the flexible brake hose and new copper washer to the hole nearest the top brake nipple, the hole that will be the TOP hole of the calliper when installed. Tighten when in.
Fit the brake line adapter and new copper washer into the other hole, it should be furthest from the top bleed nipple - at the bottom. Tighten.
Step 6. Install the calliperPosition the calliper over the rotor, feed the flexible line through the rear of the hub to stick out the front. Install the bolts with thick washers. I used some suspension washers that were off something and on the bench, purchasing some 1/2 inch washers would be quite simple at a hardware store or auto store.
The washers on the bolts are to replace the material that was removed from the calliper, so the bolts do not protrude too far through the hub assembly. Ideally about 4mm-5mm thick each.
Ensure the spacer shims are in between the calliper and the hub as the rotor will not fit inside the calliper without them!
Tighten bolts with the 19mm socket.
Once all assembled spin the rotor and ensure there are no scraping sounds and the rotor spins freely. In one test assembly the spacer shims were left out and the rotor was locked to the calliper, fitting the shim fixed the problem. One side of the install had a slight scraping on the rotor and it was a rough edge inside the calliper that was cleaned up with a gentle die grinder to smooth off some edges.
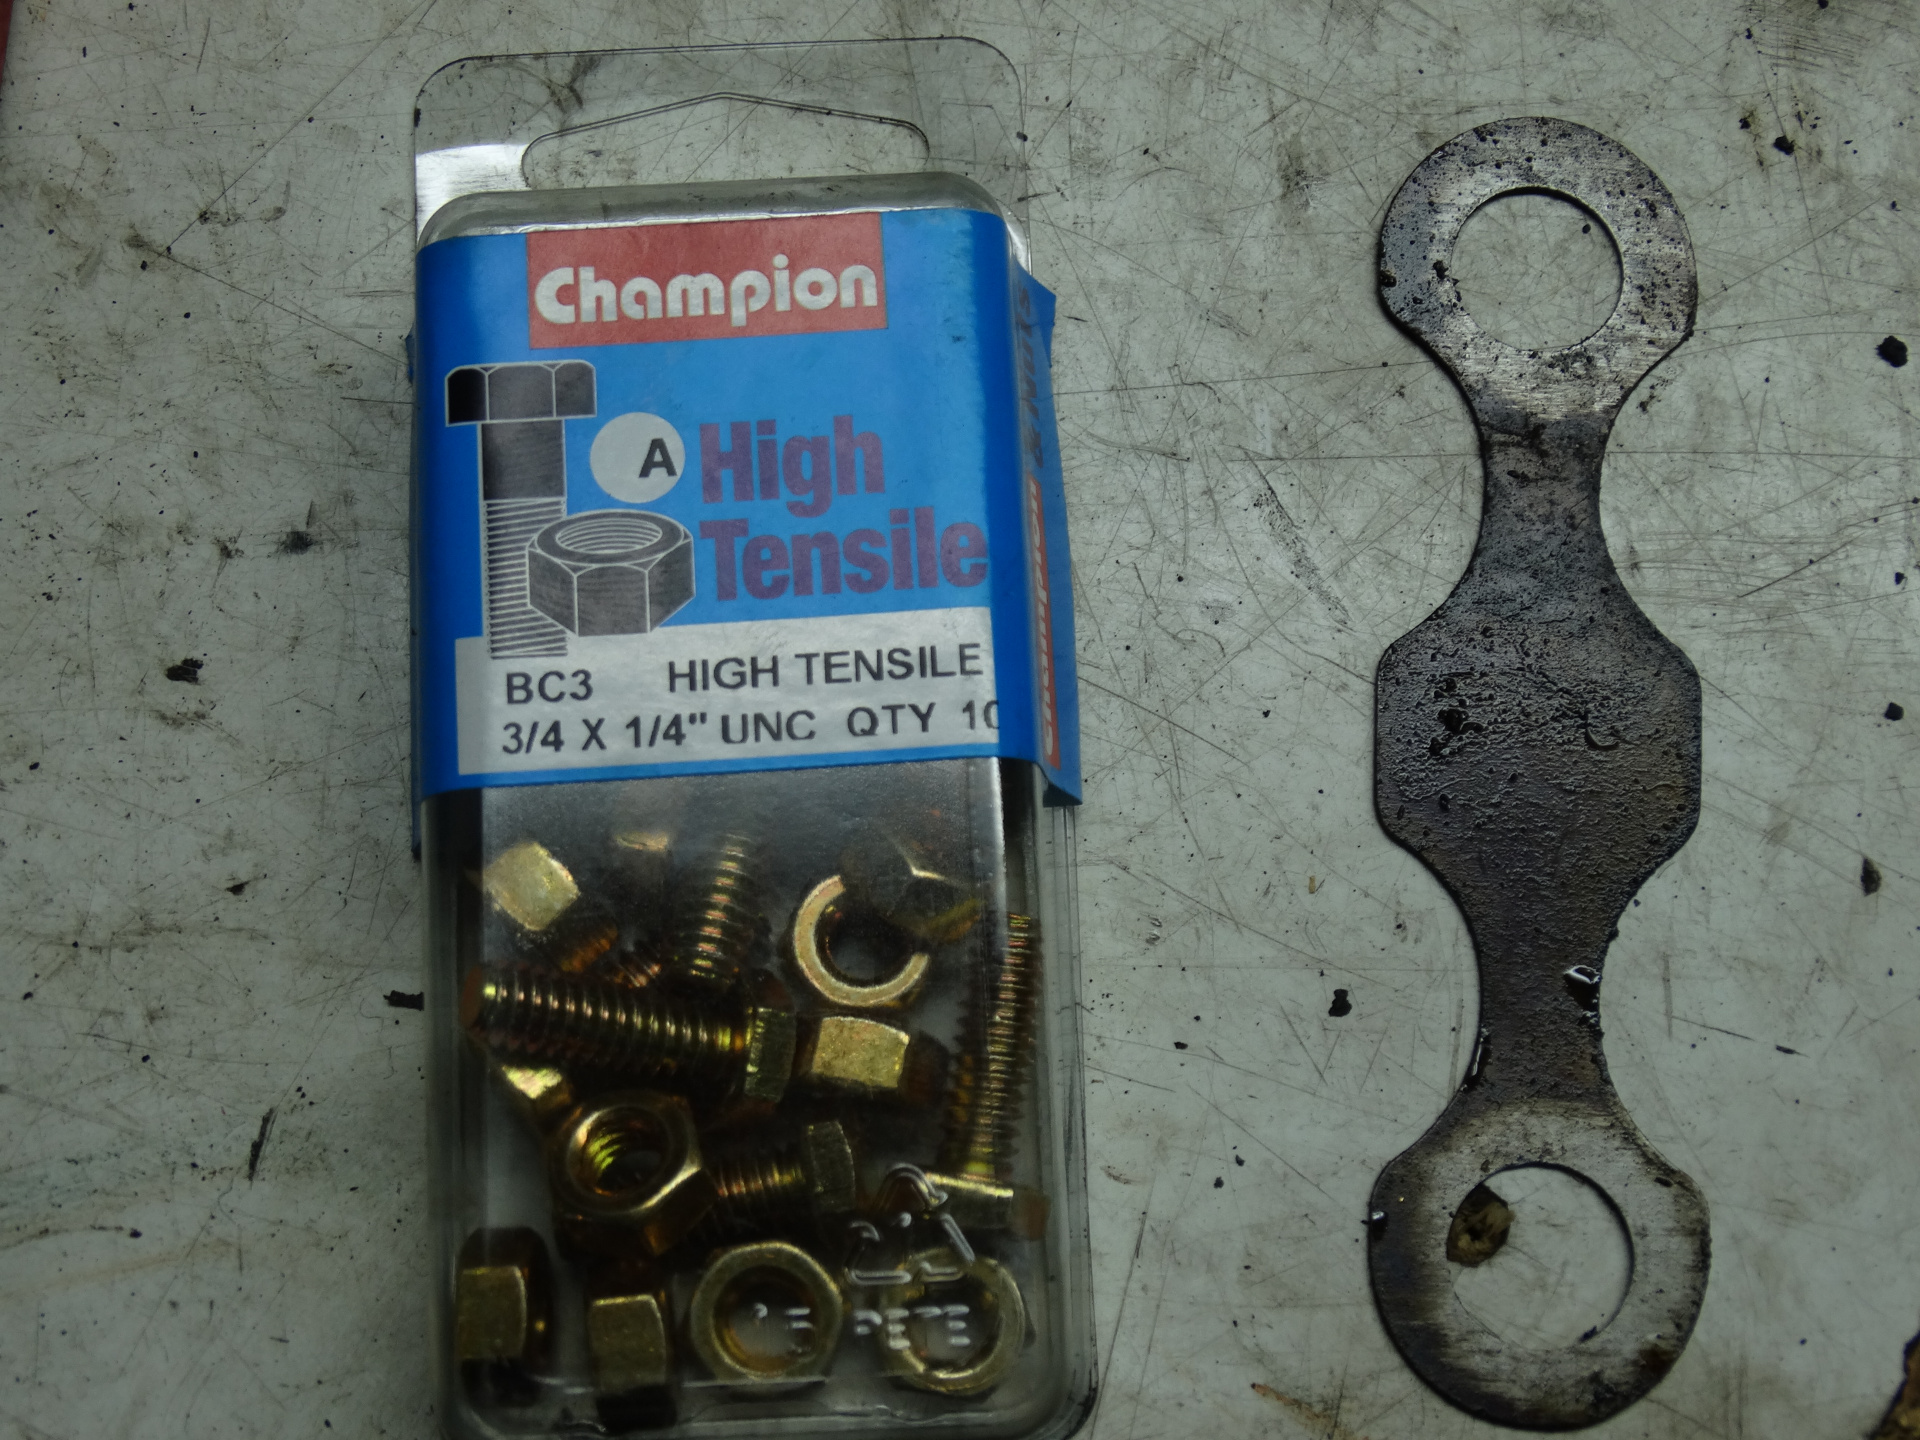
Image is of new rotor bolts and the extremely important shim from between the calliper and hub (before it was cleaned).
 Step 7. Install brake lines
Fit the hard line to the calliper and screw in about half way. Not tight though, still able to move around.
Position the hard line at the top of the backing plate where it meets the flexible line. The car done in this example needed to be bent a little, and I mean a little - about 5mm not 3 inches. Fit the hard line into the flexible fitting, then pull the line up to bend a little so the threads are aligned. Once this is done the hard line nut should screw on easily with fingers.
Once both ends of the hard line are on, tighten them. Remember they are a little hex with an open ended spanner. Tight, not cylinder head tight, they will round easily.
The image here shows what the end result should look like.
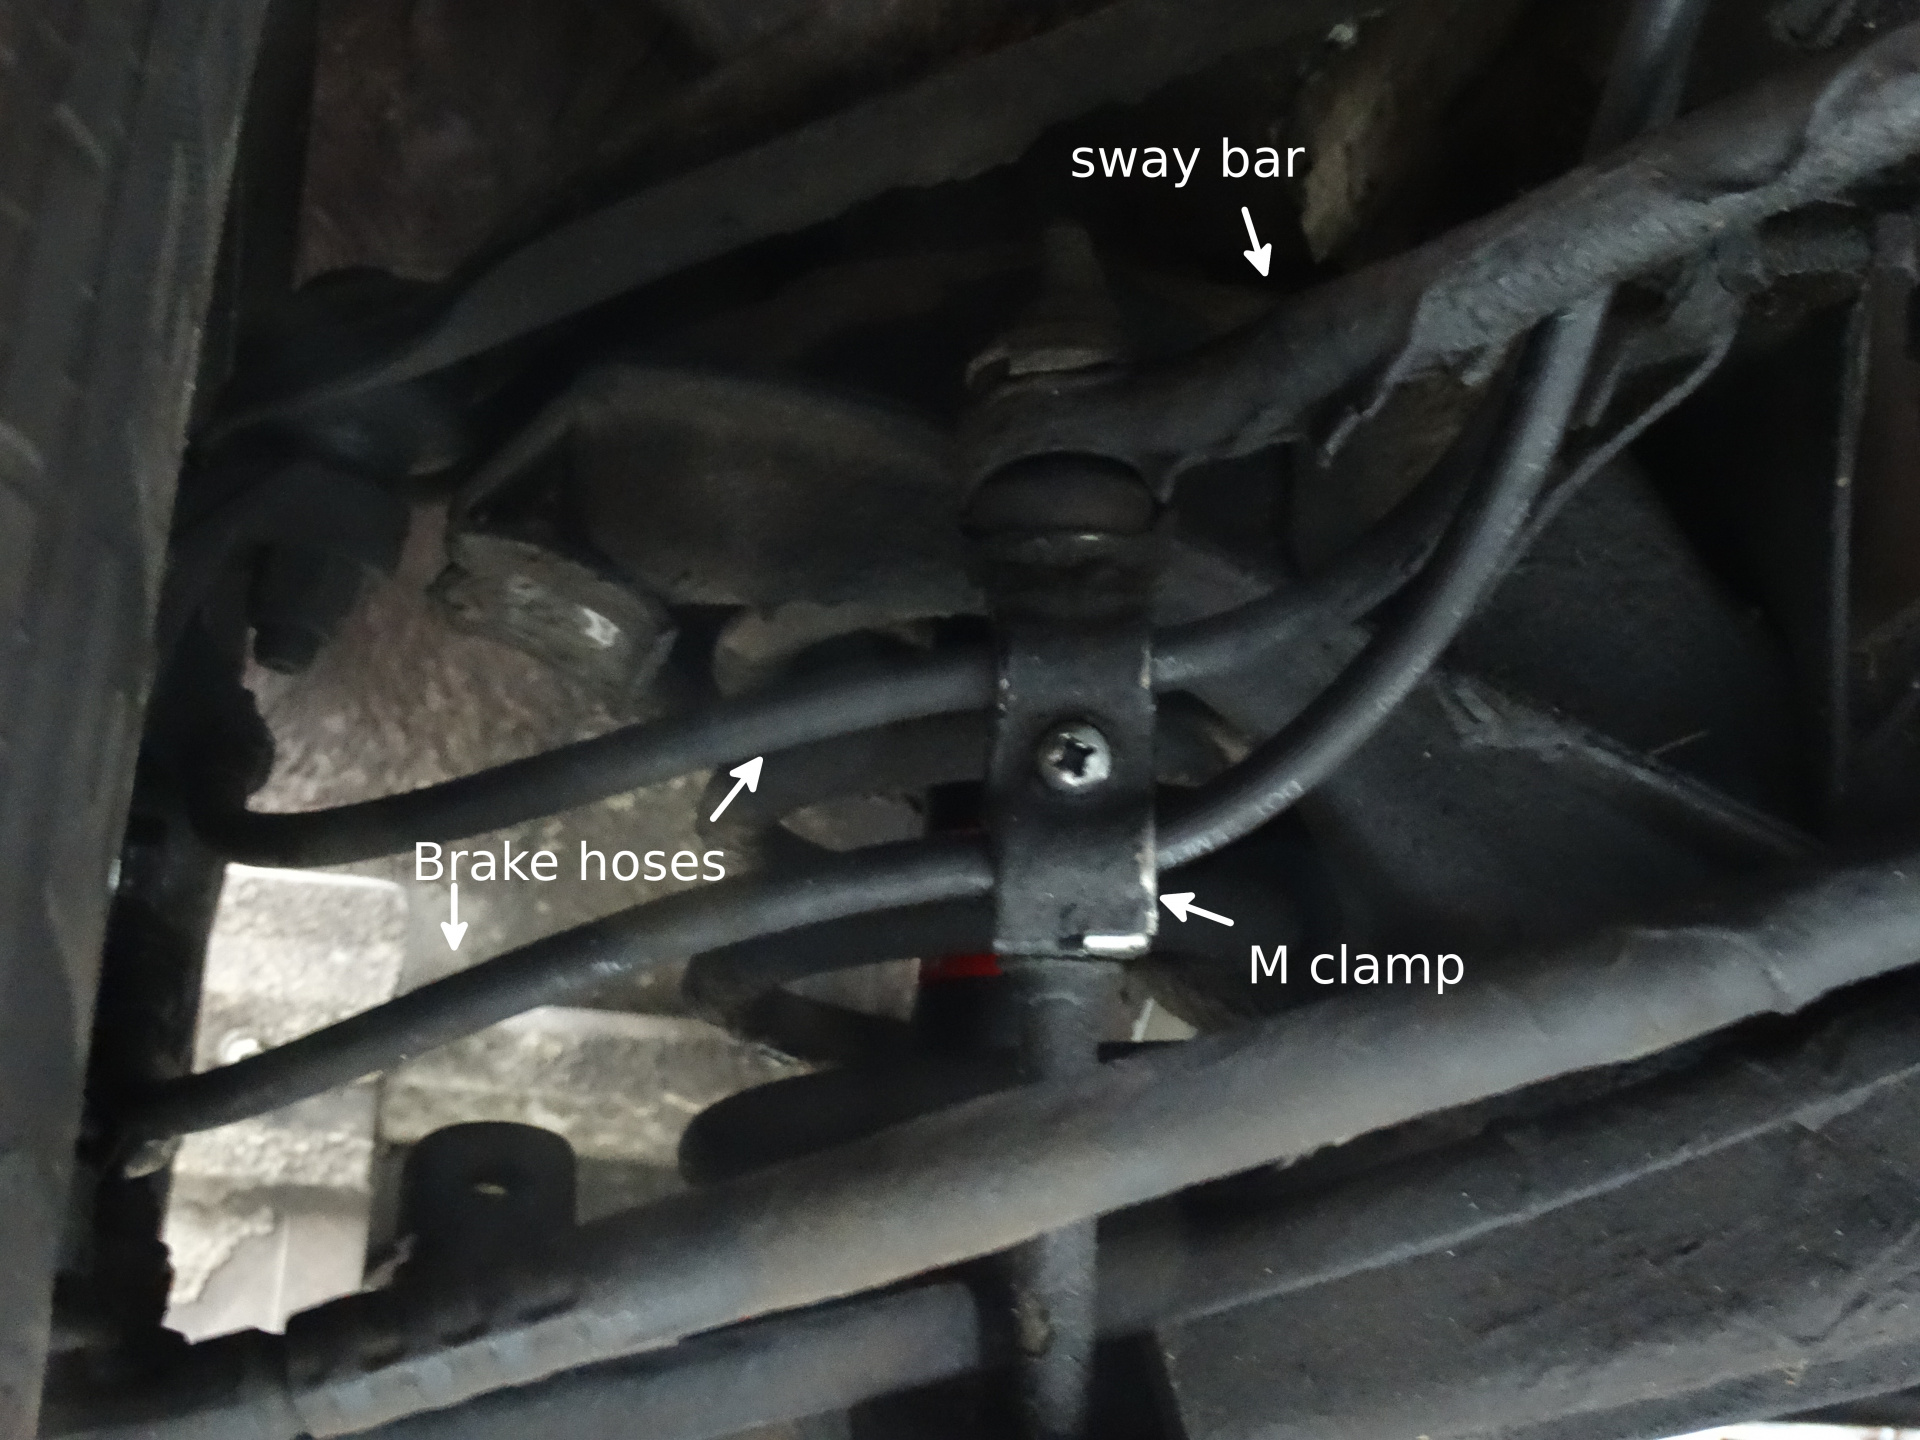
Feed the flexible hose under the sway bar alongside the other hose then reposition the flexible line in the bumper bolt bracket and fit the 14mm retaining nut and its washer. Tighten.
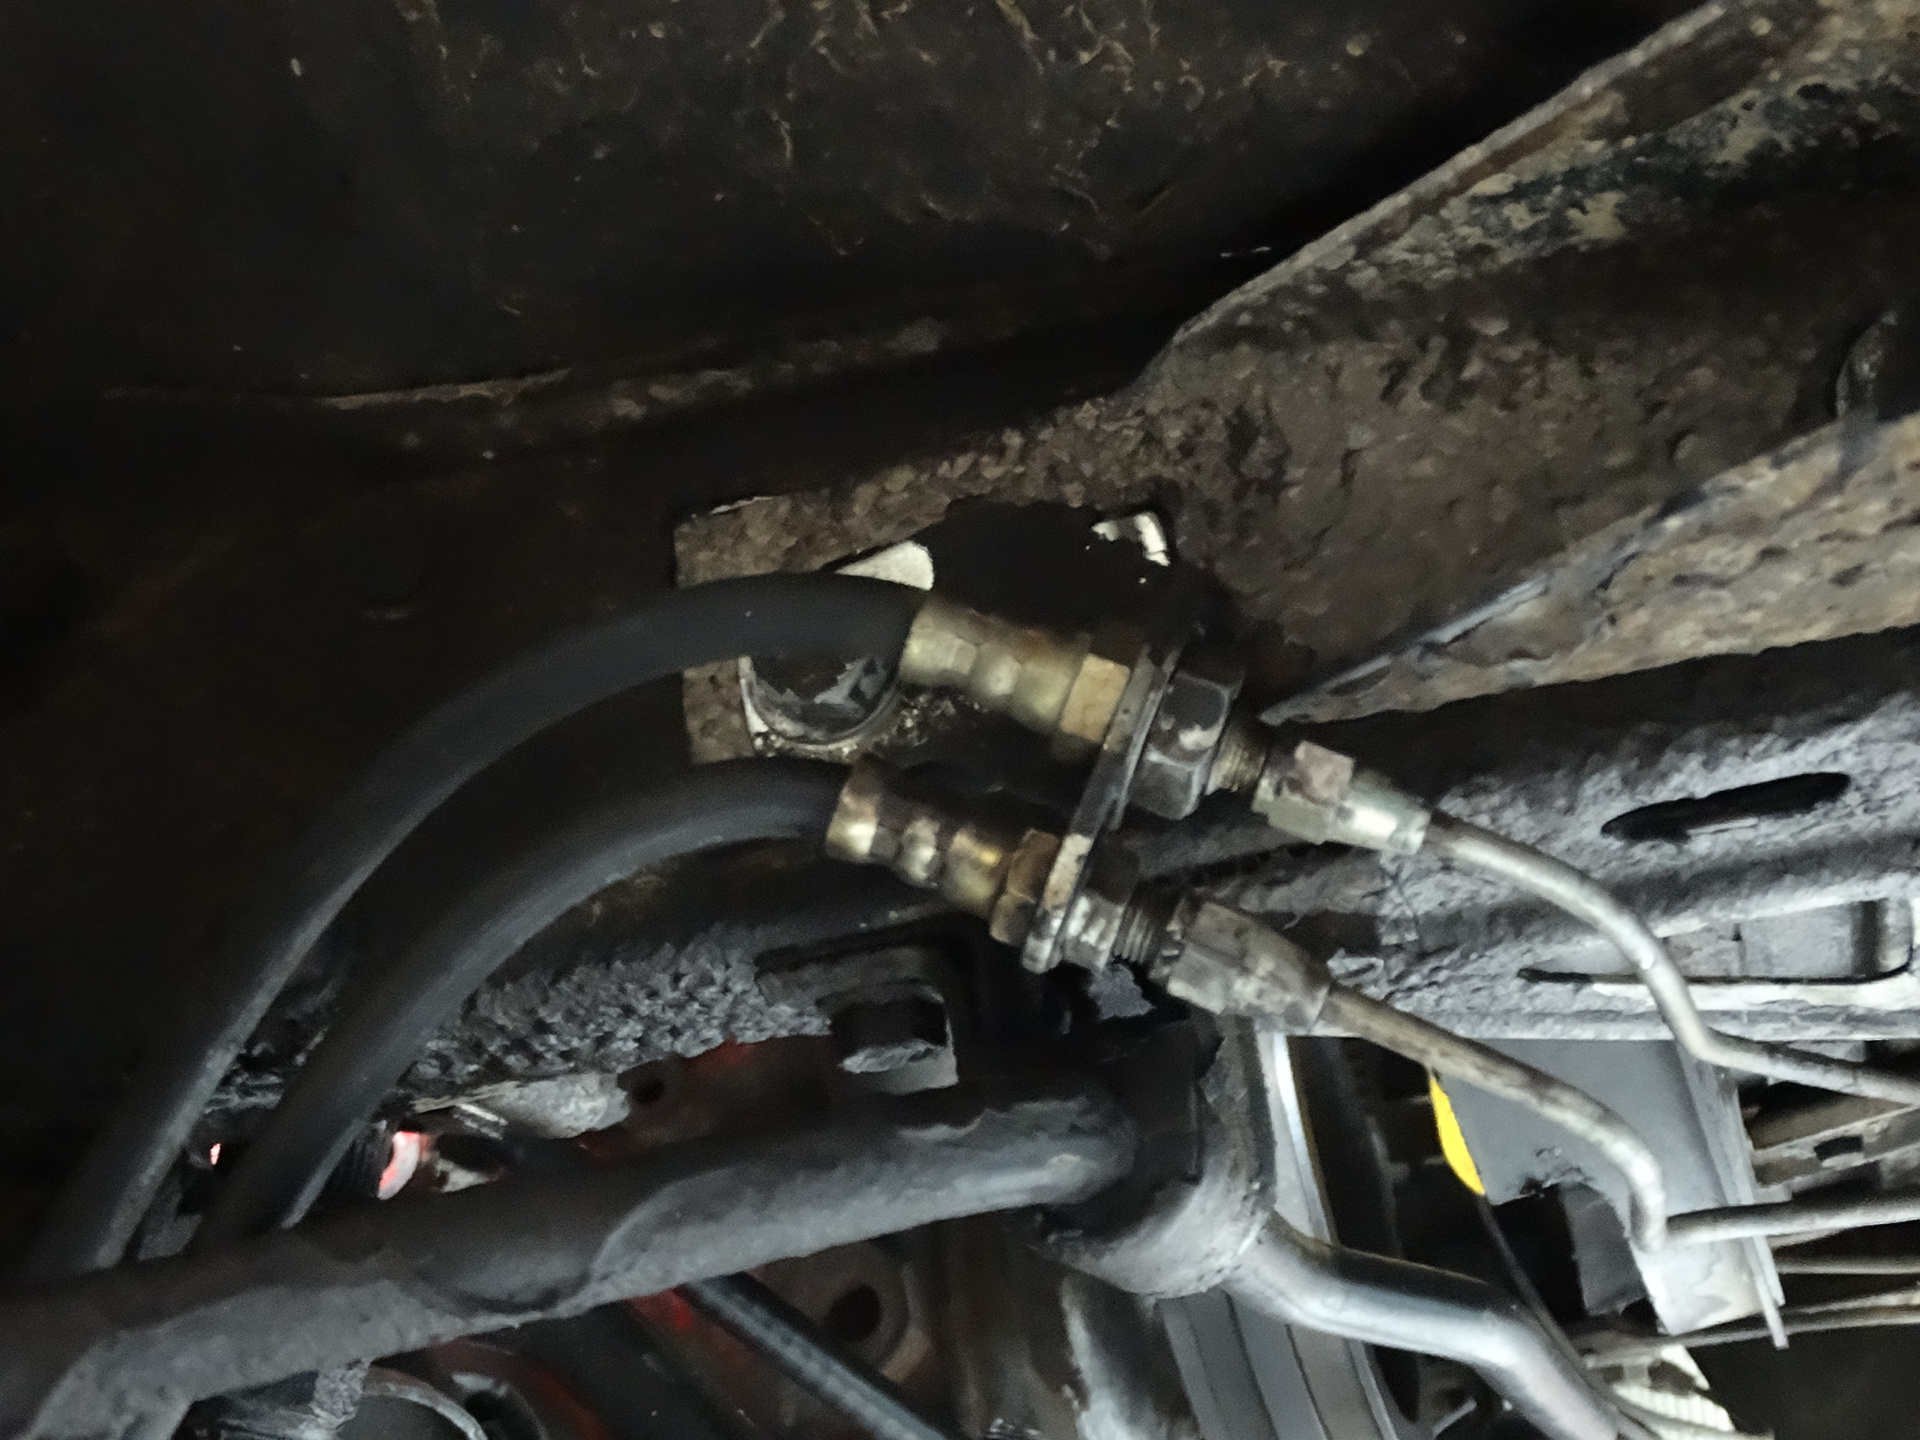
Fit the hard line from the engine bay to the flex line near the bumper, tighten (shown above).
Re-fit the M shaped clamp / bracket on the sway bar to hold the two flex hoses. Tighten. It appears there is no up nor down for the mount so I just aligned the thick sound deadener and refitted as it was before. Not sure why there is so much black sound deadener, there must be 30kg of black goop under the 144!
 Step 8. Fit brake pads and clips
Slide the brake pads into the calliper.
Slide the top pin in from outside the car through the calliper and both pads and out the other side. Ensure the hole for the R clip is visible, facing up/down, when sliding it in. Install the R clip.
Sit the two springs so they are between the pads with the tabs over the pads facing the outside of each pad. They should sit there without problem, use gravity as your friend.
Slide the lower pin in pushing the spring clip down with a finger then through the other side again holding the spring clip down with a finger. Ensure the hole for the R clip is visible. Install the R clip.
Do the other side.
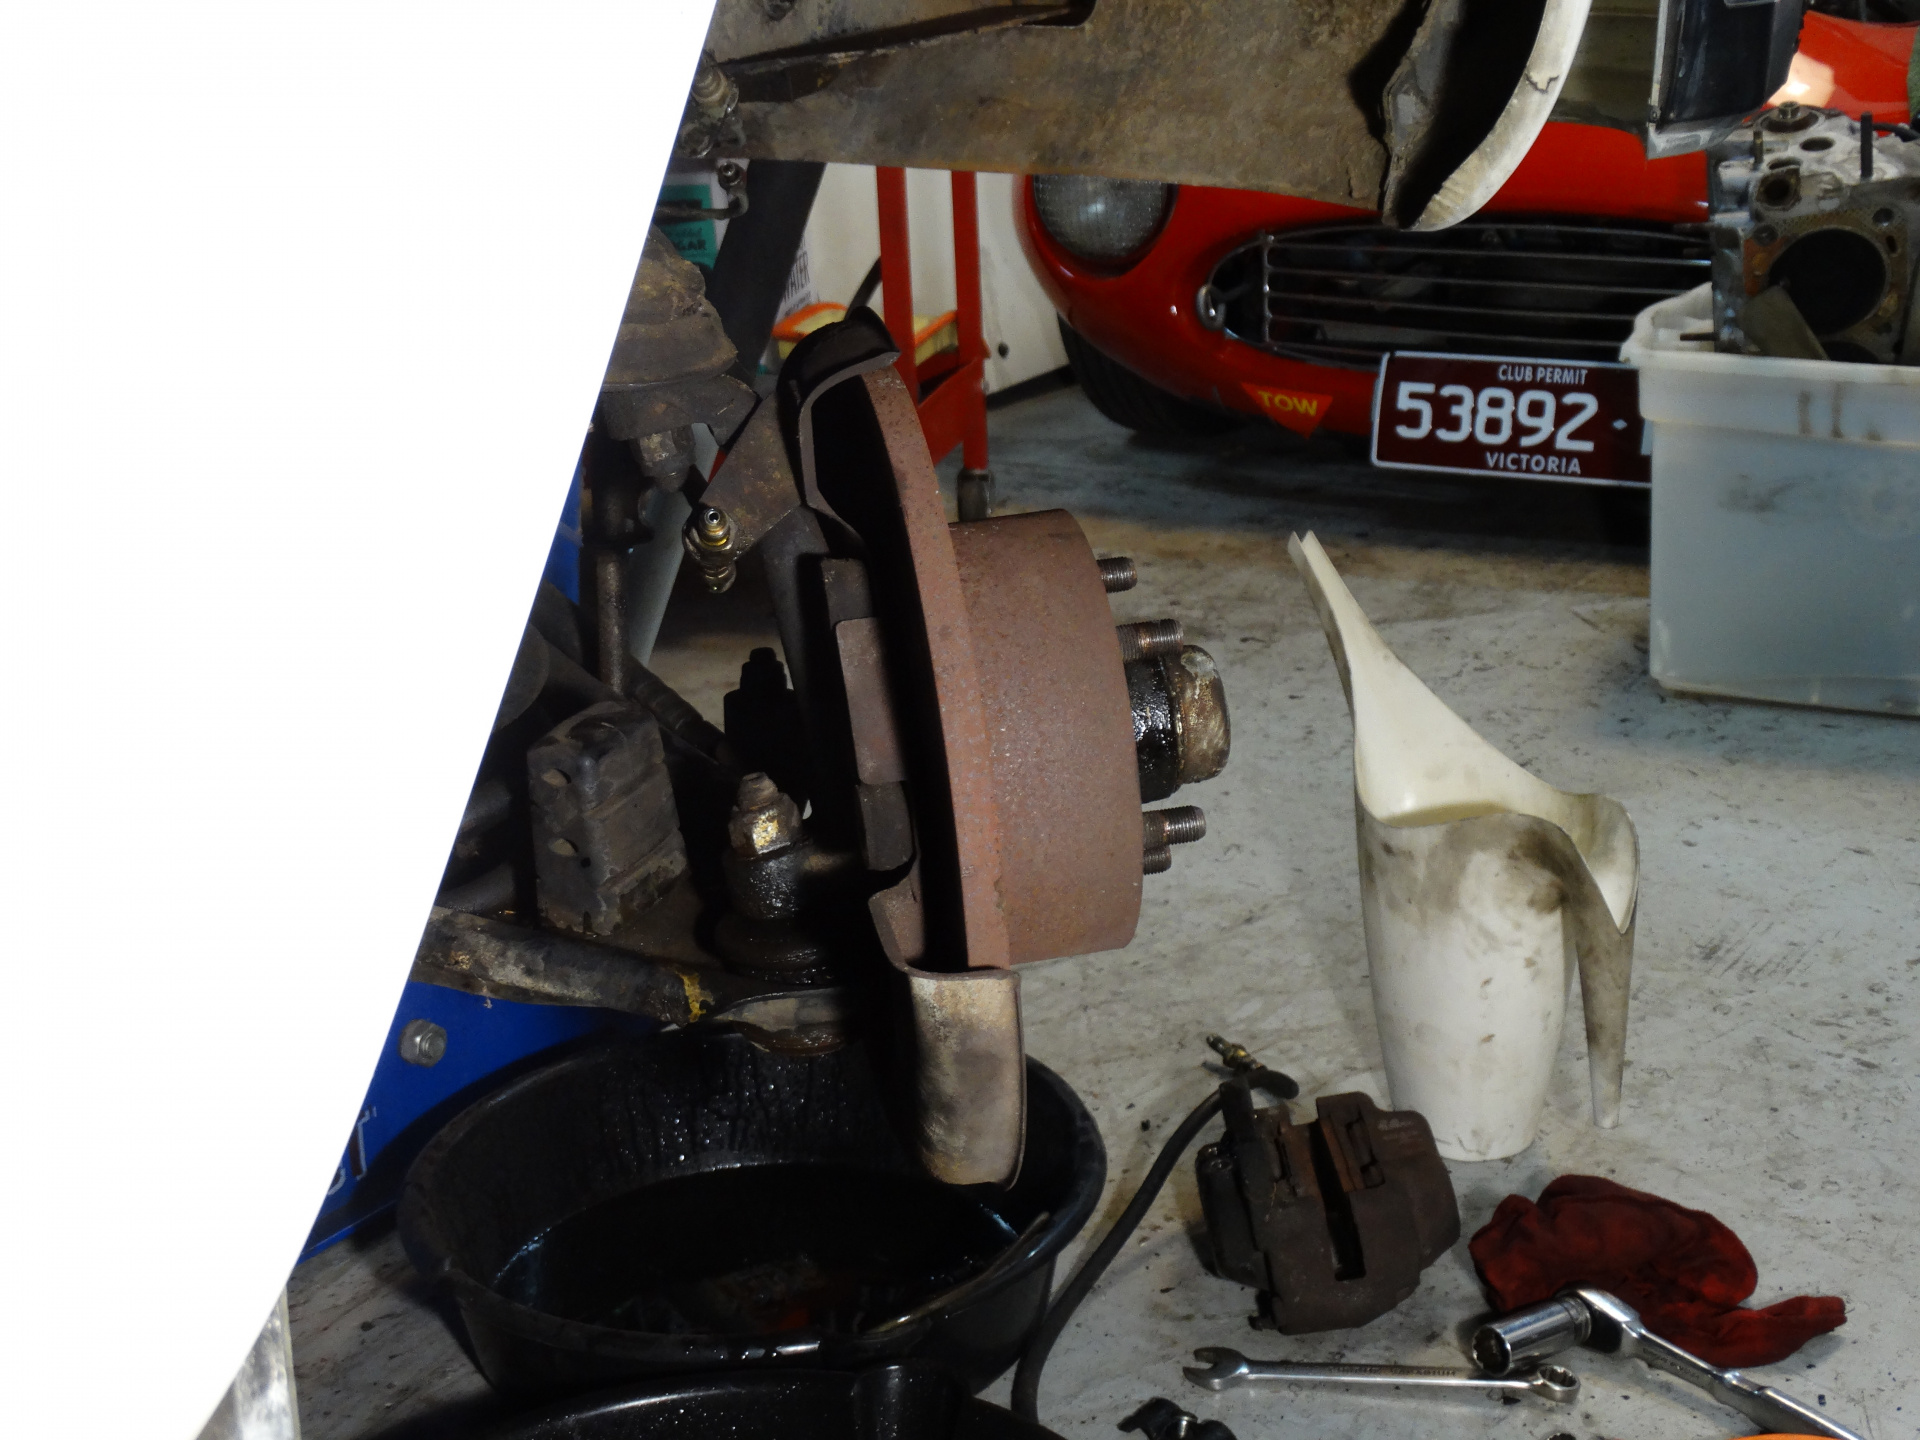
This image is using 240 rotors - the first attempt. Note the rotor is not big enough to reach all of the pad surface. That is why the 164E rotor must be used.


